Azure Network: Deploy An Azure Route Table
>
Introduction
Azure Portal has many networking services like VNet’s, Load balancers, public IP addresses, and many others. In this post, we find out how to deploy an Azure Route Table to route all VMs traffic from a subnet through an Azure Firewall (virtual appliance).
Create a route table
From the Azure Portal "All services" menu select Categories Networking – Route tables

Now we need to enter all the required details and then to select Create.
- First, type the route table Name
- Select a valid Azure Subscription
- Select an existing or create a new Resource Group
- Select a Location to deploy the route table

Add A Route
A few seconds later, from the Route table left main blade select **Settings **– **Routes **– + Add

| Setting | Description |
| Enter a Route name | |
| Type the Address prefix, e.g. 0.0.0.0/0 (0.0.0.0/0 means all possible VM IP’s) |  |
| Select the Next hop type, e.g. Virtual appliance (as virtual appliance we mean the Azure Firewall) |  |
| Enter the Next hop address, e.g. 10.0.5.10 (this is the Azure Firewall internal IP) |
 |

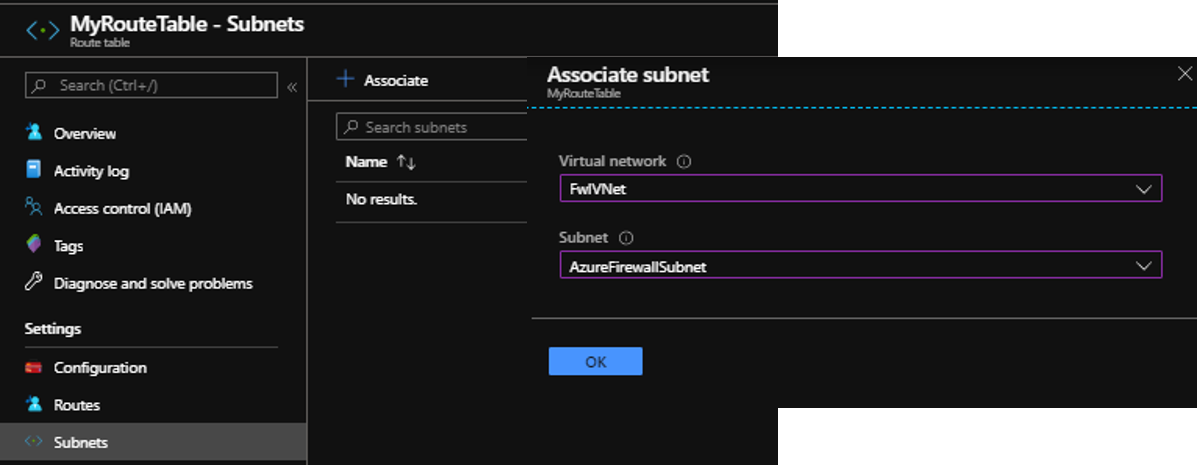
Associate Route Table With A Subnet VNet
The final step is to associate the route table with a virtual network subnet. After this step completed the route table will be linked with the vnet and it will route all the outbound traffic from the subnet VM’s to Azure Firewall.
See Also
- Route network traffic with a route table using the Azure portal
- Filter network traffic with a network security group using the Azure portal
- Azure Security: Firewall vs NSG
- Deep Dive In VNet Subnets