Power Automate –Archive SharePoint online document set
Introduction
In this article, we will explore how to archive modern SharePoint online document set using power automate. In the previous article, we had covered the Modern SharePoint Online Document Set creation steps.
Scenario
The customer requires the HR Department’s new employee onboarding operation team system. When the new candidate joins then, the HR department creates a document set of that candidate with all the related documents folder in that document set in the document library, and when a candidate is resigning then the system automatically handles archive all the information of that employee.
This should be achieved using Power automate.
Objective
We have created a document set and associated with two document libraries: Appointments and Appointments Archive.
We create power automate for automatically archive the resigning employee information in the Appointments Archive document library.
The step by step Power Automate actions to build.
We have created Appointments document library for adding new candidate's information and Appointments Archive document library to store resigned candidate's information.
Step 1
Go here and log in with your Office 365 account.
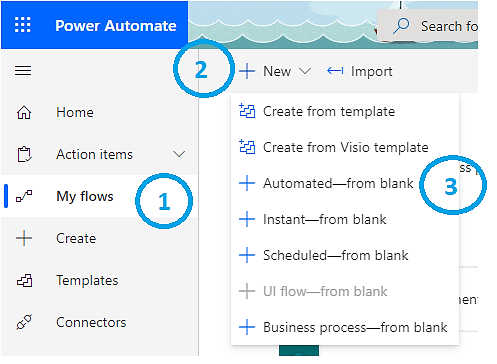
We start with a blank canvas and build the Flow ourselves. Therefore, click the +New button and select “Automated – from blank, follow the numerical points, as shown in the below screenshot:
https://www.c-sharpcorner.com/article/temp/85847/Images/doc1.png
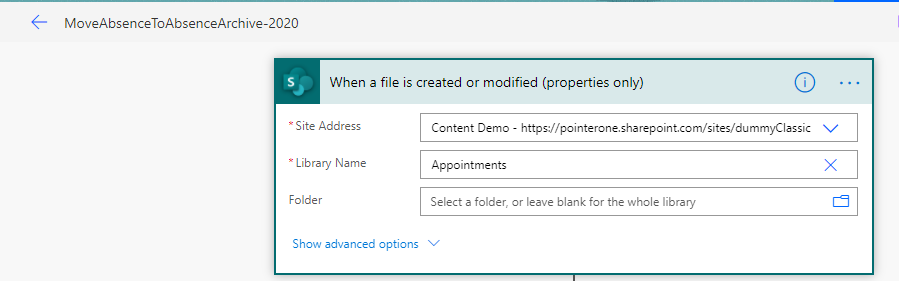
Provide a flow name and choose a trigger for flow. In our case, this will be “When a file is created (properties only)” then click the Create button. Follow the numerical points, as shown in the below screenshot:
https://www.c-sharpcorner.com/article/temp/85847/Images/doc2.png
Enter the site address (URL) and select the list on which you want this flow to run:
https://www.c-sharpcorner.com/article/temp/85847/Images/doc3.png
Step 2
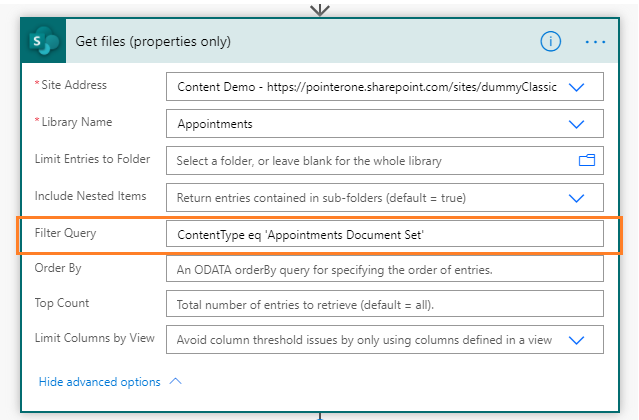
Click https://www.c-sharpcorner.com/article/temp/85847/Images/doc4.png button below this first step to add a new action. Search “Get files (properties only)” in the search bar and find the following action: “Get files (properties only)”. This action will apply the filter on document library ContentType:
https://www.c-sharpcorner.com/article/temp/85847/Images/doc5.png
Step 3
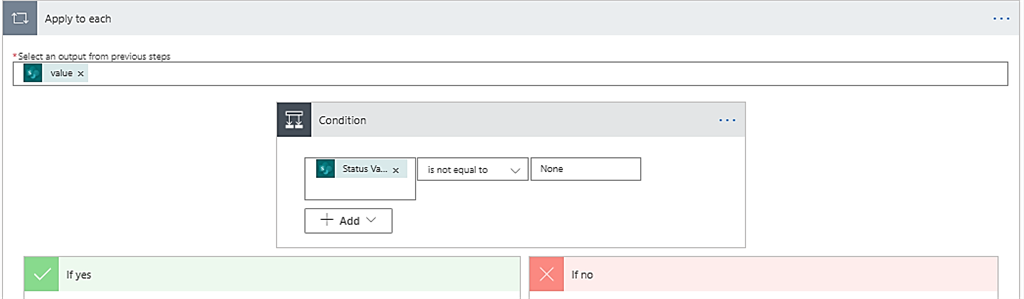
Add a new action – ‘Apply to each’, step, and loop through all get as collected property file #steps 2.
Add a condition to check the “Status” is not equal to None or Resigned
https://www.c-sharpcorner.com/article/temp/85847/Images/doc6.png
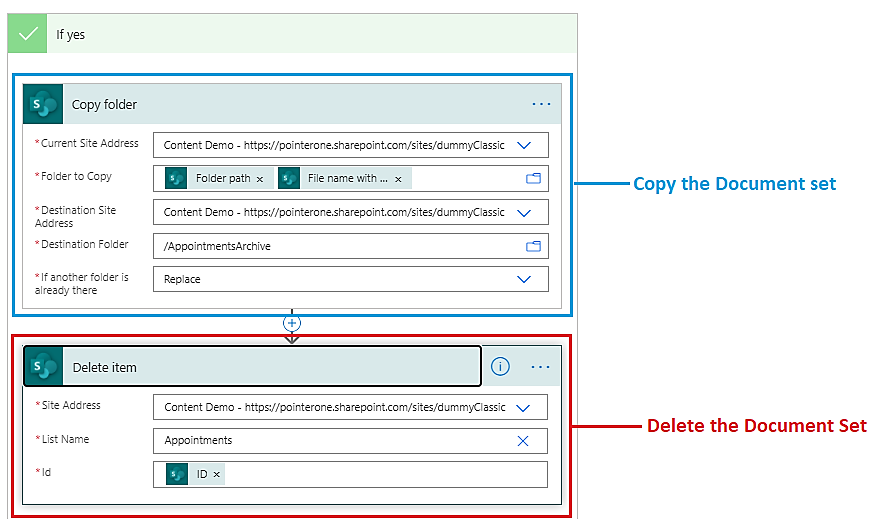
Step 4
If Status is Resigned then the next steps come to the Yes section. In this section, we copy the candidate document set from Appointments document library** to Appointments Archive** document library** and after copy the document set remove this document set from Appointments** document library**.**
https://www.c-sharpcorner.com/article/temp/85847/Images/doc7.png
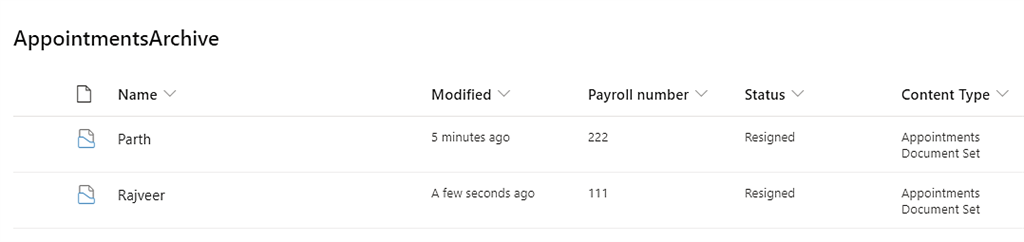
Output
Before taking action resigned below both document library with document set:
https://www.c-sharpcorner.com/article/temp/85847/Images/doc8.png
https://www.c-sharpcorner.com/article/temp/85847/Images/doc9.png
Final output ** **