Configure Azure B2C tenant for the PowerApps portal
Introduction
By reading this post, we will be able to configure Azure B2C to a PowerApps Portal.
Prerequisites
- A valid Azure Subscription
- An Azure AD B2C tenant
- A PowerApps Portal
Steps to configure
Configure Azure AD B2C settings
Register a new App
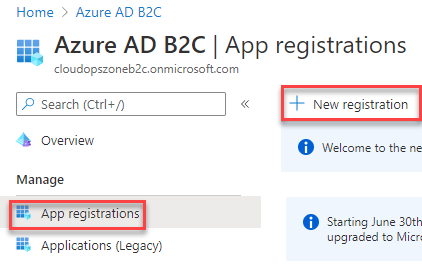
- Sign-in the Azure B2C tenant
- From the left-hand side blade select Manage - App registrations - +New registration
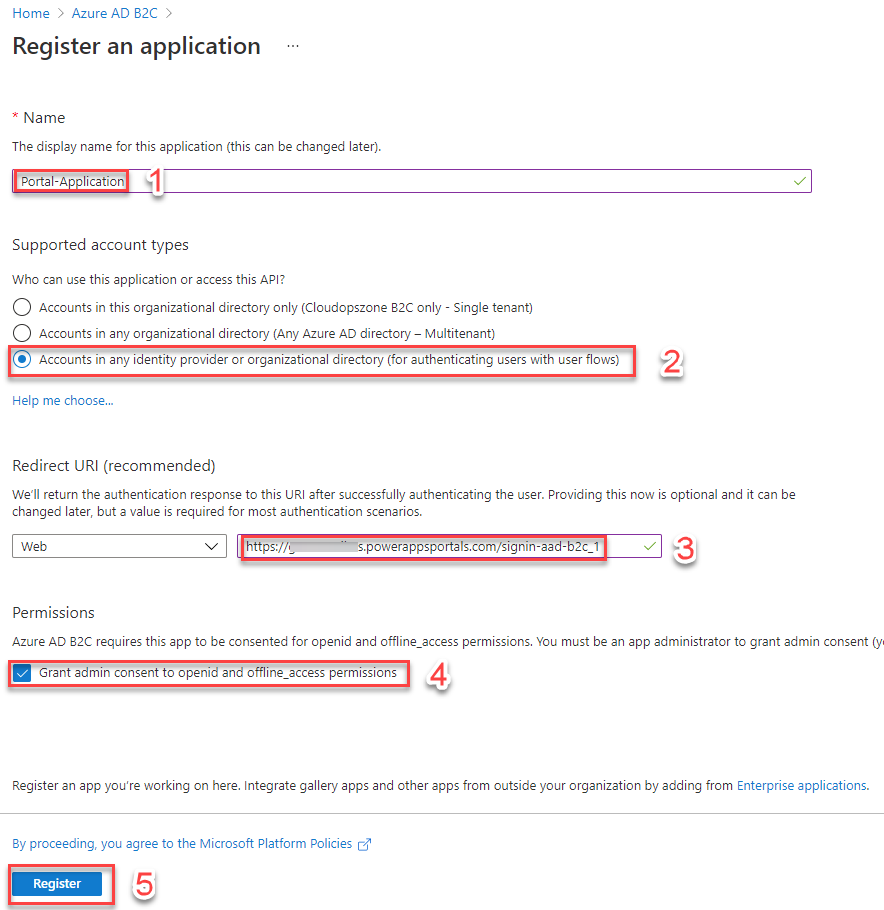
Configure the registered App
- Type a Name
- Under Supported account types, select Accounts in any identity provider or organizational directory (for authenticating users with user flows)
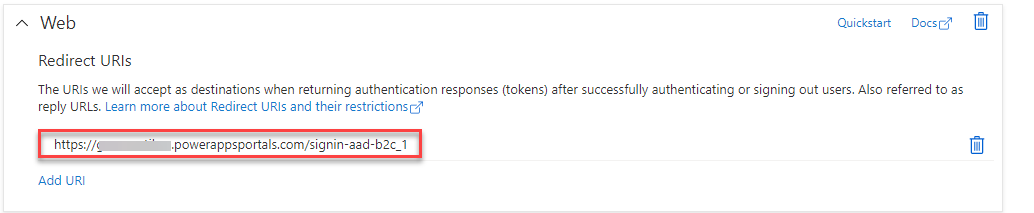
- In the Redirect URI field, type the Powerapps portal Reply URL, e.g. https://yourportalname.powerappsportals.com/signin-aad-b2c_1
- Mark the Grant admin consent to openid and offline_access permissions checkbox.
- Select Register.
Create a New user flow
Open the Azure AD B2C
From the left blade select Policies - User flows - + New user flow
**
**
On the next page "Create a user flow", select the Sign up and sign in flow type.

4. Then, select the Recommended version and click Create.

5i. Type a Name for the user flow, e.g. Powerapps-Portal-Signup-Signin.
5ii. Under Identity providers, select Local accounts - Email signup *

 Info Info |
|---|
| In case you have configured other identity providers like Microsoft, Google etc. You can select them. |
- For Multifactor authentication, leave the default settings, Type of method [Email] and MFA enforcement [Off]

- Under the User attributes and token claims, select attributes and claims you want to collect during a new sign-up. For example, in the demo app, have selected the Given Name and the Surname.
- At the final step, select Create.

Configure the User flow
Change the Token compatibility settings
- Open the Sign up and sign in flow
- From the left blade, select Settings - Properties and change the Issuer (iss) claim URL with the one that included tfp, and click Save.

- Run user flow, and then click on the OpenID configuration URL to open a new tab on the browser.

- Copy the Issuer URL from the browser.*
https://cloudopszone.com/wp-content/uploads/2021/09/13.png
Note
Make sure to copy the URL without the quotation marks ""
At this point, you have finished with the registered app.
What you need for the configuration is:
i. Application (client) ID

ii. Issuer URL https://##########.b2clogin.com/tfp/########-####-####-####-############/b2c_1_powerapps-portal-signup-signin/v2.0/
iii. Redirect URL
Configure Portal Authentication settings
Login to https://make.powerapps.com

Select Identity providers - Azure AD B2C and click Configure

Now, copy and paste the necessary values to the Site settings section. Authority: => Issuer URL Client ID: => Application (client) ID Redirect URL: => Redirect URL
**

**