Power Automate: Automate the Provisioning of SharePoint Sites
Introduction
Auto provisioning of SharePoint sites is one of the productive tasks that we can setup in any organization to reduce the number of Server Tickets raised with IT for site provisioning. We can setup a Power Automate to get this done and build some additional functionalities like applying Out of the Box or Custom Site Templates(Previously Site Designs) to the created site to add a layer of additional functionality
In this article, we will see how to use Power Automate to auto provision Communication Sites by creating a List Item entry with the basic site information and apply an Out of the Box Site template to the newly created site.
Business Use Case
We have a requirement where we need to disable the Create Site Option in the SharePoint start page which we will do by going to the SharePoint admin center -> Settings ->Site Creation and disable the option “Let users create sites from the SharePoint start page and OneDrive”

This will disable the Create a new site which otherwise will appear in the SharePoint Start Page
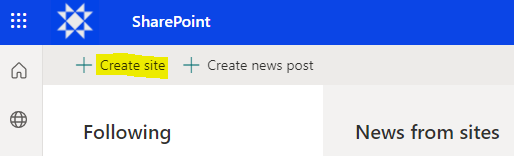
This way unnecessary site creations can be avoided by restricting the access to the site creation button. However, we will still need to provide an option to selected group of users to create sites for their team.
We can achieve this by creating a SharePoint List which has restricted access to a limited set of users and provide it with a set of columns that would capture the needed information for Site Provisioning. When a user creates an item by filling these needed columns, Power Automate will pick the values and create a SharePoint Site using the selected template.
Implementation
Lets create a List called Site Creation Wizard and add the below columns to it:
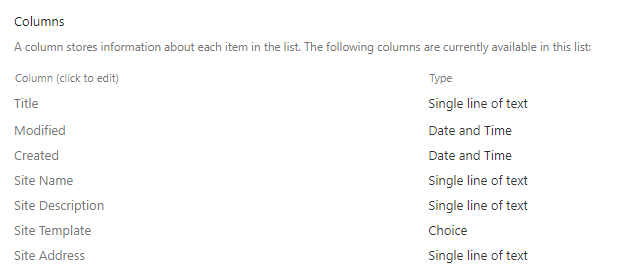
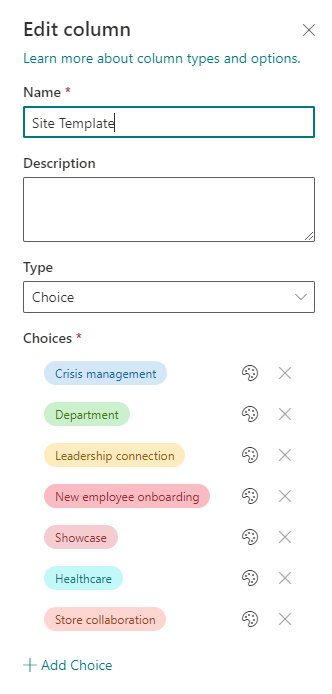
The Site Template column will be a choice field to hold the site template/design values which can be applied on top of a communication site.
Build the Flow
We will now move on to Power Automate and create a cloud flow with the trigger – When an Item is Created. We will also initiate a variable of type object that will hold the corresponding template IDs for each of the Site Template/Design names. The rationale behind storing this key value pair is that , when a user selects the site design name from the choice drop down, we will need to get the corresponding ID to use in the site provisioning action.
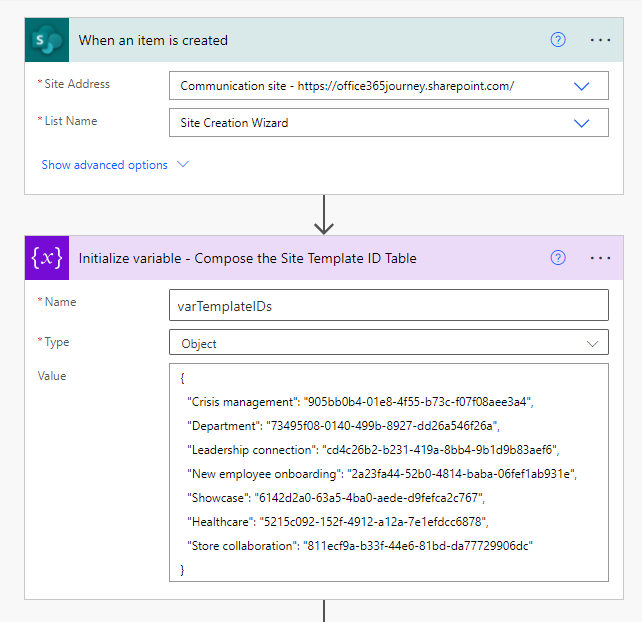
In the next step, lets initialize a variable to get the Site template ID of the selected Site Template/Design by using the expression
variables('varTemplateIDs')[triggerOutputs()?['body/SiteTemplate/Value']]
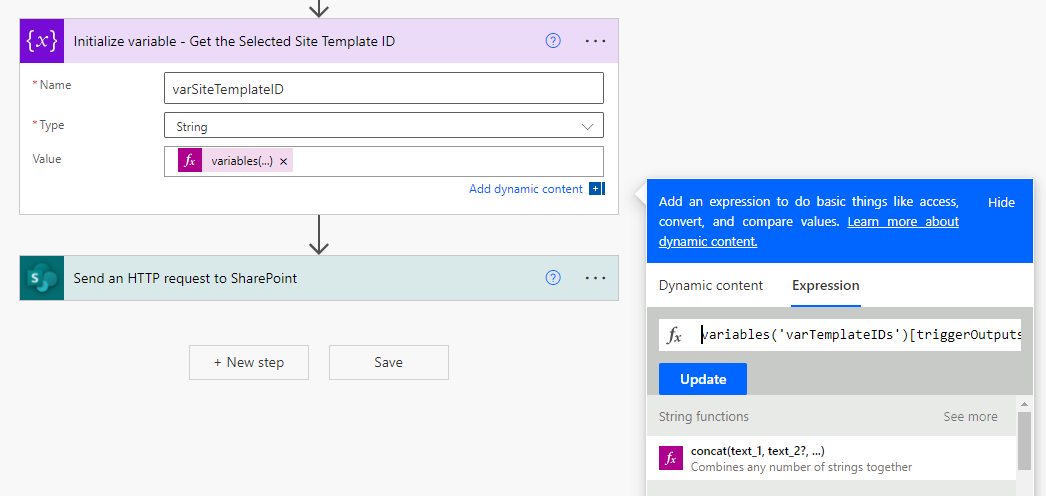
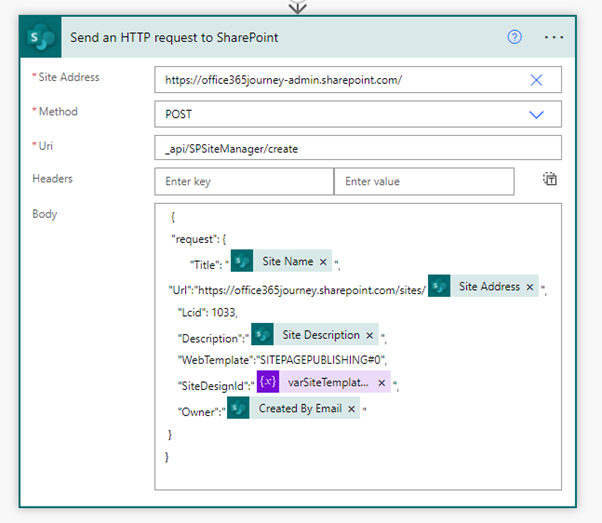
Once we have the Site template ID, lets add the HTTP Request to SharePoint action and provide the values as shown in the below diagram. We will issue a POST request to the URI - _api/SPSiteManager/create and keep the Site Address as the SharePoint Admin Center URL. In the Body, we will paste the request payload with the below values :
Title |
The Title that should come up in the Site Title bar |
URL |
The URL where the site should be provisioned, we are getting the Site Address from the user that should come after /sites |
Lcid |
Locale identifier . By default 1033 is English(United States) |
Description |
Description for the site obtained from the user |
Web template |
By default we are creating a communication site which has the web template ID : SITEPAGEPUBLISHING#0 |
Site Design ID |
The user has supplied the Site Design/template name which we cross check against the variable -varTemplateIDs to get the associated ID |
Owner |
Email ID of the item created user |
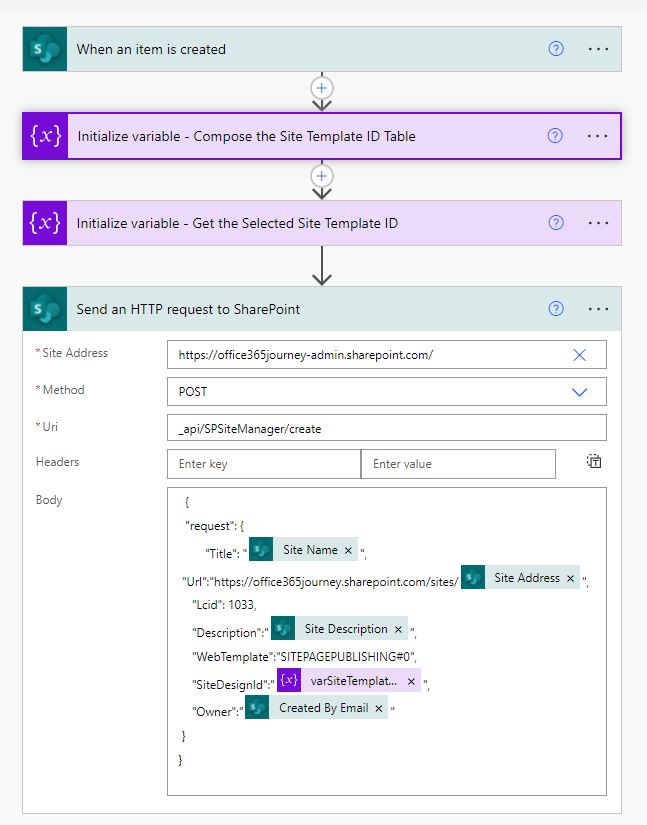
Thus the overall flow will look like :
Test the flow :
So as to test the flow, lets create a list item with the needed information.
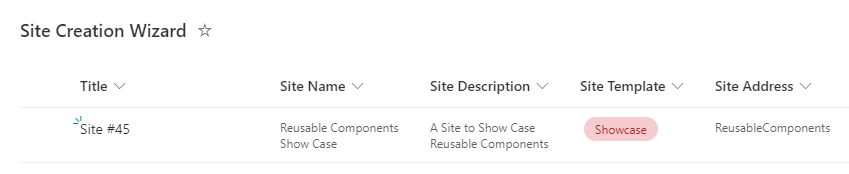
This will trigger the flow and it will create a Communication Site using the Site Template – Showcase and we can see the Site Status as 2 which indicates a successful creation :
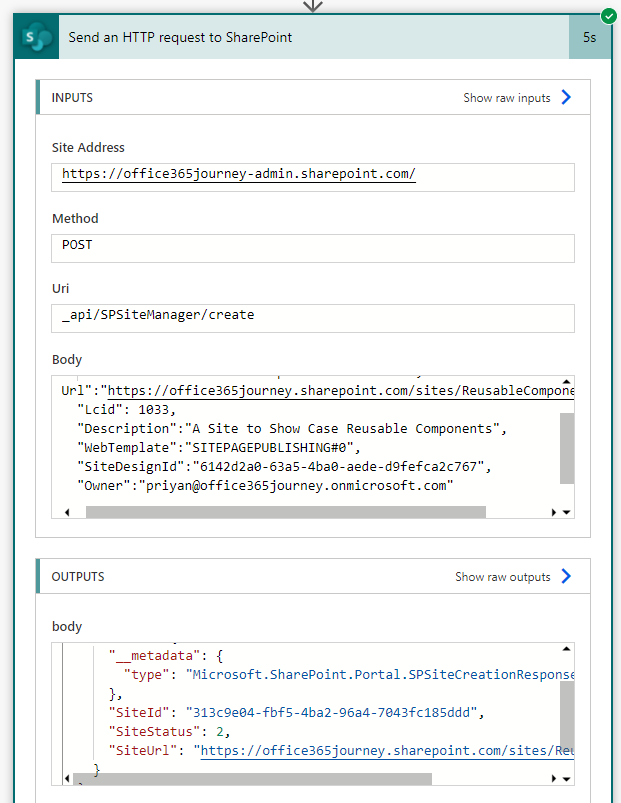
The full set of values for SiteStatus are as follows:
- 0 - Not Found. The site doesn't exist.
- 1 - Provisioning. The site is currently being provisioned.
- 2 - Ready. The site has been created.
- 3 - Error. An error occurred while provisioning the site.
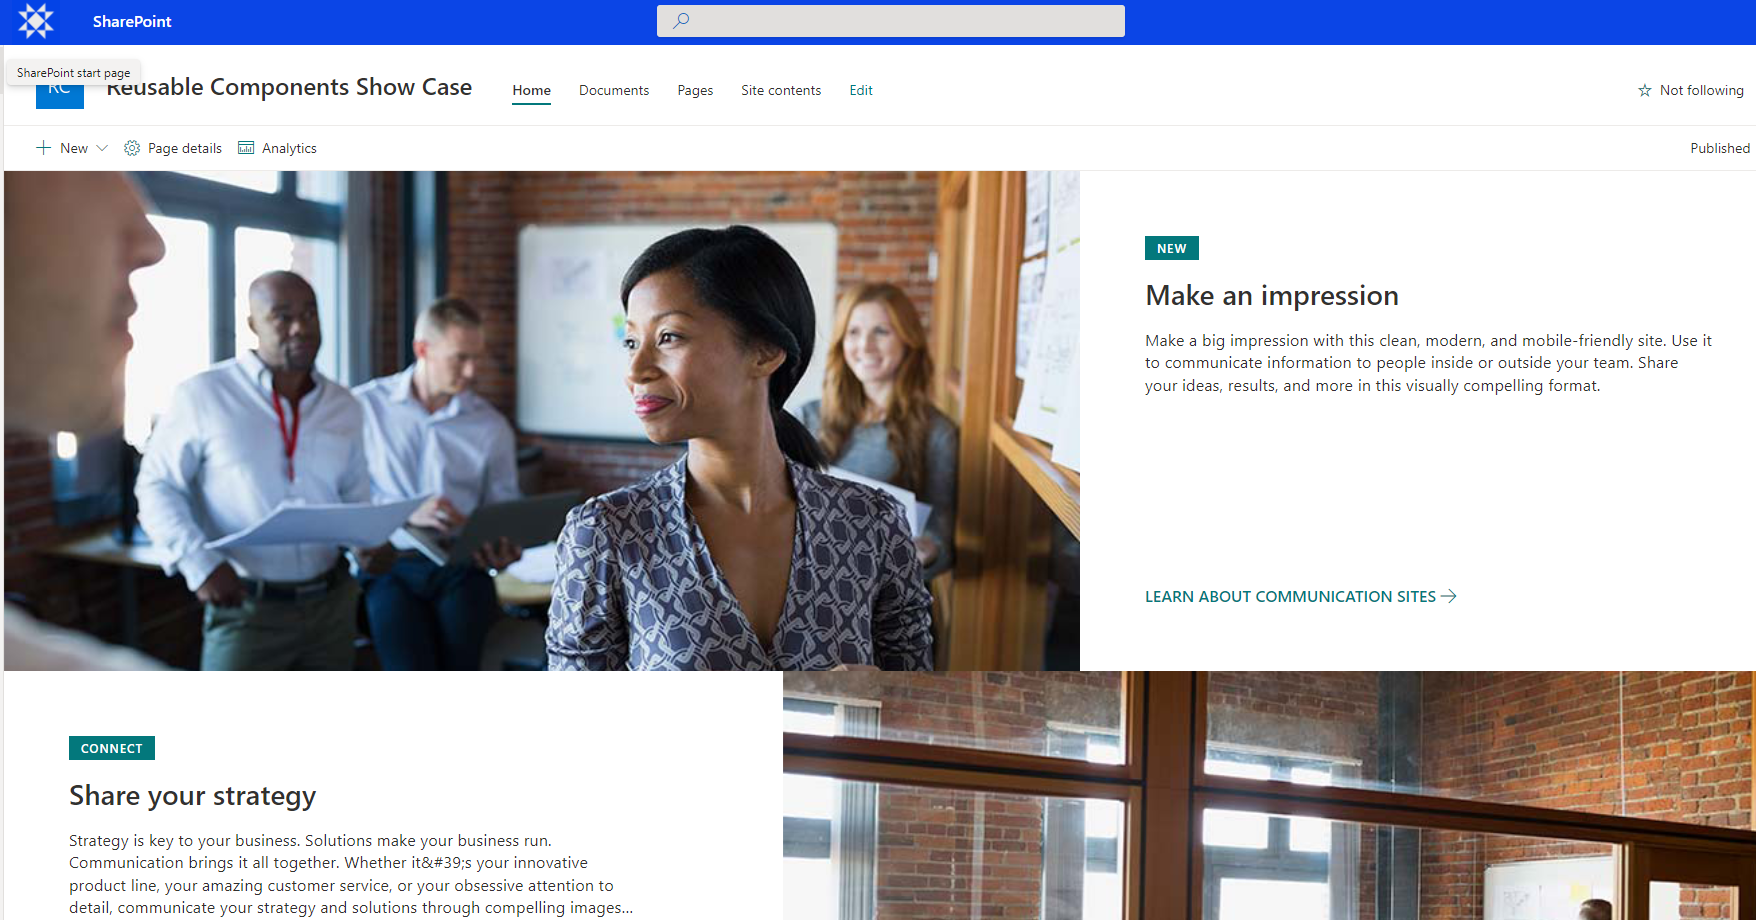
The site has also been provisioned at the provided URL :
Summary
Thus, we saw how to create an Auto Provisioning Site Solution using Power Automate and a SharePoint List and we also saw how we can give the end users the flexibility to customize the created site using one of the available Site Templates/Designs.