PowerApps: How to Save Audit App Camera Images as Attachment to SharePoint List

- Introduction
- Scenario
- Implementation
- Setting up the UI
- Camera Control
- Gallery Control
- Save as Attachment
- Testing
- Summary
Introduction
Power Apps and SharePoint together form a winning technology combination of spinning up an application in very less time. With SharePoint’s native back-end lists, storing data is quite easy as its well-integrated with Power Apps.
One of the common requirements that we come across is to capture photos and store it in the backend. In case, we want to store the captured image as a file in Document Library, we used to leverage Power Automate that can convert the captured image into a file and save it to the document library.
In this article we will see how we can save the captured images as attachments to a List Item without using Power Automate.
Scenario
As part of an Auditing requirement, we will be using an application to monitor and Quality Test the works that has been done on the Road or any other repairs done. As part of the inspection, we also have to capture the image of the site and fill the work details and save the data back to the SharePoint List.
So, we will create a SharePoint List with the below columns and customize the Out of the Box forms to incorporate Image Capturing functionality as well
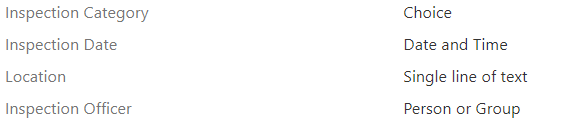
Implementation
We can easily update the OOB SharePoint List forms and customize it in Power Apps using the “Customize Forms” option.

Setting up the UI
We have renamed the fields from a readability and functionality perspective in the left tree view of Power App. Moreover, we have also updated the SharePoint Form to a 2 column layout and added 2 additional Controls
- A Button that navigates to the screen where we will use camera control to capture the images of the Inspection.
- A Gallery (Gallery_ImageCollection) to display the image collections of an inspection

In addition to that we have added an additional screen with the controls:
- Camera Control to capture the image
- Gallery to show in real time, the snapped pictures.
- Delete Icon to delete the snapped pictures, if needed.

Camera Control
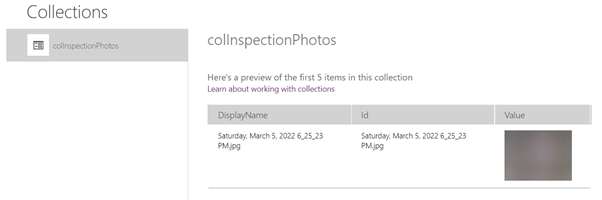
We will be using the Camera Control to capture the images of Inspection and the images will be added to a collection. The collection will have 3 columns
- DisplayName
- Id
- Value
The reason for creating the collection with this structure is because, we will setting this collection as the source for the Out of the Box Attachments Column and for it to accept the values, it has to follow the above 3 column schema.
We will also ensure that the Pictures are named in a unique way by getting the current Date and Time and setting it as the Picture Name using the formula.
Set(varPhotoID,
    Substitute(Text(Now(),DateTimeFormat.LongDateTime),":","_")
   );
Here we are substituting the Colon in the time with an underscore to avoid the presence of illegal characters in file name.
We will be adding the above formula in the OnSelect of the Camera Control, once the image ID is generated, we will add the image to the Collection with the expression :
Collect(
    colInspectionPhotos,
    {
        DisplayName: varPhotoID&".jpg",
        Id:varPhotoID&".jpg",
        Value:Camera_Inspection.Photo
    }
);
As indicated previously, since the Attachments control would expect a 3 Part Value for the image file, we will specify the formatted Photo name in varPhotoID variable to both DisplayName and ID and map the Photo to the Value Parameter.

While testing, clicking on the camera will save it to the collection as:
Gallery Control
The snapped pictures can be seen in real time in the Gallery control just below the Camera Control and we will be specifying the Collection in the Items Property of the Gallery.
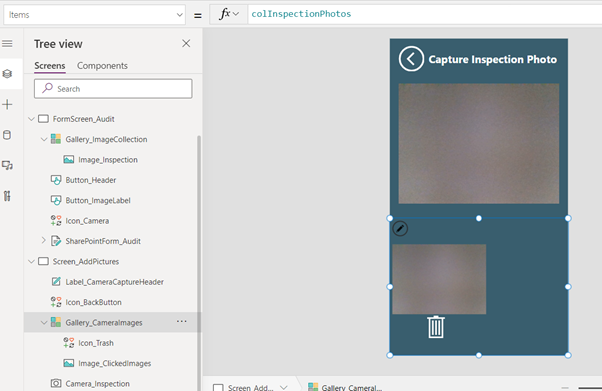
We have also added a Delete Icon inside the Gallery for deleting individual pictures and have mentioned the below expression in the OnSelect of the Delete Icon.
Remove(colInspectionPhotos,ThisItem)
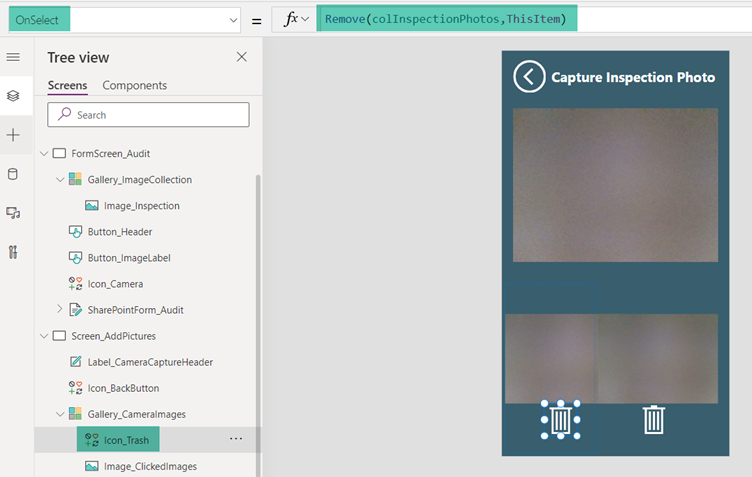
This completed the screen where we have added the Camera Control for snapping the inspection photos which we can see in real time and delete it if deemed in appropriate.
Save as Attachment
To save the image collection to the out of the box attachment column, we will go to the Attachment Card of the Home Screen of the SharePoint List and Set the Items Property to Collection value.

We will also specify the Collection in the Update property of the Attachments card

To complete the flow, add the Navigate action to the Camera Icon in the home screen so that on clicking it, it navigates to the screen with camera control.

Testing
Lets test out the app by creating a new item, which will open up the list Power App as below :
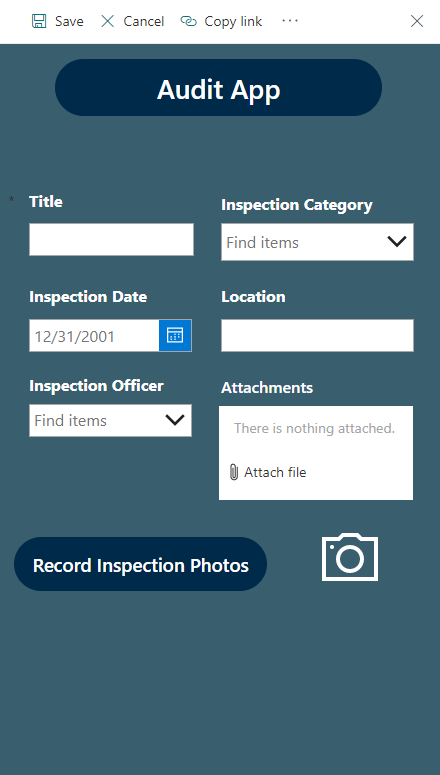
We will click on the camera to add the snaps of the Audit Site which will take us to the screen to capture the images

We have captured the image and lets navigate back to the home screen to add more details about the inspection

Finally, lets save it which will create an item in the list. If we open the item, we can see that the captured images has been saved as attachments and it is listed with the unique names(Date and Time format) we had assigned to it.

Summary
Thus, we saw how to save the images captured using Camera Control to the SharePoint List as an attachment without the use of Power Automate in between.