Power App: Implement a Marquee Animation using Timer Control
Introduction
A marquee is a scrolling piece of text which is displayed either horizontally across or vertically down the page depending on the settings. This comes in as a handy way to display Warning messages in the app, Latest Breaking news in a news portal etc.
In this article, we will see how to implement a Marquee in the Power App.
Scenario
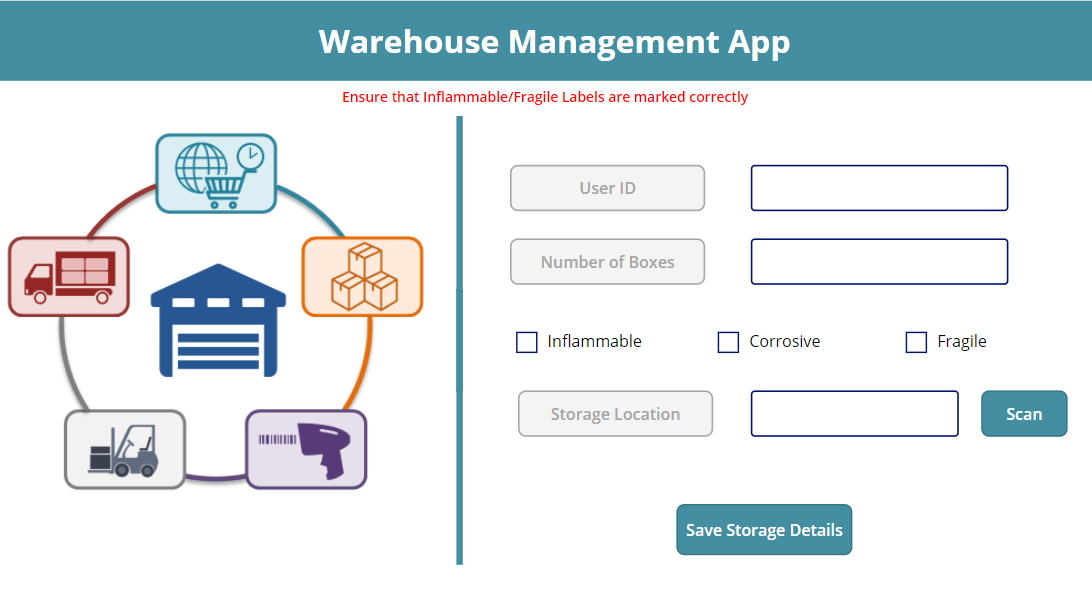
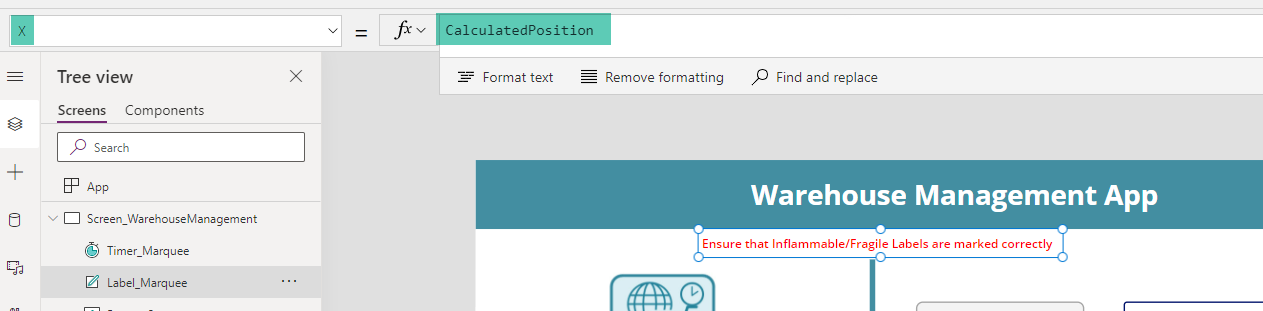
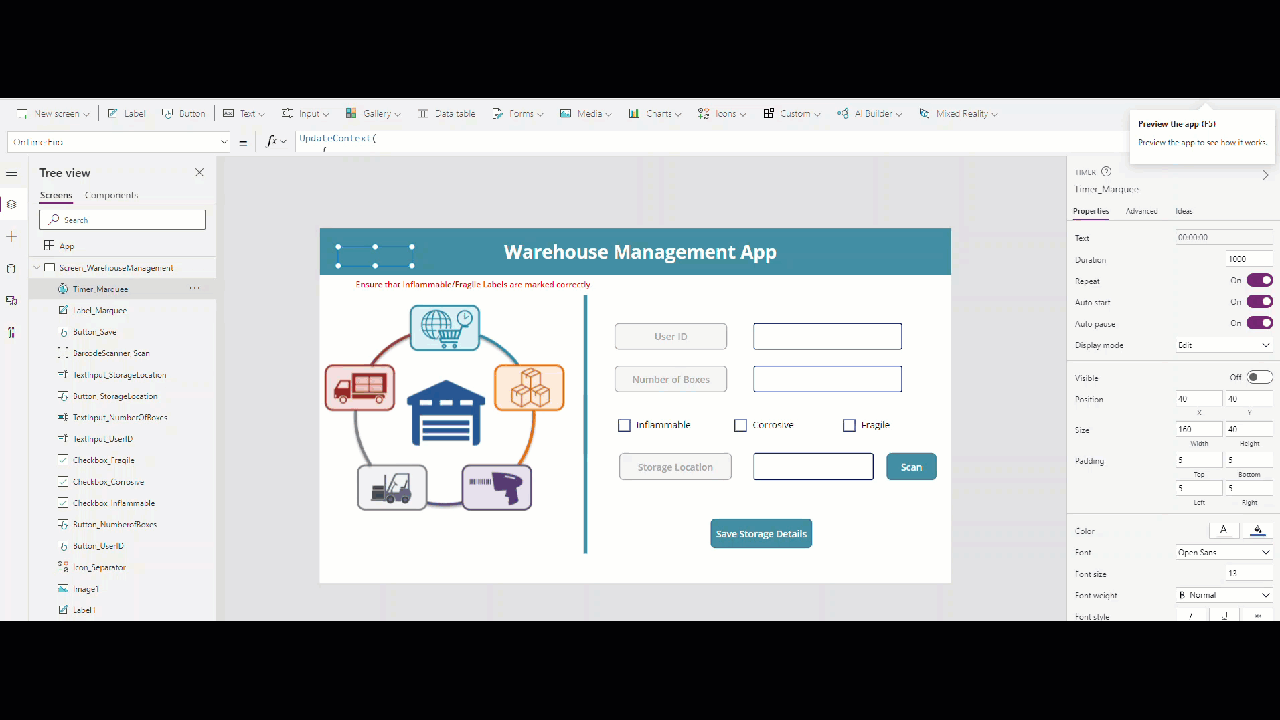
We have built a Warehouse management that is used to take inventory of the items that is brought to the warehouse for storage. We need to show a constantly moving marquee on the top that will either drift from left to right or vice versa with the statutory message “Ensure that Inflammable/Fragile labels are marked correctly” so that it gives a clear indication to the warehouse assistant on the urgency of following this instruction.
Implementation
In HTML, we have the <marquee> tag which can be used to seamlessly implement the animated effect. To simulate the marquee within Power App, we will take leverage of the Timer Control.
Let’s add the Timer Control to the Screen as well as add a Label which will contain the Marquee text.
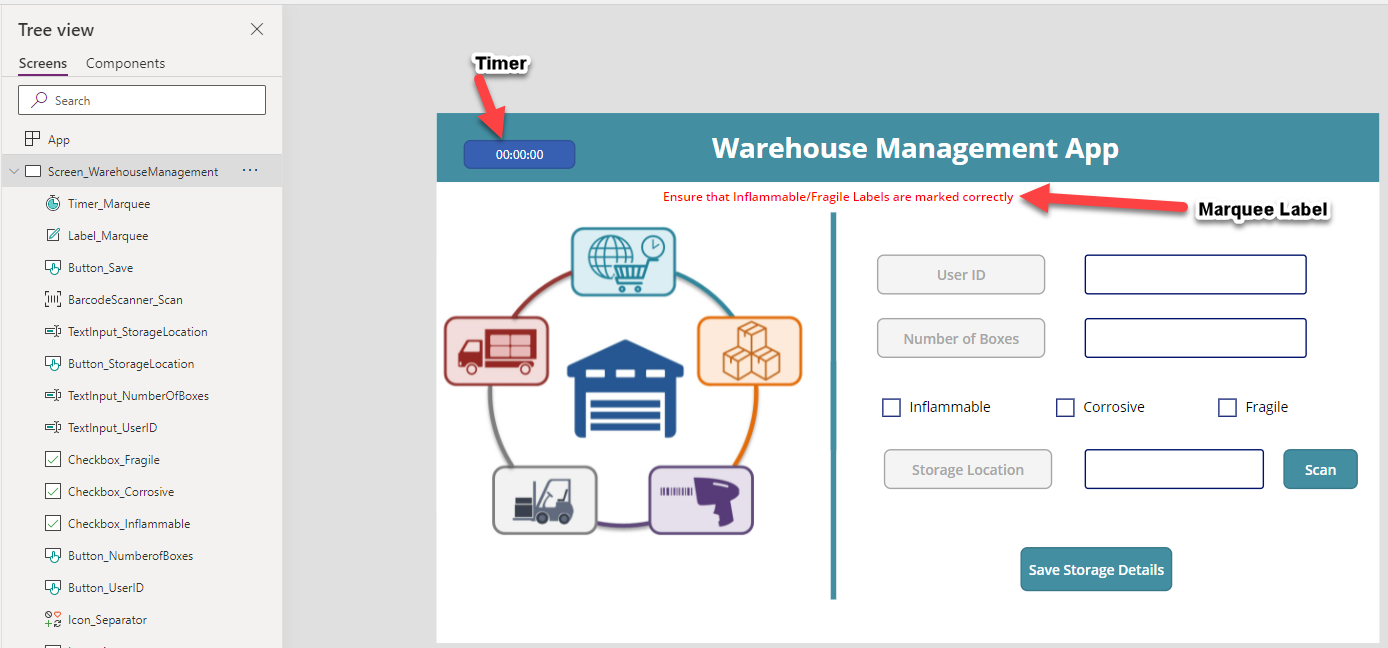
Timer Control
The timer control has few properties that define the behaviour in which it runs. Let’s explore some of the properties that we will leverage in this demo.
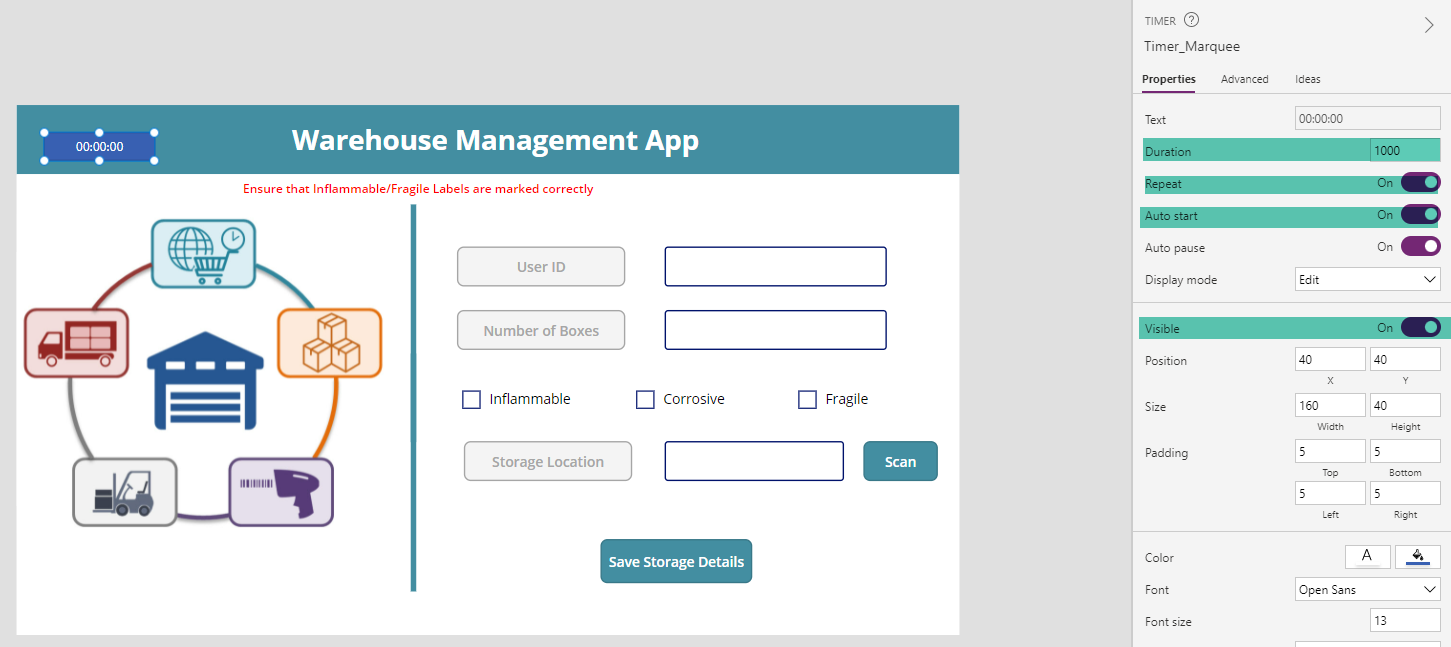
The duration property defines the time for which the timer will run.Duration takes the value in ms. Hence to define a 5 second run, we will provide the value as 5000. Enabling the Repeat property will auto start the timer and run again for the specified duration. This way, we can create a loop and at the end of every run of the timer, we can tap into the “OnTimerEnd” property to define some logic that has to be run.
This way, if we want to change the Color of the Header or Update a Data source at predefined 30 second intervals, Setting the Duration to say 30000 and adding the recurring logic in the OnTimerEnd will help us implement it.
We will also set the Auto start property to true so that the timer starts when the App is opened. We will also set the Visible property to Off so that it is not visible to end users, and we can still work with the timer behind the scenes.
Setting the Timer Property
In our case, we need to move the Label Text across the screen every 1 Second. So, we will set the Duration to 1000. In the OnTimeEnd, we will declare and set a variable CalculatedPosition to increment and add 50 to itself. This way the variable will increment by 50 points every 1 second. We can now start using this variable as the X property value of the Label.
Thus, in effect, the label will have its X value reset to +50 every 1 second creating a motion from left to right. As the timer is set to repeat, this process will continue, and Label’s X position will keep on getting incremented by 50.
Problem and Resolution
However, after some time, when the label’s X position reaches a value which is greater than the width of the screen, the label will go out of sight, and it will never return as the X position has crossed beyond the screen width.
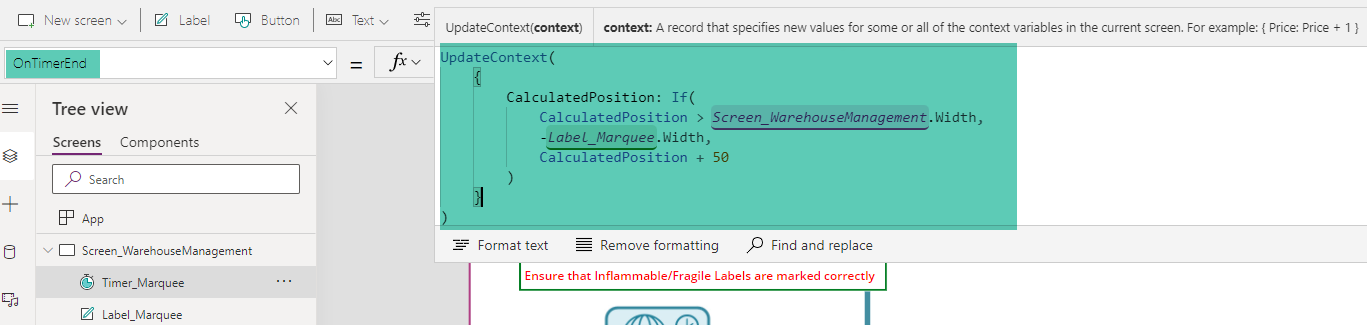
To work around this issue, we have to check if the Variable has crossed the Screen width and if Yes, we will reset the value to -Label.width . This way it will restart again from the extreme left of the screen.
UpdateContext(
    {
        CalculatedPosition: If(
            CalculatedPosition > Screen_WarehouseManagement.Width,
            -Label_Marquee.Width,
            CalculatedPosition - 50
        )
    }
)
We will then set this Calculated variable as the X value for the label so that it can dynamically move across the screen with a new position after every 1 second.
Test the Marquee
Let’s test the marquee effect by playing the app.
This we saw how to create the Marquee effect from left to right. To have the effect from Right to left, we will update the formula to below:
UpdateContext(
    {
        CalculatedPosition: If(
            CalculatedPosition < -Label_Marquee.Width,
            Screen_WarehouseManagement.Width,
            CalculatedPosition - 50
        )
    }
)
This will check if the marquee position is at the beginning of the screen, if yes, it will reset the position to the Screen width, so that it can restart the sliding in from right to left.
Summary
Thus, we saw how to create a marquee effect in Power App from Right to Left and Vice Versa.