Power Automate: Unzip and Extract files with .zip Extension
Introduction
In this article we will see how to unzip files with the .zip extension using Power Automate. We will use a qualified business use case as the base for the article.
Business Use Case
We maintain a SharePoint Document Library that accepts multiple invoices which are sent as a zip file by vendors. However, for further processing, individual invoices need to unzip from the .zip file. We will use Power Automate to achieve the unzipping of the Invoices Zip file in this scenario.
Implementation
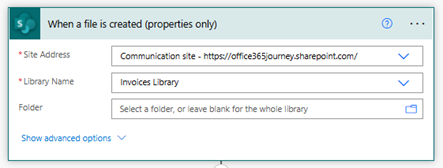
Let’s create an automated cloud flow that runs whenever a new file is created in the Document Library.
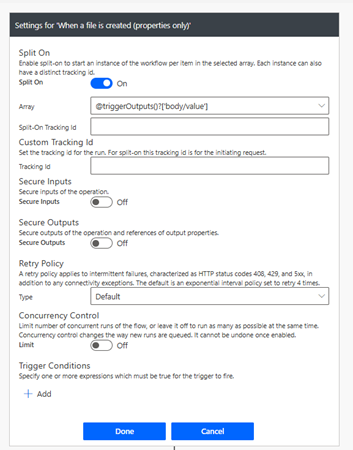
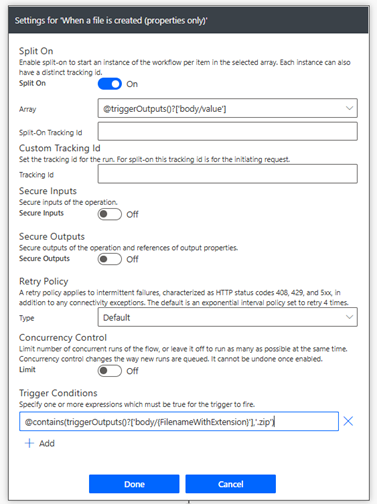
However, we need to restrict the trigger to ensure that the flow will run only when a zip file is uploaded. To ensure this, we can use the trigger condition and add a new condition by clicking on Add button at the bottom.
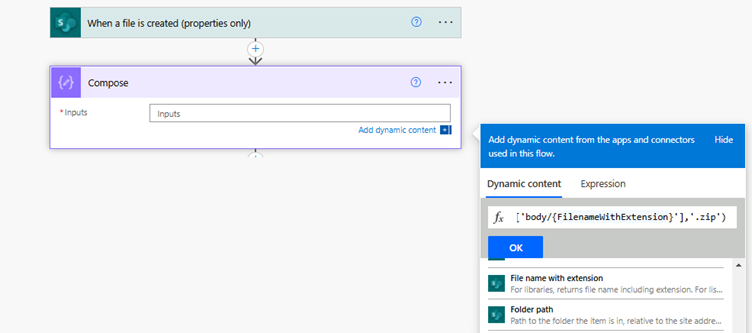
So as to formulate the condition, an easy way to do it is temporarily add a compose action and click on the Expression tab and add the expression contains(,’.zip’) and within the parenthesis as the first parameter add the dynamic content” File name with extension”. The final expression will look like below.
contains(triggerOutputs()?['body/{FilenameWithExtension}'],'.zip')
Copy the expression and paste it in the trigger condition with an @ in the beginning. This will ensure that the flow gets triggered only when this condition is met.
Note: This is a neat way to apply conditions that using the Condition action and checking inside the flow as it helps in reducing the flow run if the condition is not met.
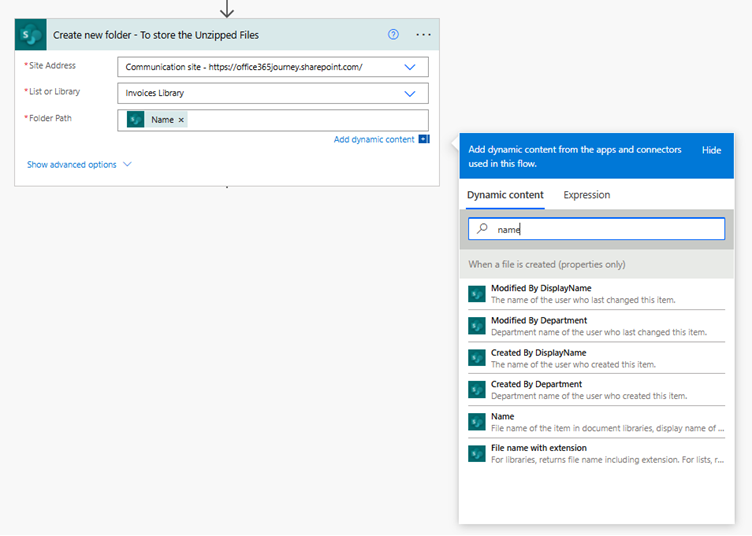
Now let’s add a new action “Create a new folder” to use it to house the extracted files from the zip. In the folder name, mention the name that needs to be used for creating the folder, we will use the name of the Zip file as the value for this parameter.
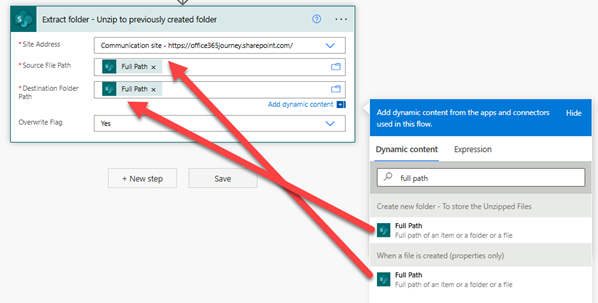
Once the folder action is configured, lets add the Extract Folder action to extract the zip and save the extracted files in the previously created folder. We have 2 parameters which will be updated with the below values:
Source File Path |
Full path of the zip file from the item created action |
Destination File Path |
Full path of the newly created folder |
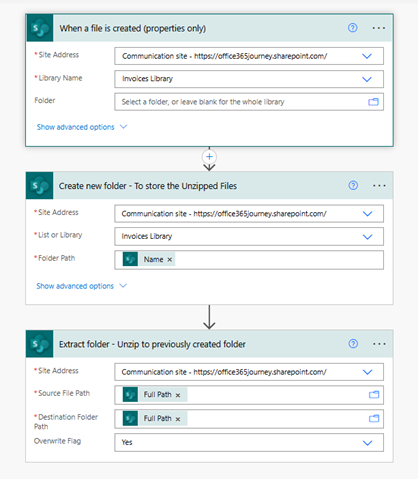
Thus, the flow configuration is completed and the completed flow would look like:
Test the flow
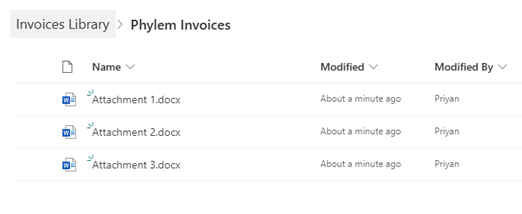
To test the flow, we will upload zip file which has 3 invoice files to the document library. This would kick start the flow and firstly it would create a new folder for storing the unzipped files

Followed by that, if we go inside the newly created folder, we can see that the file has been unzipped and copied to the new location.