SharePoint 2010: Display the Master Data Services Web Application
When you're using Master Data Services (MDS), you may want to display pages from the Master Data Manager web application within another website.
You can use a query parameter in the URL to automatically crop the web application's visible area so that it's displayed more naturally within SharePoint or other websites.
This is what the user interface looks like without the query parameter:

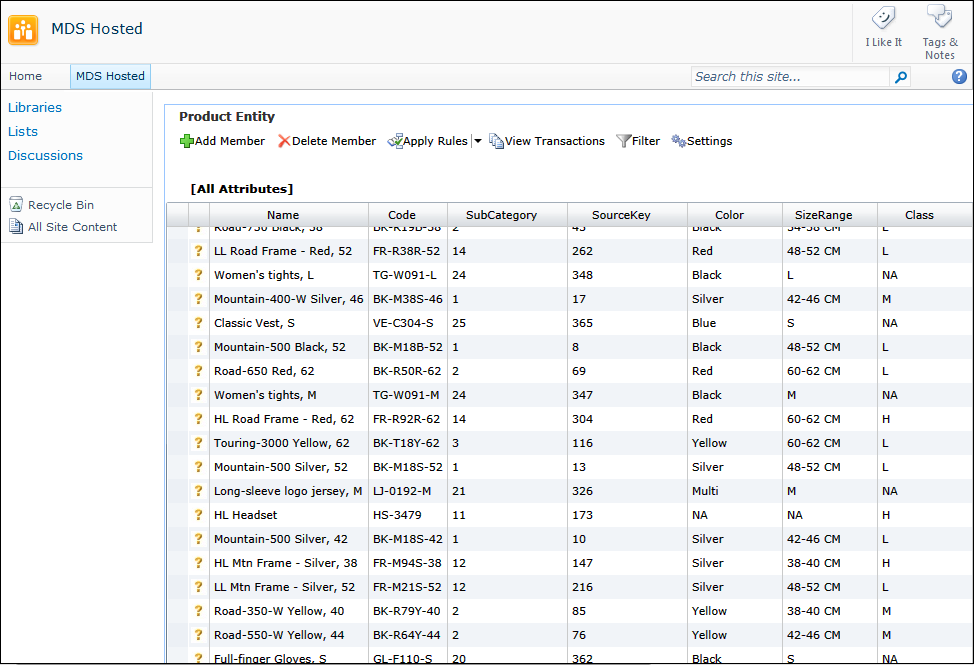
And this is what it looks like when you use the query parameter:

You'll notice that the top and bottom of the page have been cropped; the header, the menu bar, and the padding at the bottom of the page are removed.
The trick is to add the query parameter &hosted=true to the website URL.
For example, in the Master Data Manager web application, the URL of a page is something like:
http://computer/MDS/Explorer/AttributeSL.aspx?MID=10&VID=23&EID=44#/ExplorerEntity?MID=10&VID=23&EID=44
Now edit the URL to include the &hosted=true query parameter. In this example, the URL would be:
http://computer/MDS/Explorer/AttributeSL.aspx?MID=10&VID=23&EID=44**&hosted=true**#/ExplorerEntity?MID=10&VID=23&EID=44**&hosted=true**
You can use this URL any way you would like; the following procedure explains how to use the URL in a SharePoint web part.
Procedure:
1. Open the SharePoint site you want to edit.
2. On the Page tab, in the Edit group, click Edit.
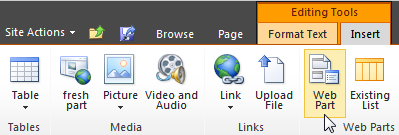
3. In the Editing Tools section, on the Insert tab, click Web Part.
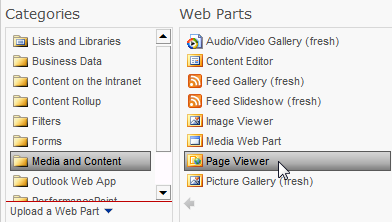
4. In the Category list, click Media and Content.
5. In the Web Parts list, click Page Viewer.
6. On the bottom right corner, click Add.
7. Instructional text is displayed. Click the open the tool pane link.

8. On the Save confirmation dialog box, click OK.
9. On the Page Viewer pane, type a URL in the path.

10. Expand the Appearance section.
11. In the Height box, select the Yes option and type 768 in the box. From the list, select Pixels. (This is the minimum supported height.)
12. Optional. In the Width box, select the Yes option and type 1024 in the box. From the list, select Pixels. (This is the minimum supported width. If you don’t specify a width, the page should automatically be sized.)
13. For the Chrome State, choose Normal.
14. In the Chrome Type list, choose Border Only.
15. Click OK.
16. On the Page tab, in the Edit group, click Save & Close.
The page is now displayed in SharePoint. (Note that the right-hand pane will also be displayed.)