Backing up a Macintosh
**Backing up a Macintosh time machine on SBS 2011 Essentials, Windows Storage Server 2008 R2 Essentials and Windows Home Server 2011
**
The process to backup an Apple time machine backup to a SBS 2011 Essentials, Windows Storage Server 2008 R2 Essentials or Windows Home Server 2011 is not as automatic as the Windows backup process is.
*As of Februrary 3, 2012 this is the current state of the ability to backup Apple Macintosh platforms.
*[**Snow Leopard and earlier. SUPPORTED but not AUTOMATIC
**
](#Snow%20Leopard%20and%20earlier)[**Lion. NOT SUPPORTED
**](#Lion)
Snow Leopard and earlier: Time machine backups can be made to use the Windows server as a storage target. There are two ways to do so.
The first is to follow the following instructions:
Original post from http://sbs.seandaniel.com/2011/02/how-to-enable-timemachine-backup-for.html
For a more step by step instruction see Tom on Tech's excellent step by step post: http://www.tomontech.com/2011/04/how-to-configure-time-machine-with-windows-home-server-2011/
Poking around on the Internet, you can find some steps, like how to get unsupported volumes to appear to the TimeMachine engine, with the help of a friend (thanks Fabian & Craig) we’ve managed to put together these steps, which work for both Home Server 2011, and SBS 2011 Essentials:
- First, create an SMB share on your server using the share permissions wizard, let’s call it Mac Backups. Make sure the users who are on a Mac have Read/Write access.
- Change the Mac TimeMachine to show unsupported Network Volumes by going to Finder, then Applications, Utilities, Terminal.
- Inside the Terminal, type this command defaults write com.apple.systempreferences TMShowUnsupportedNetworkVolumes 1. This sets the showing of unsupported network volumes to TRUE.

- Obtain the MAC’s MAC Address. A MAC Address is the hardware address of the local network card. It’s important to choose the MAC address of the built in wired connection. To obtain this, you can run the command from the terminal: ifconfig | grep en0.

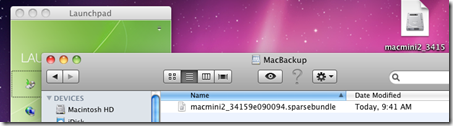
- Next (and this is the confusing part, so bare with me) we need to create a sparse file on the MAC and copy the server share. A sparse file is a file that you define a CAP size, but it will probably take up much less (we’ll define it as 200GB in this example). This file creation process is a little tricky. To do this, type in to the same terminal above: command ‘hdiutil create –size 200g –fs HFS+J –volname “<CLIENT_NAME> Backup” <CLIENT_NAME>_<MAC_ADDRESS>.sparsebundle’ Where the MAC client is called <CLIENT_NAME> and the MAC Address on the primary wired connection to the MAC is <MAC_ADDRESS>. This means if you’re client name was OSX, and your MAC address is 00:00:1F:12:82:92, then your command would be: command ‘hdiutil create –size 200g –fs HFS+J –volname “OSX Backup” OSD_00001F128292.sparsebundle’ . Here is what it looks like this client is called “macmini2” and has a MAC address of 34:15:9E:09:00:94
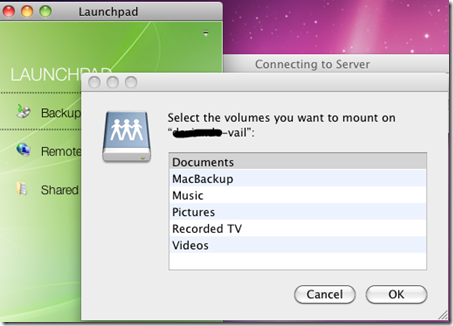
- Copy this file to “\SERVER\Mac Backups\ that you created earlier on the server. As you probably know if you are a MAC user, you have to mount the volume:
- Load up the Time Machine settings from within System Preferences, and the sparse file you created above should be in the list. Select this as the target for your backups. This will have every TimeMachine backup backup directly to a share on the server:

- Repeat for all your Mac computers on your network.
Once you have completed these steps, your MAC will start using the Windows Home Server 2011 or Windows Small Business Server 2011 Essentials as the backup TARGET. This means it will back up over the network using the built in timeline functionality, on the schedule you define inside timeline.
What is also cool, is while the MAC won’t show a percentage complete like the PC does when performing the client backup, it will tell you the status right in the console, which of course falls through to the alerts.
Mac Backup Successful:

Mac Backup Unsuccessful:

So there you have it, How to backup a MAC to a Windows Home Server 2011, Windows Storage Server 2008 R2 Essentials or Windows Small Business Server 2011 Essentials Server.
Alternatively you can download an add in from http://www.orbitaltech.com/Orbital%20Backup%20Utility.htm that will make this process easier.
**Lion
**
Due to the fact that Lion now relies on AFP (Apple filing protocol) and no longer supports saving to a NAS (see http://www.macwindows.com/Lion-broke-NAS-and-AFP-servers-.html ) the ability to send Lion based Time machine backups to a Windows share does not work at this time.
If this information changes, we will post updated information.