Prepare an Ubuntu image for Azure Stack HCI virtual machines
Applies to: Azure Stack HCI, version 23H2
This article describes how to prepare an Ubuntu image to create a virtual machine (VM) on your Azure Stack HCI cluster. You use the Azure CLI for the VM image creation.
Prerequisites
Before you begin, meet the following prerequisites:
- Have access to an Azure Stack HCI cluster. This cluster is deployed, registered, and connected to Azure Arc. Go to the Overview page in the Azure Stack HCI cluster resource. On the Server tab on the right pane, Azure Arc should appear as Connected.
- Download the latest supported Ubuntu server image on your Azure Stack HCI cluster. The supported OS versions are Ubuntu 18.04, 20.04, and 22.04 LTS. You prepare this image to create a VM image.
Workflow
To prepare an Ubuntu image and create a VM image from that image:
The following sections provide detailed instructions for each step in the workflow.
Create a VM image from an Ubuntu image
Important
We recommend that you prepare an Ubuntu image if you intend to enable guest management on the VMs.
Follow these steps on your Azure Stack HCI cluster to create a VM image by using the Azure CLI.
Step 1: Create an Ubuntu VM
To use the downloaded Ubuntu image to provision a VM:
Use the downloaded image to create a VM with the following specifications:
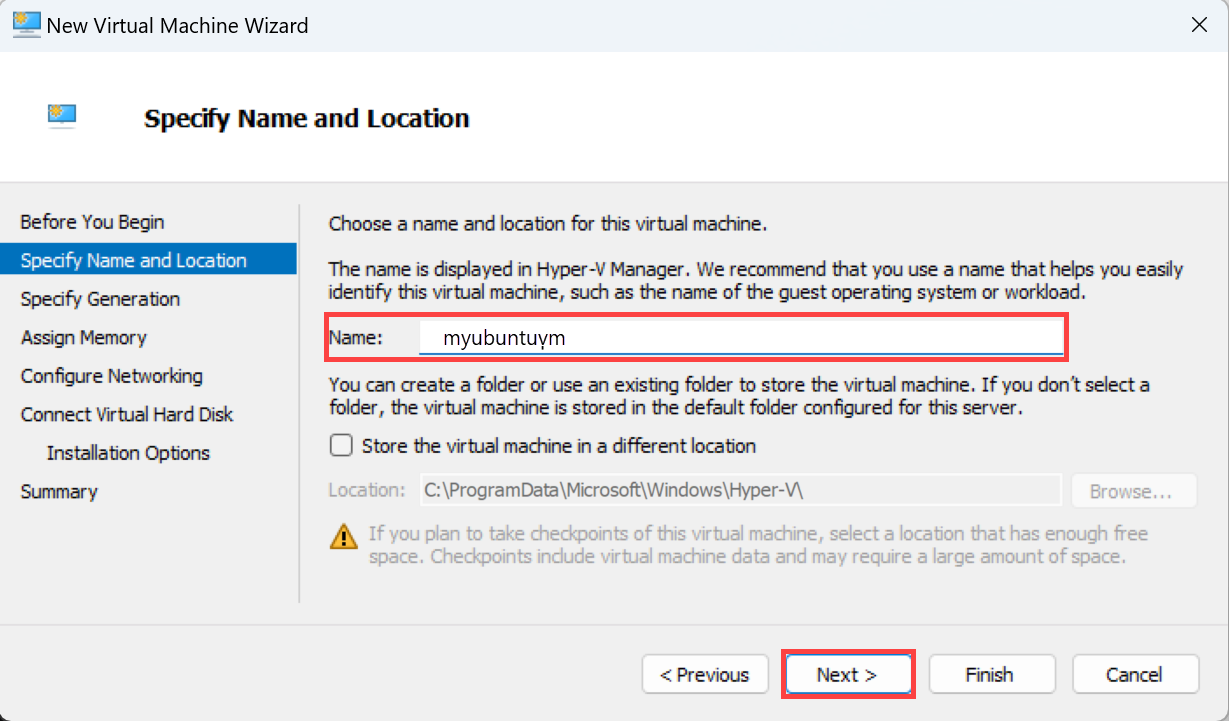
Provide a friendly name for your VM.
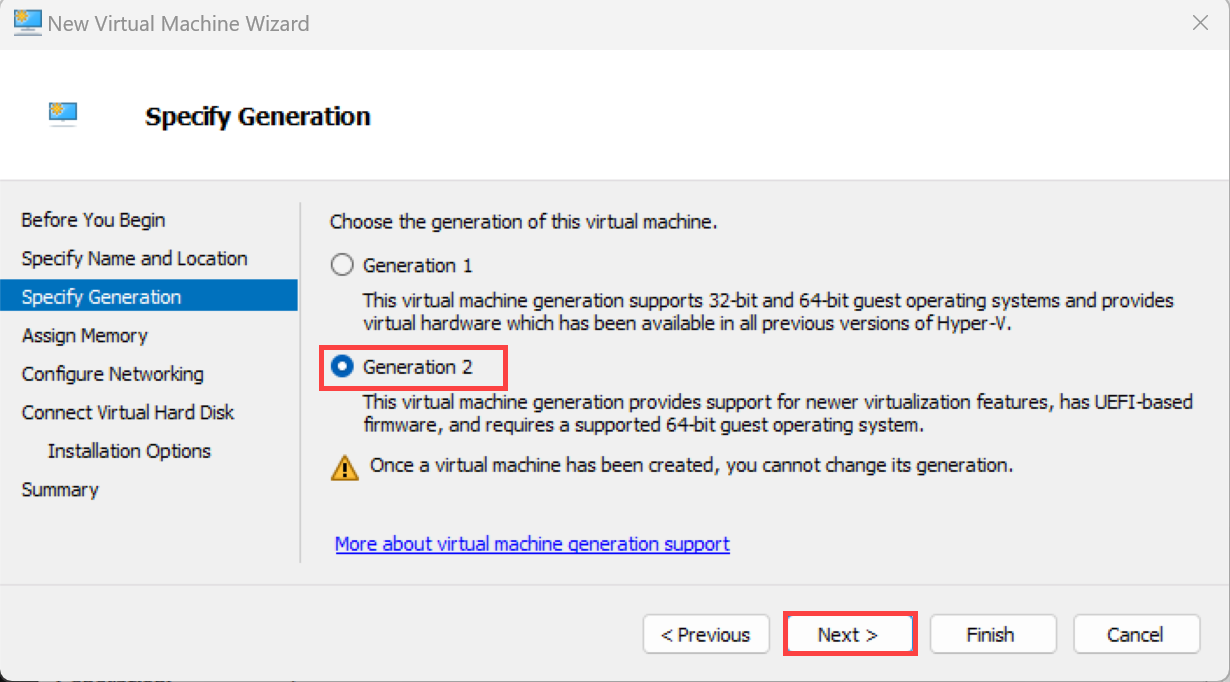
Specify Generation 2 for your VM as you're working with a VHDX image here.
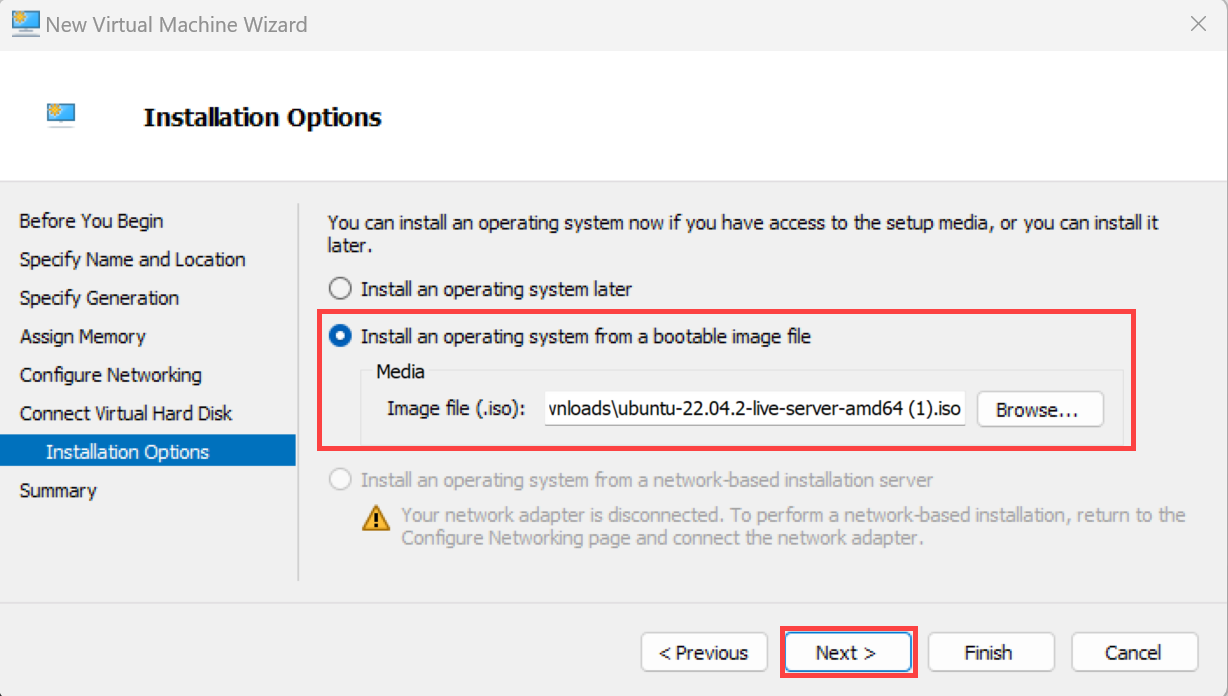
Select Install operating system from a bootable image. Point to the ISO that you downloaded earlier.
For step-by-step instructions, see Provision a VM by using Hyper-V Manager.
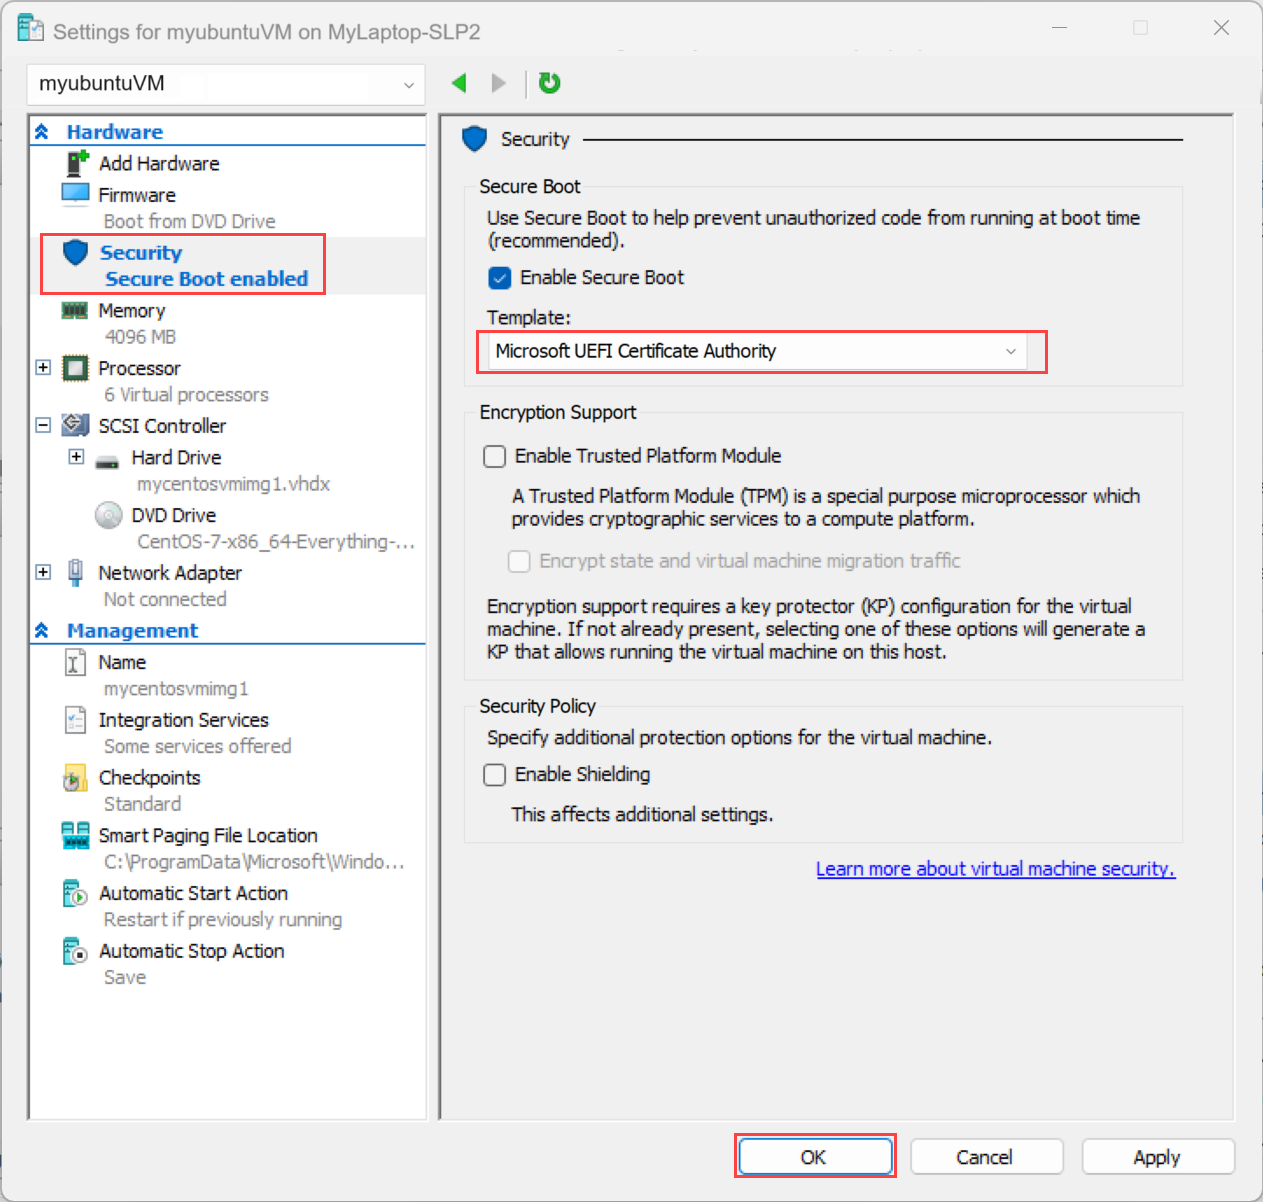
Use the UEFI certificate to secure boot the VM.
- After the VM is created, it shows up in Hyper-V Manager. Select the VM, right-click it, and then select Settings.
- On the left pane, select the Security tab. Then under Secure Boot, from the Template dropdown list, select Microsoft UEFI Certificate Authority.
- Select OK to save the changes.


Step 2: Configure the VM
Follow these steps on your Azure Stack HCI cluster to configure the VM that you provisioned earlier:
Sign in to the VM. See the steps in Connect to a Linux VM.
To download all the latest package lists from the repositories, run the following command:
sudo apt updateInstall the Azure tailored kernel. This step is required for your VM to get an IP for the network interface.
sudo apt install linux-azure -yInstall the SSH server. Run the following command:
sudo apt install openssh-server openssh-client -yConfigure passwordless sudo. Add the following command at the end of the
/etc/sudoersfile by usingvisudo:ALL ALL=(ALL) NOPASSWD:ALL
Step 3: Clean up the residual configuration
Delete machine-specific files and data from your VM so that you can create a clean VM image without any history or default configurations. Follow these steps on your Azure Stack HCI cluster to clean up the residual configuration.
Clean
cloud-initdefault configurations.sudo rm -f /etc/cloud/cloud.cfg.d/50-curtin-networking.cfg /etc/cloud/cloud.cfg.d/curtin-preserve-sources.cfg /etc/cloud/cloud.cfg.d/99-installer.cfg /etc/cloud/cloud.cfg.d/subiquity-disable-cloudinit-networking.cfg sudo rm -f /etc/cloud/ds-identify.cfg sudo rm -f /etc/netplan/*.yamlClean up the logs and cache.
sudo cloud-init clean --logs --seed
sudo rm -rf /var/lib/cloud/ /var/log/* /tmp/*
sudo apt-get clean
Remove the bash history.
rm -f ~/.bash_history
export HISTSIZE=0
logout
Shut down the VM. In Hyper-V Manager, go to Action > Shut Down.
Step 4: Create the VM image
Follow these steps on your Azure Stack HCI cluster to create the VM image from the VHDX that you created earlier.
Use the Azure CLI to create the VM image:
Run PowerShell as an administrator.
Sign in. Run the following cmdlet:
az loginSet your subscription. Run the following cmdlet:
az account set --subscription <Subscription ID>Set parameters for your subscription, resource group, custom location, location, OS type for the image, name of the image, and the path where the image is located. Replace the parameters in
< >with the appropriate values.$Subscription = "<Subscription ID>" $Resource_Group = "<Resource group>" $CustomLocation = "<Custom location>" $Location = "<Location for your Azure Stack HCI cluster>" $OsType = "<OS of source image>"Parameters are described in the following table.
Parameter Description SubscriptionSubscription associated with your Azure Stack HCI cluster. Resource_GroupResource group for Azure Stack HCI cluster that you associate with this image. LocationLocation for your Azure Stack HCI cluster. For example, the location could be eastusorwestreurope.OsTypeOperating system associated with the source image. This system can be Windows or Linux. Use the VHDX of the VM to create a gallery image. Use this VM image to create Azure Arc virtual machines on your Azure Stack HCI.
Make sure to copy the VHDX in user storage in the cluster shared volume of your Azure Stack HCI. For example, the path could look like
C:\ClusterStorage\UserStorage_1\linuxvhdx.$ImagePath = "Path to user storage in CSV" $ImageName = "mylinuxvmimg" az stack-hci-vm image create --subscription $subscription -g $resource_group --custom-location $CustomLocation --location $location --image-path $ImagePath --name $ImageName --debug --os-type 'Linux'Verify that the image is created.
Related content
- Create Azure Arc VMs on your Azure Stack HCI cluster.
Feedback
Coming soon: Throughout 2024 we will be phasing out GitHub Issues as the feedback mechanism for content and replacing it with a new feedback system. For more information see: https://aka.ms/ContentUserFeedback.
Submit and view feedback for