Open a support ticket for Azure Edge Hardware Center
This article applies to orders created by Azure Edge Hardware Center service. If you encounter any issues with your service, you can create a service request for technical support. This article walks you through:
- How to create a support request.
- How to manage a support request lifecycle from within the portal.
Create a support request
Do the following steps to create a support request:
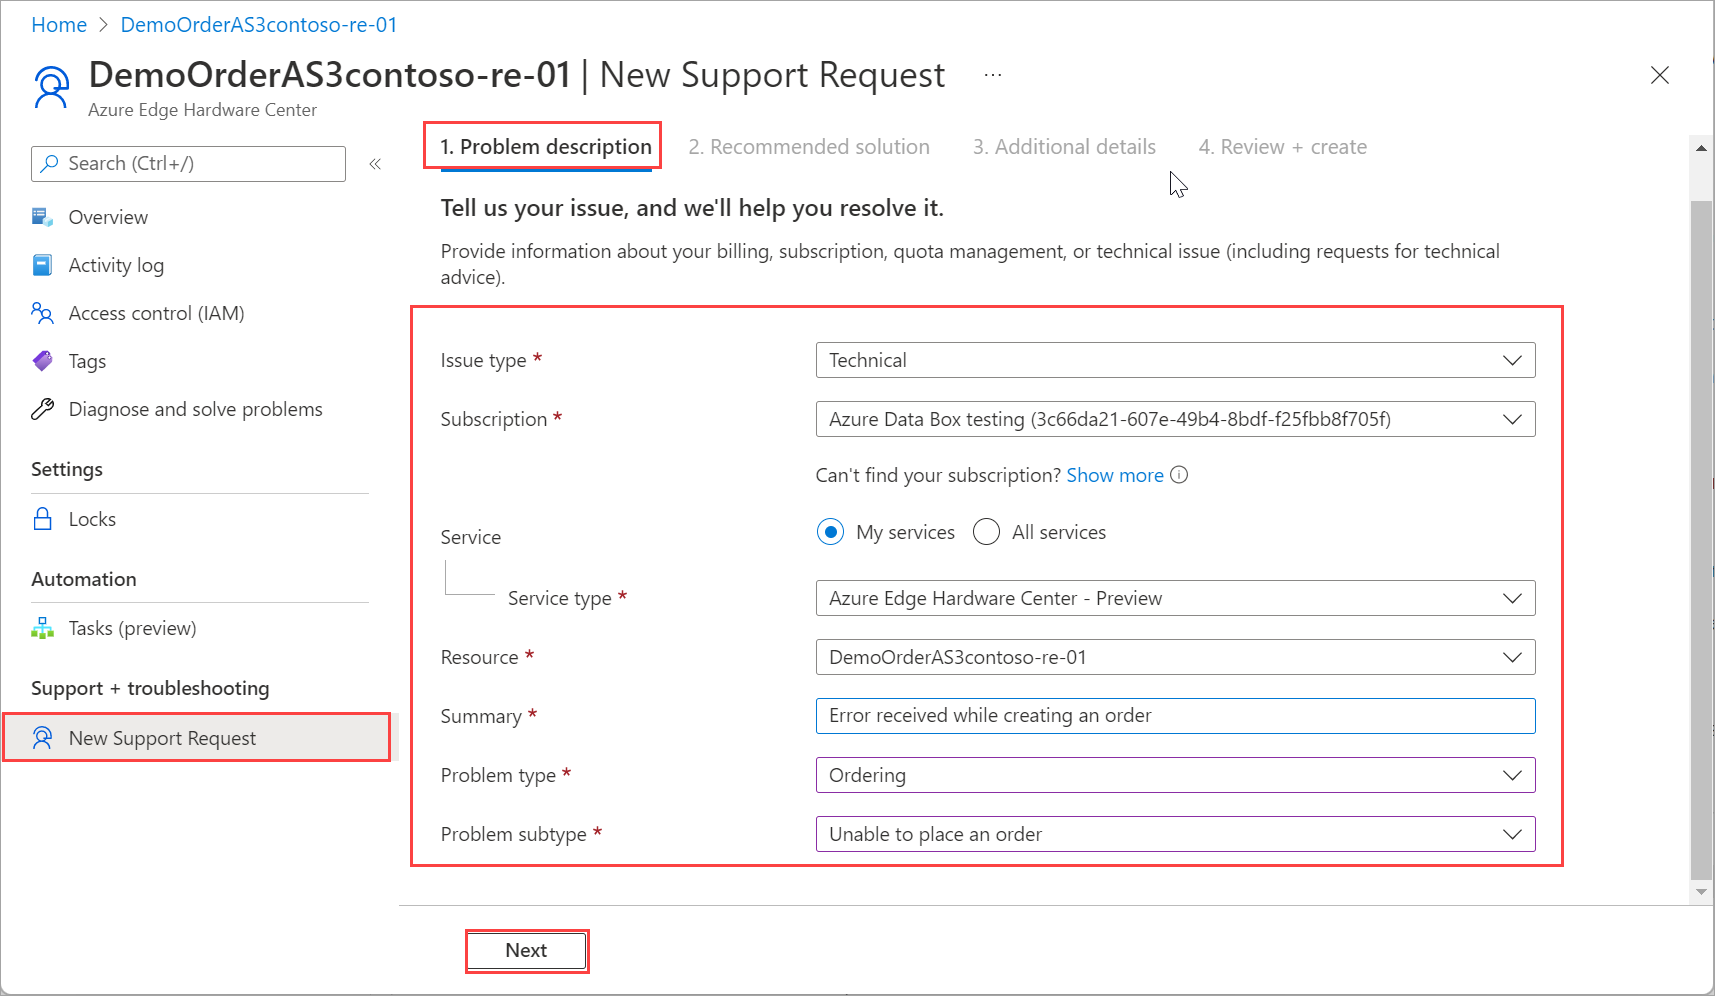
Go to your Azure Edge Hardware Center order. Navigate to Support + troubleshooting section and then select New support request.
In New support request, on the Problem description tab, take the following steps:
- From the Issue type dropdown list, select Technical.
- Choose your Subscription.
- Under Service, check My Services. From the dropdown list, select Azure Edge Hardware Center.
- Select your Resource. This corresponds to the name of your order.
- Give a brief Summary of the issue you are experiencing.
- Select your Problem type.
- Based on the problem type you selected, choose a corresponding Problem subtype.
- Select Next.
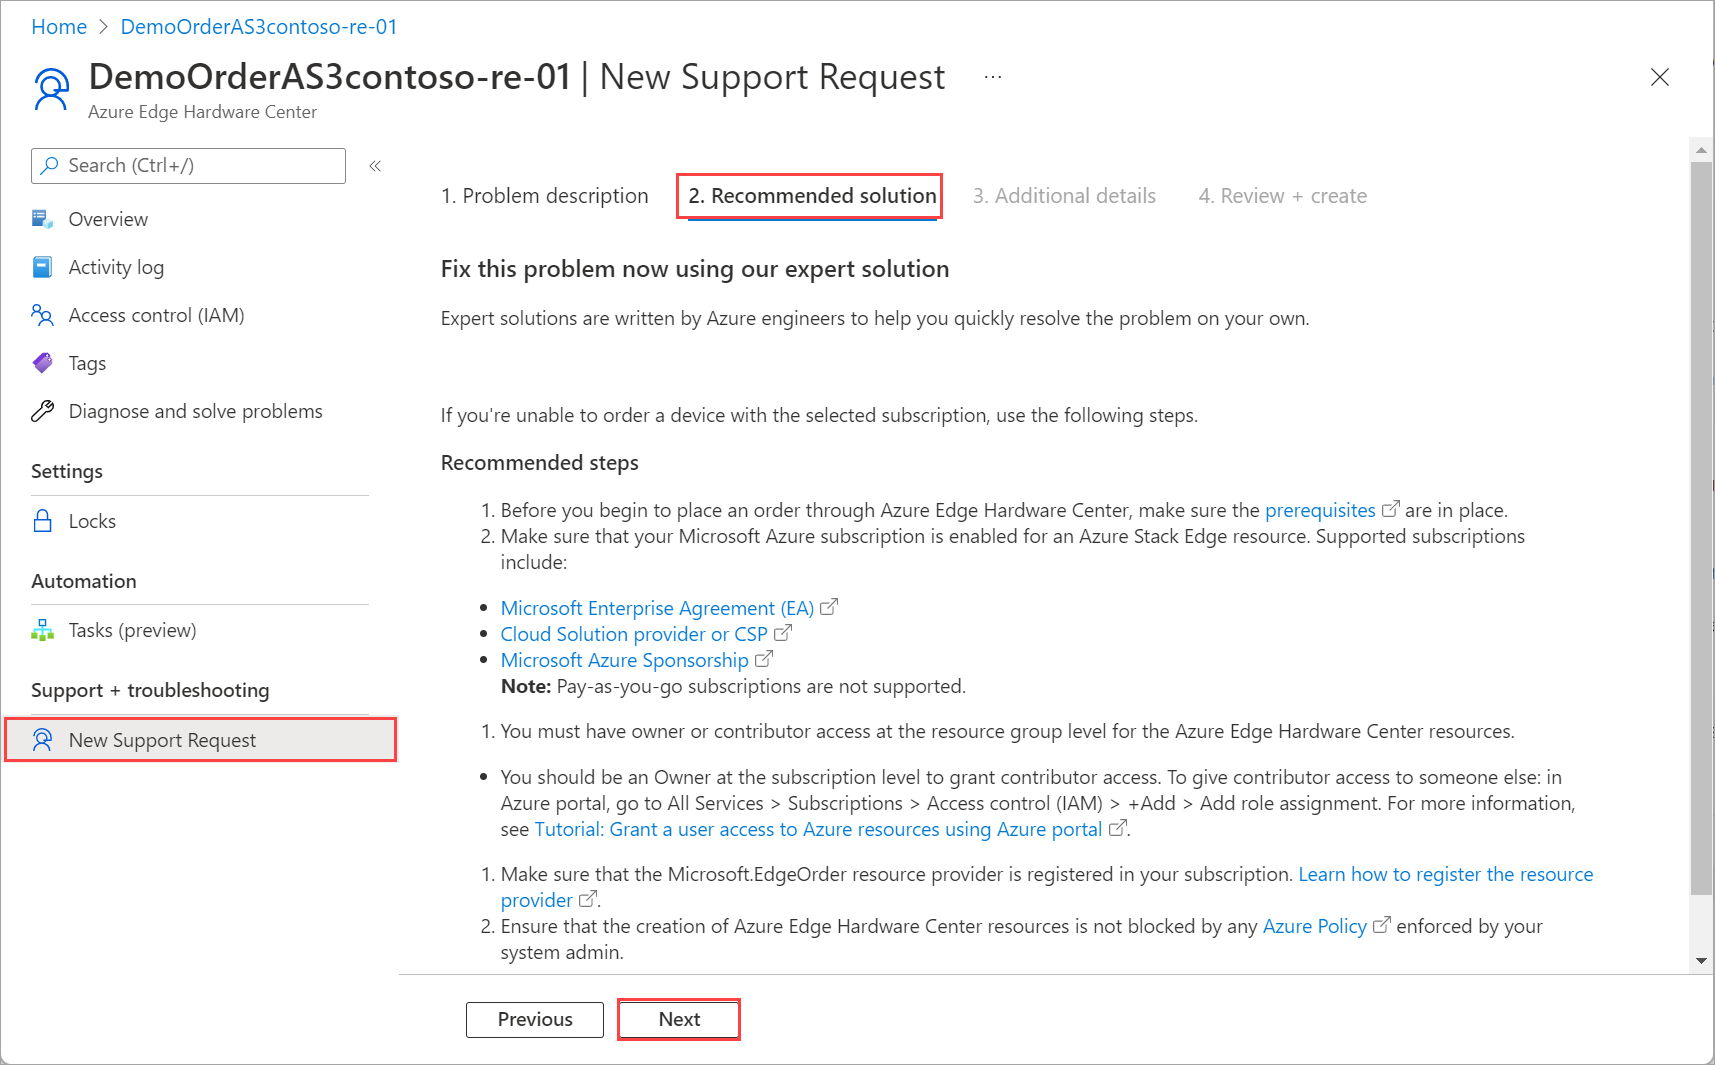
On the Recommended solution tab, check if the fix for the issue that you are observing is documented. If the error you are facing is not documented, select Next.
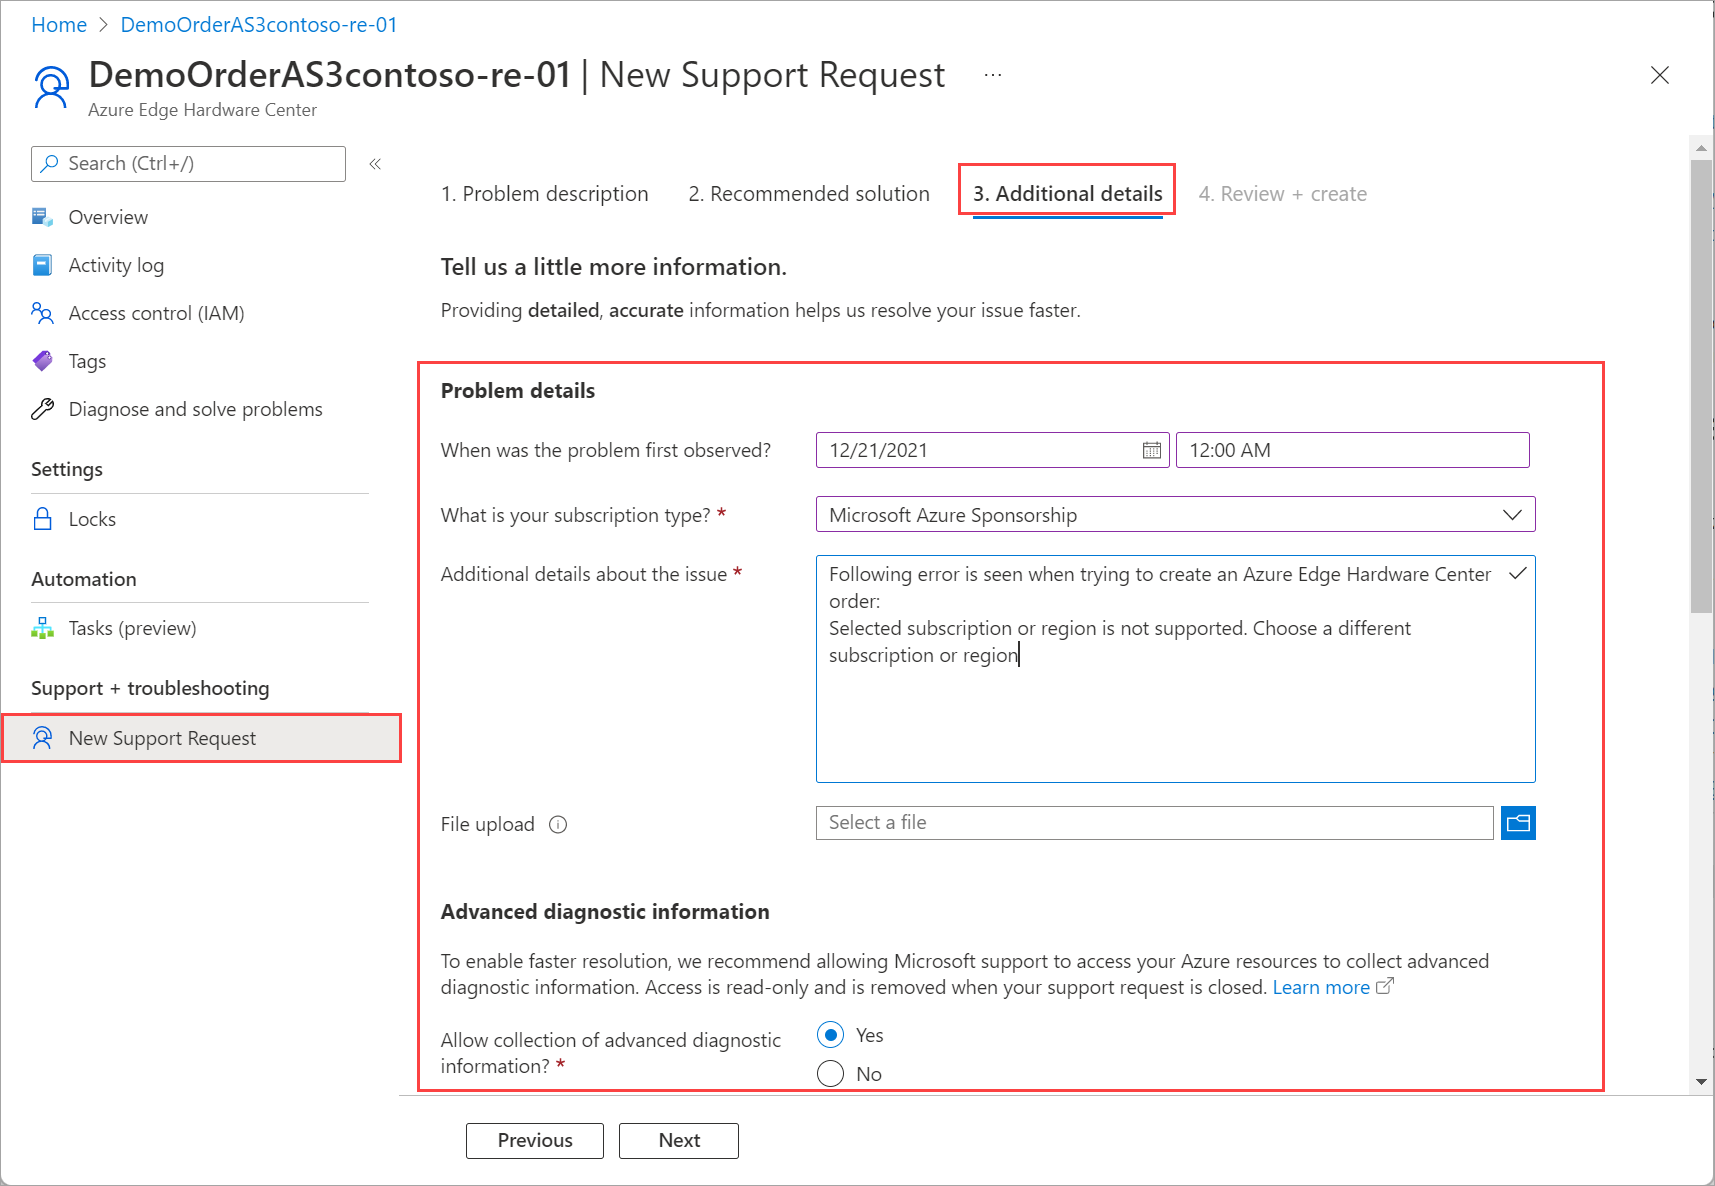
On the Additional details tab, take the following steps:
Under Problem details, provide the start date and time for the problem.
Select the Subscription type.
Supply a Additional details about the issue.
In the File upload, select the folder icon to browse any other files you want to upload.
Under Advanced diagnostic information, check Allow collection of advanced diagnostic information.
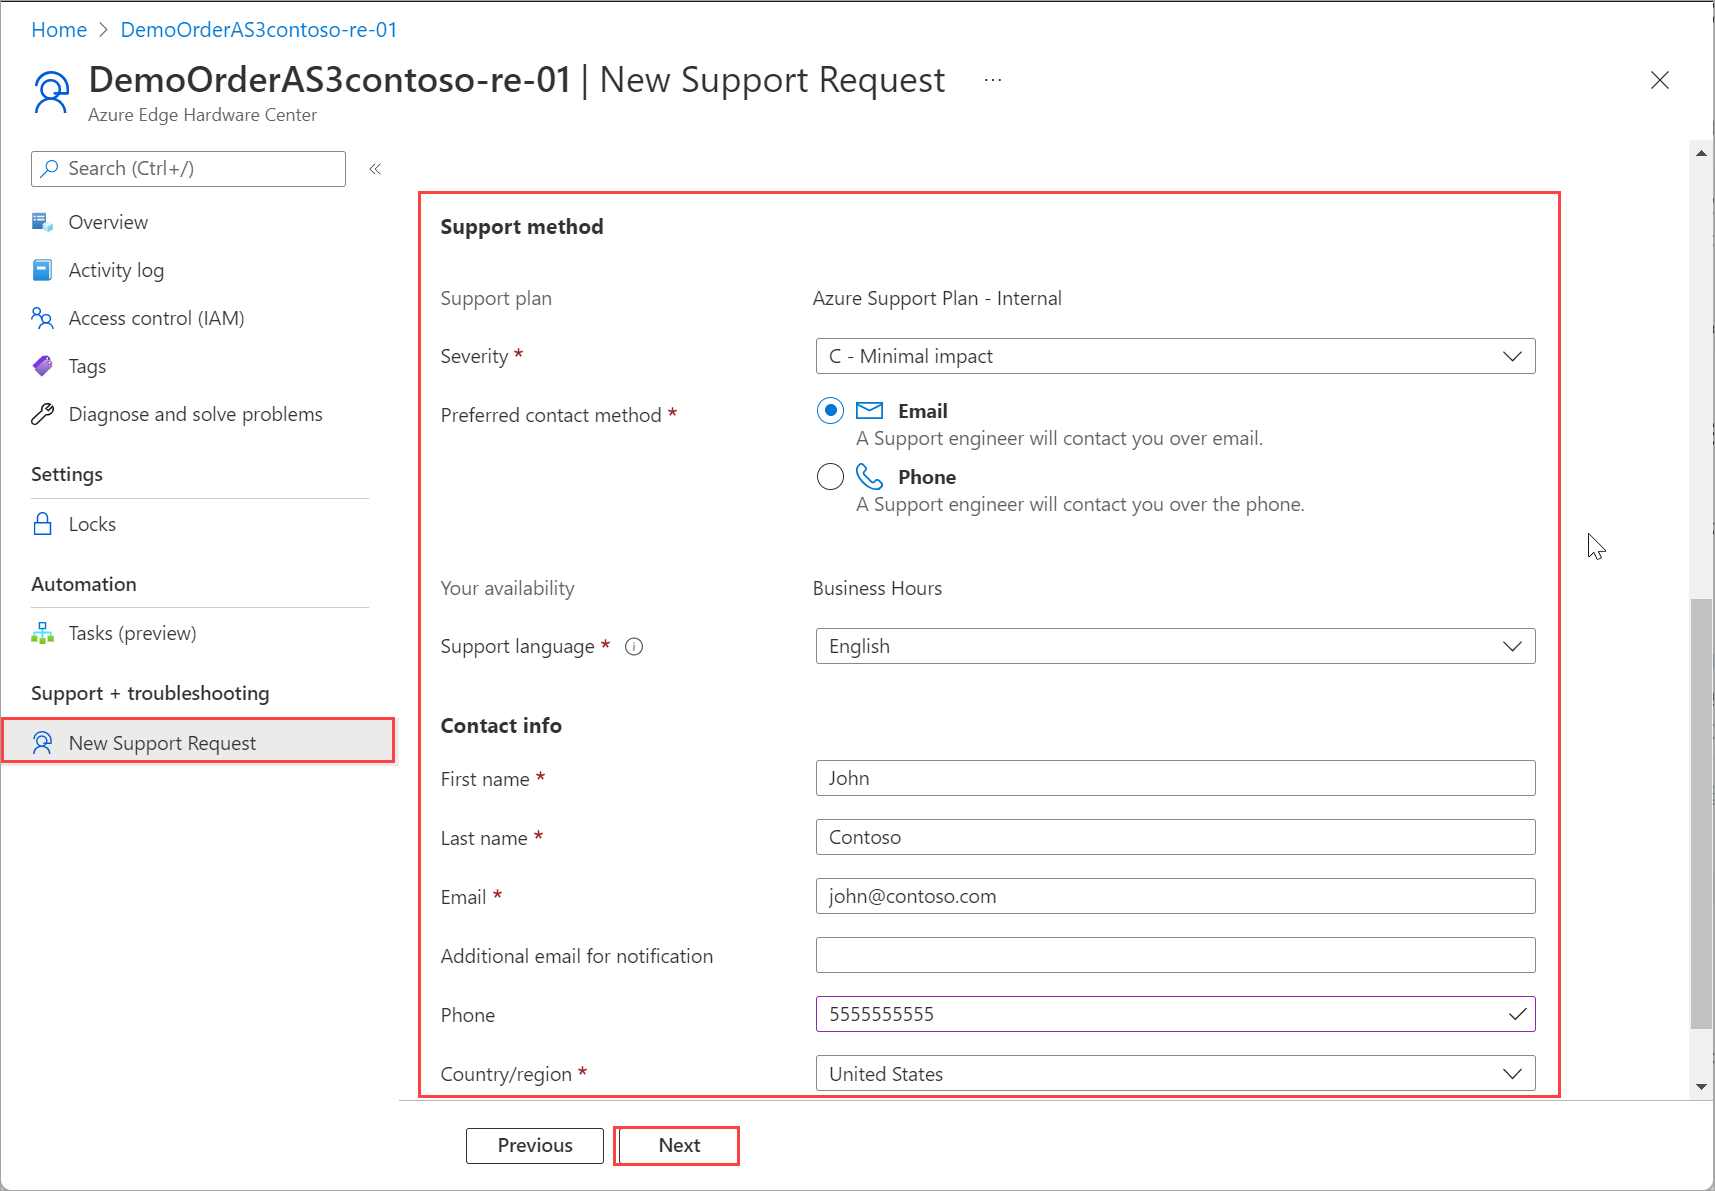
Under Support method, based on your subscription, a Support plan is automatically populated.
From the dropdown list, select the Severity.
Specify a Preferred contact method.
Your availability are automatically selected based on your subscription plan.
Provide the language you prefer for Support.
Under Contact info, provide your name, email, phone, optional contact, country/region. Microsoft Support uses this information to reach out to you for further information, diagnosis, and resolution.
Select Next.
On the Review + Create tab, review the information related to Support ticket. Select Create.
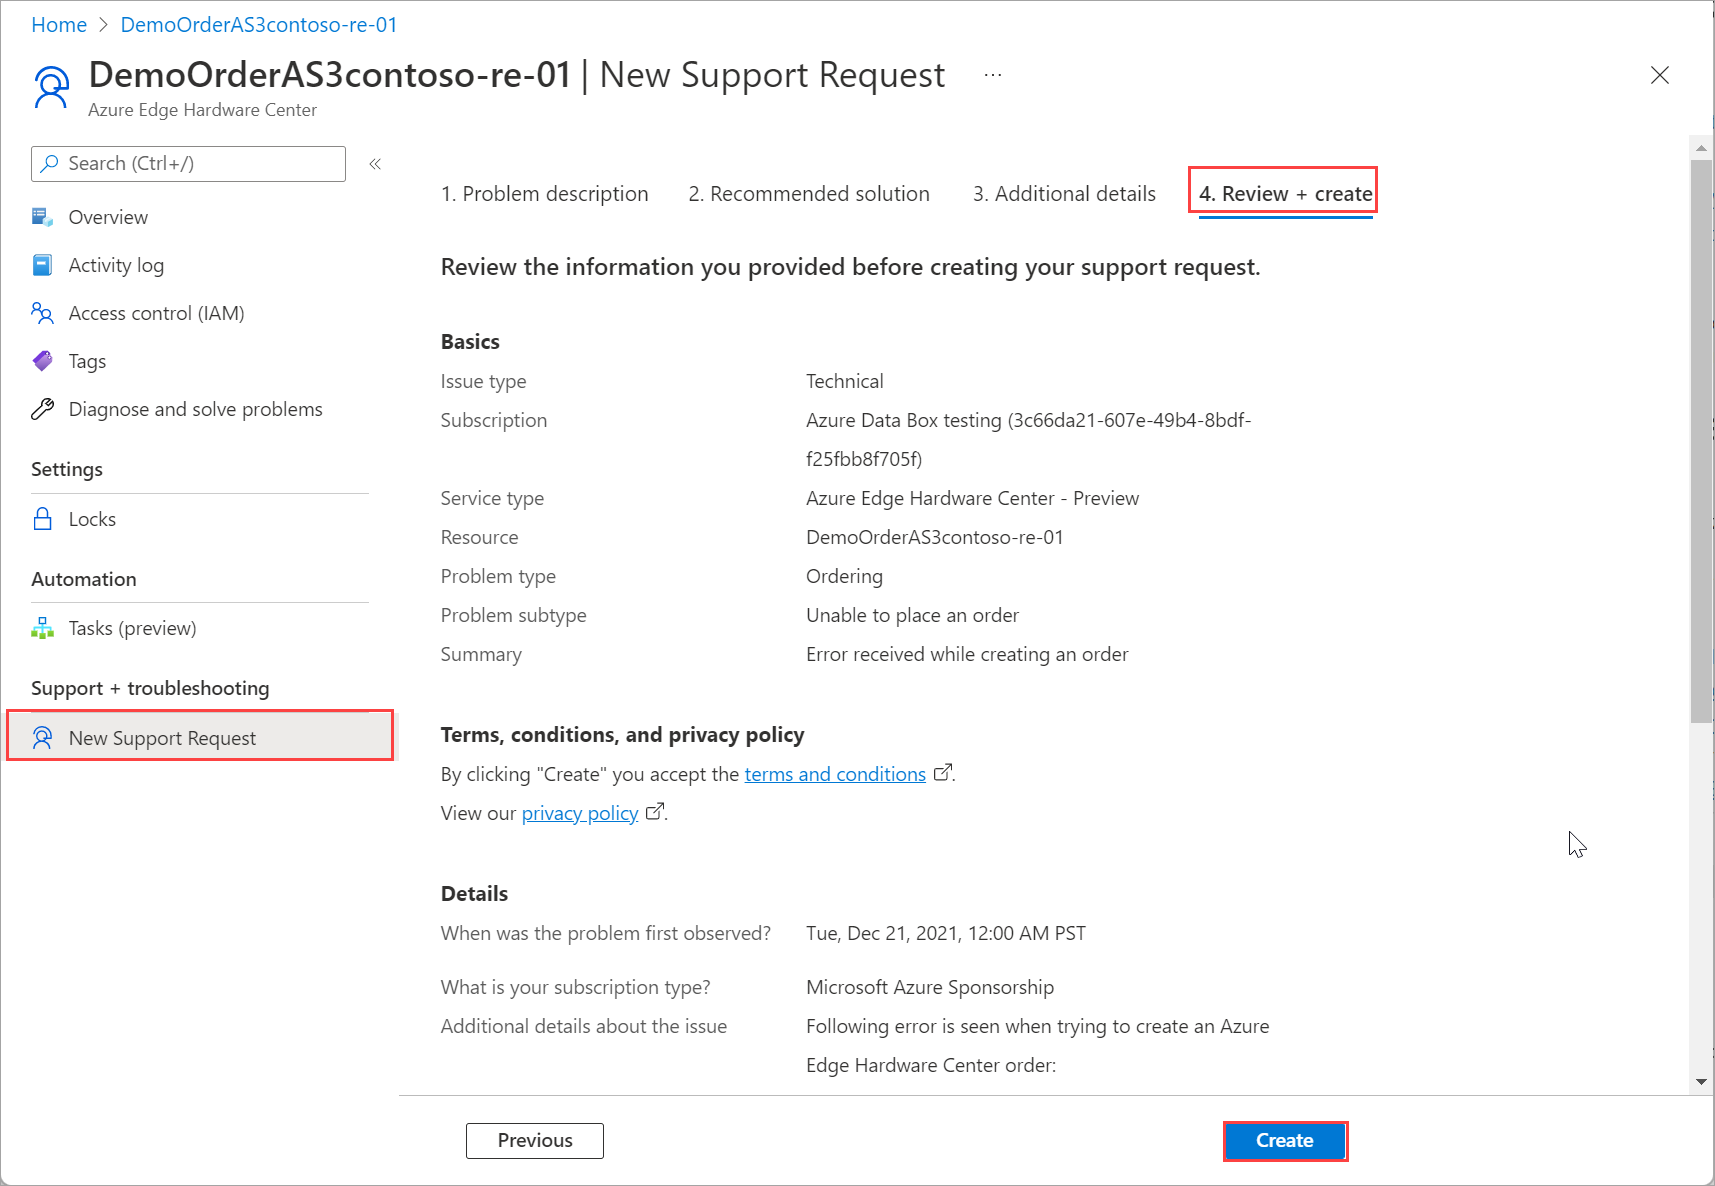
After you create the Support ticket, a Support personnel will contact you as soon as possible to proceed with your request.
Manage a support request
After creating a support ticket, you can manage the lifecycle of the ticket from within the portal.
To manage your support requests
To get to the help and support page, navigate to Help + support.

A tabular listing of Recent support requests is displayed in Help + support.
Select and click a support request. You can view the status and the details for this request. Click + New message if you want to follow up on this request.