What is the Azure portal?
The Azure portal is a web-based, unified console that lets you create and manage all your Azure resources. With the Azure portal, you can manage your Azure subscription using a graphical user interface. You can build, manage, and monitor everything from simple web apps to complex cloud deployments in the portal. For example, you can set up a new database, increase the compute power of your virtual machines, and monitor your monthly costs. You can review all available resources, and use guided wizards to create new ones.
The Azure portal is designed for resiliency and continuous availability. It has a presence in every Azure datacenter. This configuration makes the Azure portal resilient to individual datacenter failures and helps avoid network slowdowns by being close to users. The Azure portal updates continuously, and it requires no downtime for maintenance activities. You can access the Azure portal with any supported browser.
In this article, you learn about the different parts of the Azure portal.
Home
By default, the first thing you see after you sign in to the portal is Home. This page compiles resources that help you get the most from your Azure subscription. Select Create a resource to quickly create a new resource in the current subscription, or choose a service to start working in. For quick and easy access to work in progress, we show a list of your most recently visited resources. We also include links to free online courses, documentation, and other useful resources.
Portal elements and controls
The portal menu and page header are global elements that are always present in the Azure portal. These persistent features are the "shell" for the user interface associated with each individual service or feature. The header provides access to global controls.
The working pane for a resource or service may also have a service menu with commands specific to that area.
The illustration below labels the basic elements of the Azure portal, each of which are described in the following table. In this example, the current focus is a virtual machine (VM), but the same elements generally apply, no matter what type of resource or service you're working with.

| Key | Description |
|---|---|
| 1 | Portal menu. This global element can help you to navigate between services. Here, the portal menu is in flyout mode, so it's hidden until you select the menu icon. |
| 2 | Breadcrumb. Use the breadcrumb links to move back a level in your workflow. |
| 3 | Page header. Appears at the top of every portal page and holds global elements. |
| 4 | Global search. Use the search bar in the page header to quickly find a specific resource, a service, or documentation. |
| 5 | Copilot. Provides quick access to Microsoft Copilot in Azure (preview). |
| 6 | Global controls. These controls for common tasks persist in the page header: Cloud Shell, Notifications, Settings, Support + Troubleshooting, and Feedback. |
| 7 | Your account. View information about your account, switch directories, sign out, or sign in with a different account. |
| 8 | Command bar. A group of controls that are contextual to your current focus. |
| 9 | Service menu. A menu with commands that are contextual to the service or resource that you're working with. Sometimes referred to as the resource menu. |
| 10 | Working pane. Displays details about the resource or service that's currently in focus. |
Portal menu
The Azure portal menu lets you quickly get to key functionality and resource types. It's available from anywhere in the Azure portal.
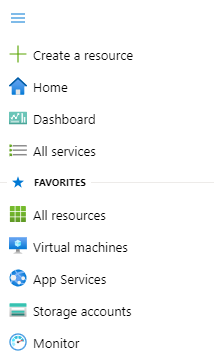
Useful commands in the portal menu include:
- Create a resource. An easy way to get started creating a new resource in the current subscription.
- Favorites. Your list of favorite Azure services. To learn how to customize this list, see Add, remove, and sort favorites.
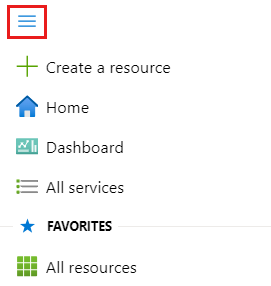
In your portal settings, you can choose a default mode for the portal menu: flyout or docked.
When the portal menu is in flyout mode, it's hidden until you need it. Select the menu icon to open or close the menu.
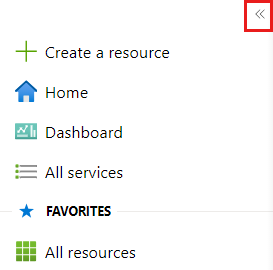
If you choose docked mode for the portal menu, it's always visible. You can select the arrows to manually collapse the menu if you want more working space.
Service menu
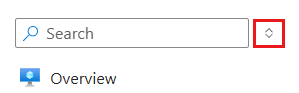
The service menu appears when you're working with an Azure service or resource. Commands in this menu are contextual to the service or resource that you're working with. You can use the search box at the top of the service menu to quickly find commands.
By default, menu items appear collapsed within menu groups. If you prefer to have all menu items expanded by default, you can set Service menu behavior to Expanded in your portal settings.
When you're working within a service, you can select any top-level menu item to expand it and see the available commands within that menu group. Select that top-level item again to collapse that menu group.
To toggle all folders in a service menu between collapsed and expanded, select the expand/collapse icon near the service icon search box.
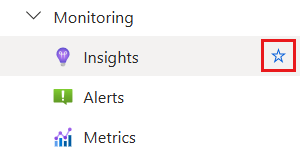
If you use certain service menu commands frequently, you may want to save them as favorites for that service. To do so, hover over the command and then select the star icon.
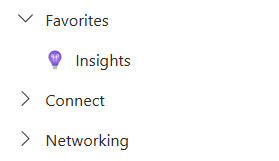
When you save a command as a favorite, it appears in a Favorites folder near the top of the service menu.
Your menu group selections are preserved by resource type and throughout sessions. For example, if you add a favorite command while working with a VM, that command will appear in your Favorites if you later work with a different VM. Specific menu groups will also appear collapsed or expanded based on your previous selections.
Note
We're in the process of rolling out the new service menu experience to all customers. If you don't see these options in the service menu, check back soon. We'll remove this note once all customers are seeing the new experience.
Dashboard
Dashboards provide a focused view of the resources in your subscription that matter most to you. We give you a default dashboard to get you started. You can customize this dashboard to bring resources you use frequently into a single view, or to display other information.
You can create other dashboards for your own use, or publish customized dashboards and share them with other users in your organization. For more information, see Create and share dashboards in the Azure portal.
As noted earlier, you can set your startup page to Dashboard if you want to see your most recently used dashboard when you sign in to the Azure portal.
Get started
If you're a new subscriber, you'll have to create a resource before there's anything to manage. Select + Create a resource from the portal menu or Home page to view the services available in the Azure Marketplace. You'll find hundreds of applications and services from many providers here, all certified to run on Azure.
To view all available services, select All services from the sidebar.
Tip
Often, the quickest way to get to a resource, service, or documentation is to use Search in the global header.
For more help getting started with Azure, explore the Azure Quickstart Center.
Next steps
- Take the Manage services with the Azure portal training module.
- Stay connected on the go with the Azure mobile app.
Feedback
Coming soon: Throughout 2024 we will be phasing out GitHub Issues as the feedback mechanism for content and replacing it with a new feedback system. For more information see: https://aka.ms/ContentUserFeedback.
Submit and view feedback for