Quickstart: Join your calling app to a Teams call queue
In this quickstart you're going to learn how to start a call from Azure Communication Services user to Teams Call Queue. You're going to achieve it with the following steps:
- Enable federation of Azure Communication Services resource with Teams Tenant.
- Select or create Teams Call Queue via Teams Admin Center.
- Get email address of Call Queue via Teams Admin Center.
- Get Object ID of the Call Queue via Graph API.
- Start a call with Azure Communication Services Calling SDK.
If you'd like to skip ahead to the end, you can download this quickstart as a sample on GitHub.
Enable interoperability in your Teams tenant
Microsoft Entra user with Teams administrator role can run PowerShell cmdlet with MicrosoftTeams module to enable the Communication Services resource in the tenant.
1. Prepare the Microsoft Teams module
First, open the PowerShell and validate the existence of the Teams module with the following command:
Get-module *teams*
If you don't see the MicrosoftTeams module, install it first. To install the module, you need to run PowerShell as an administrator. Then run the following command:
Install-Module -Name MicrosoftTeams
You'll be informed about the modules that will be installed, which you can confirm with a Y or A answer. If the module is installed but is outdated, you can run the following command to update the module:
Update-Module MicrosoftTeams
2. Connect to Microsoft Teams module
When the module is installed and ready, you can connect to the MicrosoftTeams module with the following command. You'll be prompted with an interactive window to log in. The user account that you're going to use needs to have Teams administrator permissions. Otherwise, you might get an access denied response in the next steps.
Connect-MicrosoftTeams
3. Enable tenant configuration
Interoperability with Communication Services resources is controlled via tenant configuration and assigned policy. Teams tenant has a single tenant configuration, and Teams users have assigned global policy or custom policy. For more information, see Assign Policies in Teams.
After successful login, you can run the cmdlet Set-CsTeamsAcsFederationConfiguration to enable Communication Services resource in your tenant. Replace the text IMMUTABLE_RESOURCE_ID with an immutable resource ID in your communication resource. You can find more details on how to get this information here.
$allowlist = @('IMMUTABLE_RESOURCE_ID')
Set-CsTeamsAcsFederationConfiguration -EnableAcsUsers $True -AllowedAcsResources $allowlist
4. Enable tenant policy
Each Teams user has assigned an External Access Policy that determines whether Communication Services users can call this Teams user. Use cmdlet
Set-CsExternalAccessPolicy to ensure that the policy assigned to the Teams user has set EnableAcsFederationAccess to $true
Set-CsExternalAccessPolicy -Identity Global -EnableAcsFederationAccess $true
Create or select Teams Call Queue
Teams Call Queue is a feature in Microsoft Teams that efficiently distributes incoming calls among a group of designated users or agents. It's useful for customer support or call center scenarios. Calls are placed in a queue and assigned to the next available agent based on a predetermined routing method. Agents receive notifications and can handle calls using Teams' call controls. The feature offers reporting and analytics for performance tracking. It simplifies call handling, ensures a consistent customer experience, and optimizes agent productivity. You can select existing or create new Call Queue via Teams Admin Center.
Learn more about how to create Call Queue using Teams Admin Center here.
Find Object ID for Call Queue
After Call queue is created, we need to find correlated Object ID to use it later for calls. Object ID is connected to Resource Account that was attached to call queue - open Resource Accounts tab in Teams Admin and find email.
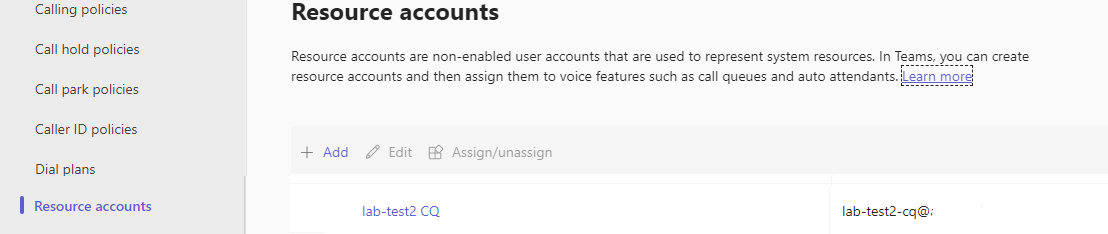 All required information for Resource Account can be found in Microsoft Graph Explorer using this email in the search.
https://graph.microsoft.com/v1.0/users/lab-test2-cq-@contoso.com
In results we'll are able to find "ID" field
    "userPrincipalName": "lab-test2-cq@contoso.com",
    "id": "31a011c2-2672-4dd0-b6f9-9334ef4999db"
Prerequisites
- Obtain an Azure account with an active subscription. Create an account for free.
- Node.js Active LTS and Maintenance LTS versions (8.11.1 and 10.14.1)
- Create an active Communication Services resource. Create a Communication Services resource.
Setting up
Create a new Node.js application
Open your terminal or command window create a new directory for your app, and navigate to the directory.
mkdir calling-quickstart && cd calling-quickstart
Install the package
Use the npm install command to install the Azure Communication Services Calling SDK for JavaScript.
Important
This quickstart uses the Azure Communication Services Calling SDK version next.
npm install @azure/communication-common@next --save
npm install @azure/communication-calling@next --save
Set up the app framework
This quickstart uses webpack to bundle the application assets. Run the following command to install the webpack, webpack-cli and webpack-dev-server npm packages and list them as development dependencies in your package.json:
npm install copy-webpack-plugin@^11.0.0 webpack@^5.88.2 webpack-cli@^5.1.4 webpack-dev-server@^4.15.1 --save-dev
Create an index.html file in the root directory of your project. We'll use this file to configure a basic layout that will allow the user to place a 1:1 video call.
Here's the code:
<!-- index.html -->
<!DOCTYPE html>
<html>
    <head>
        <title>Azure Communication Services - Calling Web SDK</title>
    </head>
    <body>
        <h4>Azure Communication Services - Calling Web SDK</h4>
        <input id="user-access-token"
            type="text"
            placeholder="User access token"
            style="margin-bottom:1em; width: 500px;"/>
        <button id="initialize-teams-call-agent" type="button">Initialize Call Agent</button>
        <br>
        <br>
        <input id="application-object-id"
            type="text"
            placeholder="Enter callee's Teams user identity in format: 'APP_GUID'"
            style="margin-bottom:1em; width: 500px; display: block;"/>
        <button id="start-call-button" type="button" disabled="true">Start Call</button>
        <button id="hangup-call-button" type="button" disabled="true">Hang up Call</button>
        <button id="accept-call-button" type="button" disabled="true">Accept Call</button>
        <button id="start-video-button" type="button" disabled="true">Start Video</button>
        <button id="stop-video-button" type="button" disabled="true">Stop Video</button>
        <br>
        <br>
        <div id="connectedLabel" style="color: #13bb13;" hidden>Call is connected!</div>
        <br>
        <div id="remoteVideoContainer" style="width: 40%;" hidden>Remote participants' video streams:</div>
        <br>
        <div id="localVideoContainer" style="width: 30%;" hidden>Local video stream:</div>
        <!-- points to the bundle generated from client.js -->
        <script src="./main.js"></script>
    </body>
</html>
Azure Communication Services Calling Web SDK Object model
The following classes and interfaces handle some of the main features of the Azure Communication Services Calling SDK:
| Name | Description |
|---|---|
CallClient |
The main entry point to the Calling SDK. |
CallAgent |
Used to start and manage calls. |
DeviceManager |
Used to manage media devices. |
Call |
Used for representing a Call. |
LocalVideoStream |
Used for creating a local video stream for a camera device on the local system. |
RemoteParticipant |
Used for representing a remote participant in the Call. |
RemoteVideoStream |
Used for representing a remote video stream from a Remote Participant. |
Create a file in the root directory of your project called client.js to contain the application logic for this quickstart. Add the following code to client.js:
// Make sure to install the necessary dependencies
const { CallClient, VideoStreamRenderer, LocalVideoStream } = require('@azure/communication-calling');
const { AzureCommunicationTokenCredential } = require('@azure/communication-common');
const { AzureLogger, setLogLevel } = require("@azure/logger");
// Set the log level and output
setLogLevel('verbose');
AzureLogger.log = (...args) => {
    console.log(...args);
};
// Calling web sdk objects
let callAgent;
let deviceManager;
let call;
let incomingCall;
let localVideoStream;
let localVideoStreamRenderer;
// UI widgets
let userAccessToken = document.getElementById('user-access-token');
let callQueueId = document.getElementById('application-object-id');
let initializeCallAgentButton = document.getElementById('initialize-teams-call-agent');
let startCallButton = document.getElementById('start-call-button');
let hangUpCallButton = document.getElementById('hangup-call-button');
let acceptCallButton = document.getElementById('accept-call-button');
let startVideoButton = document.getElementById('start-video-button');
let stopVideoButton = document.getElementById('stop-video-button');
let connectedLabel = document.getElementById('connectedLabel');
let remoteVideoContainer = document.getElementById('remoteVideoContainer');
let localVideoContainer = document.getElementById('localVideoContainer');
/**
 * Create an instance of CallClient. Initialize a CallAgent instance with a AzureCommunicationTokenCredential via created CallClient. CallAgent enables us to make outgoing calls and receive incoming calls.
 * You can then use the CallClient.getDeviceManager() API instance to get the DeviceManager.
 */
initializeCallAgentButton.onclick = async () => {
    try {
        const callClient = new CallClient();
        tokenCredential = new AzureCommunicationTokenCredential(userAccessToken.value.trim());
        callAgent = await callClient.createCallAgent(tokenCredential)
        // Set up a camera device to use.
        deviceManager = await callClient.getDeviceManager();
        await deviceManager.askDevicePermission({ video: true });
        await deviceManager.askDevicePermission({ audio: true });
        // Listen for an incoming call to accept.
        callAgent.on('incomingCall', async (args) => {
            try {
                incomingCall = args.incomingCall;
                acceptCallButton.disabled = false;
                startCallButton.disabled = true;
            } catch (error) {
                console.error(error);
            }
        });
        startCallButton.disabled = false;
        initializeCallAgentButton.disabled = true;
    } catch(error) {
        console.error(error);
    }
}
/**
 * Place a 1:1 outgoing video call to a Teams Call Queue
 * Add an event listener to initiate a call when the `startCallButton` is selected.
 * Enumerate local cameras using the deviceManager `getCameraList` API.
 * In this quickstart, we're using the first camera in the collection. Once the desired camera is selected, a
 * LocalVideoStream instance will be constructed and passed within `videoOptions` as an item within the
 * localVideoStream array to the call method. When the call connects, your application will be sending a video stream to the other participant.
 */
startCallButton.onclick = async () => {
    try {
        const localVideoStream = await createLocalVideoStream();
        const videoOptions = localVideoStream ? { localVideoStreams: [localVideoStream] } : undefined;
        call = callAgent.startCall([{ teamsAppId: callQueueId.value.trim(), cloud:"public" }], { videoOptions: videoOptions });
        // Subscribe to the call's properties and events.
        subscribeToCall(call);
    } catch (error) {
        console.error(error);
    }
}
/**
 * Accepting an incoming call with a video
 * Add an event listener to accept a call when the `acceptCallButton` is selected.
 * You can accept incoming calls after subscribing to the `CallAgent.on('incomingCall')` event.
 * You can pass the local video stream to accept the call with the following code.
 */
acceptCallButton.onclick = async () => {
    try {
        const localVideoStream = await createLocalVideoStream();
        const videoOptions = localVideoStream ? { localVideoStreams: [localVideoStream] } : undefined;
        call = await incomingCall.accept({ videoOptions });
        // Subscribe to the call's properties and events.
        subscribeToCall(call);
    } catch (error) {
        console.error(error);
    }
}
// Subscribe to a call obj.
// Listen for property changes and collection updates.
subscribeToCall = (call) => {
    try {
        // Inspect the initial call.id value.
        console.log(`Call Id: ${call.id}`);
        //Subscribe to call's 'idChanged' event for value changes.
        call.on('idChanged', () => {
            console.log(`Call ID changed: ${call.id}`);
        });
        // Inspect the initial call.state value.
        console.log(`Call state: ${call.state}`);
        // Subscribe to call's 'stateChanged' event for value changes.
        call.on('stateChanged', async () => {
            console.log(`Call state changed: ${call.state}`);
            if(call.state === 'Connected') {
                connectedLabel.hidden = false;
                acceptCallButton.disabled = true;
                startCallButton.disabled = true;
                hangUpCallButton.disabled = false;
                startVideoButton.disabled = false;
                stopVideoButton.disabled = false;
            } else if (call.state === 'Disconnected') {
                connectedLabel.hidden = true;
                startCallButton.disabled = false;
                hangUpCallButton.disabled = true;
                startVideoButton.disabled = true;
                stopVideoButton.disabled = true;
                console.log(`Call ended, call end reason={code=${call.callEndReason.code}, subCode=${call.callEndReason.subCode}}`);
            }
        });
        call.localVideoStreams.forEach(async (lvs) => {
            localVideoStream = lvs;
            await displayLocalVideoStream();
        });
        call.on('localVideoStreamsUpdated', e => {
            e.added.forEach(async (lvs) => {
                localVideoStream = lvs;
                await displayLocalVideoStream();
            });
            e.removed.forEach(lvs => {
               removeLocalVideoStream();
            });
        });

        call.on('isLocalVideoStartedChanged', () => {
            console.log(`isLocalVideoStarted changed: ${call.isLocalVideoStarted}`);
        });
        console.log(`isLocalVideoStarted: ${call.isLocalVideoStarted}`);
        // Inspect the call's current remote participants and subscribe to them.
        call.remoteParticipants.forEach(remoteParticipant => {
            subscribeToRemoteParticipant(remoteParticipant);
        });
        // Subscribe to the call's 'remoteParticipantsUpdated' event to be
        // notified when new participants are added to the call or removed from the call.
        call.on('remoteParticipantsUpdated', e => {
            // Subscribe to new remote participants that are added to the call.
            e.added.forEach(remoteParticipant => {
                subscribeToRemoteParticipant(remoteParticipant)
            });
            // Unsubscribe from participants that are removed from the call
            e.removed.forEach(remoteParticipant => {
                console.log('Remote participant removed from the call.');
            });
        });
    } catch (error) {
        console.error(error);
    }
}
// Subscribe to a remote participant obj.
// Listen for property changes and collection updates.
subscribeToRemoteParticipant = (remoteParticipant) => {
    try {
        // Inspect the initial remoteParticipant.state value.
        console.log(`Remote participant state: ${remoteParticipant.state}`);
        // Subscribe to remoteParticipant's 'stateChanged' event for value changes.
        remoteParticipant.on('stateChanged', () => {
            console.log(`Remote participant state changed: ${remoteParticipant.state}`);
        });
        // Inspect the remoteParticipants's current videoStreams and subscribe to them.
        remoteParticipant.videoStreams.forEach(remoteVideoStream => {
            subscribeToRemoteVideoStream(remoteVideoStream)
        });
        // Subscribe to the remoteParticipant's 'videoStreamsUpdated' event to be
        // notified when the remoteParticipant adds new videoStreams and removes video streams.
        remoteParticipant.on('videoStreamsUpdated', e => {
            // Subscribe to newly added remote participant's video streams.
            e.added.forEach(remoteVideoStream => {
                subscribeToRemoteVideoStream(remoteVideoStream)
            });
            // Unsubscribe from newly removed remote participants' video streams.
            e.removed.forEach(remoteVideoStream => {
                console.log('Remote participant video stream was removed.');
            })
        });
    } catch (error) {
        console.error(error);
    }
}
/**
 * Subscribe to a remote participant's remote video stream obj.
 * You have to subscribe to the 'isAvailableChanged' event to render the remoteVideoStream. If the 'isAvailable' property
 * changes to 'true' a remote participant is sending a stream. Whenever the availability of a remote stream changes
 * you can choose to destroy the whole 'Renderer' a specific 'RendererView' or keep them. Displaying RendererView without a video stream will result in a blank video frame.
 */
subscribeToRemoteVideoStream = async (remoteVideoStream) => {
    // Create a video stream renderer for the remote video stream.
    let videoStreamRenderer = new VideoStreamRenderer(remoteVideoStream);
    let view;
    const renderVideo = async () => {
        try {
            // Create a renderer view for the remote video stream.
            view = await videoStreamRenderer.createView();
            // Attach the renderer view to the UI.
            remoteVideoContainer.hidden = false;
            remoteVideoContainer.appendChild(view.target);
        } catch (e) {
            console.warn(`Failed to createView, reason=${e.message}, code=${e.code}`);
        }
    }

    remoteVideoStream.on('isAvailableChanged', async () => {
        // Participant has switched video on.
        if (remoteVideoStream.isAvailable) {
            await renderVideo();
        // Participant has switched video off.
        } else {
            if (view) {
                view.dispose();
                view = undefined;
            }
        }
    });
    // Participant has video on initially.
    if (remoteVideoStream.isAvailable) {
        await renderVideo();
    }
}
// Start your local video stream.
// This will send your local video stream to remote participants so they can view it.
startVideoButton.onclick = async () => {
    try {
        const localVideoStream = await createLocalVideoStream();
        await call.startVideo(localVideoStream);
    } catch (error) {
        console.error(error);
    }
}
// Stop your local video stream.
// This will stop your local video stream from being sent to remote participants.
stopVideoButton.onclick = async () => {
    try {
        await call.stopVideo(localVideoStream);
    } catch (error) {
        console.error(error);
    }
}
/**
 * To render a LocalVideoStream, you need to create a new instance of VideoStreamRenderer, and then
 * create a new VideoStreamRendererView instance using the asynchronous createView() method.
 * You may then attach view.target to any UI element.
 */
// Create a local video stream for your camera device
createLocalVideoStream = async () => {
    const camera = (await deviceManager.getCameras())[0];
    if (camera) {
        return new LocalVideoStream(camera);
    } else {
        console.error(`No camera device found on the system`);
    }
}
// Display your local video stream preview in your UI
displayLocalVideoStream = async () => {
    try {
        localVideoStreamRenderer = new VideoStreamRenderer(localVideoStream);
        const view = await localVideoStreamRenderer.createView();
        localVideoContainer.hidden = false;
        localVideoContainer.appendChild(view.target);
    } catch (error) {
        console.error(error);
    }
}
// Remove your local video stream preview from your UI
removeLocalVideoStream = async() => {
    try {
        localVideoStreamRenderer.dispose();
        localVideoContainer.hidden = true;
    } catch (error) {
        console.error(error);
    }
}
// End the current call
hangUpCallButton.addEventListener("click", async () => {
    // end the current call
    await call.hangUp();
});
Add the webpack local server code
Create a file in the root directory of your project called webpack.config.js to contain the local server logic for this quickstart. Add the following code to webpack.config.js:
const path = require('path');
const CopyPlugin = require("copy-webpack-plugin");

module.exports = {
    mode: 'development',
    entry: './client.js',
    output: {
        filename: 'main.js',
        path: path.resolve(__dirname, 'dist'),
    },
    devServer: {
        static: {
            directory: path.join(__dirname, './')
        },
    },
    plugins: [
        new CopyPlugin({
            patterns: [
                './index.html'
            ]
        }),
    ]
};
Run the code
Use the webpack-dev-server to build and run your app. Run the following command to bundle the application host in a local webserver:
npx webpack serve --config webpack.config.js
Manual steps to set up the call:
- Open your browser and navigate to http://localhost:8080/.
- Enter a valid user access token. Refer to the user access token documentation if you don't already have access tokens available to use.
- Click on the "Initialize Call Agent" buttons.
- Enter the Call Queue Object ID, and select the "Start Call" button. Application will start the outgoing call to the call queue with given object ID.
- Call is connected to the Call Queue.
- Communication Services user is routed through Call Queue based on its configuration.
In this quickstart you are going to learn how to start a call from Azure Communication Services user to Teams Call Queue. You are going to achieve it with the following steps:
- Enable federation of Azure Communication Services resource with Teams Tenant.
- Select or create Teams Call Queue via Teams Admin Center.
- Get email address of Call Queue via Teams Admin Center.
- Get Object ID of the Call Queue via Graph API.
- Start a call with Azure Communication Services Calling SDK.
If you'd like to skip ahead to the end, you can download this quickstart as a sample on GitHub.
Enable interoperability in your Teams tenant
Microsoft Entra user with Teams administrator role can run PowerShell cmdlet with MicrosoftTeams module to enable the Communication Services resource in the tenant.
1. Prepare the Microsoft Teams module
First, open the PowerShell and validate the existence of the Teams module with the following command:
Get-module *teams*
If you don't see the MicrosoftTeams module, install it first. To install the module, you need to run PowerShell as an administrator. Then run the following command:
Install-Module -Name MicrosoftTeams
You'll be informed about the modules that will be installed, which you can confirm with a Y or A answer. If the module is installed but is outdated, you can run the following command to update the module:
Update-Module MicrosoftTeams
2. Connect to Microsoft Teams module
When the module is installed and ready, you can connect to the MicrosoftTeams module with the following command. You'll be prompted with an interactive window to log in. The user account that you're going to use needs to have Teams administrator permissions. Otherwise, you might get an access denied response in the next steps.
Connect-MicrosoftTeams
3. Enable tenant configuration
Interoperability with Communication Services resources is controlled via tenant configuration and assigned policy. Teams tenant has a single tenant configuration, and Teams users have assigned global policy or custom policy. For more information, see Assign Policies in Teams.
After successful login, you can run the cmdlet Set-CsTeamsAcsFederationConfiguration to enable Communication Services resource in your tenant. Replace the text IMMUTABLE_RESOURCE_ID with an immutable resource ID in your communication resource. You can find more details on how to get this information here.
$allowlist = @('IMMUTABLE_RESOURCE_ID')
Set-CsTeamsAcsFederationConfiguration -EnableAcsUsers $True -AllowedAcsResources $allowlist
4. Enable tenant policy
Each Teams user has assigned an External Access Policy that determines whether Communication Services users can call this Teams user. Use cmdlet
Set-CsExternalAccessPolicy to ensure that the policy assigned to the Teams user has set EnableAcsFederationAccess to $true
Set-CsExternalAccessPolicy -Identity Global -EnableAcsFederationAccess $true
Create or select Teams Call Queue
Teams Call Queue is a feature in Microsoft Teams that efficiently distributes incoming calls among a group of designated users or agents. It's useful for customer support or call center scenarios. Calls are placed in a queue and assigned to the next available agent based on a predetermined routing method. Agents receive notifications and can handle calls using Teams' call controls. The feature offers reporting and analytics for performance tracking. It simplifies call handling, ensures a consistent customer experience, and optimizes agent productivity. You can select existing or create new Call Queue via Teams Admin Center.
Learn more about how to create Call Queue using Teams Admin Center here.
Find Object ID for Call Queue
After Call queue is created, we need to find correlated Object ID to use it later for calls. Object ID is connected to Resource Account that was attached to Call Queue - open Resource Accounts tab in Teams Admin and find email.
All required information for Resource Account can be found in Microsoft Graph Explorer using this email in the search.
https://graph.microsoft.com/v1.0/users/lab-test2-cq-@contoso.com
In results we'll are able to find "ID" field
    "userPrincipalName": "lab-test2-cq@contoso.com",
    "id": "31a011c2-2672-4dd0-b6f9-9334ef4999db"
To use in the calling App, we need to add a prefix to this ID. Currently, the following are supported:
- Public cloud Call Queue:
28:orgid:<id> - Government cloud Call Queue:
28:gcch:<id>
Prerequisites
An Azure account with an active subscription. Create an account for free.
Android Studio, for creating your Android application.
A deployed Communication Services resource. Create a Communication Services resource.
A User Access Token for your Azure Communication Service. You can also use the Azure CLI and run the command with your connection string to create a user and an access token.
az communication identity token issue --scope voip --connection-string "yourConnectionString"For details, see Use Azure CLI to Create and Manage Access Tokens.
Minimum support for Teams calling applications: 2.12.0-beta.1
Setting up
Create an Android app with an empty activity
From Android Studio, select Start a new Android Studio project.
Select "Empty Views Activity" project template under "Phone and Tablet".
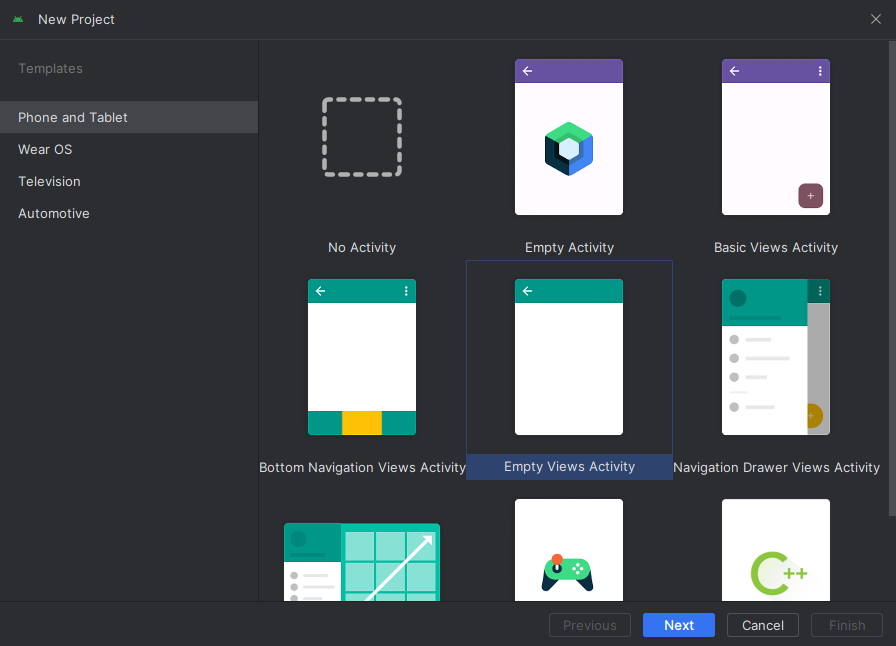
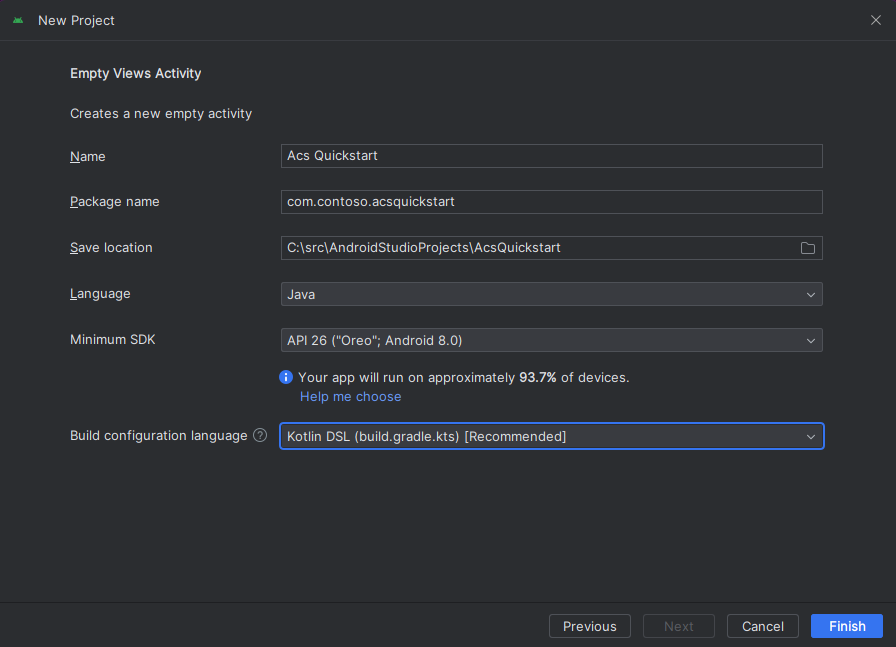
Select Minimum SDK of "API 26: Android 8.0 (Oreo)" or greater.
Install the package
Locate your project settings.gradle.kts and make sure to see mavenCentral() at the list of repositories under pluginManagement and dependencyResolutionManagement
pluginManagement {
    repositories {
    ...
        mavenCentral()
    ...
    }
}

dependencyResolutionManagement {
    repositoriesMode.set(RepositoriesMode.FAIL_ON_PROJECT_REPOS)
    repositories {
    ...
        mavenCentral()
    }
}
Then, in your module level build.gradle add the following lines to the dependencies and android sections
android {
    ...

    compileOptions {
        sourceCompatibility JavaVersion.VERSION_1_8
        targetCompatibility JavaVersion.VERSION_1_8
    }
}

dependencies {
    ...
    implementation ("com.azure.android:azure-communication-calling:2.+")
    ...
}
Add permissions to application manifest
In order to request permissions required to make a call, they must be declared in the Application Manifest (app/src/main/AndroidManifest.xml). Replace the content of file with the following code:
    <?xml version="1.0" encoding="utf-8"?>
<manifest xmlns:android="http://schemas.android.com/apk/res/android"
    package="com.contoso.acsquickstart">

    <uses-permission android:name="android.permission.INTERNET" />
    <uses-permission android:name="android.permission.ACCESS_NETWORK_STATE" />
    <uses-permission android:name="android.permission.ACCESS_WIFI_STATE" />
    <uses-permission android:name="android.permission.RECORD_AUDIO" />
    <uses-permission android:name="android.permission.CAMERA" />
    <uses-permission android:name="android.permission.WRITE_EXTERNAL_STORAGE" />
    <uses-permission android:name="android.permission.READ_PHONE_STATE" />

    <application
        android:allowBackup="true"
        android:icon="@mipmap/ic_launcher"
        android:label="@string/app_name"
        android:roundIcon="@mipmap/ic_launcher_round"
        android:supportsRtl="true"
        android:theme="@style/AppTheme">
        <!--Our Calling SDK depends on the Apache HTTP SDK.
When targeting Android SDK 28+, this library needs to be explicitly referenced.
See https://developer.android.com/about/versions/pie/android-9.0-changes-28#apache-p-->
        <uses-library android:name="org.apache.http.legacy" android:required="false"/>
        <activity android:name=".MainActivity">
            <intent-filter>
                <action android:name="android.intent.action.MAIN" />

                <category android:name="android.intent.category.LAUNCHER" />
            </intent-filter>
        </activity>
    </application>

</manifest>
Set up the layout for the app
Two inputs are needed: a text input for the callee ID, and a button for placing the call. These inputs can be added through the designer or by editing the layout xml. Create a button with an ID of call_button and a text input of callee_id. Navigate to (app/src/main/res/layout/activity_main.xml) and replace the content of file with the following code:
<?xml version="1.0" encoding="utf-8"?>
<androidx.constraintlayout.widget.ConstraintLayout xmlns:android="http://schemas.android.com/apk/res/android"
    xmlns:app="http://schemas.android.com/apk/res-auto"
    xmlns:tools="http://schemas.android.com/tools"
    android:layout_width="match_parent"
    android:layout_height="match_parent"
    tools:context="${launchApp}">

    <EditText
        android:id="@+id/callee_id"
        android:layout_width="match_parent"
        android:layout_height="wrap_content"
        android:ems="10"
        android:hint="Callee Id"
        android:inputType="textPersonName"
        android:layout_marginTop="100dp"
        android:layout_marginHorizontal="20dp"
        app:layout_constraintEnd_toEndOf="parent"
        app:layout_constraintStart_toStartOf="parent"
        app:layout_constraintTop_toTopOf="parent" />

    <LinearLayout
        android:layout_width="match_parent"
        android:layout_height="wrap_content"
        android:layout_marginBottom="46dp"
        android:gravity="center"
        app:layout_constraintBottom_toBottomOf="parent"
        app:layout_constraintEnd_toEndOf="parent"
        app:layout_constraintStart_toStartOf="parent">

        <Button
            android:id="@+id/call_button"
            android:layout_width="wrap_content"
            android:layout_height="wrap_content"
            android:text="Call" />

        <Button
            android:id="@+id/hangup_button"
            android:layout_width="wrap_content"
            android:layout_height="wrap_content"
            android:text="Hangup" />

    </LinearLayout>

    <TextView
        android:id="@+id/status_bar"
        android:layout_width="wrap_content"
        android:layout_height="wrap_content"
        android:layout_marginBottom="16dp"
        app:layout_constraintBottom_toBottomOf="parent"
        app:layout_constraintEnd_toEndOf="parent"
        app:layout_constraintStart_toStartOf="parent" />
</androidx.constraintlayout.widget.ConstraintLayout>
Create the main activity scaffolding and bindings
With the layout created the bindings can be added as well as the basic scaffolding of the activity. The activity handles requesting runtime permissions, creating the call agent, and placing the call when the button is pressed. The onCreate method is overridden to invoke getAllPermissions and createAgent and to add the bindings for the call button. This event occurs only once when the activity is created. For more information, on onCreate, see the guide Understand the Activity Lifecycle.
Navigate to MainActivity.java and replace the content with the following code:
package com.contoso.acsquickstart;

import androidx.annotation.NonNull;
import androidx.appcompat.app.AppCompatActivity;
import androidx.core.app.ActivityCompat;

import android.Manifest;
import android.content.pm.PackageManager;
import android.media.AudioManager;
import android.os.Bundle;
import android.widget.Button;
import android.widget.EditText;
import android.widget.TextView;
import android.widget.Toast;

import java.util.ArrayList;
import java.util.concurrent.ExecutionException;

import com.azure.android.communication.common.CommunicationIdentifier;
import com.azure.android.communication.common.CommunicationUserIdentifier;
import com.azure.android.communication.calling.Call;
import com.azure.android.communication.calling.CallAgent;
import com.azure.android.communication.calling.CallClient;
import com.azure.android.communication.calling.HangUpOptions;
import com.azure.android.communication.common.CommunicationTokenCredential;
import com.azure.android.communication.calling.StartCallOptions;

public class MainActivity extends AppCompatActivity {
    private static final String[] allPermissions = new String[] { Manifest.permission.RECORD_AUDIO, Manifest.permission.CAMERA, Manifest.permission.WRITE_EXTERNAL_STORAGE, Manifest.permission.READ_PHONE_STATE };
    private static final String UserToken = "<User_Access_Token>";

    TextView statusBar;

    private CallAgent agent;
    private Call call;
    private Button callButton;

    @Override
    protected void onCreate(Bundle savedInstanceState) {
        super.onCreate(savedInstanceState);
        setContentView(R.layout.activity_main);

        callButton = findViewById(R.id.call_button);

        getAllPermissions();
        createAgent();
        callButton.setOnClickListener(l -> startCall());

        Button hangupButton = findViewById(R.id.hangup_button);
        hangupButton.setOnClickListener(l -> endCall());

        statusBar = findViewById(R.id.status_bar);

        setVolumeControlStream(AudioManager.STREAM_VOICE_CALL);
    }

    /**
     * Start a call
     */
    private void startCall() {
        if (UserToken.startsWith("<")) {
            Toast.makeText(this, "Please enter token in source code", Toast.LENGTH_SHORT).show();
            return;
        }

        EditText calleeIdView = findViewById(R.id.callee_id);
        String calleeId = calleeIdView.getText().toString();
        if (calleeId.isEmpty()) {
            Toast.makeText(this, "Please enter callee", Toast.LENGTH_SHORT).show();
            return;
        }
        List<CommunicationIdentifier> participants = new ArrayList<>();
        participants.add(new MicrosoftTeamsAppIdentifier(calleeId));
        StartCallOptions options = new StartCallOptions();
        call = agent.startCall(
                getApplicationContext(),
                participants,
                options);
        call.addOnStateChangedListener(p -> setStatus(call.getState().toString()));
    }

    /**
     * Ends the call previously started
     */
    private void endCall() {
        try {
            call.hangUp(new HangUpOptions()).get();
        } catch (ExecutionException | InterruptedException e) {
            Toast.makeText(this, "Unable to hang up call", Toast.LENGTH_SHORT).show();
        }
    }

    /**
     * Create the call agent
     */
    private void createAgent() {
        try {
            CommunicationTokenCredential credential = new CommunicationTokenCredential(UserToken);
            agent = new CallClient().createCallAgent(getApplicationContext(), credential).get();
        } catch (Exception ex) {
            Toast.makeText(getApplicationContext(), "Failed to create call agent.", Toast.LENGTH_SHORT).show();
        }
    }

    /**
     * Ensure all permissions were granted, otherwise inform the user permissions are missing.
     */
    @Override
    public void onRequestPermissionsResult(int requestCode, @NonNull String[] permissions, int[] grantResults) {
        boolean allPermissionsGranted = true;
        for (int result : grantResults) {
            allPermissionsGranted &= (result == PackageManager.PERMISSION_GRANTED);
        }
        if (!allPermissionsGranted) {
            Toast.makeText(this, "All permissions are needed to make the call.", Toast.LENGTH_LONG).show();
            finish();
        }
    }

    /**
     * Shows message in the status bar
     */
    private void setStatus(String status) {
        runOnUiThread(() -> statusBar.setText(status));
    }
}
Request permissions at runtime
For Android 6.0 and higher (API level 23) and targetSdkVersion 23 or higher, permissions are granted at runtime instead of when the app is installed. In order to support it, getAllPermissions can be implemented to call ActivityCompat.checkSelfPermission and ActivityCompat.requestPermissions for each required permission.
/**
 * Request each required permission if the app doesn't already have it.
 */
private void getAllPermissions() {
    ArrayList<String> permissionsToAskFor = new ArrayList<>();
    for (String permission : allPermissions) {
        if (ActivityCompat.checkSelfPermission(this, permission) != PackageManager.PERMISSION_GRANTED) {
            permissionsToAskFor.add(permission);
        }
    }
    if (!permissionsToAskFor.isEmpty()) {
        ActivityCompat.requestPermissions(this, permissionsToAskFor.toArray(new String[0]), 1);
    }
}
Note
When designing your app, consider when these permissions should be requested. Permissions should be requested as they are needed, not ahead of time. For more information, see, the Android Permissions Guide.
Object model
The following classes and interfaces handle some of the major features of the Azure Communication Services Calling SDK:
| Name | Description |
|---|---|
CallClient |
The CallClient is the main entry point to the Calling SDK. |
CallAgent |
The CallAgent is used to start and manage calls. |
CommunicationTokenCredential |
The CommunicationTokenCredential is used as the token credential to instantiate the CallAgent. |
CommunicationIdentifier |
The CommunicationIdentifier is used as different type of participant that could be part of a call. |
Create an agent from the user access token
With a user token, an authenticated call agent can be instantiated. Generally this token is generated from a service with authentication specific to the application. For more information on user access tokens, check the User Access Tokens guide.
For the quickstart, replace <User_Access_Token> with a user access token generated for your Azure Communication Service resource.
/**
 * Create the call agent for placing calls
 */
private void createAgent() {
    String userToken = "<User_Access_Token>";

    try {
            CommunicationTokenCredential credential = new CommunicationTokenCredential(userToken);
            callAgent = new CallClient().createCallAgent(getApplicationContext(), credential).get();
    } catch (Exception ex) {
        Toast.makeText(getApplicationContext(), "Failed to create call agent.", Toast.LENGTH_SHORT).show();
    }
}
Run the code
The app can now be launched using the "Run App" button on the toolbar.
Manual steps to set up the call:
- Launch the app using Android Studio.
- Enter the Call Queue Object ID (with prefix), and select the "Start Call" button. Application will start the outgoing call to the Call Queue with given object ID.
- Call is connected to the Call Queue.
- Communication Services user is routed through Call Queue based on its configuration.
In this quickstart you are going to learn how to start a call from Azure Communication Services user to Teams Call Queue. You are going to achieve it with the following steps:
- Enable federation of Azure Communication Services resource with Teams Tenant.
- Select or create Teams Call Queue via Teams Admin Center.
- Get email address of Call Queue via Teams Admin Center.
- Get Object ID of the Call Queue via Graph API.
- Start a call with Azure Communication Services Calling SDK.
If you'd like to skip ahead to the end, you can download this quickstart as a sample on GitHub.
Enable interoperability in your Teams tenant
Microsoft Entra user with Teams administrator role can run PowerShell cmdlet with MicrosoftTeams module to enable the Communication Services resource in the tenant.
1. Prepare the Microsoft Teams module
First, open the PowerShell and validate the existence of the Teams module with the following command:
Get-module *teams*
If you don't see the MicrosoftTeams module, install it first. To install the module, you need to run PowerShell as an administrator. Then run the following command:
Install-Module -Name MicrosoftTeams
You'll be informed about the modules that will be installed, which you can confirm with a Y or A answer. If the module is installed but is outdated, you can run the following command to update the module:
Update-Module MicrosoftTeams
2. Connect to Microsoft Teams module
When the module is installed and ready, you can connect to the MicrosoftTeams module with the following command. You'll be prompted with an interactive window to log in. The user account that you're going to use needs to have Teams administrator permissions. Otherwise, you might get an access denied response in the next steps.
Connect-MicrosoftTeams
3. Enable tenant configuration
Interoperability with Communication Services resources is controlled via tenant configuration and assigned policy. Teams tenant has a single tenant configuration, and Teams users have assigned global policy or custom policy. For more information, see Assign Policies in Teams.
After successful login, you can run the cmdlet Set-CsTeamsAcsFederationConfiguration to enable Communication Services resource in your tenant. Replace the text IMMUTABLE_RESOURCE_ID with an immutable resource ID in your communication resource. You can find more details on how to get this information here.
$allowlist = @('IMMUTABLE_RESOURCE_ID')
Set-CsTeamsAcsFederationConfiguration -EnableAcsUsers $True -AllowedAcsResources $allowlist
4. Enable tenant policy
Each Teams user has assigned an External Access Policy that determines whether Communication Services users can call this Teams user. Use cmdlet
Set-CsExternalAccessPolicy to ensure that the policy assigned to the Teams user has set EnableAcsFederationAccess to $true
Set-CsExternalAccessPolicy -Identity Global -EnableAcsFederationAccess $true
Create or select Teams Call Queue
Teams Call Queue is a feature in Microsoft Teams that efficiently distributes incoming calls among a group of designated users or agents. It's useful for customer support or call center scenarios. Calls are placed in a queue and assigned to the next available agent based on a predetermined routing method. Agents receive notifications and can handle calls using Teams' call controls. The feature offers reporting and analytics for performance tracking. It simplifies call handling, ensures a consistent customer experience, and optimizes agent productivity. You can select existing or create new Call Queue via Teams Admin Center.
Learn more about how to create Call Queue using Teams Admin Center here.
Find Object ID for Call Queue
After Call queue is created, we need to find correlated Object ID to use it later for calls. Object ID is connected to Resource Account that was attached to Call Queue - open Resource Accounts tab in Teams Admin and find email.
All required information for Resource Account can be found in Microsoft Graph Explorer using this email in the search.
https://graph.microsoft.com/v1.0/users/lab-test2-cq-@contoso.com
In results we'll are able to find "ID" field
    "userPrincipalName": "lab-test2-cq@contoso.com",
    "id": "31a011c2-2672-4dd0-b6f9-9334ef4999db"
To use in the calling App, we need to add a prefix to this ID. Currently, the following are supported:
- Public cloud Call Queue:
28:orgid:<id> - Government cloud Call Queue:
28:gcch:<id>
Prerequisites
Obtain an Azure account with an active subscription. Create an account for free.
A Mac running Xcode, along with a valid developer certificate installed into your Keychain.
A deployed Communication Services resource. Create a Communication Services resource. You need to record your connection string for this quickstart.
A User Access Token for your Azure Communication Service. You can also use the Azure CLI and run the command with your connection string to create a user and an access token.
az communication identity token issue --scope voip --connection-string "yourConnectionString"For details, see Use Azure CLI to Create and Manage Access Tokens.
Minimum support for Teams calling applications: 2.15.0
Setting up
Creating the Xcode project
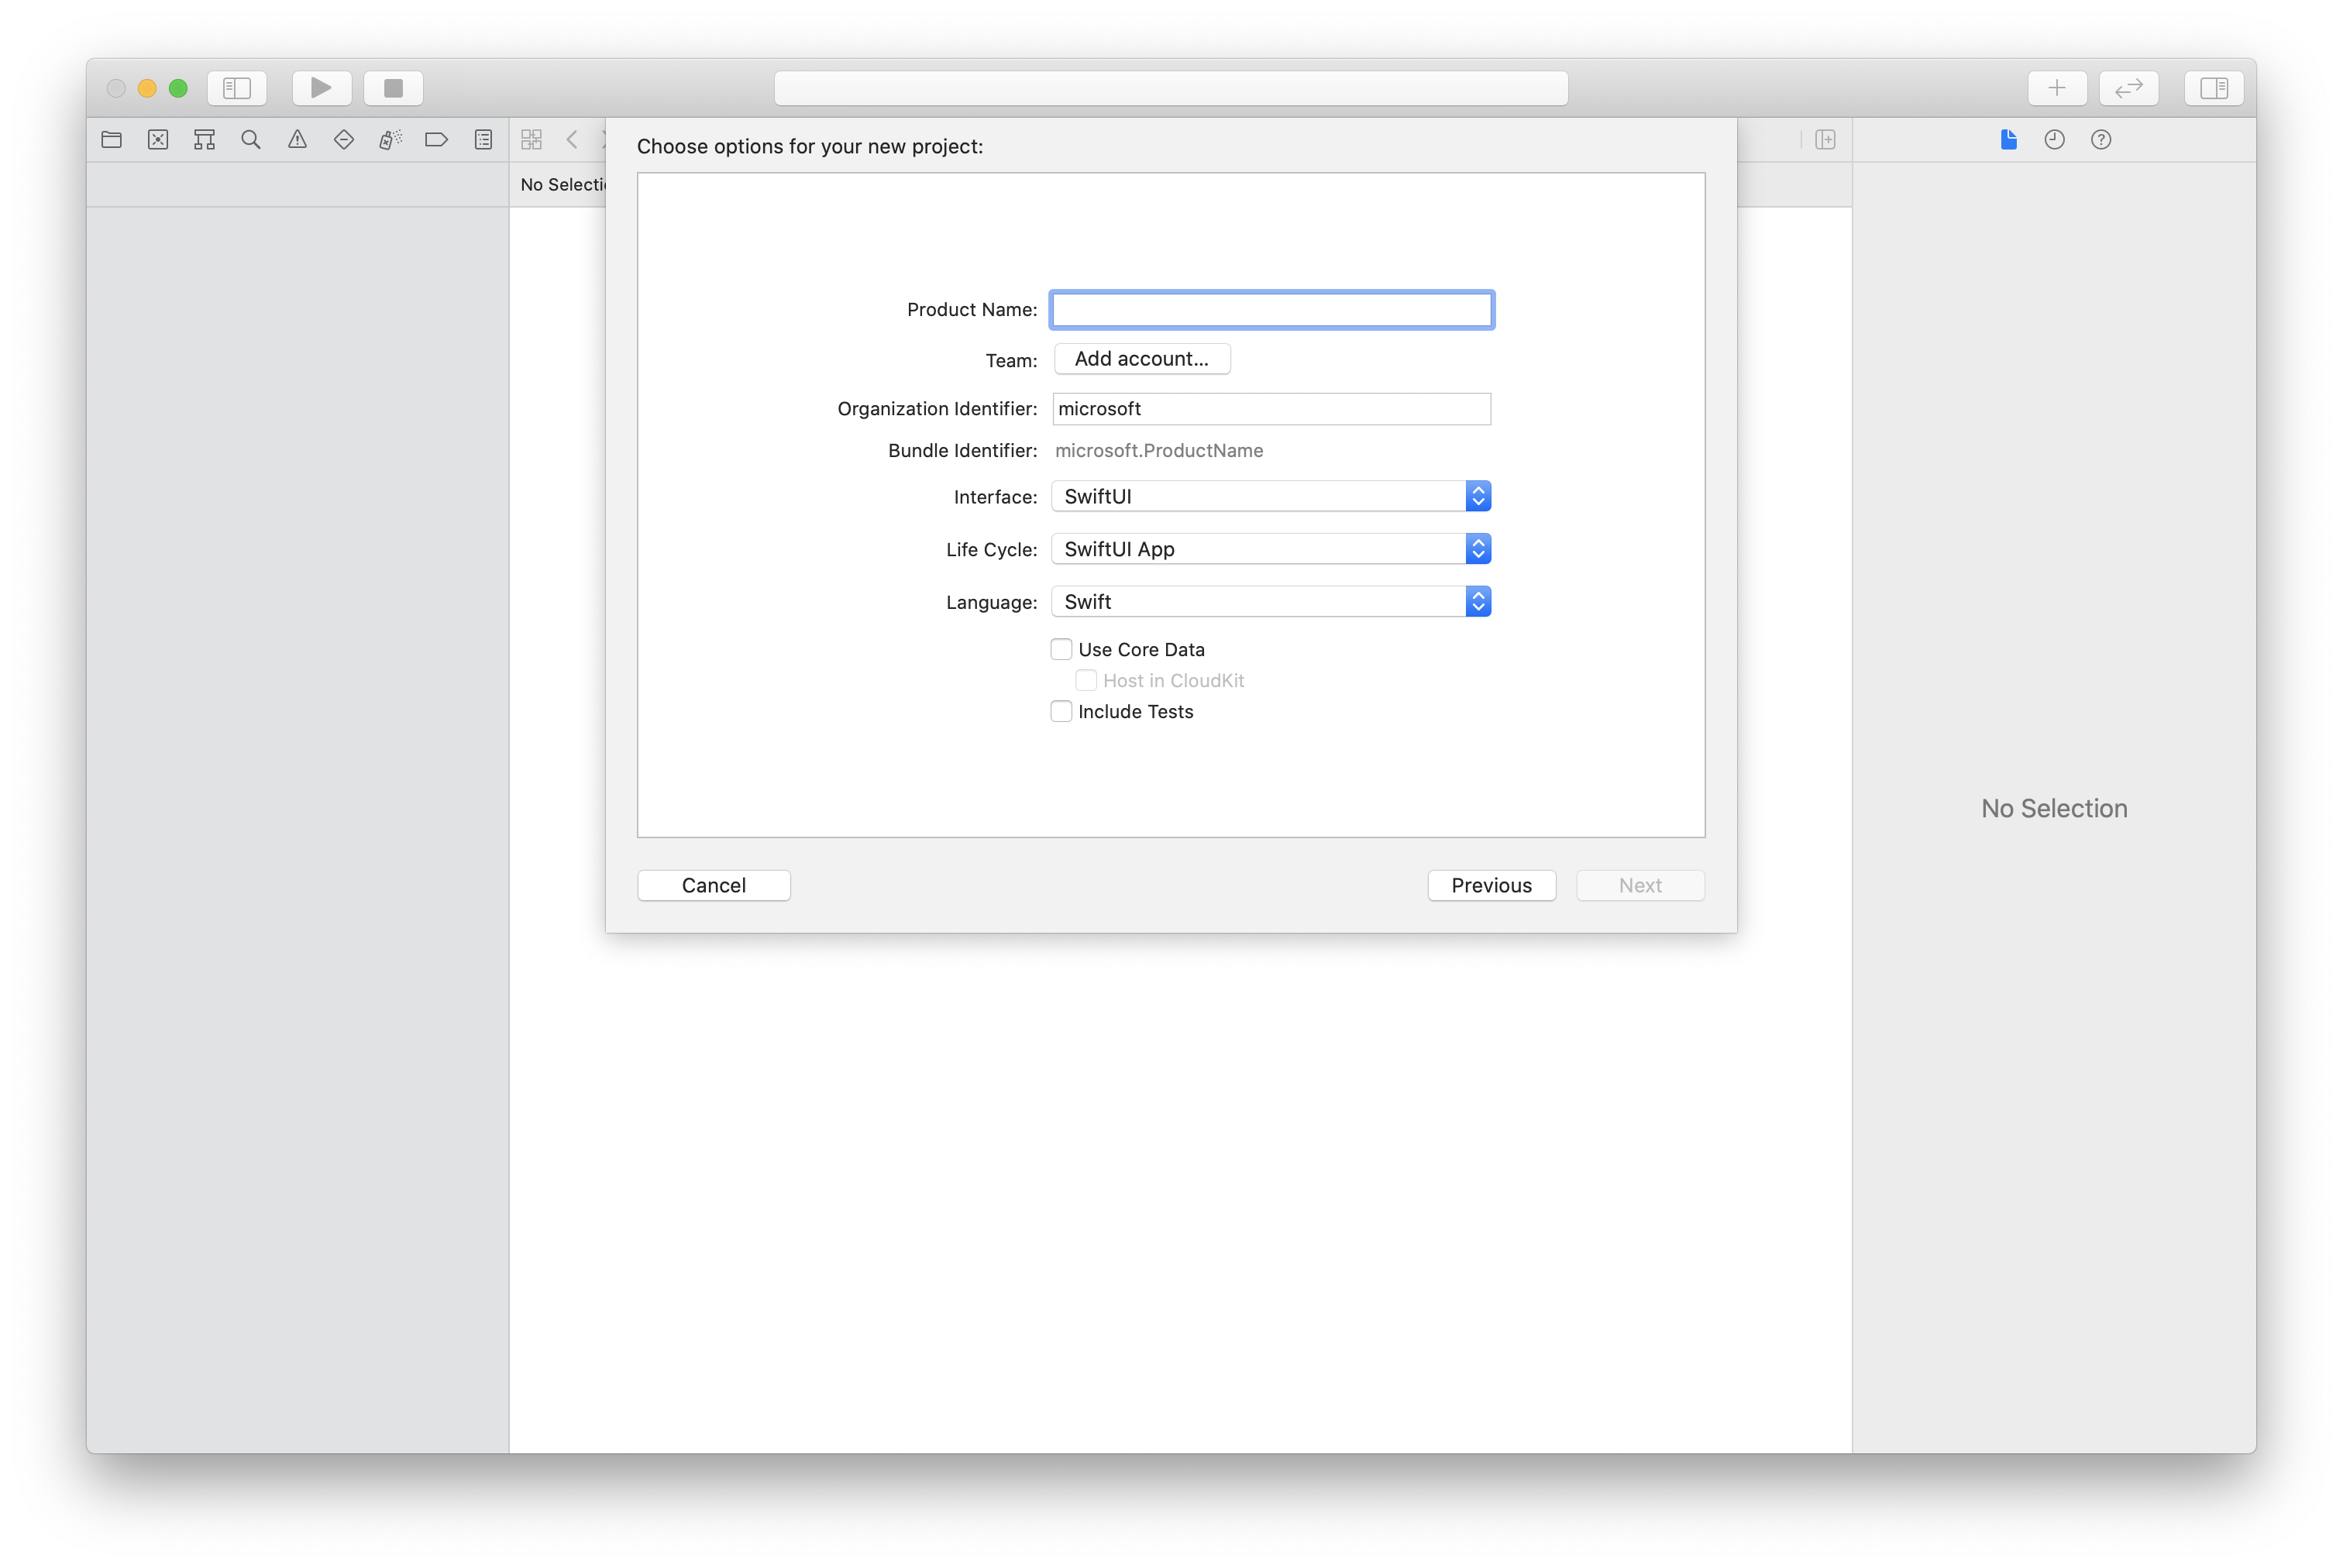
In Xcode, create a new iOS project and select the App template. This tutorial uses the SwiftUI framework, so you should set the Language to Swift and the User Interface to SwiftUI. You're not going to create tests during this quick start. Feel free to uncheck Include Tests.
Install the package and dependencies with CocoaPods
To create a Podfile for your application, open the terminal and navigate to the project folder and run:
pod initAdd the following code to the Podfile and save (make sure that "target" matches the name of your project):
platform :ios, '13.0'
use_frameworks!

target 'AzureCommunicationCallingSample' do
  pod 'AzureCommunicationCalling', '~> 2.15.0'
end
Run
pod install.Open the
.xcworkspacewith Xcode.
Request access to the microphone
In order to access the device's microphone, you need to update your app's Information Property List with an NSMicrophoneUsageDescription. You set the associated value to a string that was included in the dialog the system uses to request access from the user.
Right-click the Info.plist entry of the project tree and select Open As > Source Code. Add the following lines the top level <dict> section, and then save the file.
<key>NSMicrophoneUsageDescription</key>
<string>Need microphone access for VOIP calling.</string>
Set up the app framework
Open your project's ContentView.swift file and add an import declaration to the top of the file to import the AzureCommunicationCalling library. In addition, import AVFoundation, we need this code for audio permission request in the code.
import AzureCommunicationCalling
import AVFoundation
Replace the implementation of the ContentView struct with some simple UI controls that enable a user to initiate and end a call. We attach business logic to these controls in this quickstart.
struct ContentView: View {
    @State var callee: String = ""
    @State var callClient: CallClient?
    @State var callAgent: CallAgent?
    @State var call: Call?

    var body: some View {
        NavigationView {
            Form {
                Section {
                    TextField("Who would you like to call?", text: $callee)
                    Button(action: startCall) {
                        Text("Start Call")
                    }.disabled(callAgent == nil)
                    Button(action: endCall) {
                        Text("End Call")
                    }.disabled(call == nil)
                }
            }
            .navigationBarTitle("Calling Quickstart")
        }.onAppear {
            // Initialize call agent
        }
    }

    func startCall() {
        // Ask permissions
        AVAudioSession.sharedInstance().requestRecordPermission { (granted) in
            if granted {
                // Add start call logic
            }
        }
    }

    func endCall() {
        // Add end call logic
    }
}
Object model
The following classes and interfaces handle some of the major features of the Azure Communication Services Calling SDK:
| Name | Description |
|---|---|
CallClient |
The CallClient is the main entry point to the Calling SDK. |
CallAgent |
The CallAgent is used to start and manage calls. |
CommunicationTokenCredential |
The CommunicationTokenCredential is used as the token credential to instantiate the CallAgent. |
CommunicationUserIdentifier |
The CommunicationUserIdentifier is used to represent the identity of the user, which can be one of the following options: CommunicationUserIdentifier,PhoneNumberIdentifier or CallingApplication. |
Authenticate the client
Initialize a CallAgent instance with a User Access Token, which enables us to make and receive calls.
In the following code, you need to replace <USER ACCESS TOKEN> with a valid user access token for your resource. Refer to the user access token documentation if you don't already have a token available.
Add the following code to the onAppear callback in ContentView.swift:
var userCredential: CommunicationTokenCredential?
do {
    userCredential = try CommunicationTokenCredential(token: "<USER ACCESS TOKEN>")
} catch {
    print("ERROR: It was not possible to create user credential.")
    return
}

self.callClient = CallClient()

// Creates the call agent
self.callClient?.createCallAgent(userCredential: userCredential!) { (agent, error) in
    if error != nil {
        print("ERROR: It was not possible to create a call agent.")
        return
    }
    else {
        self.callAgent = agent
        print("Call agent successfully created.")
    }
}
Start a call
The startCall method is set as the action that is performed when the Start Call button is tapped. Update the implementation to start a call with the ASACallAgent:
func startCall()
{
    // Ask permissions
    AVAudioSession.sharedInstance().requestRecordPermission { (granted) in
        if granted {
            // start call logic
            let callees:[CommunicationIdentifier] = [MicrosoftTeamsAppIdentifier(self.callee)]
            self.callAgent?.startCall(participants: callees, options: StartCallOptions()) { (call, error) in
                if (error == nil) {
                    self.call = call
                } else {
                    print("Failed to get call object")
                }
            }
        }
    }
}
You also can use the properties in StartCallOptions to set the initial options for the call (that is, it allows starting the call with the microphone muted).
End a call
Implement the endCall method to end the current call when the End Call button is tapped.
func endCall()
{
    self.call!.hangUp(options: HangUpOptions()) { (error) in
        if (error != nil) {
            print("ERROR: It was not possible to hangup the call.")
        }
    }
}
Run the code
You can build and run your app on iOS simulator by selecting Product > Run or by using the (⌘-R) keyboard shortcut.
Note
The first time you make a call, the system will prompt you for access to the microphone. In a production application, you should use the AVAudioSession API to check the permission status and gracefully update your application's behavior when permission is not granted.
Manual steps to set up the call:
- Launch the app using Xcode
- Enter the Call Queue Object ID (with prefix), and select the "Start Call" button. Application will start the outgoing call to the Call Queue with given object ID.
- Call is connected to the Call Queue.
- Communication Services user is routed through Call Queue based on its configuration.
In this quickstart you are going to learn how to start a call from Azure Communication Services user to Teams Call Queue. You are going to achieve it with the following steps:
- Enable federation of Azure Communication Services resource with Teams Tenant.
- Select or create Teams Call Queue via Teams Admin Center.
- Get email address of Call Queue via Teams Admin Center.
- Get Object ID of the Call Queue via Graph API.
- Start a call with Azure Communication Services Calling SDK.
If you'd like to skip ahead to the end, you can download this quickstart as a sample on GitHub.
Enable interoperability in your Teams tenant
Microsoft Entra user with Teams administrator role can run PowerShell cmdlet with MicrosoftTeams module to enable the Communication Services resource in the tenant.
1. Prepare the Microsoft Teams module
First, open the PowerShell and validate the existence of the Teams module with the following command:
Get-module *teams*
If you don't see the MicrosoftTeams module, install it first. To install the module, you need to run PowerShell as an administrator. Then run the following command:
Install-Module -Name MicrosoftTeams
You'll be informed about the modules that will be installed, which you can confirm with a Y or A answer. If the module is installed but is outdated, you can run the following command to update the module:
Update-Module MicrosoftTeams
2. Connect to Microsoft Teams module
When the module is installed and ready, you can connect to the MicrosoftTeams module with the following command. You'll be prompted with an interactive window to log in. The user account that you're going to use needs to have Teams administrator permissions. Otherwise, you might get an access denied response in the next steps.
Connect-MicrosoftTeams
3. Enable tenant configuration
Interoperability with Communication Services resources is controlled via tenant configuration and assigned policy. Teams tenant has a single tenant configuration, and Teams users have assigned global policy or custom policy. For more information, see Assign Policies in Teams.
After successful login, you can run the cmdlet Set-CsTeamsAcsFederationConfiguration to enable Communication Services resource in your tenant. Replace the text IMMUTABLE_RESOURCE_ID with an immutable resource ID in your communication resource. You can find more details on how to get this information here.
$allowlist = @('IMMUTABLE_RESOURCE_ID')
Set-CsTeamsAcsFederationConfiguration -EnableAcsUsers $True -AllowedAcsResources $allowlist
4. Enable tenant policy
Each Teams user has assigned an External Access Policy that determines whether Communication Services users can call this Teams user. Use cmdlet
Set-CsExternalAccessPolicy to ensure that the policy assigned to the Teams user has set EnableAcsFederationAccess to $true
Set-CsExternalAccessPolicy -Identity Global -EnableAcsFederationAccess $true
Create or select Teams Call Queue
Teams Call Queue is a feature in Microsoft Teams that efficiently distributes incoming calls among a group of designated users or agents. It's useful for customer support or call center scenarios. Calls are placed in a queue and assigned to the next available agent based on a predetermined routing method. Agents receive notifications and can handle calls using Teams' call controls. The feature offers reporting and analytics for performance tracking. It simplifies call handling, ensures a consistent customer experience, and optimizes agent productivity. You can select existing or create new Call Queue via Teams Admin Center.
Learn more about how to create Call Queue using Teams Admin Center here.
Find Object ID for Call Queue
After Call queue is created, we need to find correlated Object ID to use it later for calls. Object ID is connected to Resource Account that was attached to Call Queue - open Resource Accounts tab in Teams Admin and find email.
All required information for Resource Account can be found in Microsoft Graph Explorer using this email in the search.
https://graph.microsoft.com/v1.0/users/lab-test2-cq-@contoso.com
In results we'll are able to find "ID" field
    "userPrincipalName": "lab-test2-cq@contoso.com",
    "id": "31a011c2-2672-4dd0-b6f9-9334ef4999db"
To use in the calling App, we need to add a prefix to this ID. Currently, the following are supported:
- Public cloud Call Queue:
28:orgid:<id> - Government cloud Call Queue:
28:gcch:<id>
Prerequisites
To complete this tutorial, you need the following prerequisites:
An Azure account with an active subscription. Create an account for free.
Install Visual Studio 2022 with Universal Windows Platform development workload.
A deployed Communication Services resource. Create a Communication Services resource. You need to record your connection string for this quickstart.
A User Access Token for your Azure Communication Service. You can also use the Azure CLI and run the command with your connection string to create a user and an access token.
az communication identity token issue --scope voip --connection-string "yourConnectionString"For details, see Use Azure CLI to Create and Manage Access Tokens.
Minimum support for Teams calling applications: 1.11.0
Setting up
Creating the project
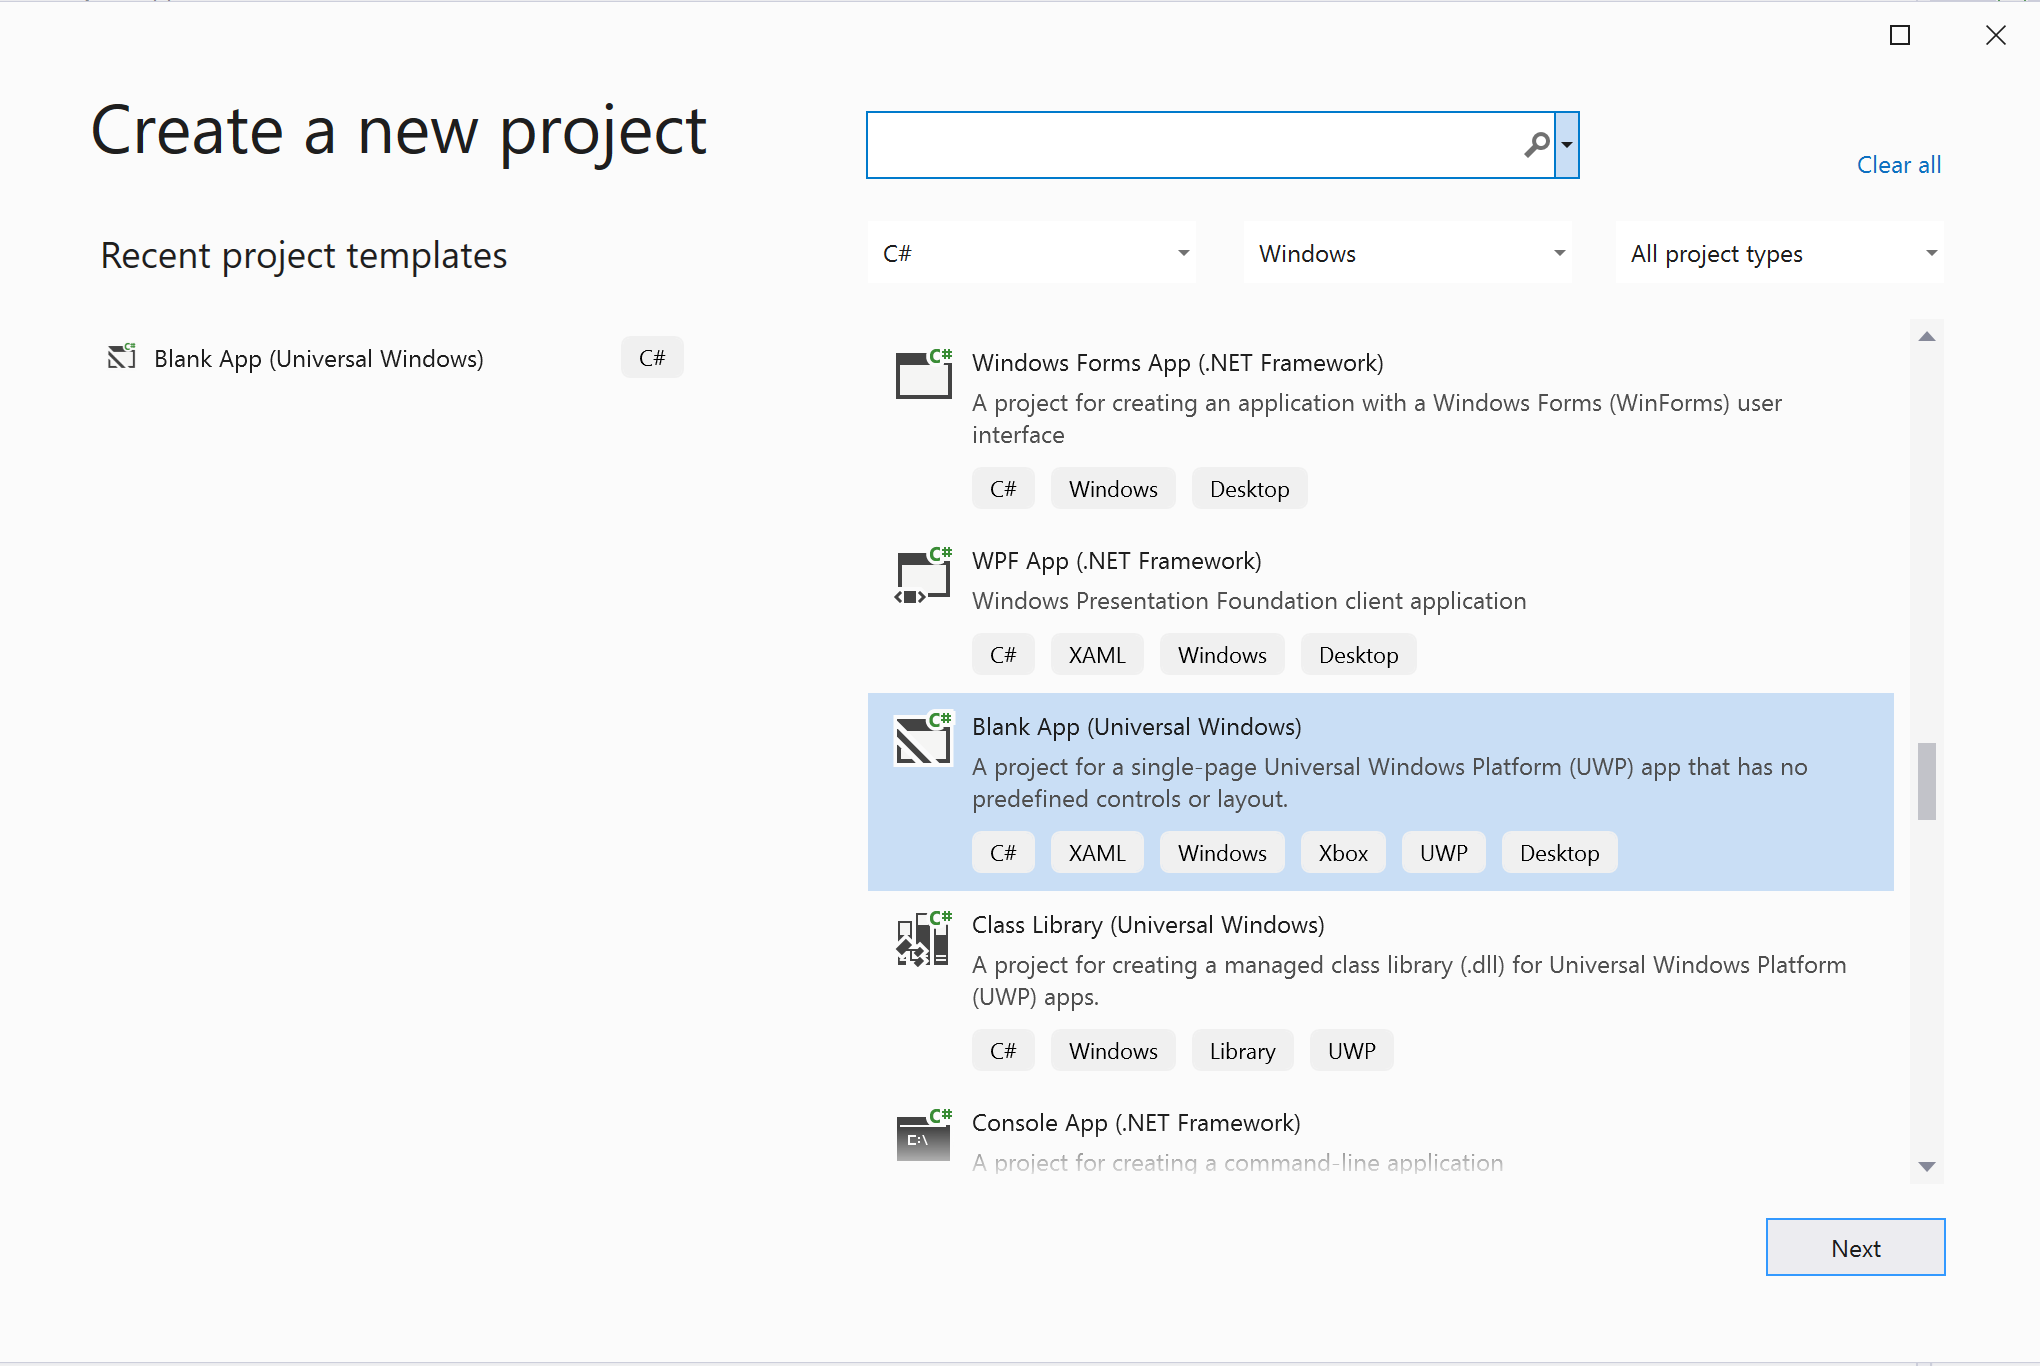
In Visual Studio, create a new project with the Blank App (Universal Windows) template to set up a single-page Universal Windows Platform (UWP) app.
Install the package
Right select your project and go to Manage Nuget Packages to install Azure.Communication.Calling.WindowsClient 1.4.0 or superior. Make sure Include Prerelease is checked if you want to see the versions for public preview.
Request access
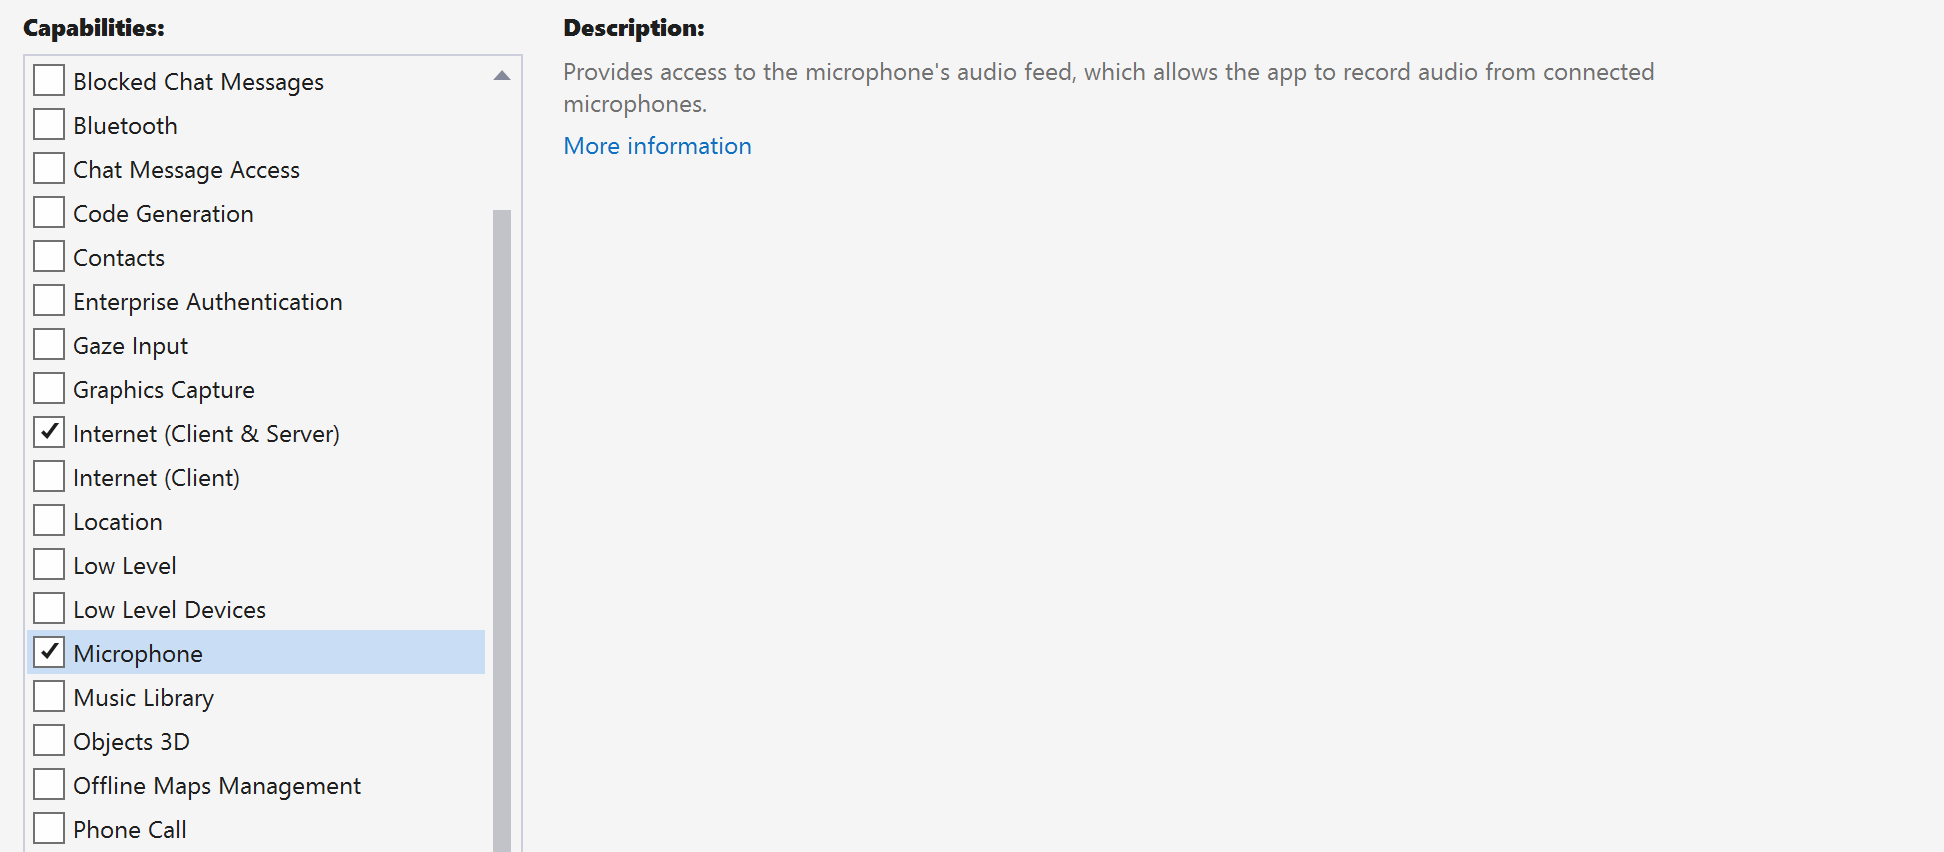
Go to Package.appxmanifest and select Capabilities.
Check Internet (Client) and Internet (Client & Server) to gain inbound and outbound access to the Internet. Check Microphone to access the audio feed of the microphone, and Webcam to access the video feed of the camera.
Set up the app framework
We need to configure a basic layout to attach our logic. In order to place an outbound call, we need a TextBox to provide the User ID of the callee. We also need a Start/Join call button and a Hang up button. A Mute and a BackgroundBlur checkboxes are also included in this sample to demonstrate the features of toggling audio states and video effects.
Open the MainPage.xaml of your project and add the Grid node to your Page:
<Page
    x:Class="CallingQuickstart.MainPage"
    xmlns="http://schemas.microsoft.com/winfx/2006/xaml/presentation"
    xmlns:x="http://schemas.microsoft.com/winfx/2006/xaml"
    xmlns:local="using:CallingQuickstart"
    xmlns:d="http://schemas.microsoft.com/expression/blend/2008"
    xmlns:mc="http://schemas.openxmlformats.org/markup-compatibility/2006"
    mc:Ignorable="d"
    Background="{ThemeResource ApplicationPageBackgroundThemeBrush}" Width="800" Height="600">

        <!-- Don't forget to replace ‘CallingQuickstart’ with your project’s name -->


    <Grid>
        <Grid.RowDefinitions>
            <RowDefinition Height="16*"/>
            <RowDefinition Height="30*"/>
            <RowDefinition Height="200*"/>
            <RowDefinition Height="60*"/>
            <RowDefinition Height="16*"/>
        </Grid.RowDefinitions>
        <TextBox Grid.Row="1" x:Name="CalleeTextBox" PlaceholderText="Who would you like to call?" TextWrapping="Wrap" VerticalAlignment="Center" Height="30" Margin="10,10,10,10" />

        <Grid x:Name="AppTitleBar" Background="LightSeaGreen">
            <TextBlock x:Name="QuickstartTitle" Text="Calling Quickstart sample title bar" Style="{StaticResource CaptionTextBlockStyle}" Padding="7,7,0,0"/>
        </Grid>

        <Grid Grid.Row="2">
            <Grid.RowDefinitions>
                <RowDefinition/>
            </Grid.RowDefinitions>
            <Grid.ColumnDefinitions>
                <ColumnDefinition Width="*"/>
                <ColumnDefinition Width="*"/>
            </Grid.ColumnDefinitions>
            <MediaPlayerElement x:Name="LocalVideo" HorizontalAlignment="Center" Stretch="UniformToFill" Grid.Column="0" VerticalAlignment="Center" AutoPlay="True" />
            <MediaPlayerElement x:Name="RemoteVideo" HorizontalAlignment="Center" Stretch="UniformToFill" Grid.Column="1" VerticalAlignment="Center" AutoPlay="True" />
        </Grid>
        <StackPanel Grid.Row="3" Orientation="Vertical" Grid.RowSpan="2">
            <StackPanel Orientation="Horizontal">
                <Button x:Name="CallButton" Content="Start/Join call" Click="CallButton_Click" VerticalAlignment="Center" Margin="10,0,0,0" Height="40" Width="123"/>
                <Button x:Name="HangupButton" Content="Hang up" Click="HangupButton_Click" VerticalAlignment="Center" Margin="10,0,0,0" Height="40" Width="123"/>
                <CheckBox x:Name="MuteLocal" Content="Mute" Margin="10,0,0,0" Click="MuteLocal_Click" Width="74"/>
            </StackPanel>
        </StackPanel>
        <TextBox Grid.Row="5" x:Name="Stats" Text="" TextWrapping="Wrap" VerticalAlignment="Center" Height="30" Margin="0,2,0,0" BorderThickness="2" IsReadOnly="True" Foreground="LightSlateGray" />
    </Grid>
</Page>
Open the MainPage.xaml.cs and replace the content with following implementation:
using Azure.Communication.Calling.WindowsClient;
using System;
using System.Collections.Generic;
using System.ComponentModel;
using System.Linq;
using System.Threading.Tasks;
using Windows.ApplicationModel;
using Windows.ApplicationModel.Core;
using Windows.Media.Core;
using Windows.Networking.PushNotifications;
using Windows.UI;
using Windows.UI.ViewManagement;
using Windows.UI.Xaml;
using Windows.UI.Xaml.Controls;
using Windows.UI.Xaml.Media;
using Windows.UI.Xaml.Navigation;

namespace CallingQuickstart
{
    public sealed partial class MainPage : Page
    {
        private const string authToken = "<AUTHENTICATION_TOKEN>";

        private CallClient callClient;
        private CallTokenRefreshOptions callTokenRefreshOptions = new CallTokenRefreshOptions(false);
        private CallAgent callAgent;
        private CommunicationCall call;

        private LocalOutgoingAudioStream micStream;

        #region Page initialization
        public MainPage()
        {
            this.InitializeComponent();
            // Additional UI customization code goes here
        }

        protected override async void OnNavigatedTo(NavigationEventArgs e)
        {
            await InitCallAgentAndDeviceManagerAsync();

            base.OnNavigatedTo(e);
        }
        #endregion

        #region UI event handlers
        private async void CallButton_Click(object sender, RoutedEventArgs e)
        {
            // Start a call
        }

        private async void HangupButton_Click(object sender, RoutedEventArgs e)
        {
            // Hang up a call
        }

        private async void MuteLocal_Click(object sender, RoutedEventArgs e)
        {
            // Toggle mute/unmute audio state of a call
        }
        #endregion

        #region API event handlers
        private async void OnIncomingCallAsync(object sender, IncomingCallReceivedEventArgs args)
        {
            // Handle incoming call event
        }

        private async void OnStateChangedAsync(object sender, PropertyChangedEventArgs args)
        {
            // Handle connected and disconnected state change of a call
        }
        #endregion

        #region Helper methods

        private async Task InitCallAgentAndDeviceManagerAsync()
        {
            //Initialize the call agent and search for devices
        }


        private async Task<CommunicationCall> StartCallAsync(string acsCallee)
        {
            // Start a call to an Azure Communication Services user using the CallAgent and the callee id
        }

        #endregion
    }
}
Object model
The next table listed the classes and interfaces handle some of the major features of the Azure Communication Services Calling SDK:
| Name | Description |
|---|---|
CallClient |
The CallClient is the main entry point to the Calling SDK. |
CallAgent |
The CallAgent is used to start and manage calls. |
CommunicationCall |
The CommunicationCall is used to manage an ongoing call. |
CallTokenCredential |
The CallTokenCredential is used as the token credential to instantiate the CallAgent. |
CallIdentifier |
The CallIdentifier is used to represent the identity of the user, which can be one of the following options: UserCallIdentifier, PhoneNumberCallIdentifier etc. |
Authenticate the client
Initialize a CallAgent instance with a User Access Token that enables us to make and receive calls, and optionally obtain a DeviceManager instance to query for client device configurations.
In the code, replace <AUTHENTICATION_TOKEN> with a User Access Token. Refer to the user access token documentation if you don't already have a token available.
Add InitCallAgentAndDeviceManagerAsync function, which bootstraps the SDK. This helper can be customized to meet the requirements of your application.
        private async Task InitCallAgentAndDeviceManagerAsync()
        {
            this.callClient = new CallClient(new CallClientOptions() {
                Diagnostics = new CallDiagnosticsOptions() {

                    // make sure to put your project AppName
                    AppName = "CallingQuickstart",

                    AppVersion="1.0",

                    Tags = new[] { "Calling", "ACS", "Windows" }
                    }

                });

            // Set up local audio stream using the first mic enumerated
            var deviceManager = await this.callClient.GetDeviceManagerAsync();
            var mic = deviceManager?.Microphones?.FirstOrDefault();

            micStream = new LocalOutgoingAudioStream();

            var tokenCredential = new CallTokenCredential(authToken, callTokenRefreshOptions);

            var callAgentOptions = new CallAgentOptions()
            {
                DisplayName = $"{Environment.MachineName}/{Environment.UserName}",
            };

            this.callAgent = await this.callClient.CreateCallAgentAsync(tokenCredential, callAgentOptions);

            this.callAgent.IncomingCallReceived += OnIncomingCallAsync;
        }
Start the call
Once a StartCallOptions object is obtained, CallAgent can be used to initiate the Azure Communication Services call:
        private async Task<CommunicationCall> StartCallAsync(string acsCallee)
        {
            var options = new StartCallOptions();
            var call = await this.callAgent.StartCallAsync( new [] { new MicrosoftTeamsAppCallIdentifier(acsCallee) }, options);
            return call;
        }
End a call
End the current call when the Hang up button is clicked. Add the implementation to the HangupButton_Click to end a call, and stop the preview and video streams.
        private async void HangupButton_Click(object sender, RoutedEventArgs e)
        {
            var call = this.callAgent?.Calls?.FirstOrDefault();
            if (call != null)
            {
                await call.HangUpAsync(new HangUpOptions() { ForEveryone = false });
            }
        }
Toggle mute/unmute on audio
Mute the outgoing audio when the Mute button is clicked. Add the implementation to the MuteLocal_Click to mute the call.
        private async void MuteLocal_Click(object sender, RoutedEventArgs e)
        {
            var muteCheckbox = sender as CheckBox;

            if (muteCheckbox != null)
            {
                var call = this.callAgent?.Calls?.FirstOrDefault();

                if (call != null)
                {
                    if ((bool)muteCheckbox.IsChecked)
                    {
                        await call.MuteOutgoingAudioAsync();
                    }
                    else
                    {
                        await call.UnmuteOutgoingAudioAsync();
                    }
                }

                // Update the UI to reflect the state
            }
        }
Accept an incoming call
IncomingCallReceived event sink is set up in the SDK bootstrap helper InitCallAgentAndDeviceManagerAsync.
this.callAgent.IncomingCallReceived += OnIncomingCallAsync;
Application has an opportunity to configure how the incoming call should be accepted, such as video and audio stream kinds.
        private async void OnIncomingCallAsync(object sender, IncomingCallReceivedEventArgs args)
        {
            var incomingCall = args.IncomingCall;

            var acceptCallOptions = new AcceptCallOptions() { };

            call = await incomingCall.AcceptAsync(acceptCallOptions);
            call.StateChanged += OnStateChangedAsync;
        }
Monitor and response to call state change event
StateChanged event on CommunicationCall object is fired when an in progress call transactions from one state to another. Application is offered the opportunities to reflect the state changes on UI or insert business logics.
        private async void OnStateChangedAsync(object sender, PropertyChangedEventArgs args)
        {
            var call = sender as CommunicationCall;

            if (call != null)
            {
                var state = call.State;

                // Update the UI

                switch (state)
                {
                    case CallState.Connected:
                        {
                            await call.StartAudioAsync(micStream);

                            break;
                        }
                    case CallState.Disconnected:
                        {
                            call.StateChanged -= OnStateChangedAsync;

                            call.Dispose();

                            break;
                        }
                    default: break;
                }
            }
        }
Make call button work
Once the Callee ID isn't null or empty, you can start a call.
The call state must be changed using the OnStateChangedAsync action.
    private async void CallButton_Click(object sender, RoutedEventArgs e)
    {
        var callString = CalleeTextBox.Text.Trim();

        if (!string.IsNullOrEmpty(callString))
        {
            call = await StartCallAsync(callString);

            call.StateChanged += OnStateChangedAsync;
        }


    }
Run the code
You can build and run the code on Visual Studio. For solution platforms, we support ARM64, x64, and x86.
Manual steps to set up the call:
- Launch the app using Visual Studio.
- Enter the Call Queue Object ID (with prefix), and select the "Start Call" button. Application will start the outgoing call to the Call Queue with given object ID.
- Call is connected to the Call Queue.
- Communication Services user is routed through Call Queue based on its configuration.
Clean up resources
If you want to clean up and remove a Communication Services subscription, you can delete the resource or resource group. Deleting the resource group also deletes any other resources associated with it. Learn more about cleaning up resources.
Next steps
For more information, see the following articles:
- Get started with UI Calling to Teams Voice Apps
- Learn about Calling SDK capabilities
- Learn more about how calling works