Transform data in delta lake using mapping data flows
APPLIES TO:  Azure Data Factory
Azure Synapse Analytics
Azure Data Factory
Azure Synapse Analytics
Tip
Try out Data Factory in Microsoft Fabric, an all-in-one analytics solution for enterprises. Microsoft Fabric covers everything from data movement to data science, real-time analytics, business intelligence, and reporting. Learn how to start a new trial for free!
If you're new to Azure Data Factory, see Introduction to Azure Data Factory.
In this tutorial, you use the data flow canvas to create data flows that allow you to analyze and transform data in Azure Data Lake Storage (ADLS) Gen2 and store it in Delta Lake.
Prerequisites
- Azure subscription. If you don't have an Azure subscription, create a free Azure account before you begin.
- Azure storage account. You use ADLS storage as a source and sink data stores. If you don't have a storage account, see Create an Azure storage account for steps to create one.
The file that we're transforming in this tutorial is MoviesDB.csv, which can be found here. To retrieve the file from GitHub, copy the contents to a text editor of your choice to save locally as a .csv file. To upload the file to your storage account, see Upload blobs with the Azure portal. The examples are referencing a container named 'sample-data'.
Create a data factory
In this step, you create a data factory and open the Data Factory UX to create a pipeline in the data factory.
Open Microsoft Edge or Google Chrome. Currently, Data Factory UI is supported only in the Microsoft Edge and Google Chrome web browsers.
On the left menu, select Create a resource > Integration > Data Factory
On the New data factory page, under Name, enter ADFTutorialDataFactory
Select the Azure subscription in which you want to create the data factory.
For Resource Group, take one of the following steps:
a. Select Use existing, and select an existing resource group from the drop-down list.
b. Select Create new, and enter the name of a resource group.
To learn about resource groups, see Use resource groups to manage your Azure resources.
Under Version, select V2.
Under Location, select a location for the data factory. Only locations that are supported are displayed in the drop-down list. Data stores (for example, Azure Storage and SQL Database) and computes (for example, Azure HDInsight) used by the data factory can be in other regions.
Select Create.
After the creation is finished, you see the notice in Notifications center. Select Go to resource to navigate to the Data factory page.
Select Author & Monitor to launch the Data Factory UI in a separate tab.
Create a pipeline with a data flow activity
In this step, you create a pipeline that contains a data flow activity.
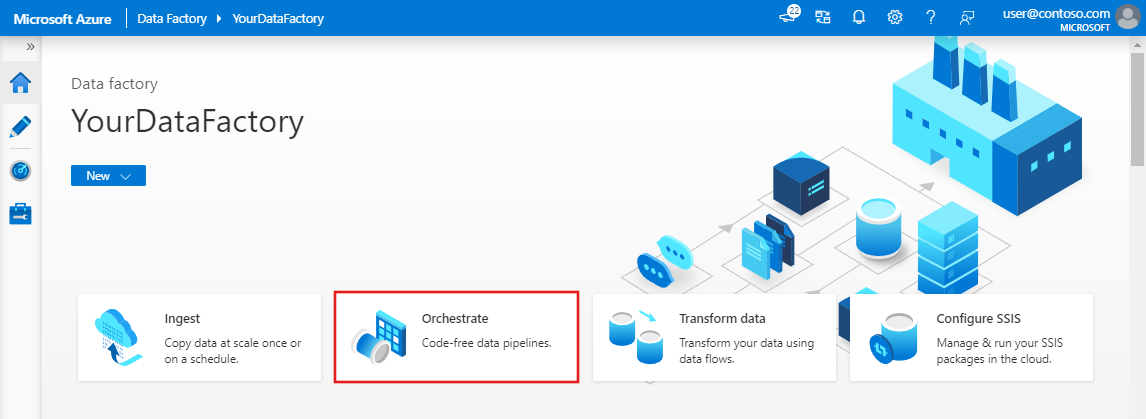
On the home page, select Orchestrate.
In the General tab for the pipeline, enter DeltaLake for Name of the pipeline.
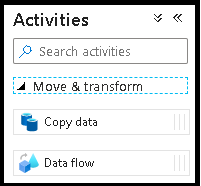
In the Activities pane, expand the Move and Transform accordion. Drag and drop the Data Flow activity from the pane to the pipeline canvas.
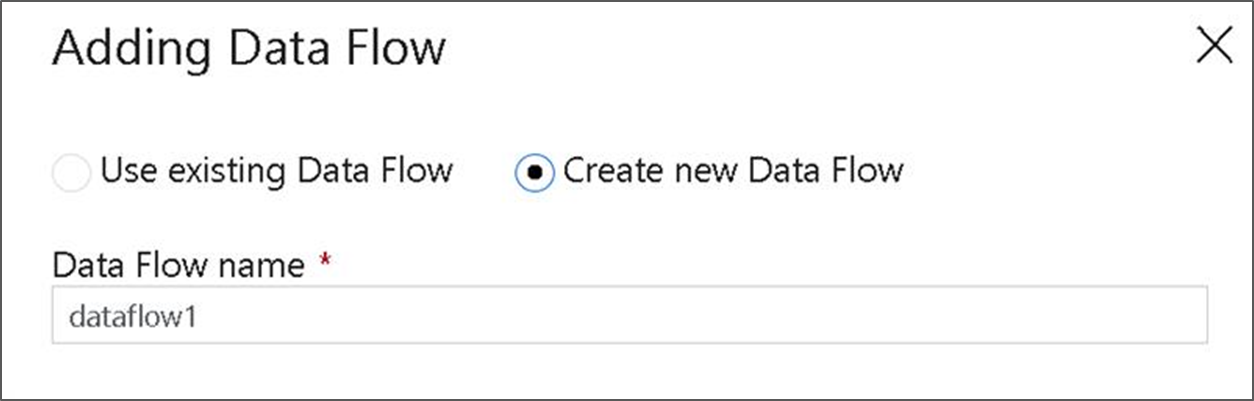
In the Adding Data Flow pop-up, select Create new Data Flow and then name your data flow DeltaLake. Select Finish when done.
In the top bar of the pipeline canvas, slide the Data Flow debug slider on. Debug mode allows for interactive testing of transformation logic against a live Spark cluster. Data Flow clusters take 5-7 minutes to warm up and users are recommended to turn on debug first if they plan to do Data Flow development. For more information, see Debug Mode.

Build transformation logic in the data flow canvas
You generate two data flows in this tutorial. The first data flow is a simple source to sink to generate a new Delta Lake from the movies CSV file. Lastly, you create the flow design that follows to update data in Delta Lake.

Tutorial objectives
- Use the MoviesCSV dataset source from the prerequisites, and form a new Delta Lake from it.
- Build the logic to updated ratings for 1988 movies to '1'.
- Delete all movies from 1950.
- Insert new movies for 2021 by duplicating the movies from 1960.
Start from a blank data flow canvas
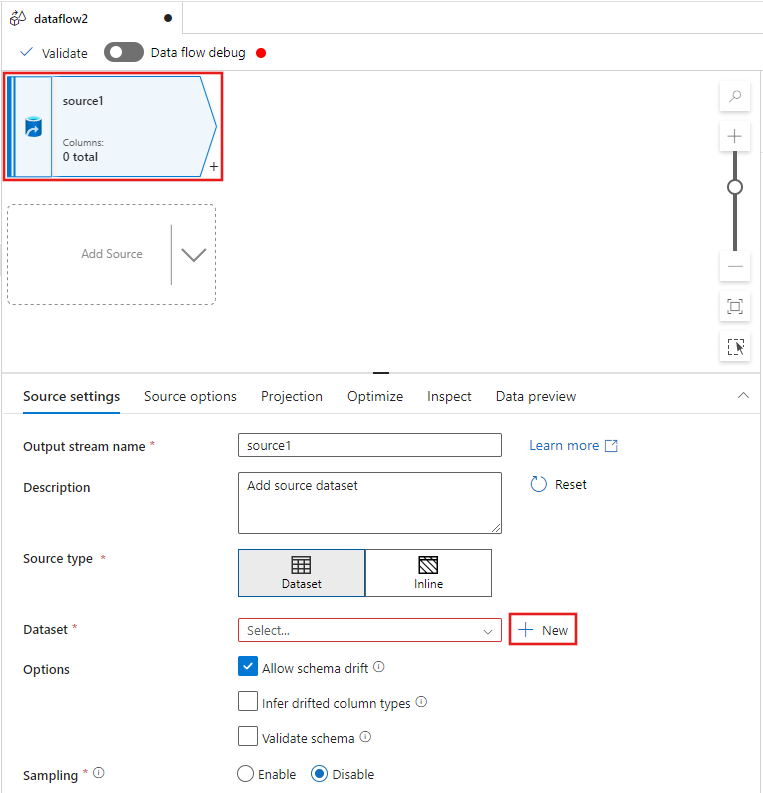
Select the source transformation at the top of the data flow editor window, and then select + New next to the Dataset property in the Source settings window:
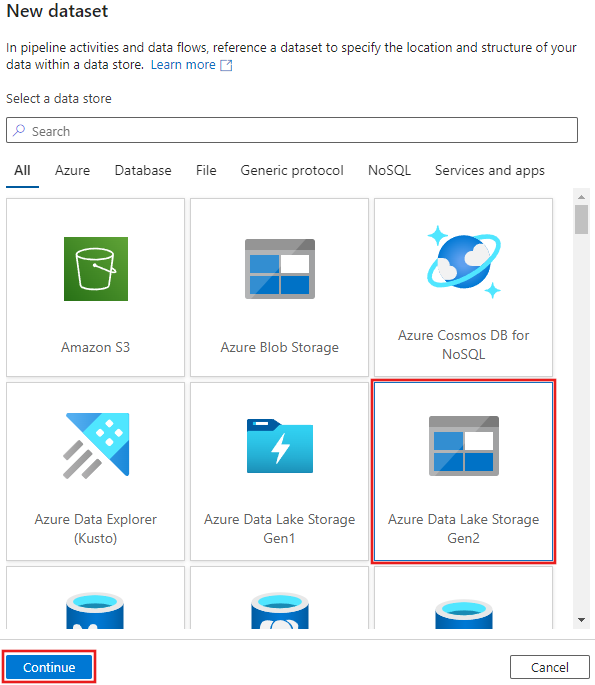
Select Azure Data Lake Storage Gen2 from the New dataset window that appears, and then select Continue.
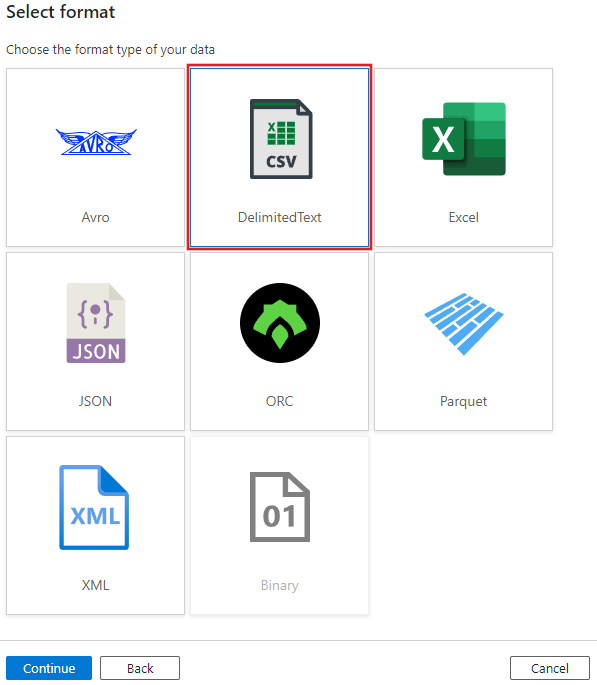
Choose DelimitedText for the dataset type, and select Continue again.
Name the dataset “MoviesCSV”, and select + New under Linked service to create a new linked service to the file.
Provide the details for your storage account created previously in the Prerequisites section, and browse and select the MoviesCSV file that you uploaded there.
After adding your linked service, select the First row as header checkbox, then select OK to add the source.
Navigate to the Projection tab of the data flow settings window, and then select Detect data types.
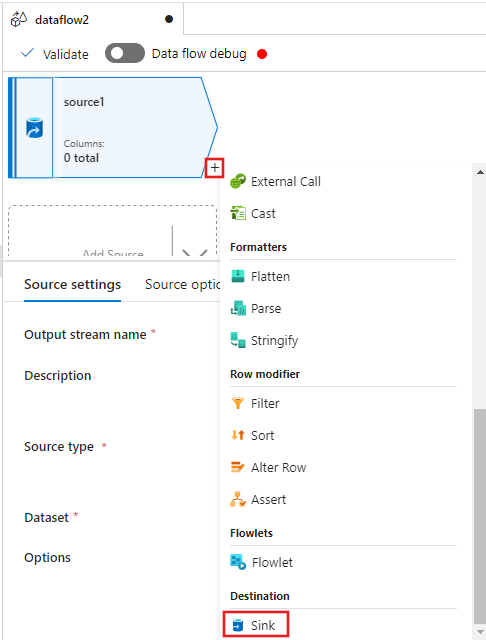
Now select the + after the Source in the data flow editor window, and scroll down to select Sink under the Destination section, adding a new sink to your data flow.
In the Sink tab for the sink settings that appear after the sink is added, select Inline for the Sink type, and then Delta for the Inline dataset type. Then select your Azure Data Lake Storage Gen2 for the Linked service.
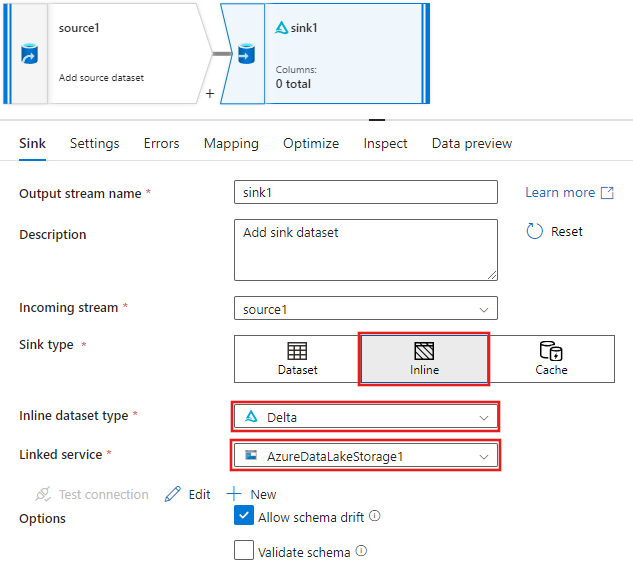
Choose a folder name in your storage container where you would like the service to create the Delta Lake.
Finally, navigate back the pipeline designer and select Debug to execute the pipeline in debug mode with just this data flow activity on the canvas. This generates your new Delta Lake in Azure Data Lake Storage Gen2.
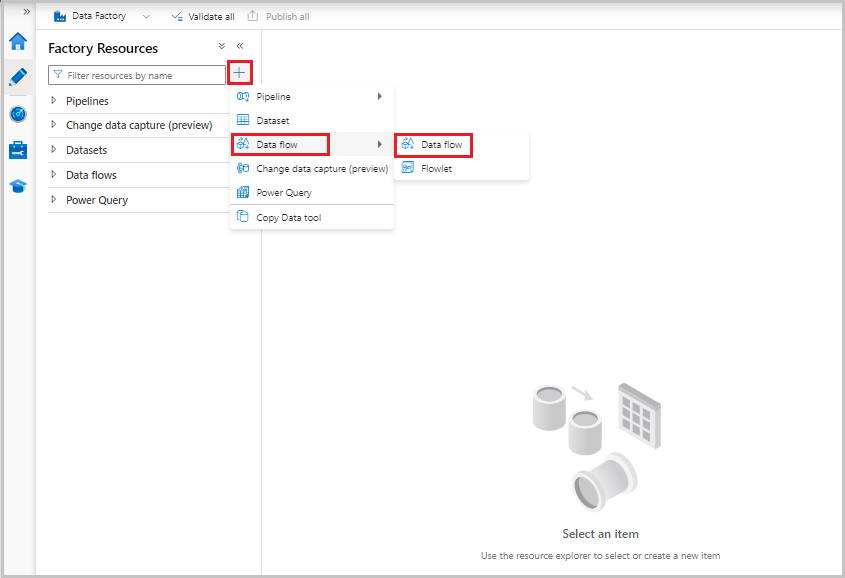
Now, from the Factory Resources menu on the left of the screen, select + to add a new resource, and then select Data flow.
As previously, select the MoviesCSV file again as a source and then select Detect data types again from the Projection tab.
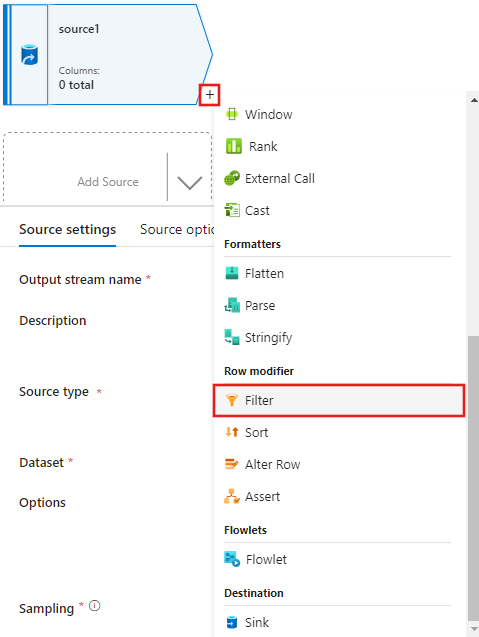
This time, after creating the source, select the + in the data flow editor window, and add a Filter transformation to your source.
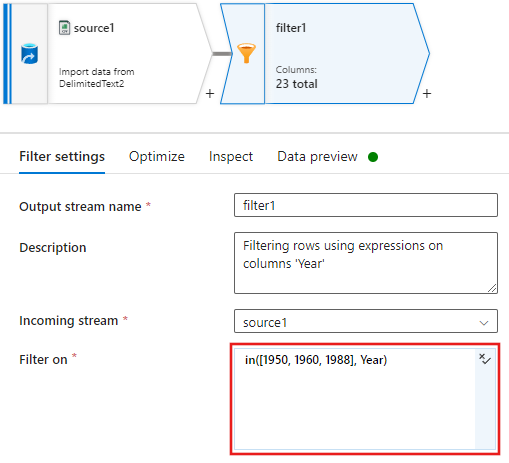
Add a Filter on condition in the Filter settings window that only allows movie rows matching 1950, 1960, and 1988.
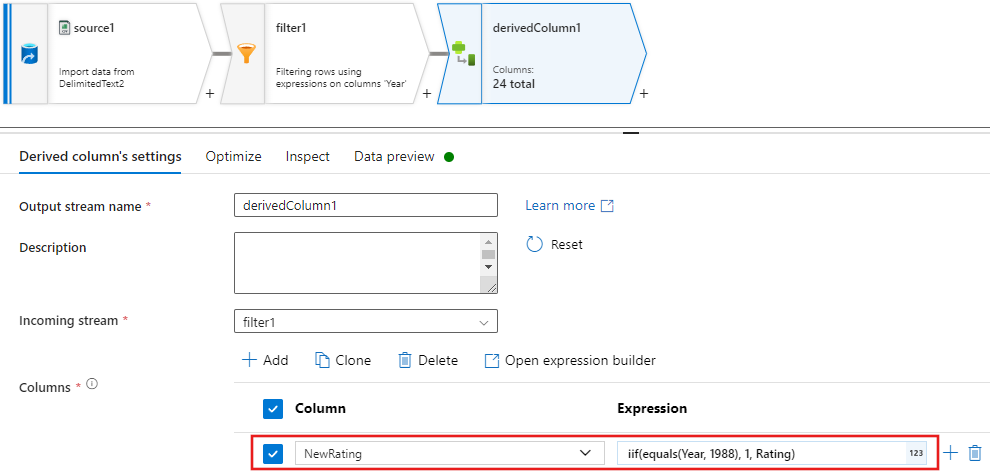
Now add a Derived column transformation to update ratings for each 1988 movie to '1'.
Update, insert, delete, and upsertpolicies are created in the alter Row transform. Add an alter row transformation after your derived column.Your alter row policies should look like this.

Now that you set the proper policy for each alter row type, check that the proper update rules were set on the sink transformation
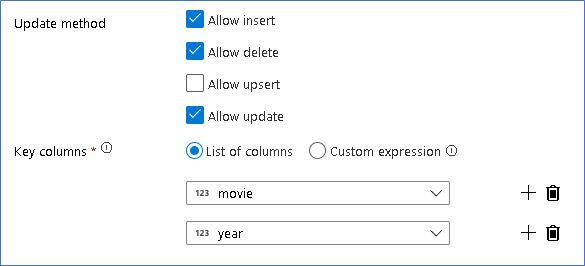
Here we're using the Delta Lake sink to your Azure Data Lake Storage Gen2 data lake and allowing inserts, updates, deletes.
Note that the key columns are a composite key made up of the Movie primary key column and year column. This is because we created fake 2021 movies by duplicating the 1960 rows. This avoids collisions when looking up the existing rows by providing uniqueness.
Download completed sample
Here's a sample solution for the Delta pipeline with a data flow for update/delete rows in the lake.
Related content
Learn more about the data flow expression language.
Feedback
Coming soon: Throughout 2024 we will be phasing out GitHub Issues as the feedback mechanism for content and replacing it with a new feedback system. For more information see: https://aka.ms/ContentUserFeedback.
Submit and view feedback for