Secure Java Spring Boot apps using Azure Active Directory B2C
This article demonstrates a Java Spring Boot web app that signs in users on your Azure Active Directory B2C tenant using the Azure AD B2C Spring Boot Starter client library for Java. It uses the OpenID Connect protocol.
The following diagram shows the topology of the app:

The client app uses the Azure AD B2C Spring Boot Starter client library for Java to sign in a user and obtain an ID token from Azure AD B2C. The ID token proves that the user is authenticated with Azure AD B2C and enables the user to access protected routes.
Prerequisites
- JDK version 15. This sample was developed on a system with Java 15, but it might be compatible with other versions.
- Maven 3
- Java Extension Pack for Visual Studio Code is recommended for running this sample in Visual Studio Code.
- An Azure AD B2C tenant. For more information, see Tutorial: Create an Azure Active Directory B2C tenant
- Visual Studio Code
- Azure Tools for Visual Studio Code
Recommendations
- Some familiarity with the Spring Framework.
- Some familiarity with Linux/OSX terminal.
- jwt.ms for inspecting your tokens.
- Fiddler for monitoring your network activity and troubleshooting.
- Follow the Microsoft Entra ID Blog to stay up-to-date with the latest developments.
Set up the sample
The following sections show you how to set up the sample application.
Clone or download the sample repository
To clone the sample, open a Bash window and use the following command:
git clone https://github.com/Azure-Samples/ms-identity-msal-java-samples.git
cd 4-spring-web-app/1-Authentication/sign-in-b2c
Alternatively, navigate to the ms-identity-msal-java-samples repository, then download it as a .zip file and extract it to your hard drive.
Important
To avoid file path length limitations on Windows, clone or extract the repository into a directory near the root of your hard drive.
This sample comes with a preregistered application for demo purposes. If you'd like to use your own Azure AD B2C tenant and application, register and configure the application in the Azure portal. For more information, see the Register the app section. Otherwise, continue with the steps in the Run the sample section.
Choose the Azure AD B2C tenant where you want to create your applications
To choose your tenant, use the following steps:
Sign in to the Azure portal.
If your account is present in more than one Azure AD B2C tenant, select your profile in the corner of the Azure portal, and then select Switch directory to change your session to the desired Azure AD B2C tenant.
Create user flows and custom policies
To create common user flows like sign-up, sign-in, profile edit, and password reset, see Tutorial: Create user flows in Azure Active Directory B2C.
You should consider creating custom policies in Azure Active Directory B2C as well. However, this task is beyond the scope of this tutorial. For more information, see Azure AD B2C custom policy overview.
Add external identity providers
See Tutorial: Add identity providers to your applications in Azure Active Directory B2C.
Register the app (java-spring-webapp-auth-b2c)
To register the app, use the following steps:
Navigate to the Azure portal and select Azure AD B2C.
Select App Registrations on the navigation pane, then select New registration.
In the Register an application page that appears, enter the following application registration information:
- In the Name section, enter a meaningful application name for display to users of the app - for example,
java-spring-webapp-auth-b2c. - Under Supported account types, select Accounts in any identity provider or organizational directory (for authenticating users with user flows).
- In the Redirect URI (optional) section, select Web in the combo-box and enter the following redirect URI:
http://localhost:8080/login/oauth2/code/.
- In the Name section, enter a meaningful application name for display to users of the app - for example,
Select Register to create the application.
On the app's registration page, find and copy the Application (client) ID value to use later. You use this value in your app's configuration file or files.
Select Save to save your changes.
On the app's registration page, select the Certificates & secrets pane on the navigation pane to open the page to generate secrets and upload certificates.
In the Client secrets section, select New client secret.
Type a description - for example, app secret.
Select one of the available durations as per your security concerns - for example, In 2 years.
Select Add. The generated value is displayed.
Copy and save the generated value for use in later steps. You need this value for your code's configuration files. This value isn't displayed again, and you can't retrieve it by any other means. So, be sure to save it from the Azure portal before you navigate to any other screen or pane.
Configure the app (java-spring-webapp-auth-b2c) to use your app registration
Use the following steps to configure the app:
Note
In the following steps, ClientID is the same as Application ID or AppId.
Open the project in your IDE.
Open the src/main/resources/application.yml file.
Find the
client-idproperty and replace the existing value with the application ID orclientIdof thejava-spring-webapp-auth-b2capplication from the Azure portal.Find the
client-secretproperty and replace the existing value with the value you saved during the creation of thejava-spring-webapp-auth-b2capplication from the Azure portal.Find the
base-uriproperty and replace the two instances of the valuefabrikamb2cwith the name of the Azure AD B2C tenant in which you created thejava-spring-webapp-auth-b2capplication in the Azure portal.Find the
sign-up-or-sign-inproperty and replace it with the name of the sign-up/sign-in user-flow policy you created in the Azure AD B2C tenant in which you created thejava-spring-webapp-auth-b2capplication in the Azure portal.Find the
profile-editproperty and replace it with the name of the password reset user-flow policy you created in the Azure AD B2C tenant in which you created thejava-spring-webapp-auth-b2capplication in the Azure portal.Find the
password-resetproperty and replace it with the name of the edit profile user-flow policy you created in the Azure AD B2C tenant in which you created thejava-spring-webapp-auth-b2capplication in the Azure portal.Open the src/main/resources/templates/navbar.html file.
Find the references to the
b2c_1_susiandb2c_1_edit_profileflows and replace them with yoursign-up-sign-inandprofile-edituser-flows.
Run the sample
The following sections show you how to deploy the sample to Azure Container Apps.
Prerequisites
- An Azure account. If you don't have one, create a free account. You need the Contributor or Owner permission on the Azure subscription to proceed. For more information, see Assign Azure roles using the Azure portal.
- The Azure CLI.
- The Azure Container Apps CLI extension, version
0.3.47or higher. To install the latest version, use theaz extension add --name containerapp --upgrade --allow-previewcommand. - The Java Development Kit, version 17 or higher.
- Maven.
Prepare the Spring project
Use the following steps to prepare the project:
Use the following Maven command to build the project:
mvn clean verifyRun the sample project locally by using the following command:
mvn spring-boot:run
Setup
To sign in to Azure from the CLI, run the following command and follow the prompts to complete the authentication process.
az login
To ensure you're running the latest version of the CLI, run the upgrade command.
az upgrade
Next, install or update the Azure Container Apps extension for the CLI.
If you receive errors about missing parameters when you run az containerapp commands in Azure CLI, be sure you have the latest version of the Azure Container Apps extension installed.
az extension add --name containerapp --upgrade
Note
Starting in May 2024, Azure CLI extensions no longer enable preview features by default. To access Container Apps preview features, install the Container Apps extension with --allow-preview true.
az extension add --name containerapp --upgrade --allow-preview true
Now that the current extension or module is installed, register the Microsoft.App and Microsoft.OperationalInsights namespaces.
Note
Azure Container Apps resources have migrated from the Microsoft.Web namespace to the Microsoft.App namespace. Refer to Namespace migration from Microsoft.Web to Microsoft.App in March 2022 for more details.
az provider register --namespace Microsoft.App
az provider register --namespace Microsoft.OperationalInsights
Create the Azure Container Apps environment
Now that your Azure CLI setup is complete, you can define the environment variables that are used throughout this article.
Define the following variables in your bash shell.
export RESOURCE_GROUP="ms-identity-containerapps"
export LOCATION="canadacentral"
export ENVIRONMENT="env-ms-identity-containerapps"
export API_NAME="ms-identity-api"
export JAR_FILE_PATH_AND_NAME="./target/ms-identity-spring-boot-webapp-0.0.1-SNAPSHOT.jar"
Create a resource group.
az group create  \
    --name $RESOURCE_GROUP \
    --location $LOCATION \
Create an environment with an auto-generated Log Analytics workspace.
az containerapp env create \
    --name $ENVIRONMENT \
    --resource-group $RESOURCE_GROUP \
    --location $LOCATION
Show the default domain of the container app environment. Note down this domain to use in later sections.
az containerapp env show \
    --name $ENVIRONMENT \
    --resource-group $RESOURCE_GROUP \
    --query properties.defaultDomain
Prepare the app for deployment
When you deploy your application to Azure Container Apps, your redirect URL changes to the redirect URL of your deployed app instance in Azure Container Apps. Use the following steps to change these settings in your application.yml file:
Navigate to your app's src\main\resources\application.yml file and change the value of
post-logout-redirect-urito your deployed app's domain name, as shown in the following example. Be sure to replace<API_NAME>and<default-domain-of-container-app-environment>with your actual values. For example, with the default domain for your Azure Container App environment from the previous step andms-identity-apifor your app name, you would usehttps://ms-identity-api.<default-domain>for thepost-logout-redirect-urivalue.post-logout-redirect-uri: https://<API_NAME>.<default-domain-of-container-app-environment>After saving this file, use the following command to rebuild your app:
mvn clean package
Important
The application.yml file of the application currently holds the value of your client secret in the client-secret parameter. It isn't good practice to keep this value in this file. You might also be taking a risk if you commit the file to a Git repository. For the recommended approach, see Manage secrets in Azure Container Apps.
Update your Microsoft Entra ID app registration
Because the redirect URI changes to your deployed app on Azure Container Apps, you also need to change the redirect URI in your Microsoft Entra ID app registration. Use the following steps to make this change:
Navigate to the Microsoft identity platform for developers App registrations page.
Use the search box to search for your app registration - for example,
java-servlet-webapp-authentication.Open your app registration by selecting its name.
Select Authentication from the menu.
In the Web - Redirect URIs section, select Add URI.
Fill out the URI of your app, appending
/login/oauth2/code/- for example,https://<containerapp-name>.<default domain of container app environment>/login/oauth2/code/.Select Save.
Deploy the app
Deploy the JAR package to Azure Container Apps.
Note
If necessary, you can specify the JDK version in the Java build environment variables. For more information, see Build environment variables for Java in Azure Container Apps.
Now you can deploy your WAR file with the az containerapp up CLI command.
az containerapp up \
    --name $API_NAME \
    --resource-group $RESOURCE_GROUP \
    --location $LOCATION \
    --environment $ENVIRONMENT \
    --artifact <JAR_FILE_PATH_AND_NAME> \
    --ingress external \
    --target-port 8080 \
    --query properties.configuration.ingress.fqdn
Note
The default JDK version is 17. If you need to change the JDK version for compatibility with your application, you can use the --build-env-vars BP_JVM_VERSION=<YOUR_JDK_VERSION> argument to adjust the version number.
For more build environment variables, see Build environment variables for Java in Azure Container Apps.
Validate the app
In this example, the containerapp up command includes the --query properties.configuration.ingress.fqdn argument, which returns the fully qualified domain name (FQDN), also known as the app's URL. Use the following steps to check the app's logs to investigate any deployment issue:
Access the output application URL from the Outputs page of the Deployment section.
From the navigation pane of the Azure Container Apps instance Overview page, select Logs to check the app's logs.
Explore the sample
Use the following steps to explore the sample:
- Notice the signed-in or signed-out status displayed at the center of the screen.
- Select the context-sensitive button in the corner. This button reads Sign In when you first run the app. Alternatively, select the link to token details. Because this page is protected and requires authentication, you're automatically redirected to the sign-in page.
- On the next page, follow the instructions and sign in with an account of your chosen identity provider. You can also choose to sign up or sign in to a local account on the B2C tenant using an email address.
- Upon successful completion of the sign-in flow, you should be redirected to the home page - which shows the sign in status - or the token details page, depending on which button triggered your sign-in flow.
- Notice that the context-sensitive button now says Sign out and displays your username.
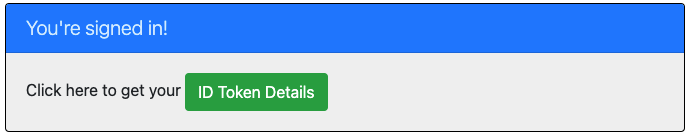
- If you're on the home page, select ID Token Details to see some of the ID token's decoded claims.
- Edit your profile. Select edit profile to change details like your display name, place of residence, and profession.
- Use the button in the corner to sign out. The status page reflects the new state.
About the code
This sample demonstrates how to use Azure AD B2C Spring Boot Starter client library for Java to sign in users into your Azure AD B2C tenant. The sample also makes use of the Spring Oauth2 Client and Spring Web boot starters. The sample uses claims from the ID token obtained from Azure AD B2C to display the details of the signed-in user.
Contents
The following table shows the contents of the sample project folder:
| File/folder | Description |
|---|---|
| pom.xml | Application dependencies. |
| src/main/resources/templates/ | Thymeleaf Templates for UI. |
| src/main/resources/application.yml | Application and Microsoft Entra Boot Starter library configuration. |
| src/main/java/com/microsoft/azuresamples/msal4j/msidentityspringbootwebapp/ | This directory contains the main application entry point, controller, and config classes. |
| .../MsIdentitySpringBootWebappApplication.java | Main class. |
| .../SampleController.java | Controller with endpoint mappings. |
| .../SecurityConfig.java | Security configuration - for example, which routes require authentication. |
| .../Utilities.java | Utility class - for example, filter ID token claims. |
| CHANGELOG.md | List of changes to the sample. |
| CONTRIBUTING.md | Guidelines for contributing to the sample. |
| LICENSE | The license for the sample. |
ID token claims
To extract token details, the app makes use of Spring Security's AuthenticationPrincipal and OidcUser object in a request mapping, as shown in the following example, as shown in the following example. See the Sample Controller for the full details of how this app makes use of ID token claims.
import org.springframework.security.oauth2.core.oidc.user.OidcUser;
import org.springframework.security.core.annotation.AuthenticationPrincipal;
//...
@GetMapping(path = "/some_path")
public String tokenDetails(@AuthenticationPrincipal OidcUser principal) {
    Map<String, Object> claims = principal.getIdToken().getClaims();
}
Sign-in and sign-out links
For sign-in, the app makes a request to the Azure AD B2C sign-in endpoint automatically configured by Azure AD B2C Spring Boot Starter client library for Java, as shown in the following example:
<a class="btn btn-success" href="/oauth2/authorization/{your-sign-up-sign-in-user-flow}">Sign In</a>
For sign-out, the app makes a POST request to the logout endpoint, as shown in the following example:
<form action="#" th:action="@{/logout}" method="post">
  <input class="btn btn-warning" type="submit" value="Sign Out" />
</form>
Authentication-dependent UI elements
The app has some simple logic in the UI template pages for determining content to display based on whether the user is authenticated, as shown in the following example using Spring Security Thymeleaf tags:
<div sec:authorize="isAuthenticated()">
  this content only shows to authenticated users
</div>
<div sec:authorize="isAnonymous()">
  this content only shows to not-authenticated users
</div>
Protect routes with WebSecurityConfigurerAdapter
By default, the app protects the ID Token Details page so that only signed-in users can access it. The app configures these routes from the app.protect.authenticated property from the application.yml file. To configure your app's specific requirements, you can extend WebSecurityConfigurerAdapter in one of your classes. For an example, see this app's SecurityConfig class, shown in the following code:
@EnableWebSecurity
public class SecurityConfig extends WebSecurityConfigurerAdapter {

    @Value("${app.protect.authenticated}")
    private String[] protectedRoutes;

    private final AADB2COidcLoginConfigurer configurer;

    public SecurityConfig(AADB2COidcLoginConfigurer configurer) {
        this.configurer = configurer;
    }

    @Override
    protected void configure(HttpSecurity http) throws Exception {
        // @formatter:off
        http.authorizeRequests()
            .antMatchers(protectedRoutes).authenticated()     // limit these pages to authenticated users (default: /token_details)
            .antMatchers("/**").permitAll()                  // allow all other routes.
            .and()
            .apply(configurer)
            ;
        // @formatter:off
    }
}
More information
- Microsoft identity platform (Microsoft Entra ID for developers)
- Overview of Microsoft Authentication Library (MSAL)
- Quickstart: Register an application with the Microsoft identity platform
- Quickstart: Configure a client application to access web APIs
- Understanding Microsoft Entra ID application consent experiences
- Understand user and admin consent
- Application and service principal objects in Microsoft Entra ID
- National Clouds
- MSAL code samples
- Microsoft Entra ID Spring Boot Starter client library for Java
- Azure Active Directory B2C Spring Boot Starter client library for Java
- Microsoft Authentication Library for Java (MSAL4J)
- MSAL4J Wiki
- ID tokens
- Access tokens in the Microsoft identity platform
For more information about how OAuth 2.0 protocols work in this scenario and other scenarios, see Authentication Scenarios for Microsoft Entra ID.