Quickstart: Deploy to Azure Container Apps using IntelliJ IDEA
This article shows you how to deploy a containerized application to Azure Container Apps using Azure Toolkit for IntelliJ IDEA. The article uses a sample backend web API service that returns a static collection of music albums.
Prerequisites
- An Azure account with an active subscription. If you don't have a subscription, create a free account before you begin.
- A supported Java Development Kit (JDK). For more information about the JDKs available for use when developing on Azure, see Java support on Azure and Azure Stack.
- IntelliJ IDEA, Ultimate or Community Edition.
- Maven 3.5.0+.
- A Docker client.
- The Azure Toolkit for IntelliJ. For more information, see Install the Azure Toolkit for IntelliJ. You also need to sign in to your Azure account for the Azure Toolkit for IntelliJ. For more information, see Sign-in instructions for the Azure Toolkit for IntelliJ.
Clone the project
Use the following commands to clone the sample app and check out the
IDEbranch:git clone https://github.com/Azure-Samples/containerapps-albumapi-java cd containerapps-albumapi-java git checkout IDESelect Open to open the project in IntelliJ IDEA.
Build and run the project locally
Use the following command to build the project with Maven:
mvn clean package -DskipTestsTo verify that the application is running, open a browser and go to
http://localhost:8080/albums. The page returns a list of JSON objects similar to the output of the following command:java -jar target\containerapps-albumapi-java-0.0.1-SNAPSHOT.jar
Push image to an Azure Container Registry
To deploy your project to Azure Container Apps, you need to build the container image and push it to an Azure Container Registry first.
In Azure Explorer view, expand the Azure node, right-click Container Registries, and then select Create in Azure Portal.
On the Create container registry page, enter the following information:
- Subscription: Specifies the Azure subscription that you want to use for your container registry.
- Resource Group: Specifies the resource group for your container registry. Select one of the following options:
- Create New: Specifies that you want to create a new resource group.
- Use Existing: Specifies that you must select from a list of resource groups that are associated with your Azure account.
- Registry Name: Specifies a name for the new container registry.
- Location: Specifies the region where your container registry is created (for example, West US).
- SKU: Specifies the service tier for your container registry. For this tutorial, select Basic.
Select Review + create and verify that the information is correct. Then, select Create.
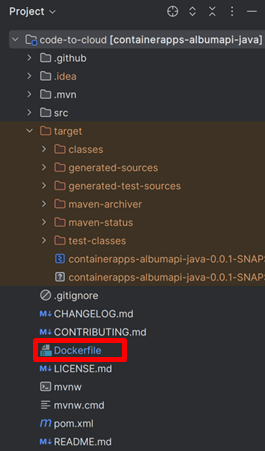
On the Project tab, navigate to your project and open Dockerfile.
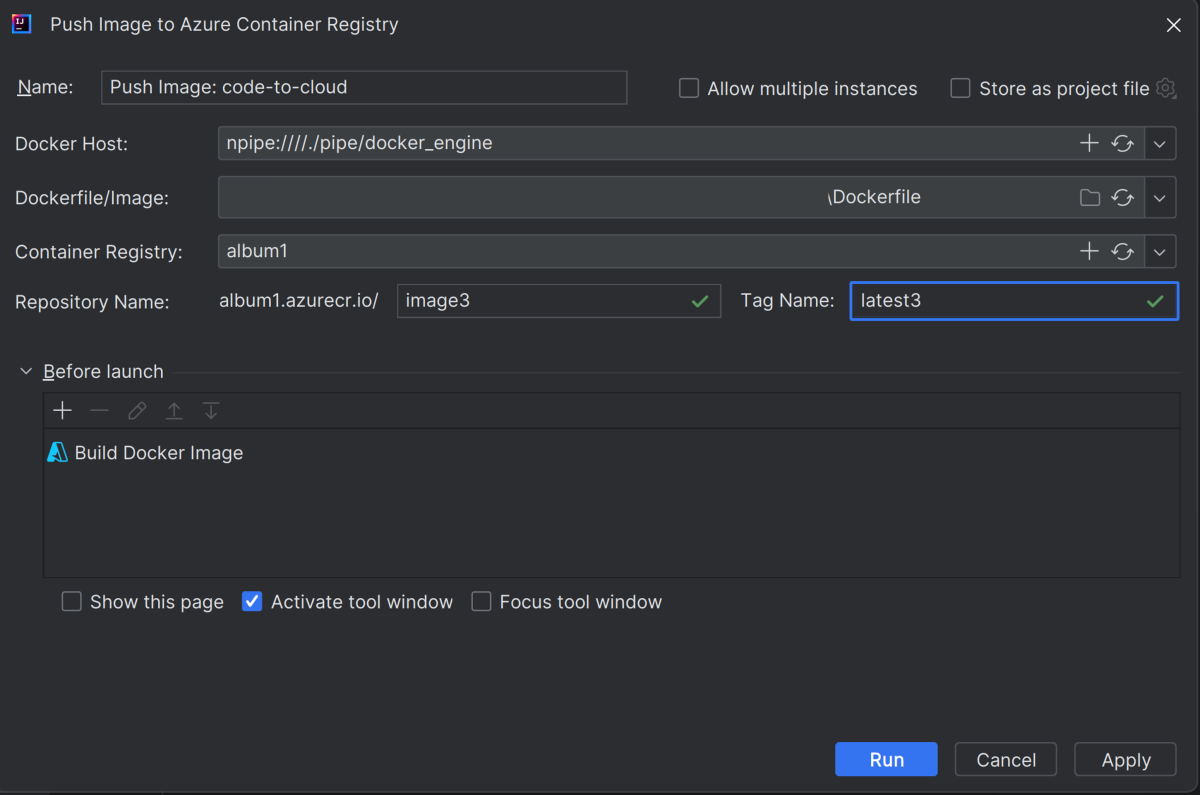
Select the Azure icon and then select Push Image to Azure Container Registry.
Select the registry you created in the previous step, fill in the following information, and then select Run.
- Repository Name: Specifies the name for the repository.
- Tag Name: Specifies the version of an image or other artifact.
Create an environment and a container app
Use the following steps to set up your environment and deploy a container app in Azure:
Right-click Container Apps Environment in Azure Explorer view, and then select Create Container Apps Environment.
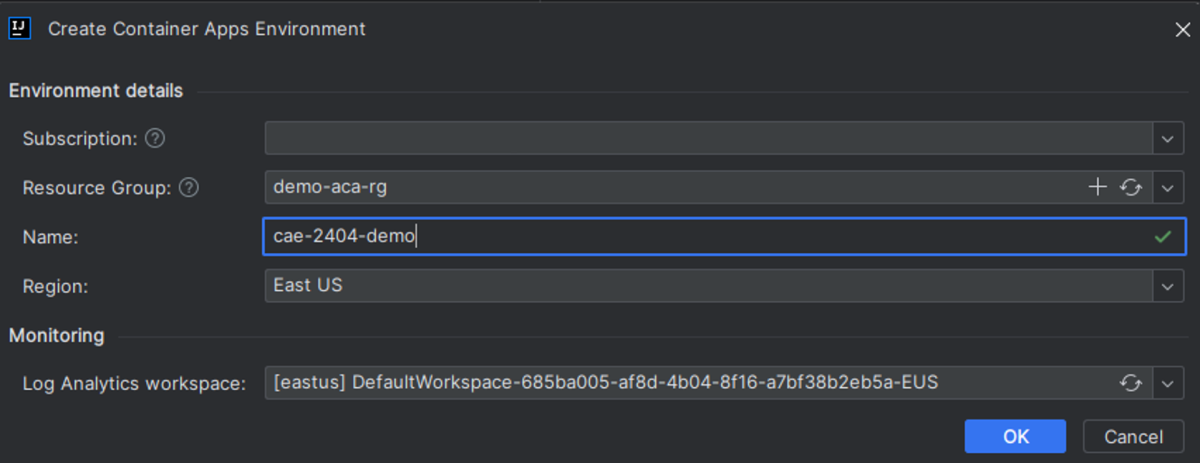
On the Create Container Apps Environment page, enter the following information, and then select OK.
- Subscription: Specifies the Azure subscription that you want to use.
- Resource Group: Specifies the resource group for your container apps. Select one of the following options:
- Create New: Specifies that you want to create a new resource group.
- Use Existing: Specifies that you must select from a list of resource groups that are associated with your Azure account.
- Name: Specifies the name for the new container apps environment.
- Region: Specifies the appropriate region (for example, East US).
- Log Analytics workspace: Specifies the Log Analytics workspace you want to use or accept the default.
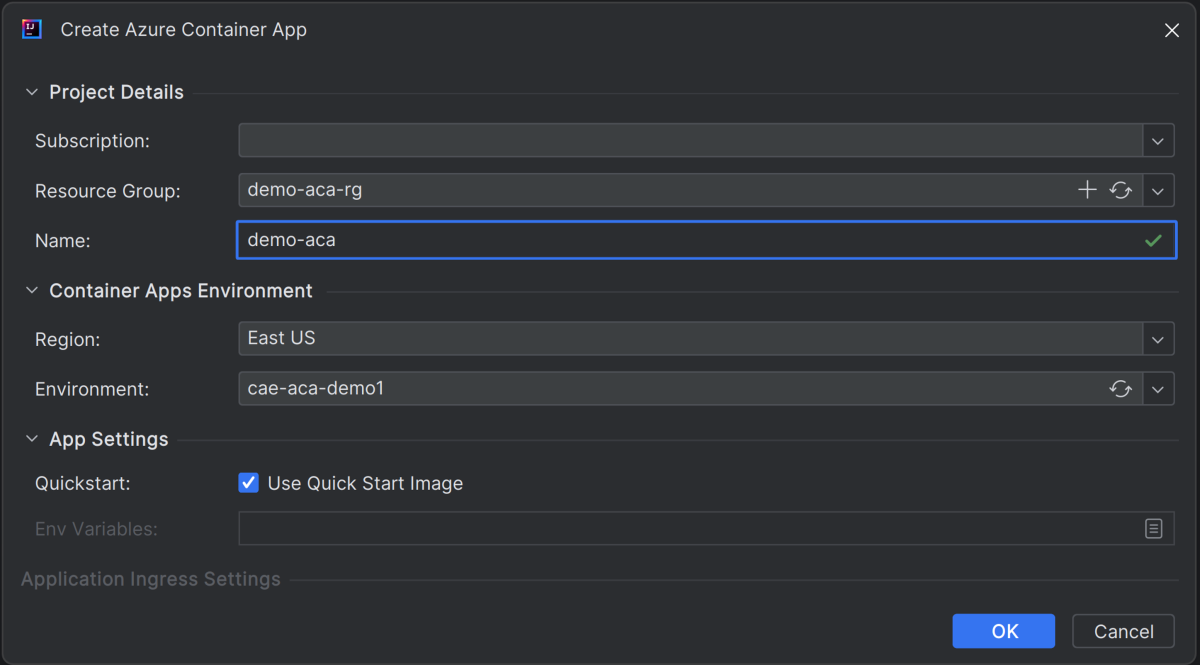
Right-click on the container apps environment you created and select Create > Container App in Azure Explorer. Enter the following information:
- Subscription: Specifies the Azure subscription that you want to use.
- Resource Group: Specifies the resource group for your container apps. Select one of the following options:
- Create New: Specifies that you want to create a new resource group.
- Use Existing: Specifies that you must select from a list of resource groups that are associated with your Azure account.
- Name: Specifies the name for a new container app.
- Region: Specifies the appropriate region (for example, East US).
- Environment: Specifies the Container Apps Environment you want to use.
- Quickstart: Select Use Quick Start Image.
Select OK. The toolkit displays a status message when the app creation succeeds.
Deploy the container app
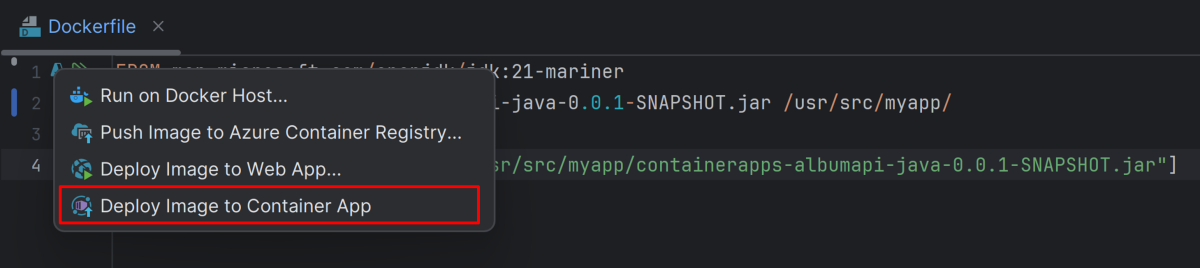
On the Project tab, navigate to your project and open Dockerfile.
Select the Azure icon and then select Deploy Image to Container App.
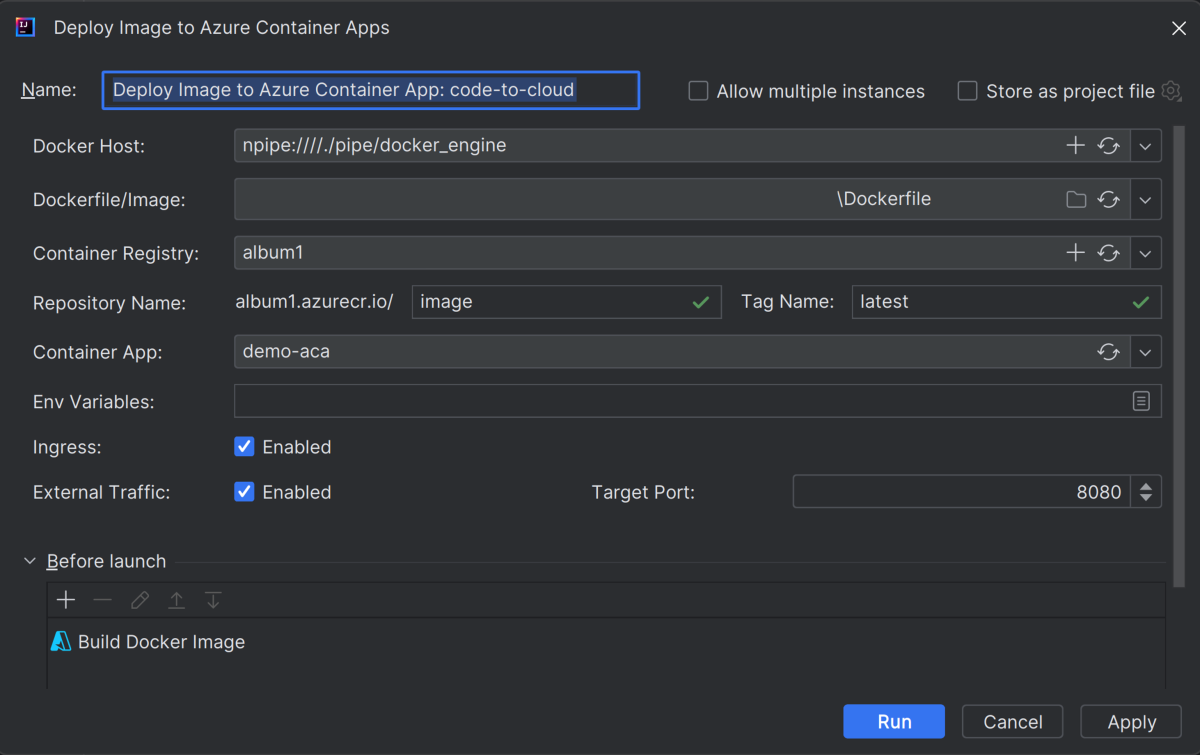
On the Deploy Image to Azure Container Apps page, enter the following information, and then select Run.
- Dockerfile/Image: Specifies the path of the Dockerfile or accept the default.
- Container Registry: Specifies the Container Registry you want to use.
- Repository Name: Specifies the repository name you want to use under your Container Registry.
- Tag Name: Specifies the tag name you want to use under your Container Registry.
- Container App: Specifies the Container App you want to deploy to.
- Ingress: Enable ingress for applications that require an HTTP or TCP endpoint. Select Enable.
- External Traffic: Enable external traffic for applications that need an HTTP or TCP endpoint. Select Enable.
- Target Port: Set this value to the port number that your container uses. Open port 8080 in this step.
After the deployment finishes, the Azure Toolkit for IntelliJ displays a notification. Select Browse to open the deployed app in a browser.
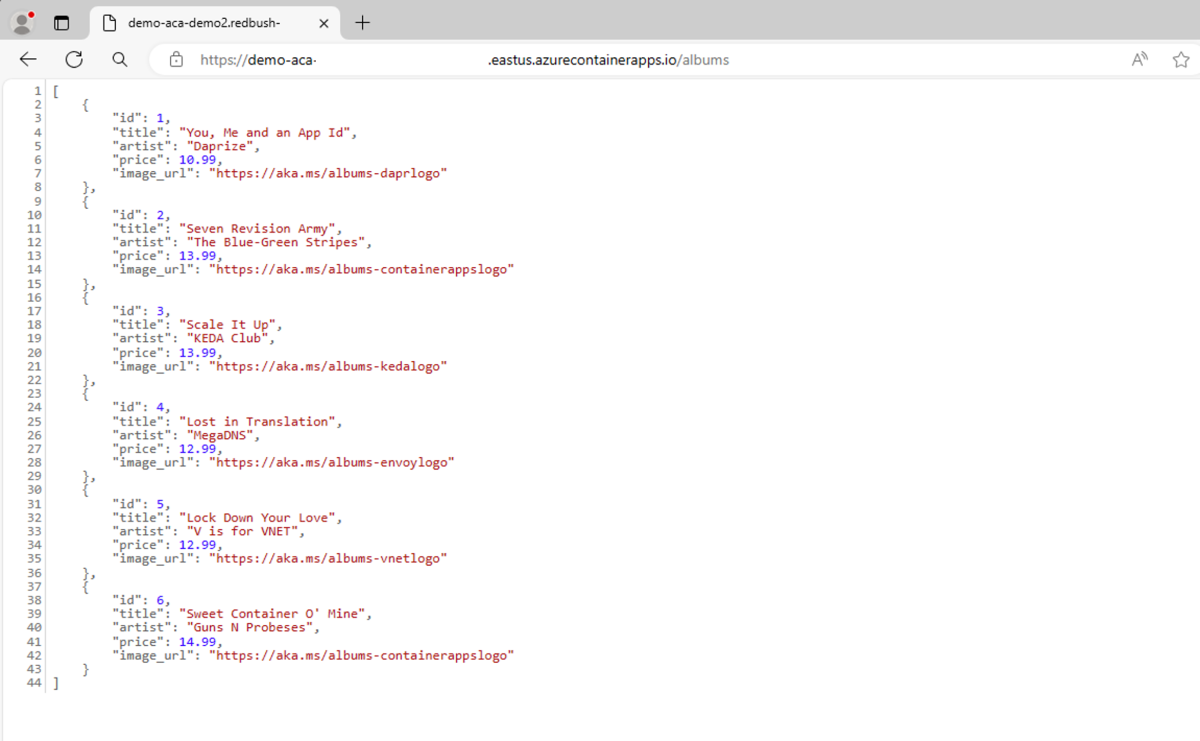
In the browser's address bar, append the /albums path to the end of the app URL to view data from a sample API request.
Clean up resources
If you want to clean up and remove an Azure Container Apps resource, you can delete the resource or resource group. Deleting the resource group also deletes any other resources associated with it. Use the following steps to clean up resources:
To delete your Azure Container Apps resources, navigate to the left-hand Azure Explorer sidebar and locate the Container Apps Environment item.
Right-click on the Azure Container Apps service you'd like to delete and then select Delete.
To delete your resource group, visit the Azure portal and manually delete the resources under your subscription.