Prerequisites for Managed DevOps Pools
There are a few things you need to prepare before using Managed DevOps Pools for the first time.
At a high level, you need:
- An Azure account with an active subscription, with the Managed DevOps Pools resource provider registered
- An Azure DevOps organization, connected to the Microsoft Entra ID tenant of the users who will be administering the Managed DevOps Pool
This article shows you how to configure your Azure subscription and Azure DevOps organization for use with Managed DevOps Pools. These configuration steps only need to be performed a single time per Azure DevOps organization and Azure subscription.
Configure your Azure subscription
- Register the Managed DevOps Pools resource provider in your Azure Subscription
- Review Managed DevOps Pools quotas
- Create a Dev Center and Dev Center project (If you plan to create your Managed DevOps Pools using the Azure portal, you can create the Dev Center and Dev Center project during the pool creation process.)
Register the Managed DevOps Pools resource provider in your Azure Subscription
To use Managed DevOps Pools, register the following resource providers with your Azure subscription.
| Resource provider | Description |
|---|---|
| Microsoft.DevOpsInfrastructure | Resource provider for Managed DevOps Pools |
| Microsoft.DevCenter | Resource provider for Dev Center and Dev Center project |
Registering a resource provider uses the /register/action operation. Permission to perform this operation is included if your account is assigned the contributor or owner role on your subscription.
Azure portal
Sign in to the Azure portal.
On the Azure portal menu, search for Subscriptions. Select it from the available options.
Select the Azure subscription you plan to use for Managed DevOps Pools.
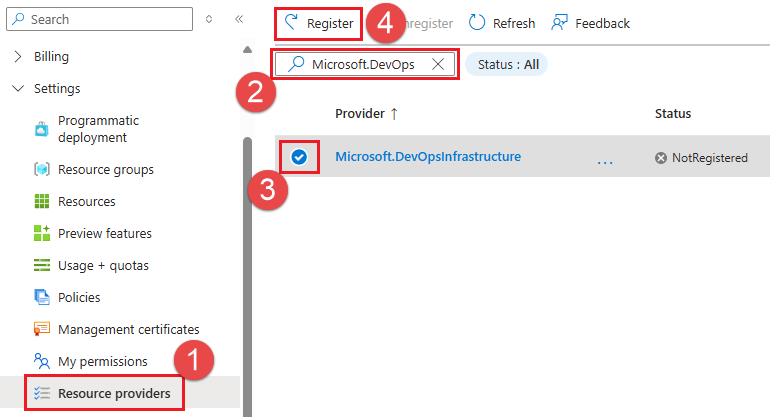
On the left menu, under Settings, select Resource providers.
Search for Microsoft.DevOpsInfrastructure, select the check box from the list, and choose Register.
Search for Microsoft.DevCenter. If Microsoft.DevCenter isn't registered, select the check box from the list, and choose Register.
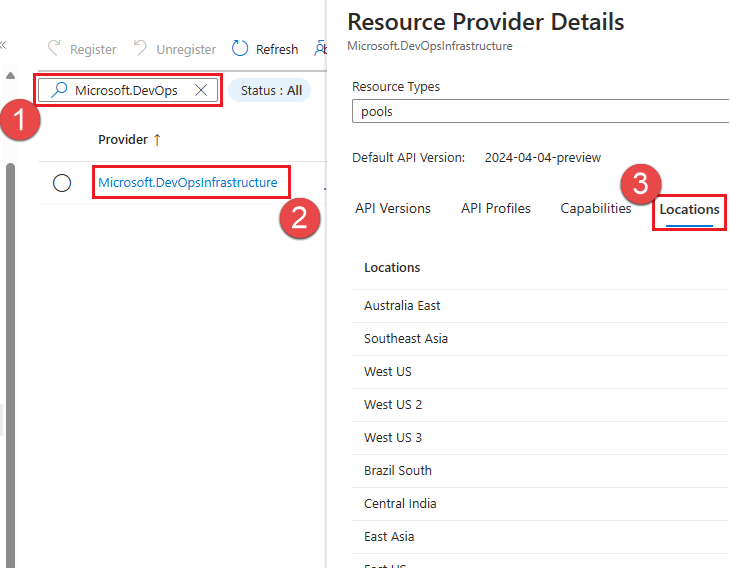
To see the Azure regions that support Managed DevOps Pools in your subscription, first register the Microsoft.DevOpsInfrastructure provider, select it from the list, and choose Locations.

For more information about Azure resource providers, see Azure resource providers and types.
Review Managed DevOps Pools quotas
Managed DevOps Pools uses Azure Quotas to manage the usage of the virtual machine resources that run your agents. Managed DevOps Pools quotas are based on CPU cores per Azure VM SKU family. By default, regions that support Managed DevOps Pools have five cores of quota granted for the following SKU families.
standardBSFamilystandardDADSv5FamilystandardDASv5FamilystandardDDSv5FamilystandardDLDSv5FamilystandardDPLDSv5FamilystandardDPLSv5FamilystandardDPSv5FamilystandardDSv2FamilystandardDSv5FamilystandardDv2FamilystandardEASv4FamilystandardEDSv5FamilystandardESv5FamilystandardFSv2FamilystandardLSv3Family
The default agent size for new Managed DevOps Pools resources is Standard D2ads v5, which is part of the standardDADSv5Family. Standard D2ads v5 uses two cores, so you can create a pool with up to two agents, for a total of four cores, without requesting additional quota. To create more, you must request a quota adjustment.
View your quotas
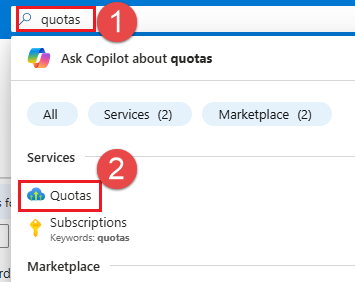
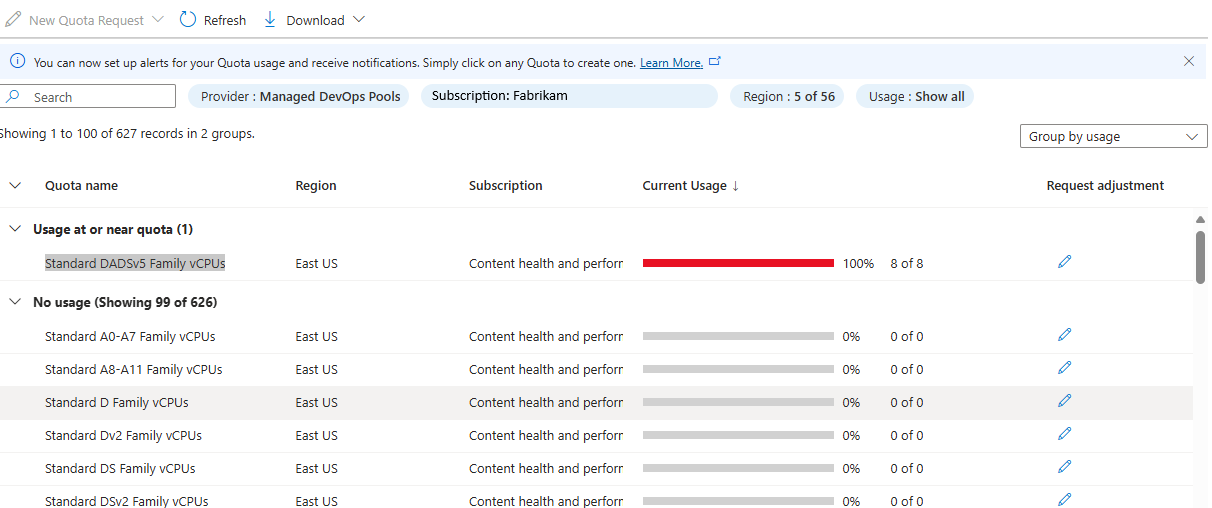
To view the quotas for SKU families in your region, sign in to the Azure portal, enter quotas in the search box, and choose Quotas from the list.
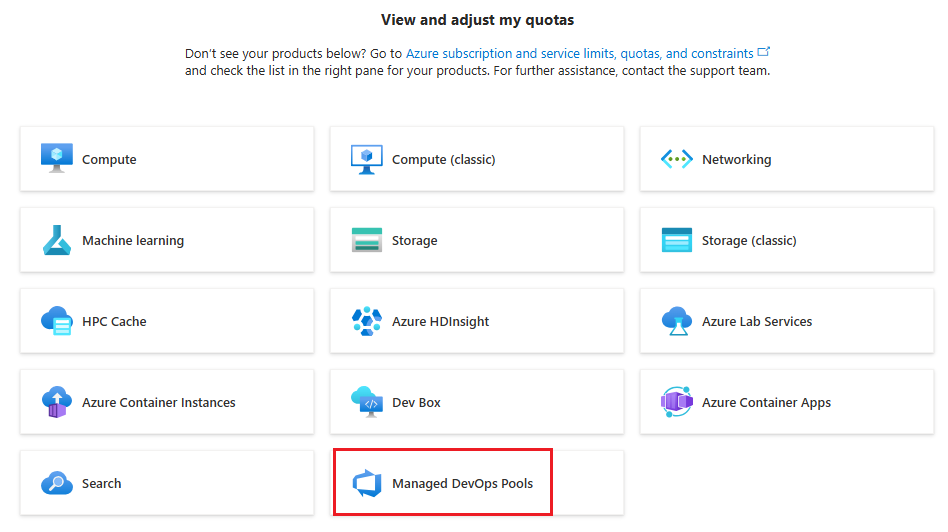
Choose Managed DevOps Pools.
Choose your subscription and the region where you want to create the pool. In the following example, the Standard DADSv5 Family vCPUs quota is 8 of 8, which means eight cores are available, but all eight are being used. If you want to use more than eight cores for this SKU, or you want to use a different SKU that doesn't have any quota, you can request a quota adjustment.
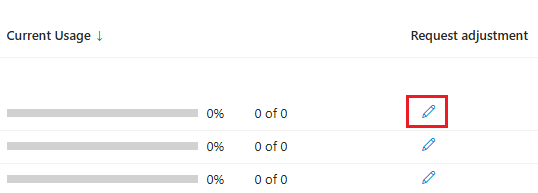
Request a quota adjustment
To request an increase in quota, choose Request adjustment for the desired SKU in your region.
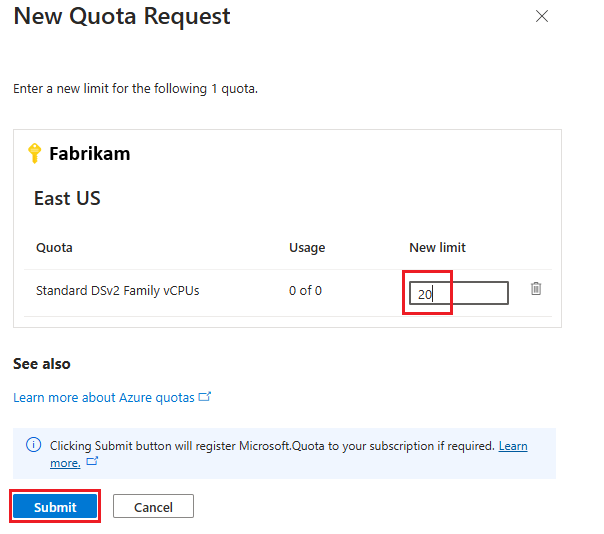
Specify the desired number of cores for the selected SKU, and choose Submit. In the following example, 20 cores are requested for Standard DSv2 Family vCPUs.
The quota request takes a few moments to process. The following example shows the result of a successful quota adjustment.
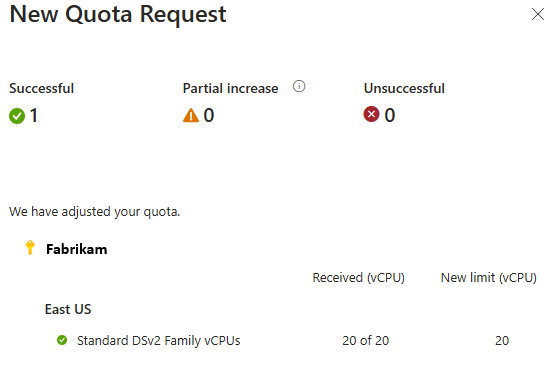
If the quota adjustment can't be auto-approved, you'll be directed to submit a support request, as described in the following section.
Create a quota support request
If your subscription doesn't have the capacity to configure your pool with desired Azure VM SKU and maximum agents count, pool creation fails with an error similar to the following message:
Cores needed to complete this request is 8, which exceeds the current limit of 0 for SKU family standardDDSv4Family in region eastus. Please choose a different region if possible, or request additional quota at https://portal.azure.com/#view/Microsoft_Azure_Support/NewSupportRequestV3Blade/issueType/quota/subscriptionId/subscription_id_placeholder/topicId/3eadc5d3-b59a-3658-d8c6-9c729ba35b97.
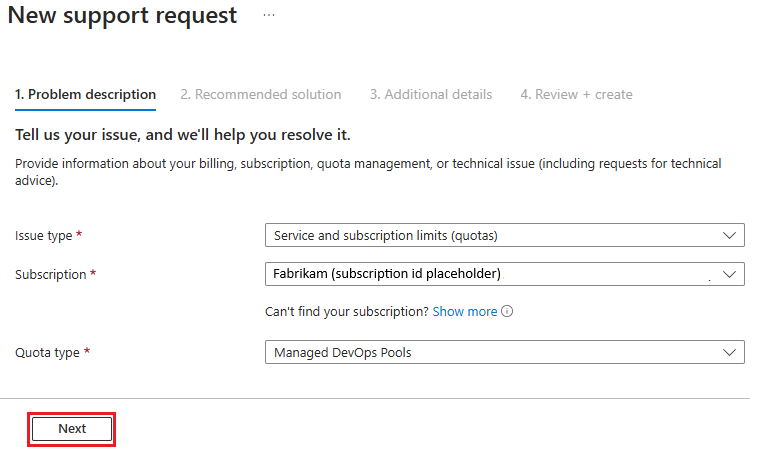
Go to the link to start a New support request to request a quota increase. Choose Next.
Choose Enter details.

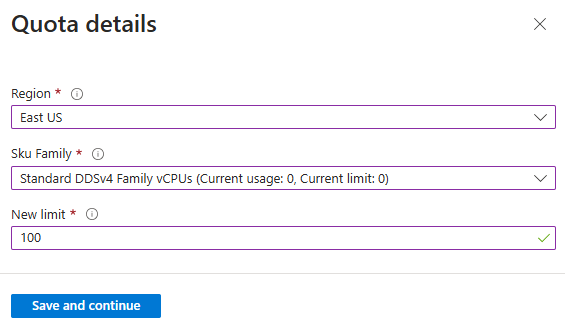
Enter the Region, Sku Family, New limit, and choose Save and continue. In th following example, 100 cores are requested for Standard DDSv4 Family vCPUs.
Fill the following details in this form:
Severity: Choose one of the available severity levels based on the business impact.
Preferred contact method: You can either choose to be contacted over Email or by Phone.
Select Next: Review+Create. Validate the information provided and select Create to create a support request.
Within 24 hours, the Managed DevOps Pools support team will evaluate your request and get back to you.
Create a Dev Center and Dev Center project
Managed DevOps Pools requires a Dev Center and Dev Center project. You have the option to create a Dev Center and Dev Center project when you create your pool in the Azure portal, but if you want to create them ahead of time, perform the following steps. Multiple Managed DevOps Pools can use the same Dev Center and Dev Center project.
Create a Dev Center
Sign in to the Azure portal.
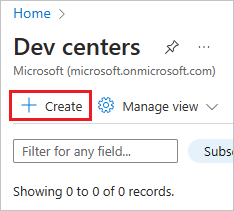
On the Azure portal menu, search for Dev centers, select it from the available options, and choose Create.
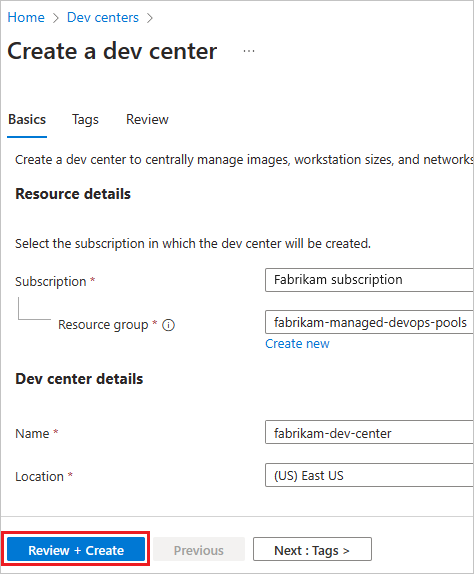
Choose the desired Subscription, Resource group, Name, and Location, and choose Review + Create.
On the confirmation window, choose Create to create the Dev center.
Wait until the new Dev center is created, and proceed to the next section and create a Dev Center Project.
Create a Dev Center Project
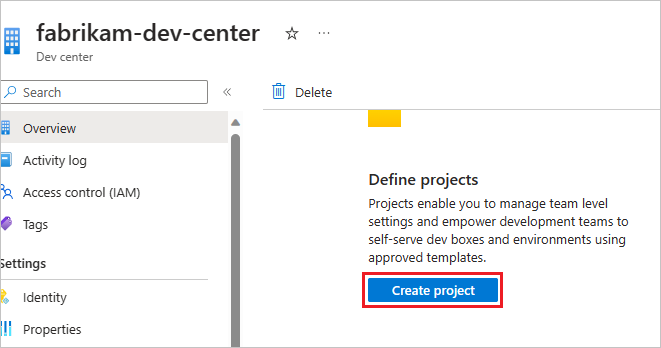
Go to the Dev Center created in the previous section, and choose Create project.
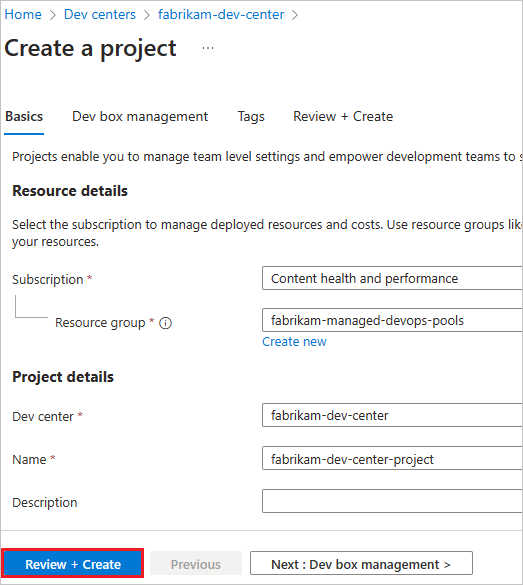
Choose the desired Subscription, Resource group, Dev center, Name, and choose Review + Create.
On the confirmation window, choose Create to create the Dev center project.
When you create your Managed DevOps Pool, specify the Dev Center and Dev Center project you created in these steps.
Configure your Azure DevOps organization
- Connect your Azure DevOps organization to Microsoft Entra ID and verify membership
- Verify Azure DevOps permissions
Connect your Azure DevOps organization to Microsoft Entra ID and verify membership
To create a Managed DevOps Pool in your Azure DevOps organization, your Azure DevOps organization must be connected to Microsoft Entra ID, and your user account must be a member of the following Microsoft Entra ID tenants:
- The tenant of the Azure subscription that contains your Managed DevOps Pool
- The tenant your Azure DevOps organization is connected to
If the tenants are different, your account must be a member of both tenants. To view your tenants:
- View your current directory (Azure tenant) in the Azure portal.
- View the tenant for your Azure DevOps organization. You can go directly to this page in the Azure DevOps portal here:
https://dev.azure.com/<your-organization>/_settings/organizationAad. - If your Azure DevOps organization isn't connected to Microsoft Entra ID, follow the steps in Connect your organization to Microsoft Entra ID and connect to the desired tenant, such as the same tenant as your Azure subscription.
- If your Azure DevOps organization and Managed DevOps Pools Azure subscription are in different tenants, verify that you are a member of both tenants.
Verify Azure DevOps permissions
When you create a Managed DevOps Pool, the account you use to sign in to the Azure subscription that contains your Managed DevOps Pool is used to create a corresponding agent pool in your Azure DevOps organization. To successfully create a Managed DevOps Pool, your account must have one of the following permissions in your Azure DevOps organization. These permissions are listed in order from least privileged to most privileged.
- Organization-level Agent pools administrator - Administrators of agent pools at the organization level can create new agent pools as well as perform all operations on them. For instructions on adding users to this group, see Configure organization security for agent pools - Set organization security for all agent pools.
- Project Collection Administrator - The Project Collection Administrators group is the main administrative security group defined for an organization and can perform all operations in an Azure DevOps organization, including creating new pools. For information about this group and how to see its members, see Look up a project collection administrator.