Add and manage information banners in Azure Devops
Azure DevOps Services | Azure DevOps Server 2022 - Azure DevOps Server 2019
Use information banners to quickly and effectively communicate with your Azure DevOps users. Alert users to upcoming changes or events without sending mass emails.
Specify one of three types of banners: error, information, or warning. Only the last added or updated banner is displayed at a time. Banners remain in effect until their expiration date.
The following image shows an information message. Users can cancel the message by selecting Close ![]() .
.
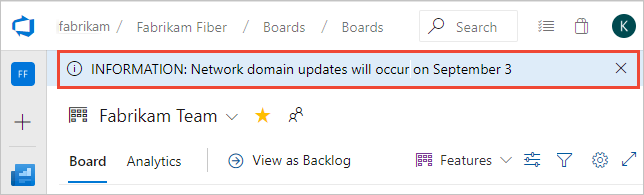
We limit banners to 30 words prioritize by level. So, if you post a warning message and an info message, the info message only shows after the user closes or you delete the warning message.
Prerequisites
- Permissions: To add or manage banners, be a member of the Project Collection Administrators security group. To get added, see Change permissions at the organization or collection-level.
- Access levels:
- Install the Banner Settings marketplace extension. For more information, see Install extensions.
- Install the Azure DevOps CLI extension.
- Sign into Azure DevOps using
az login. - For the examples in this article, set the default organization using
az devops configure --defaults organization=YourOrganizationURL.
- Sign into Azure DevOps using
- Permissions: To add or manage banners, be a member of the Project Collection Administrators security group. To get added, see Change permissions at the organization or collection-level.
- Access levels:
- Install the Banner Settings marketplace extension on the project collection where you want to manage banners. For more information, see Install extensions for on-premises servers.
Manage banners using the Banner Settings extension
The Banner Settings extension provides a settings pane under Organization settings to add and manage sitewide banners. The extension supports the following features:
The Banner Settings extension provides a settings pane under Collection settings to add and manage sitewide banners. The extension supports the following features:
- Show banners on any page in Azure DevOps
- Choose between three levels of messages: Info, Warning, and Error
- Choose an expiration date for a message
- Include hyperlinks in banners using markdown syntax
Open Organization settings
To add or delete a banner, open Organization settings, scroll down to the Extensions section, and choose Banner.
Organization settings configure resources for all projects respectively for the entire organization. For an overview of all organization settings, see Project collection administrator role and managing collections of projects.
Choose the
 Azure DevOps logo to open Projects, and then choose Organization settings.
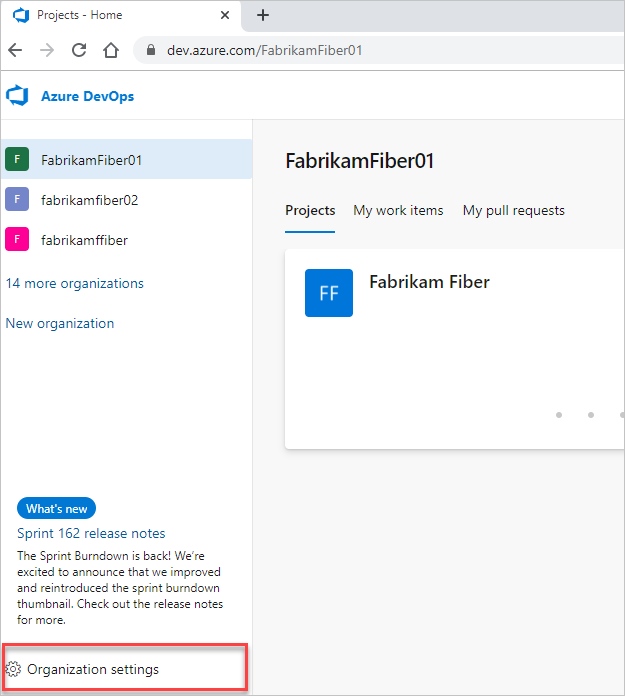
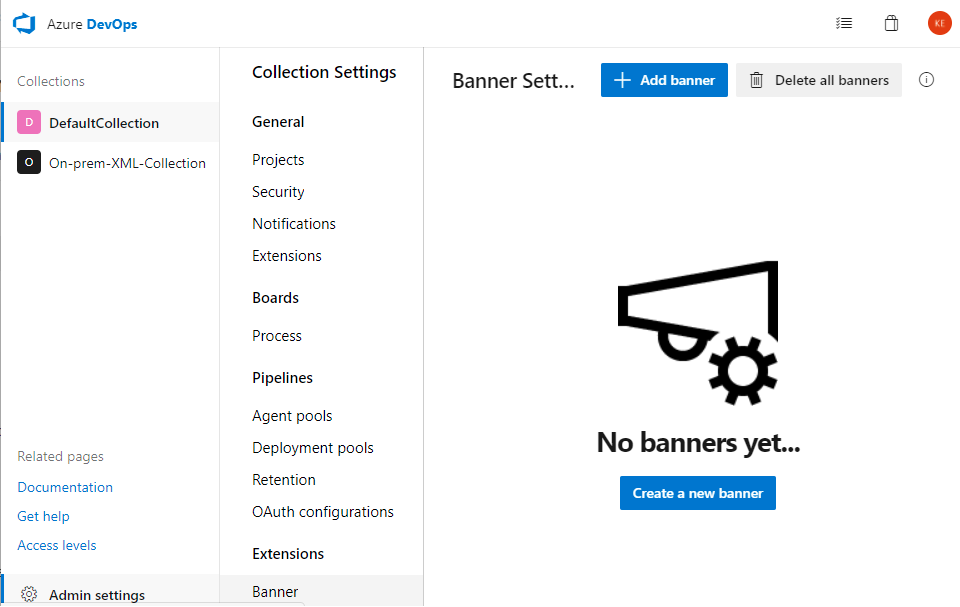
Open Admin settings
To add or delete a banner, open Admin settings, scroll down to the Extensions section, and choose Banner.
Admin settings configure resources for all projects in a project collection. For an overview of all collection settings, see Project collection administrator role and managing collections of projects.
Choose the
Azure DevOps logo to open Collections, and then choose Admin settings.
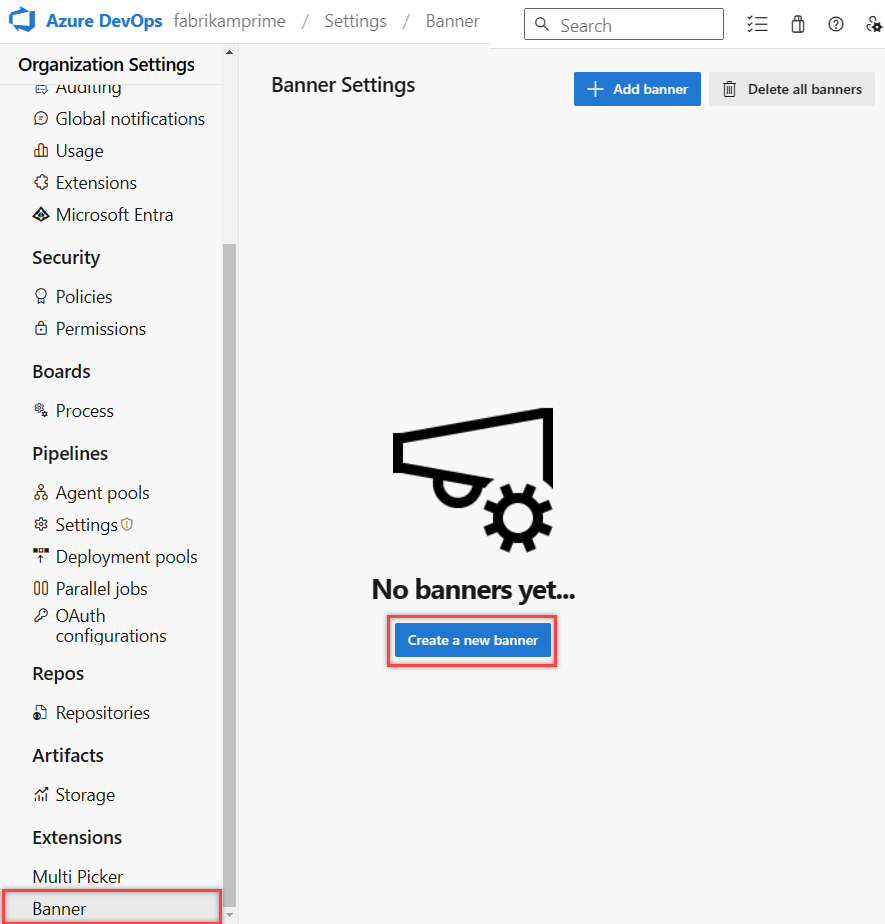
Add and manage banners
If no banners are defined, select Create a new banner. Otherwise, select Edit more for the banner and go to step 3.
Enter the banner text into the text box. Select Edit more to change the message level and set the expiration date.
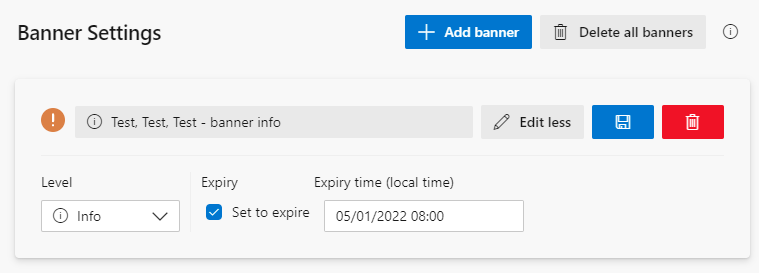
 Save your changes.
(Optional) Delete all banners or select the trash can icon to delete a specific banner.