How to use Geo-replication (Public Preview)
This tutorial shows you how to use the Geo-replication with your Event Hubs Dedicated namespace. To learn more about this feature, read the Geo-replication article. In this article you learn how to:
- Enable Geo-replication on a new namespace.
- Enable Geo-replication on an existing namespace.
- Perform a planned promotion or failover.
- Remove the secondary from your namespace.
Prerequisites
To use the Geo-replication feature, you need to have at least one Dedicated Event Hubs cluster in two regions where the Geo-replication feature is available.
Enable Geo-replication on a new namespace
You can enable Geo-replication during namespace creation and after namespace creation. To enable Geo-replication on a namespace during namespace creation:
Navigate to the Event Hubs Cluster page for your Event Hubs cluster.
On the left menu, expand Entities, and select Cluster Namespaces.
To create an Event Hubs namespace in an Event Hubs cluster in a region with Geo-replication enabled, on the Cluster Namespaces page, on the toolbar, select + Namespace. Provide a name for the namespace, and select Enable Geo-replication.
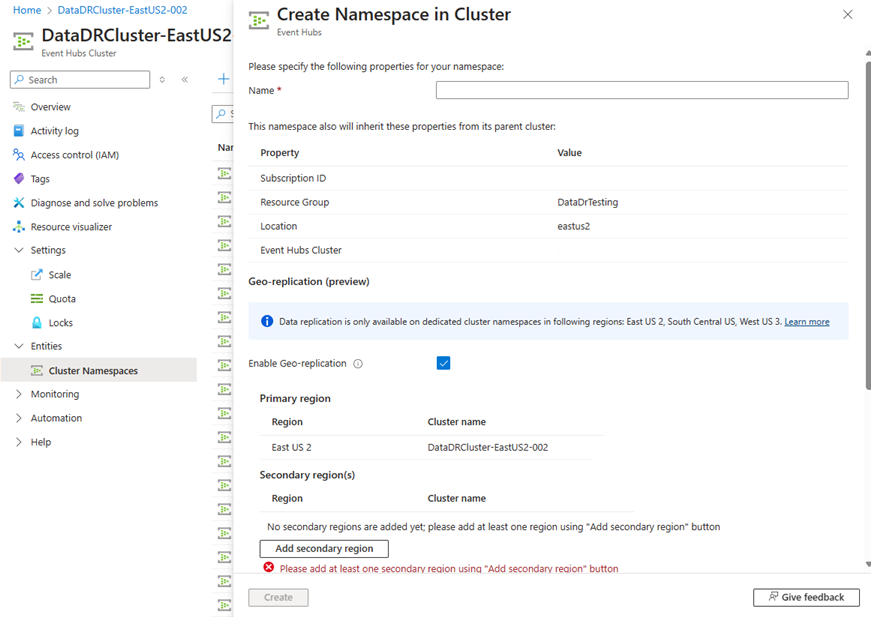
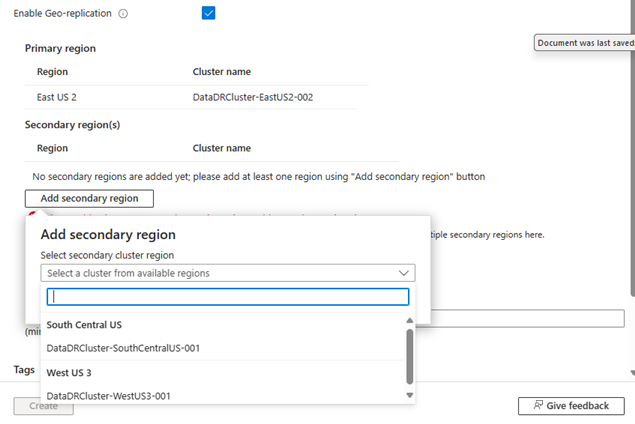
Select Add secondary region, and select a secondary region and a corresponding Event Hubs dedicated cluster running in that region.
Select asynchronous or synchronous replication mode as the replication consistency mode. If you select asynchronous consistency, enter the allowable amount of time the secondary region can lag behind the primary region in minutes.

Then, select Create to create the Geo-replicated Event Hubs namespace. The deployment takes a couple of minutes to complete.
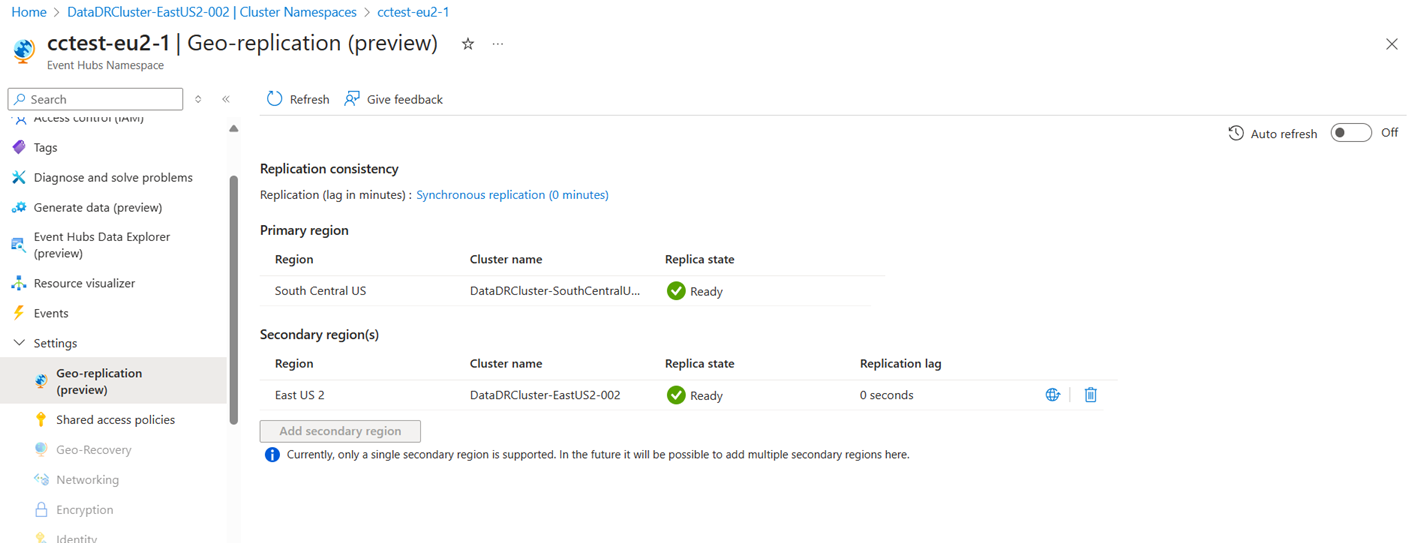
Once the namespace is created, you can navigate to it and select Geo-replication on the left menu to see your Geo-replication configuration.
Enable Geo-replication on an existing namespace
Navigate to your Event Hubs namespace in the Azure portal, and select Geo-replication on the left menu.
Select Add secondary region, and select a secondary region and the corresponding Event Hubs Dedicated clusters running in that region.
Select asynchronous or synchronous replication mode as the replication consistency mode. If selecting asynchronous consistency, enter the allowable amount of time the secondary region can lag behind the primary region in minutes.

After a secondary region is added, all of the data held in the primary namespace is replicated to the secondary. Complete replication can take a while depending on various factors with the main one being how much data is in your primary namespace. Users can observe replication progress by monitoring the lag to the secondary region.
Promote secondary
You can promote your configured secondary region to being the primary region. When you promote a secondary region to primary, the current primary region becomes the secondary region. A promotion can be planned or forced. Planned promotions ensure both regions are caught up before accepting new traffic. Forced promotions take effect as quickly as possible and doesn't wait for things to be caught up.
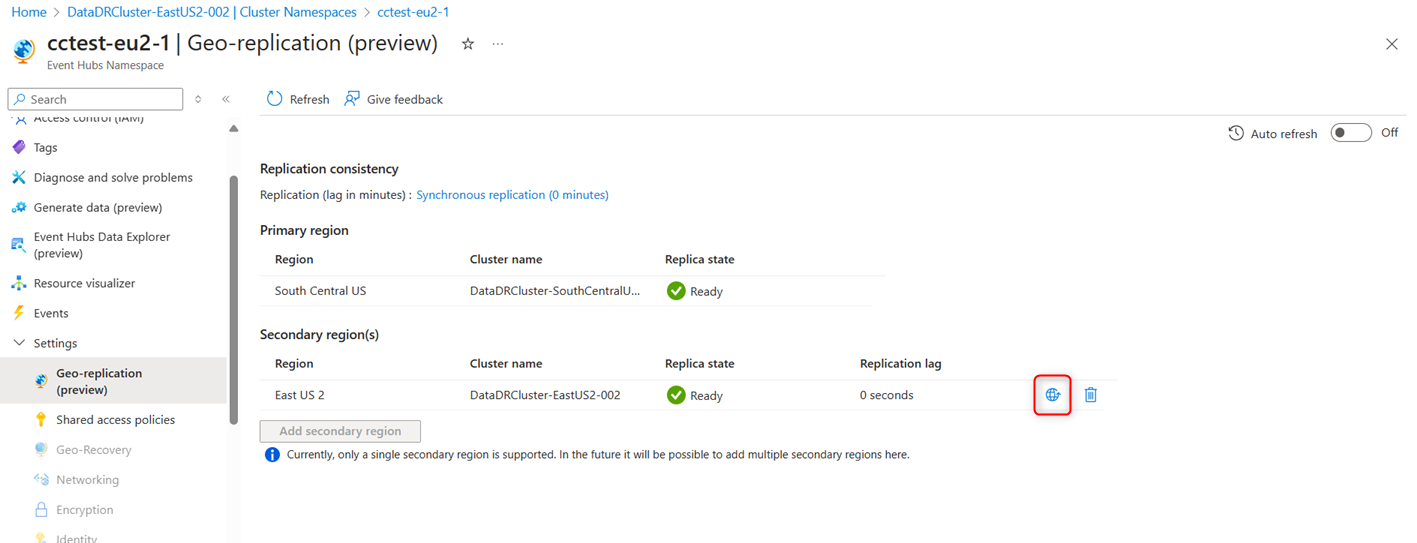
To initiate a promotion of your secondary region to primary, select failover icon.
When in the promotion flow, you can select planned or forced. You can also choose to select forced after starting a planned promotion. Enter the word promote in the prompt to be able to start the promotion.
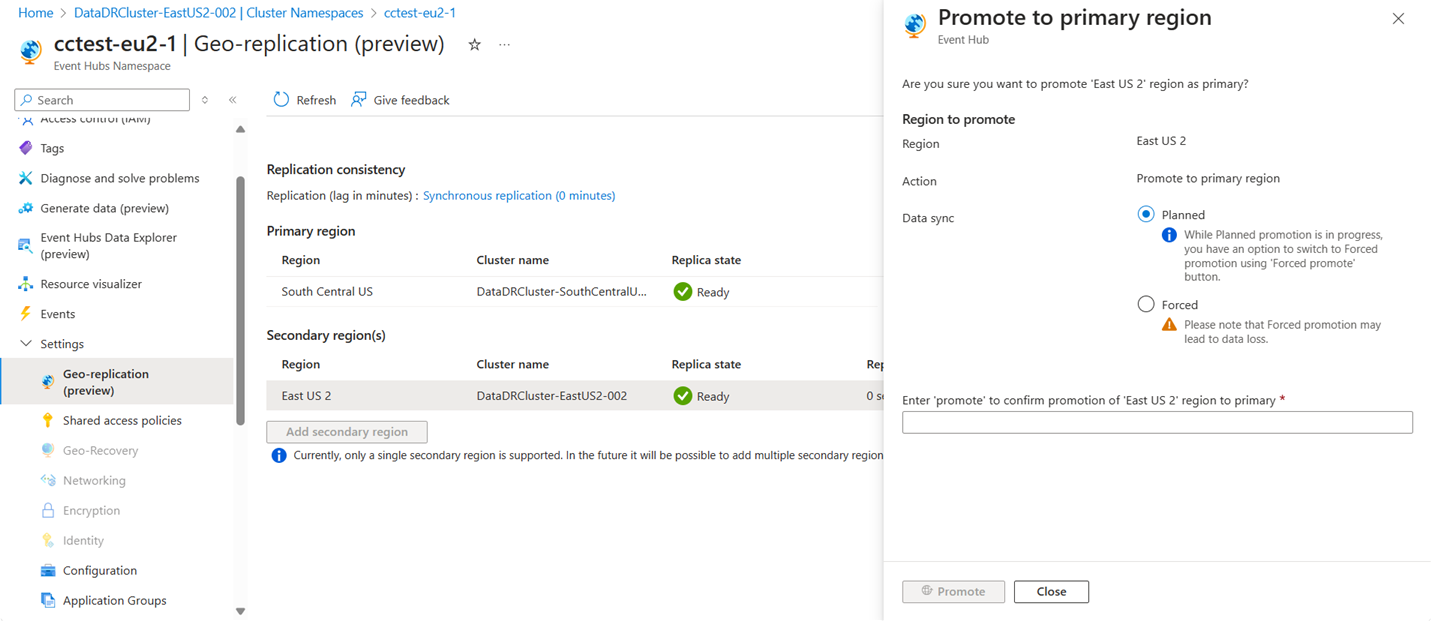
If doing a planned promotion, then once the promotion process is initiated, the new primary rejects any new events until failover is completed. The promotion process repoints the fully qualified domain name(FQDN) for your namespace to the selected region, complete data replication between the two regions and configure the new primary region to be active. Promotion doesn't require any changes to clients, and that they continue to work after the promotion event.
In the case where your primary region goes down completely, you can still perform a forced promotion.
Remove a secondary
To remove a Geo-replication pairing with a secondary, select Geo-replication on the left menu, select the secondary region, and then select Remove. At the prompt, enter the word delete, and then you can delete the secondary.
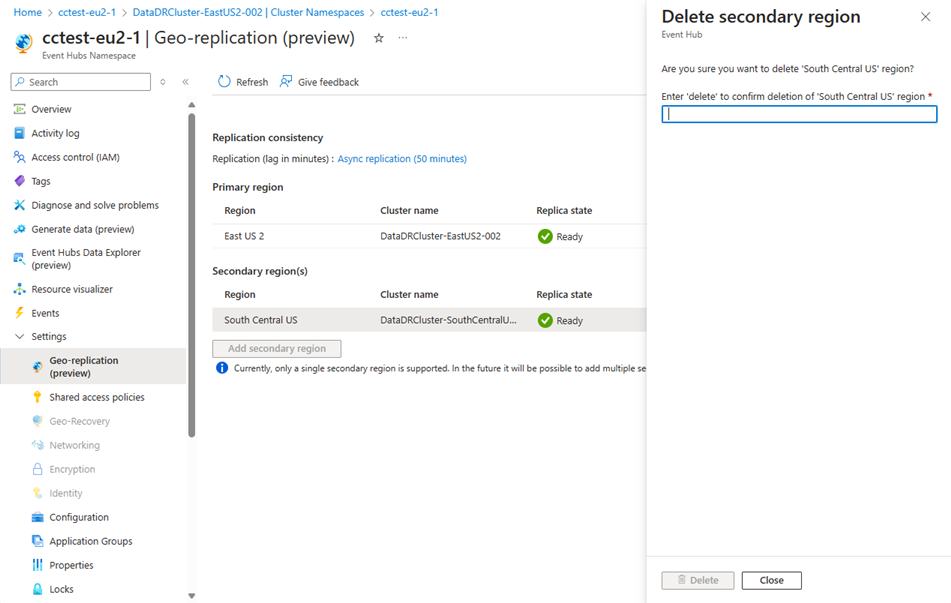
When a secondary region is removed, all of the data that it held is also removed. If you wish to re-enable Geo-replication with that region and cluster, it has to replicate the primary region data all over again.
Related content
For conceptual information about the Geo-replication feature, see Azure Event Hubs geo-replication.