Deploy the DICOM service with Blob storage by using the Azure portal
In this quickstart, you learn how to deploy the DICOM® service by using the Azure portal.
After deployment completes, you can use the Azure portal to see the details about the DICOM service, including the service URL. The service URL used to access your DICOM service is https://<workspacename-dicomservicename>.dicom.azurehealthcareapis.com. Make sure to specify the API version as part of the URL when you make requests. For more information, see API versioning for the DICOM service.
Note
The DICOM service with Azure Data Lake Storage is generally available. This capability provides greater flexibility and control over your imaging data. For more information, see Deploy the DICOM service with Azure Data Lake Storage
Prerequisites
To deploy the DICOM service, you need a workspace created in the Azure portal. For more information, see Deploy a workspace in the Azure portal.
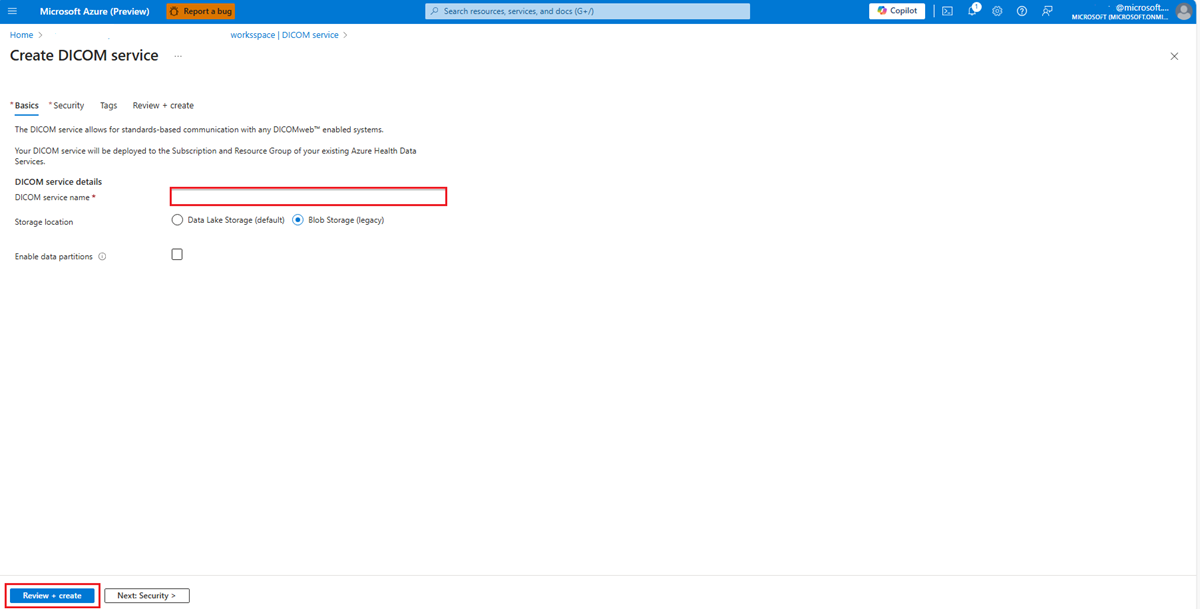
Deploy the DICOM service
- On the Resource group page of the Azure portal, select the name of your Azure Health Data Services workspace.

- Select Deploy DICOM service.

- Select Add DICOM service.

- Enter a name for the DICOM service.
Select Blob Storage (legacy) for the storage location.
(Optional) Select Enable data partitions when you deploy a new DICOM service. After data partitioning is turned on, it can't be turned off. In addition, data partitions can't be turned on for any DICOM service that is already deployed. For more information, see Enable data partitioning.
After the data partitions setting is turned on, the capability modifies the API surface of the DICOM server and makes any previous data accessible under the
Microsoft.Defaultpartition. Select Review + create.
(Optional) Select Next: Tags.
Tags are name/value pairs used for categorizing resources. For more information about tags, see Use tags to organize your Azure resources and management hierarchy.
When you notice the green validation check mark, select Create to deploy the DICOM service.
After the deployment process is finished, select Go to resource.

The result of the newly deployed DICOM service is shown here.

Next steps
Note
DICOM® is the registered trademark of the National Electrical Manufacturers Association for its Standards publications relating to digital communications of medical information.