Working with network adapter status, IP addresses, etc., using OSConfig and Azure IoT
Important
Version 1.0.3 (published 28 June 2022) includes breaking changes to member names which may impact existing users. For more information, see: Member names transition from PascalCase to camelCase in version 1.0.3
Audience and scope
This article is designed to support people who provision or manage devices with Azure IoT. If that doesn't sound like you, consider taking a look at Audiences for OSConfig documentation.
This example is about getting and setting device IP addresses, network adapter status, DNS servers, and so on.
Prerequisites
If you are using this article for reference (for example, you are here to copy a property name), there are no pre-requisites.
If you want to try the examples on live systems (recommended), then:
You will need an Azure account with an IoT Hub
This article assumes some familiarity with IoT Hub and related tools. For example, it assumes you are comfortable creating IoT Hubs and attaching devices. If you prefer a more prescriptive step-by-step introduction to installing and using OSConfig from scratch, see: Quickstart: Manage a single virtual IoT device using Azure CLI instead.
You will need at least one Linux device with the OSConfig agent installed and connected to Azure IoT.
For more information, see: How and where to install the OSConfig agent for Linux.
You will use Azure Portal or Azure CLI to interact with the devices via your IoT Hub
For further steps, choose your preferred experience:
- Ensure you are signed in to the Azure Portal and can access your IoT Hub's Overview page
About the OSConfig object model for network adapter properties
The core properties such as IP addresses, DNS servers, connection state, etc. are available under properties.reported.Networking.NetworkConfiguration.
For example, the following is taken from a sample device's OSConfig twin in Azure IoT.
{
    "properties": {
        "reported": {
            "Networking": {
                "__t": "c",
                "NetworkConfiguration": {
                    "interfaceTypes": "eth0=ethernet;lo=loopback;wlan0=wifi",
                    "macAddresses": "eth0=dc:a6:32:d3:5b:c6;lo=00:00:00:00:00:00;wlan0=dc:a6:32:d3:5b:c7",
                    "ipAddresses": "lo=127.0.0.1,::1;wlan0=192.168.1.86",
                    "subnetMasks": "lo=/8,/128;wlan0=/24",
                    "defaultGateways": "wlan0=192.168.1.1",
                    "dnsServers": "wlan0=1.1.1.3,1.0.0.3",
                    "dhcpEnabled": "eth0=false;lo=false;wlan0=true",
                    "enabled": "eth0=false;lo=unknown;wlan0=true",
                    "connected": "eth0=false;lo=true;wlan0=true"
                }
            }
        }
    }
}
Important
Version 1.0.3 (published 28 June 2022) includes breaking changes to member names which may impact existing users. For more information, see: Member names transition from PascalCase to camelCase in version 1.0.3
A. Examples for individual devices
The following demonstrate specific use cases. You can use these as starting points and adapt for your unique environment.
Example A.1. Get the IP address(es) of a specific device
There are many use cases for observing device IP addresses. Solution dashboards often include them, setup workflows (e.g., connecting an IP camera) often need them, and troubleshooting workflows may rely on them. In these scenarios it is important to get the IP address from the device's local/LAN perspective. This is often different from the source IP address you might see in cloud traffic, having passed through NATs, proxy servers, etc.
Choose your preferred experience (e.g., Portal vs. CLI) to see example instructions for integrating this task in your own dashboards, setup workflows, or troubleshooting scenarios.
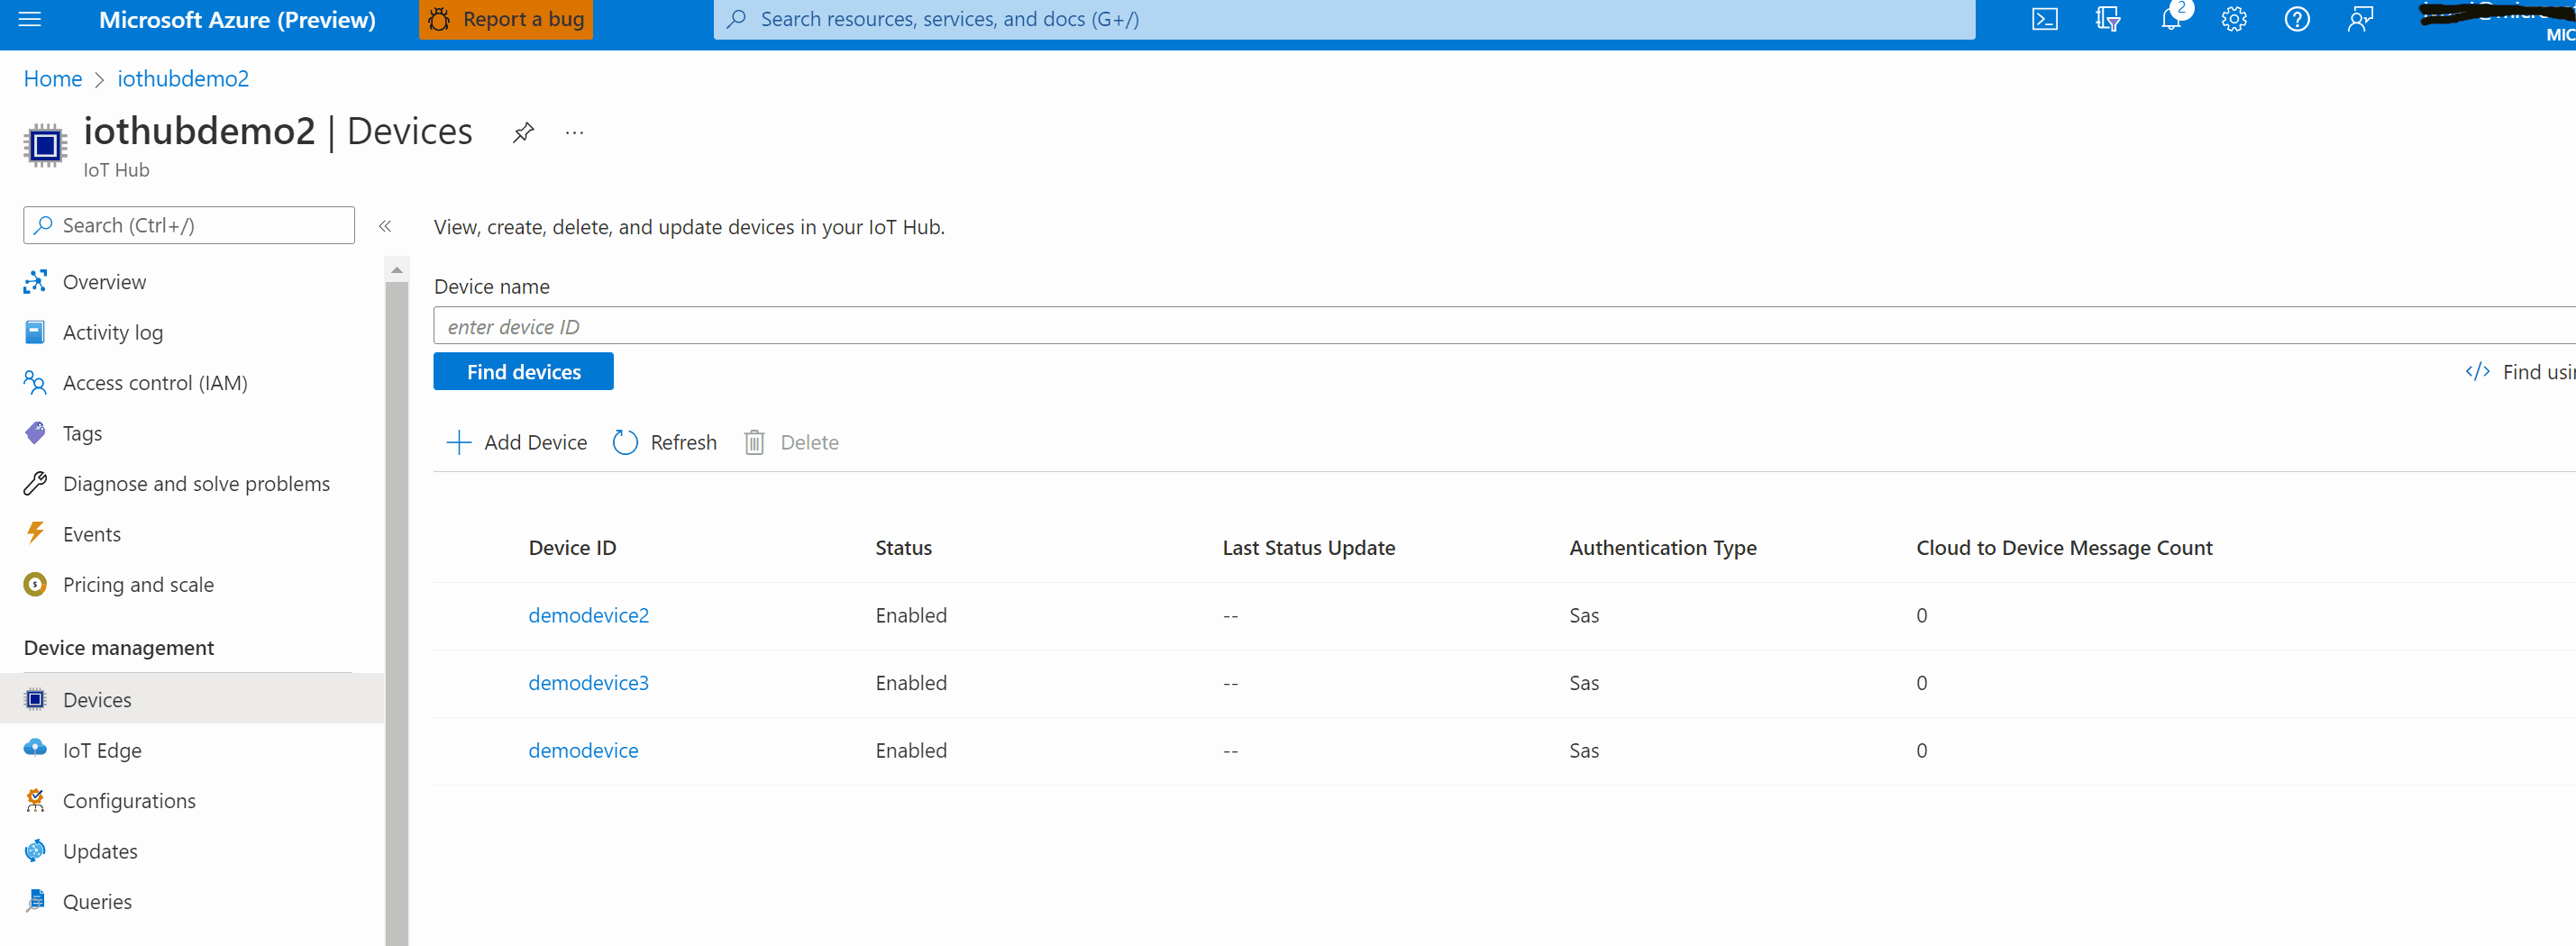
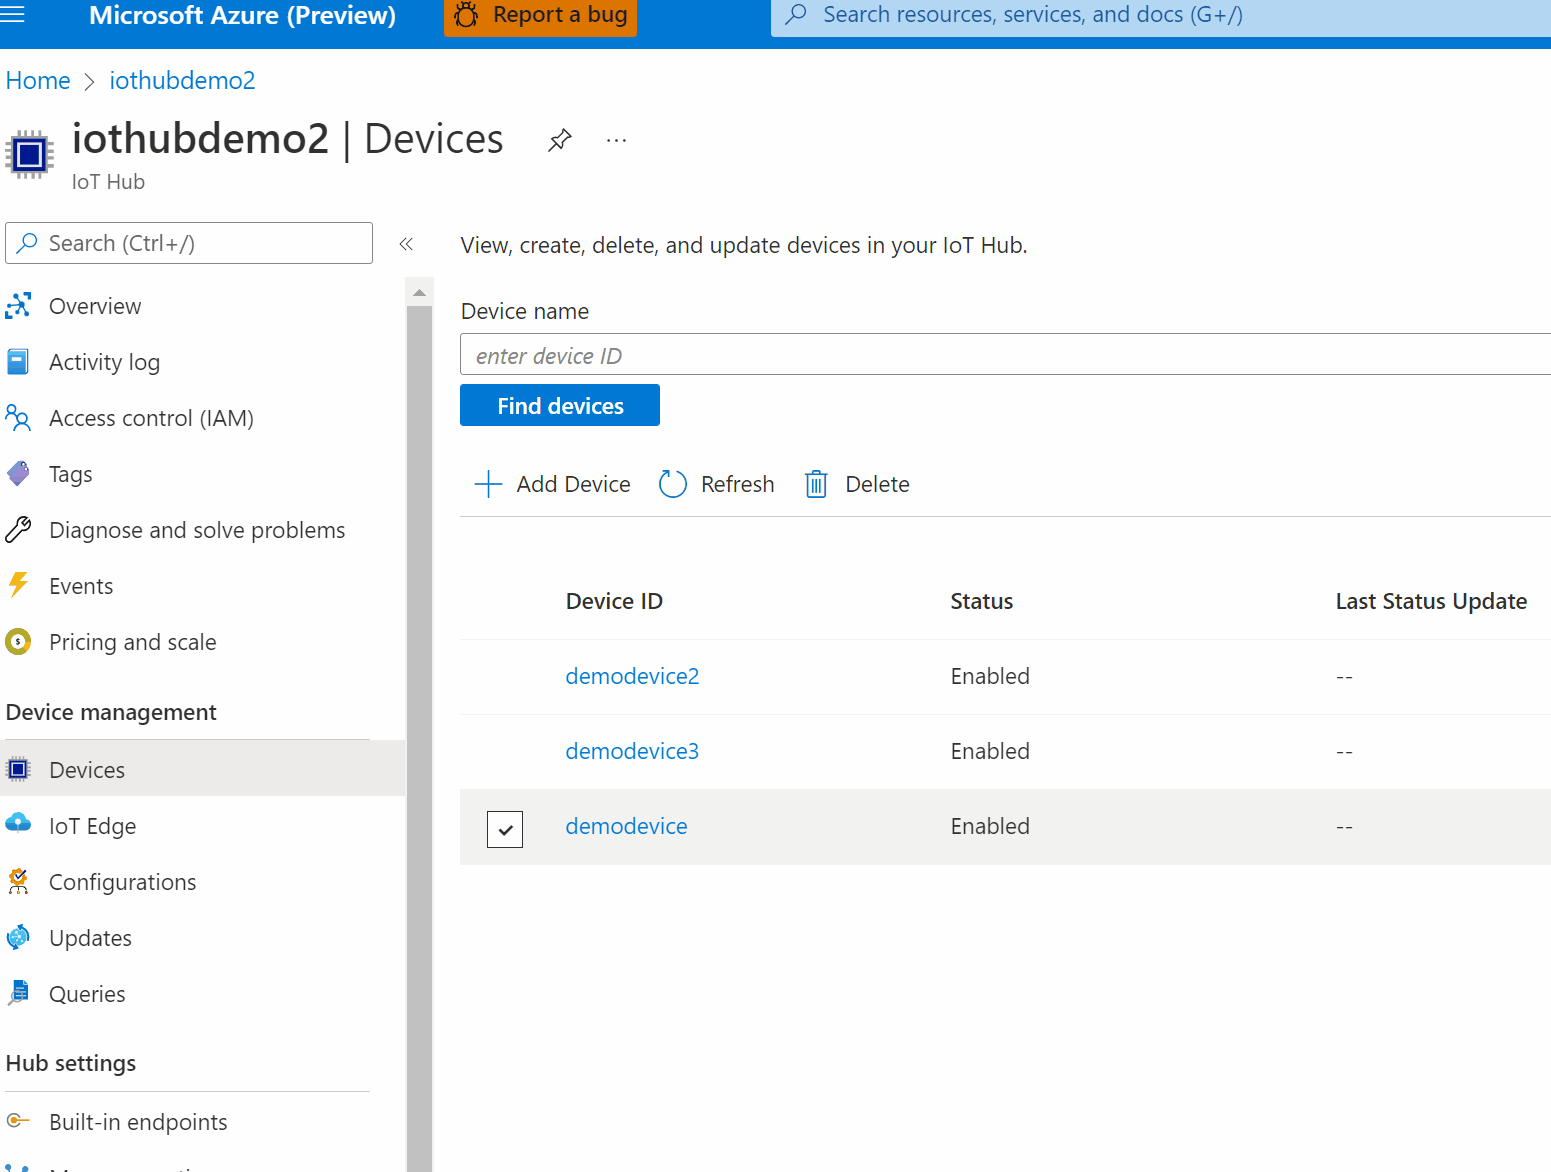
- From your IoT Hub's portal page, choose Devices in the left hand navigation. If the device has IoT Edge installed in addition to OSConfig, choose IoT Edge instead of Devices
- Click on a device where OSConfig is installed
- Under Module Identities click osconfig
- Click on Module Identity Twin and browse the JSON to properties, then reported, then Networking, then NetworkConfiguration.
- The IP addresses of each network adapter should be visible in the ipAddresses field.

Example A.2. Get other device networking properties for a specific device
As shown in About the OSConfig object model for network adapter properties, there are more properties available beyond IP addresses. To get these, you can replace ipAddresses in the previous example with one or more additional properties, such as dnsServers, connected or interfaceTypes. Alternatively, you can retrieve them all as shown in the following.
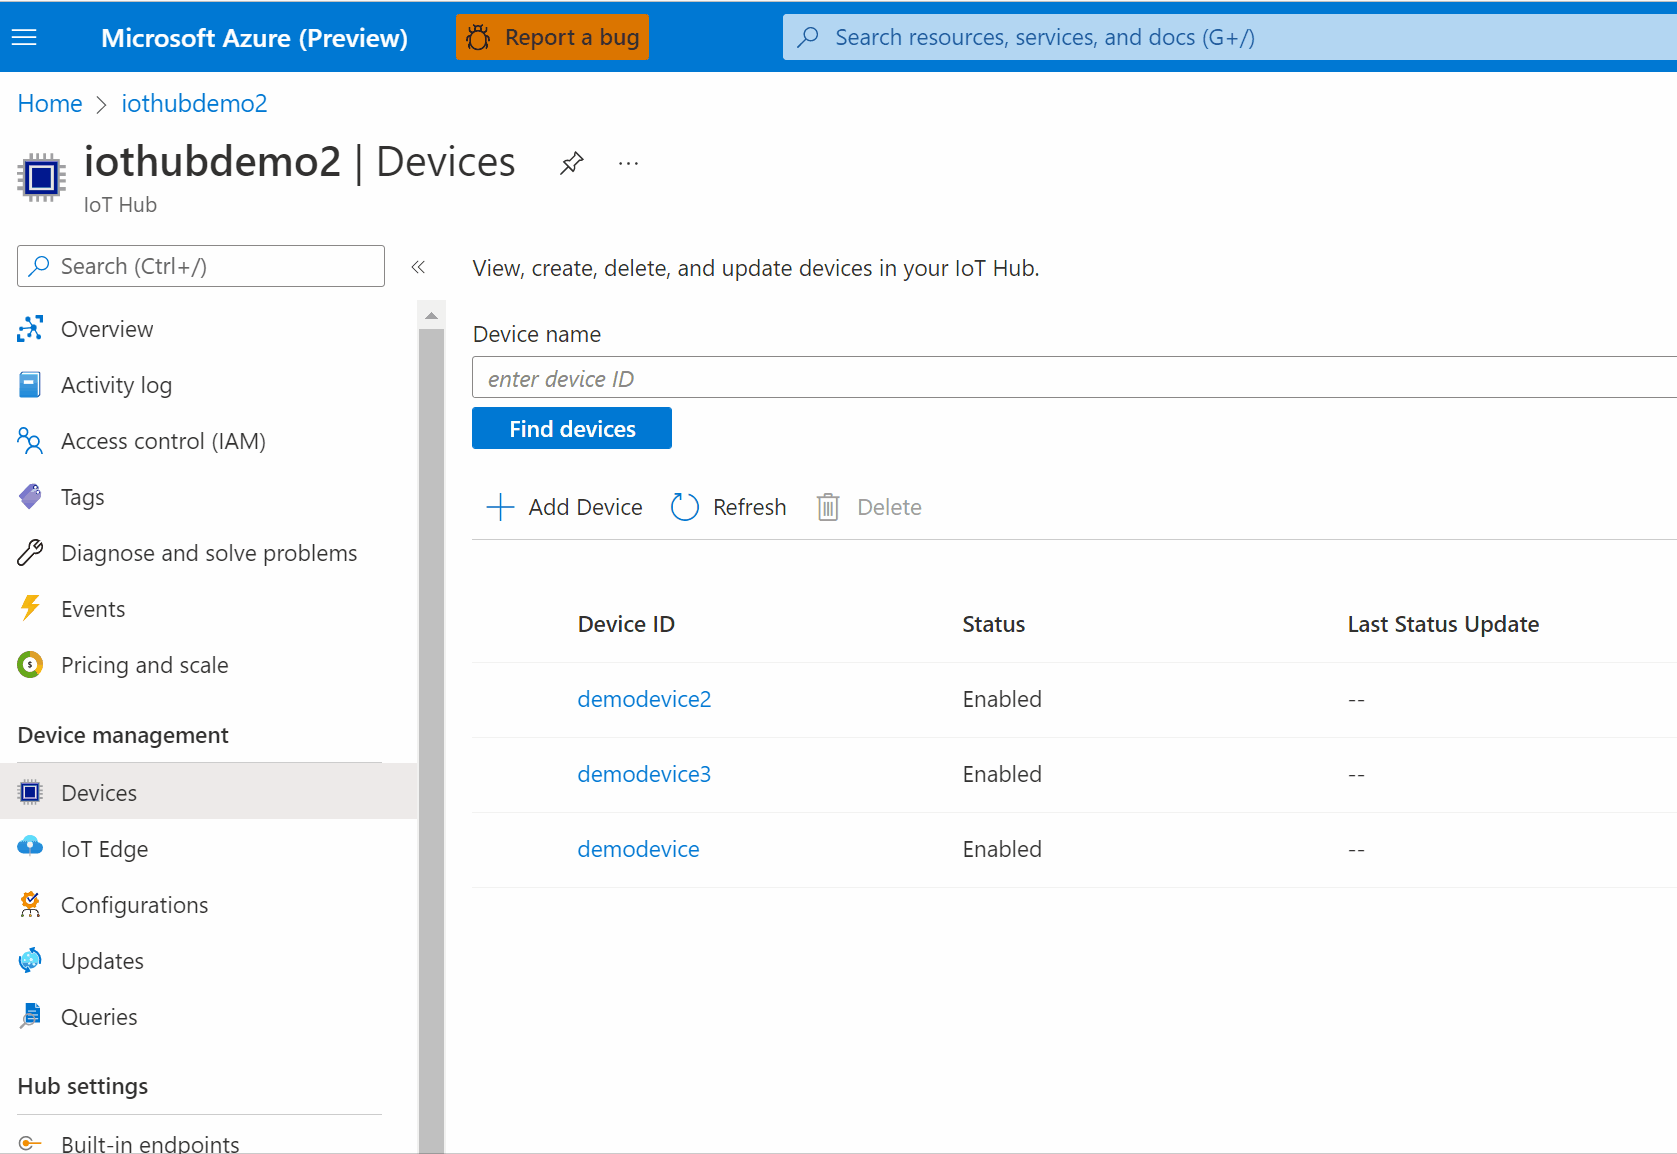
- From your IoT Hub's portal page, choose Devices in the left hand navigation. If the device has IoT Edge installed, choose IoT Edge instead of Devices
- Click on a device where OSConfig is installed
- Under Module Identities click osconfig
- Click on Module Identity Twin and browse the JSON to properties, then reported, then Networking, then NetworkConfiguration.
Example A.3. Add static IP address to network adapter for a specific device
This is most often done as part of a device deployment process. For example devices may use, temporarily, a well-known static IP address during setup (for discovering IP cameras, sensors, etc.)
At this time, the Networking.NetworkConfiguration properties are read-only, but you can use OSConfig's CommandRunner feature to apply custom configuration, including network configuration. The following example uses the ip command line tool to add a static IP address to the device's eth0 interface. Note that in many Linux environments, including Ubuntu, this method is used for a temporary static IP which will be cleared upon reboot.
- You can add or update the IP address by editing the OSConfig module twin for the specific device from the Azure Portal.
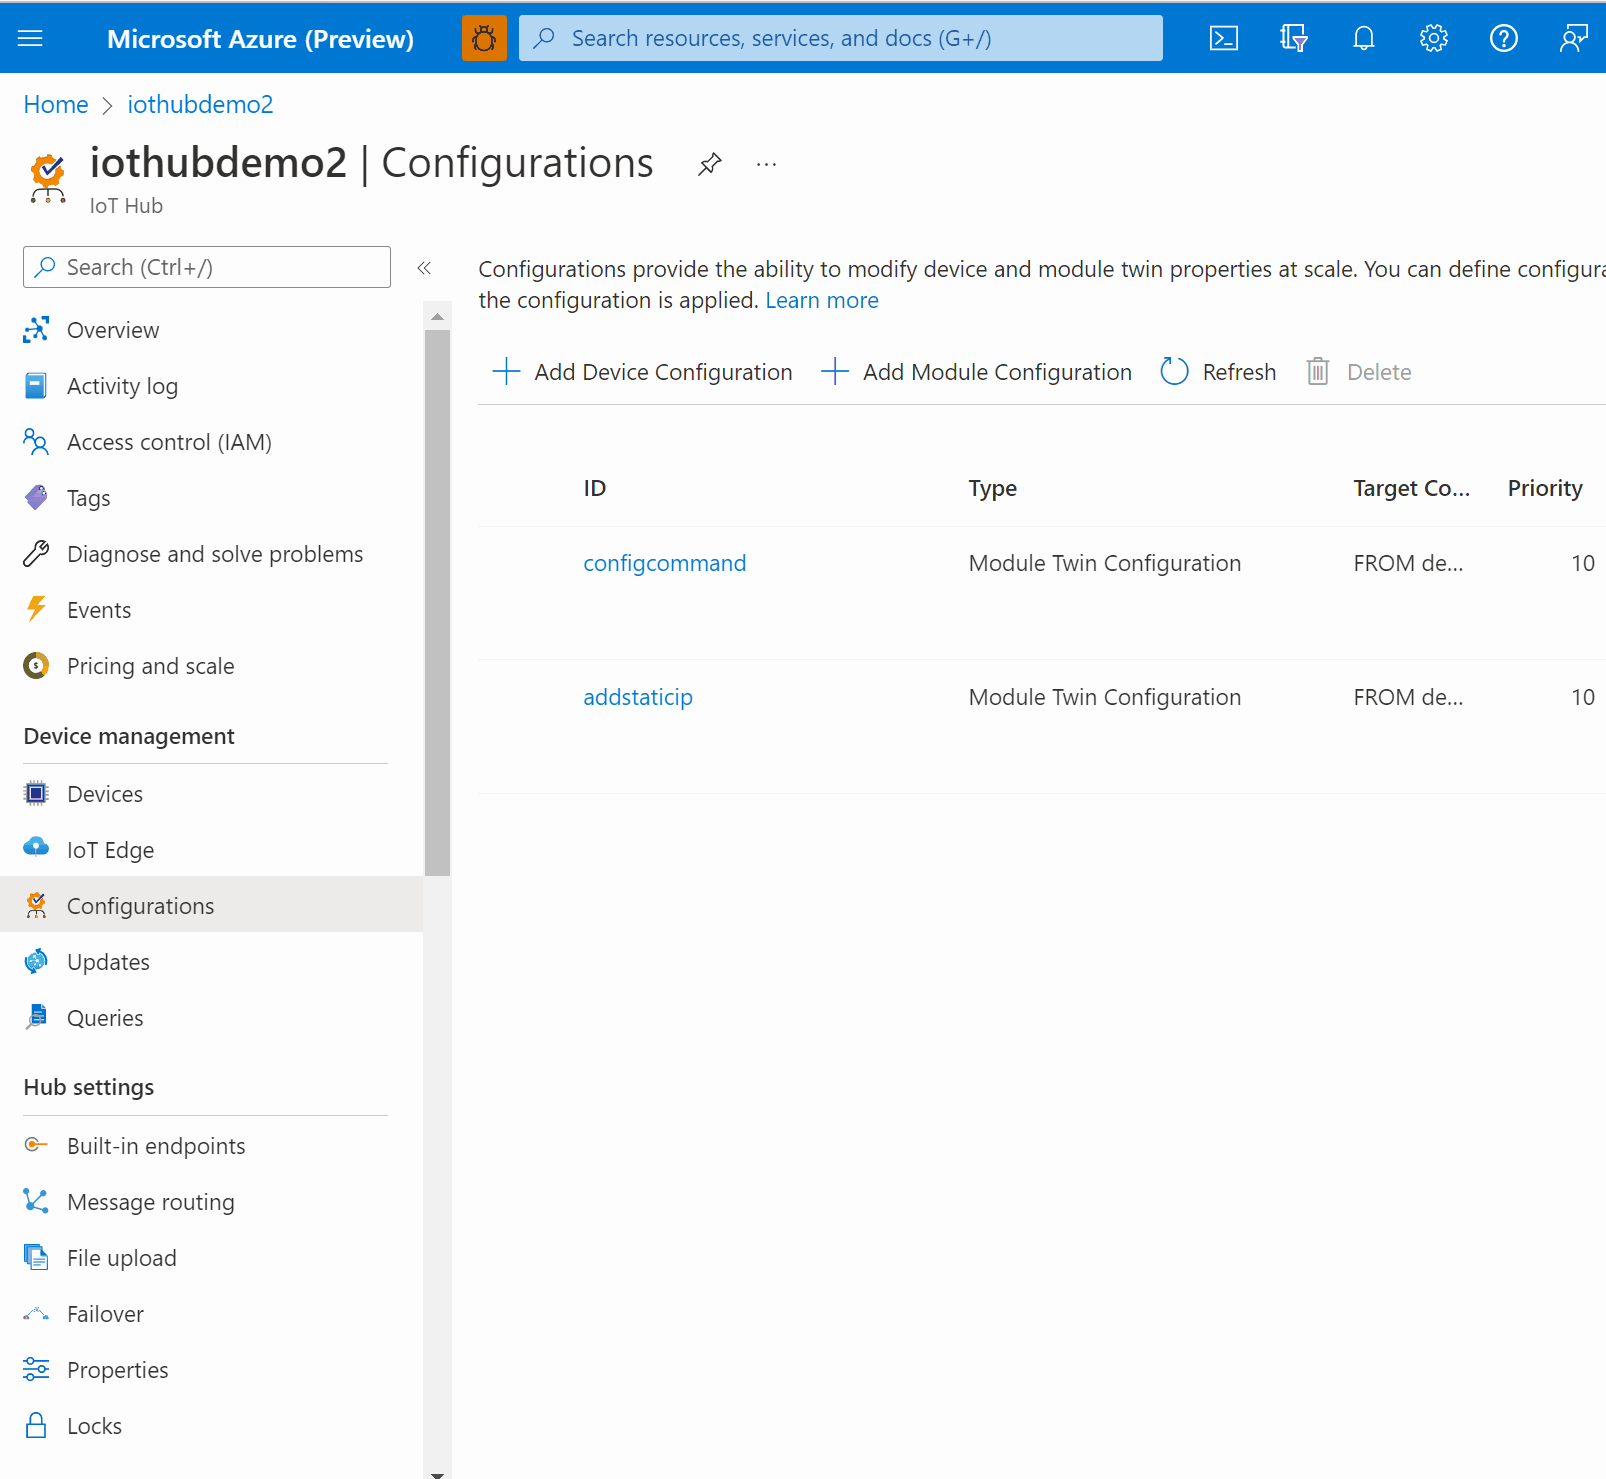
B. At-scale examples for fleets of devices
Example B.1. At scale, inventory or audit the IP addresses of many devices
Solution portals, security audits, and other inventory-oriented workflows often rely on having IP address information for all devices. Choose from the following tools to see example steps of how to perform this task.
- From your IoT Hub's portal page, choose Device management --> Queries in the left hand navigation.
- Execute this query:
SELECT deviceId,properties.reported.Networking.NetworkConfiguration.ipAddresses FROM devices.modules WHERE moduleId='osconfig'"

Example B.2. At scale, inventory or audit which devices are using expected network infrastructure
Auditing for DNS servers (or other network infrastructure properties) can be a quick way to monitor that devices are only connected to approved production infrastructure, not left connected to test networks, and not operating from some unexpected coffee shop.
This example uses the GROUP BY operator in IoT Hub queries to organize devices by which infrastructure they are using.
- From your IoT Hub's portal page, choose Device management --> Queries in the left hand navigation.
- Execute the following query, and evaluate the results as per your expectations for your unique environment:
SELECT properties.reported.Networking.NetworkConfiguration.dnsServers, COUNT() as numberOfDevices
FROM devices.modules
WHERE moduleId='osconfig'
GROUP BY properties.reported.Networking.NetworkConfiguration.dnsServers
Example B.3. At scale, automatically add a temporary static IP to new devices during deployment
Adding a temporary static IP is most often done as part of a device deployment process. For example devices may use, temporarily, a well-known static IP address during setup (for discovering IP cameras, sensors, etc.).
We will create an IoT Hub Configuration profile (aka Automatic Device Management [ADM]) which will cause each device to add, one time, a temporary static IP. This assumes a deployment scenario where each device is in a different physical location or vlan, so there is no need to coordinate timing, avoiding devices doing this at the same time.
Iot Hub Configurations can target a fleet of devices based on their properties, define a desired configuration which in turn updates the devices that are defined in the scope.
For more information, see: Create a configuration
Create the IoT Hub Configuration profile
Next steps
For more information about setting up the OSConfig agent, see: How and where to install the OSConfig agent for Linux.
For broader information about OSConfig, see: What is OSConfig for IoT?