Verify resource reachability with Virtual Network Verifier - Azure portal
In this article, you learn how to use Virtual Network Verifier in the Azure portal to verify the reachability of a storage account from a VM based on your applied network policies. As part of the process, you create a verifier workspace, create a reachability analysis intent, run a reachability analysis, and view the reachability analysis results. This article also demonstrates how you can delegate verifier workspaces to other users in your organization so they gain the ability to use a permitted verifier workspace.
Important
Virtual Network Verifier in Azure Virtual Network Manager is currently in public preview:
- australiaeast
- centralus
- eastus
- eastus2
- eastus2euap
- northeurope
- southcentralus
- uksouth
- westeurope
- westus
- westus2
This public preview version is provided without a service level agreement, and it's not recommended for production workloads. Certain features might not be supported or might have constrained capabilities. For more information, see Supplemental Terms of Use for Microsoft Azure Previews.
Important
Azure Virtual Network Manager is generally available for hub-and-spoke connectivity configurations and security configurations with security admin rules. Mesh connectivity configurations remain in preview.
This preview version is provided without a service-level agreement, and we don't recommend it for production workloads. Certain features might not be supported or might have constrained capabilities. For more information, see Supplemental Terms of Use for Microsoft Azure Previews.
Prerequisites
- An Azure subscription. If you don't have an Azure subscription, create a free account before you begin.
- An existing network manager instance. If you don't have a network manager instance, create one by following the instructions in Create a virtual network manager.
- A verifier workspace is a child resource of a network manager, so it must be created from a network manager instance. Once a verifier workspace exists, it can be accessed directly from the Azure portal by searching Verifier workspaces.
- Resources to verify reachability between. In this example, two virtual machines are used.
Create a Virtual Network Verifier
In this step, you create a verifier workspace in your network manager to set up the reachability analysis intent needed to verify whether your virtual machine can reach your other virtual machine.
- In the Azure portal, type Network managers into the search box on the task bar and select the desired network manager instance.
- Within the network manager instance, navigate to the Verifier workspace pane to create a new verifier workspace.
- Select Create to create a new verifier workspace.
- On the Create a virtual network manager verifier workspace page, provide a name and optional description for your verifier workspace.
Create a reachability analysis intent
In this step, you create a reachability analysis intent in your verifier workspace. This analysis intent describes the traffic path being checked for reachability.
Within the verifier workspace you created, select Define an analysis intent directly, or navigate to Reachability analysis intents under Settings and select + Create.
Enter or select the following information, then select Create to create the reachability analysis intent.
Setting Value Name Enter a name for the reachability analysis intent. Protocol Select the protocol of the traffic you want to verify. Source type Select the source type of either Public internet, Virtual machines, or Subnet. Select Virtual machines for this example. Source If a virtual machine is selected as the source type, use the selection picker to select an instance from the parent network manager's scope. Source IP address Enter an IPv4 or IPv6 address or a range using CIDR notation of the source you want to verify. Source port Enter a port or a range of the source you want to verify. To specify any port, enter *. Destination type Select the destination type of either Public internet, Cosmos DB, Storage Account, SQL Server, Virtual machines, or Subnet. Select Virtual machines for this example. Destination If a Cosmos DB, storage account, SQL server, or virtual machine is selected as the destination type, use the selection picker to select an instance from the parent network manager's scope. Destination IP address Enter an IPv4 or IPv6 address or a range using CIDR notation of the destination you want to verify. Destination port Enter a port or a range of the destination you want to verify. To specify any port, enter *. 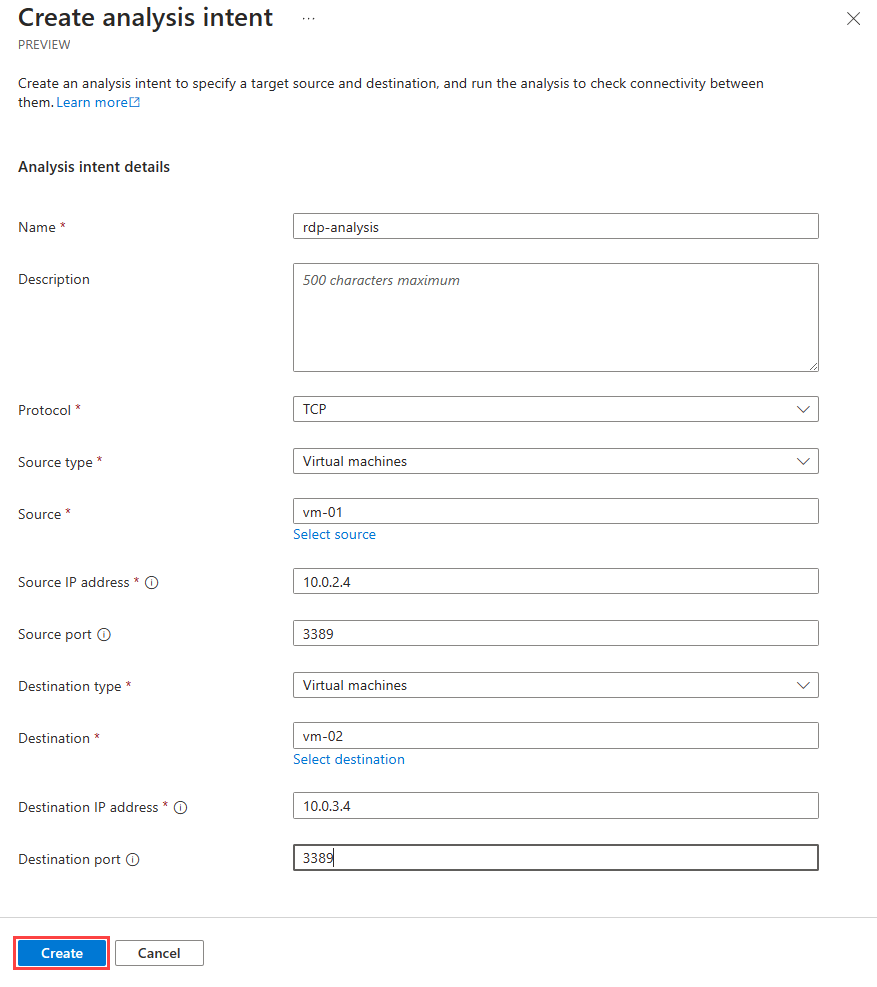
Repeat the process to create more reachability analysis intents in the verifier workspace.
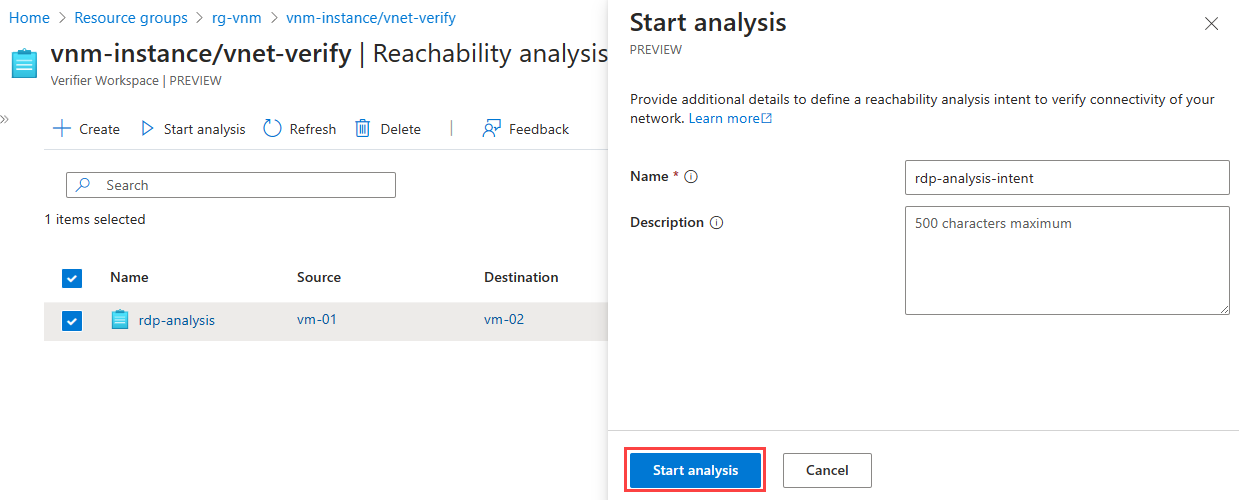
Start an analysis
After setting up a reachability analysis intent, you can initiate an analysis. This analysis checks if a path exists between the source and destination specified in the intent, considering the network policies and resources that are currently in place. This analysis evaluates policies and resources within the scope of the verifier workspace's parent network manager.
Under Reachability analysis intents, select the checkbox next to the reachability analysis intent you want to analyze and select Start analysis.
In the Start analysis pane, enter a name and optional description for the analysis, and then select the Start analysis button.
Note
The analysis run may take a few minutes to complete. You can monitor the progress of the analysis in the Azure Portal.
View reachability analysis results
In this step, you view the results of the analysis you started in the previous step.
In the verifier workspace, select Reachability analysis intents under Settings and select the corresponding View results for your reachability analysis intent. Alternatively, navigate to Reachability analysis results and select the name of the result you want to view.
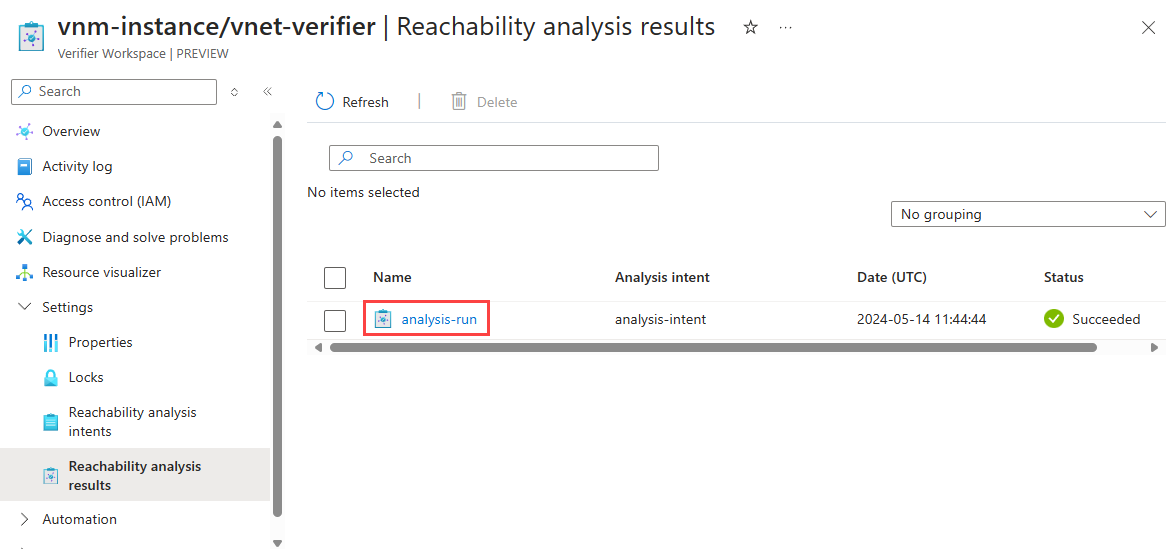
In the View analysis results pane, you can view the results of the analysis, including the status of the analysis, the path taken by the traffic, the resources traversed, and the result outcome.

On the Reachability analysis results tab in the View analysis results pane, you see the results in a visual format. The visualization shows the path taken by the traffic and the resources traversed.
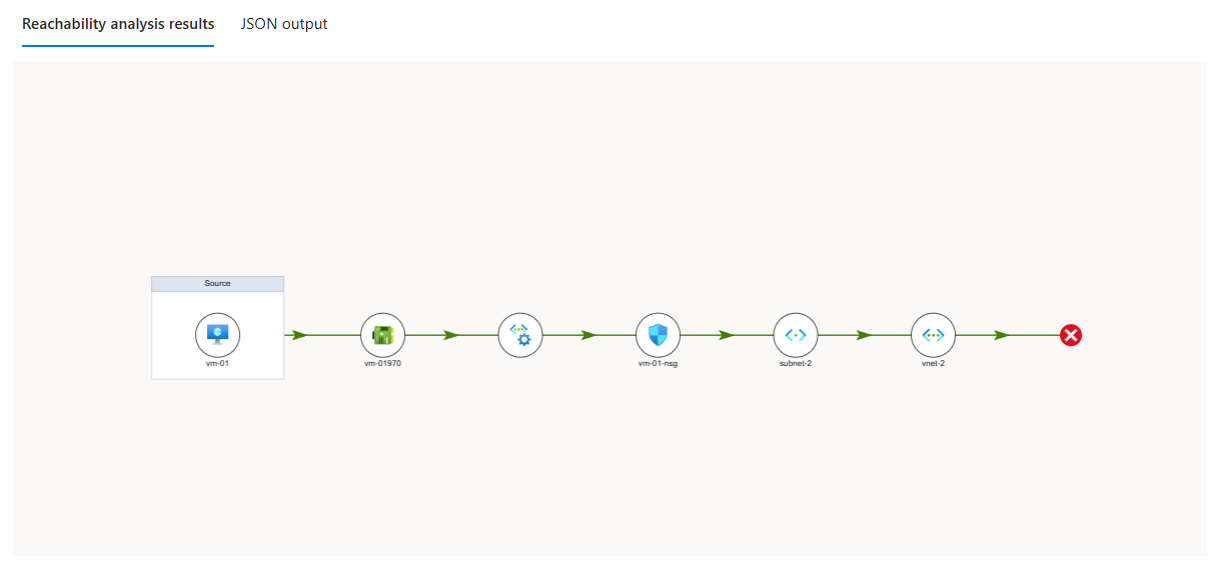
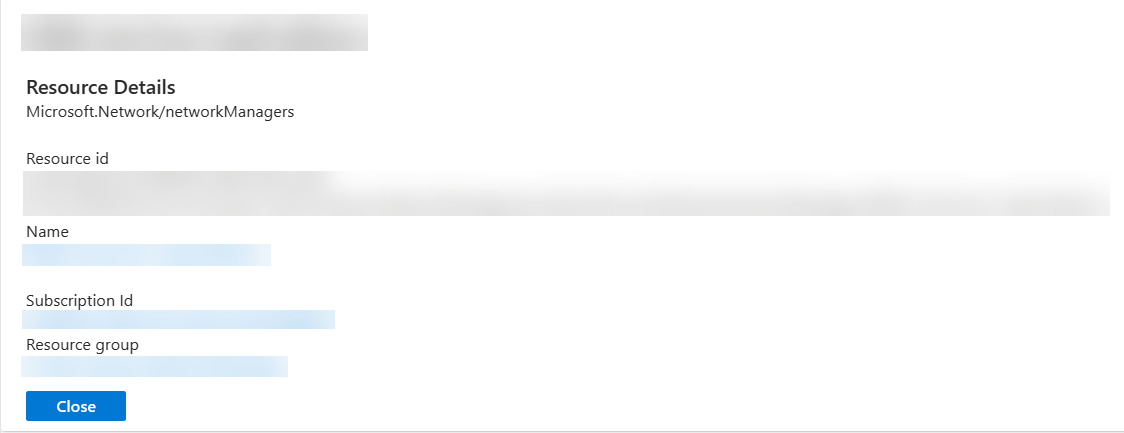
Select one of the resources in the visualization to view the resource details. You can also select any of the lengths in the visualization to view details of that step.
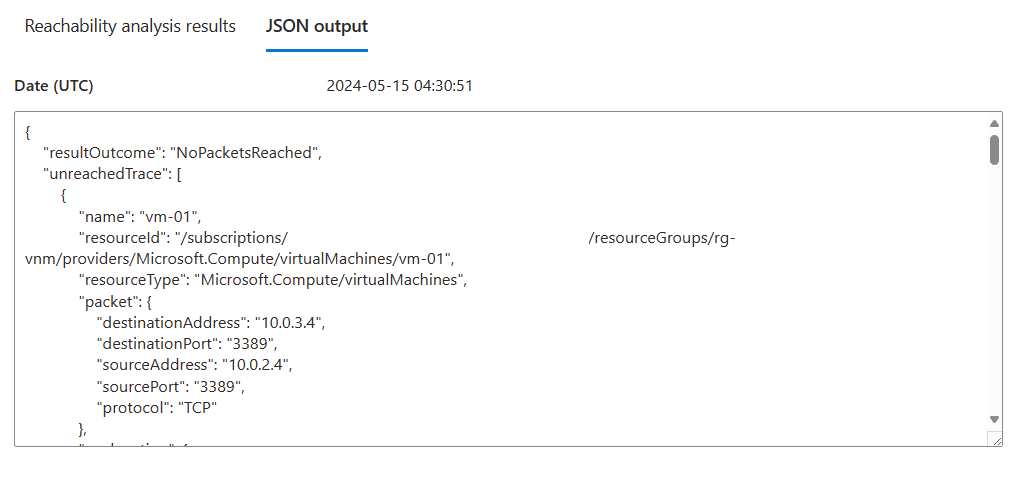
Select the JSON output tab to view the full JSON output of the analysis result. The beginning of the JSON object details the outcome of the result, which indicates whether all packets reached, some packets reached, or no packets reached. Explanations are provided for each outcome and each reachability step.
Select Close to close the analysis results.
Delegate a verifier workspace to other users
Optionally, you can delegate a verifier workspace to other users. This allows other users to use a network verifier's capability by granting them access to the verifier workspace, reachability analysis intents, analysis ability, and reachability analysis results. Each verifier workspace in a network manager has its own permissions, so granting a user access to one verifier workspace doesn't result in access to all verifier workspaces under the same network manager. Granting a user permission to a verifier workspace also doesn't result in any access to the rest of the parent network manager.
- In the verifier workspace, select Access control (IAM).
- Select + Add and Add role assignment.
- Within Add role assignment and the Role tab, select the Privileged administrator roles tab and select the Contributor role.
- Select the Members tab and add the users you want to have access to the verifier workspace to by clicking + Select members.
- Select Review + assign.
Next steps
Feedback
Coming soon: Throughout 2024 we will be phasing out GitHub Issues as the feedback mechanism for content and replacing it with a new feedback system. For more information see: https://aka.ms/ContentUserFeedback.
Submit and view feedback for