Collect support logs in Microsoft Defender for Endpoint using live response
Applies to:
Want to experience Defender for Endpoint? Sign up for a free trial.
When contacting support, you might be asked to provide the output package of the Microsoft Defender for Endpoint Client Analyzer tool.
This article provides instructions on how to run the tool via Live Response on Windows and on Linux machines.
Windows
Download and fetch the required scripts available from within the Tools subdirectory of the Microsoft Defender for Endpoint Client Analyzer.
For example, to get the basic sensor and device health logs, fetch
..\Tools\MDELiveAnalyzer.ps1.If you also require Microsoft Defender Antivirus support logs (
MpSupportFiles.cab), then fetch..\Tools\MDELiveAnalyzerAV.ps1.Initiate a Live Response session on the machine you need to investigate.
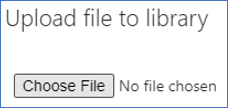
Select Upload file to library.

Select Choose file.
Select the downloaded file named
MDELiveAnalyzer.ps1, and then select on Confirm.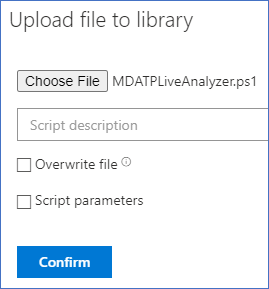
While still in the LiveResponse session, use the following commands to run the analyzer and collect the resulting file.
Run MDELiveAnalyzer.ps1
GetFile "C:\ProgramData\Microsoft\Windows Defender Advanced Threat Protection\Downloads\MDEClientAnalyzerResult.zip"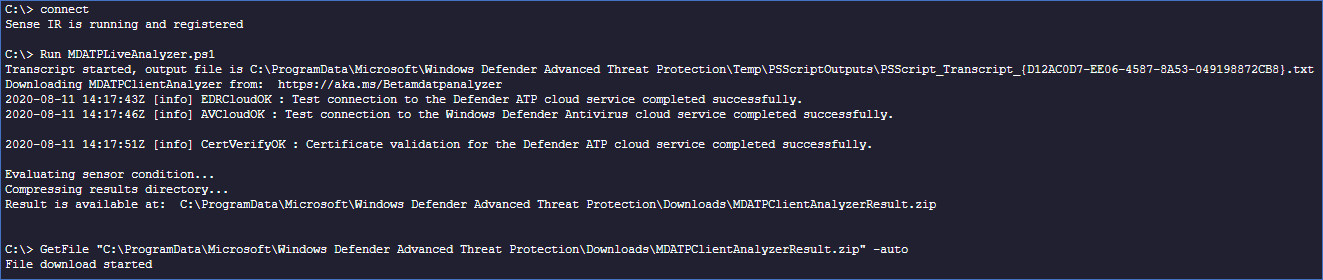


Additional information
The latest preview version of MDEClientAnalyzer can be downloaded here: https://aka.ms/Betamdeanalyzer.
If you can't allow the machine to reach the above URL, then upload
MDEClientAnalyzerPreview.zipfile to the library before running the LiveAnalyzer script:PutFile MDEClientAnalyzerPreview.zip -overwrite Run MDELiveAnalyzer.ps1 GetFile "C:\ProgramData\Microsoft\Windows Defender Advanced Threat Protection\Downloads\MDEClientAnalyzerResult.zip"For more information on gathering data locally on a machine in case the machine isn't communicating with Microsoft Defender for Endpoint cloud services, or doesn't appear in Microsoft Defender for Endpoint portal as expected, see Verify client connectivity to Microsoft Defender for Endpoint service URLs.
As described in Live response command examples, you might want to use the
&symbol at the end of the command to collect logs as a background action:Run MDELiveAnalyzer.ps1&
Linux
The XMDE Client Analyzer tool can be downloaded as a binary or Python package that can be extracted and executed on Linux machines. Both versions of the XMDE Client Analyzer can be executed during a Live Response session.
Prerequisites
For installation the
unzippackage is required.For execution the
aclpackage is required.
Important
Window uses the Carriage Return and Line Feed invisible characters to represent the end of one line and beginning of a new line in a file, but Linux systems uses only the Line Feed invisible character at the end of its file lines. When using the following scripts, if done on Windows, this difference can result in errors and failures of the scripts to run. A potential solution to this is to utilize the Windows Subsystem for Linux and the dos2unix package to reformat the script so it aligns with the Unix and Linux format standard.
Installing the XMDE Client Analyzer
Both versions of XMDE Client Analyzer, binary and Python, a self-contained package that must be downloaded and extracted before executing, and the complete set of steps for this process can be found:
Due to the limited commands available in Live Response the steps detailed must be executed in a bash script, and by splitting the installation and execution portion of these commands it's possible to run the install script once, while running the execution script multiple times.
Important
The example scripts assume the machine has direct internet access and can retrieve the XMDE Client Analyzer from Microsoft. If the machine does not have direct internet access then the installation scripts will need to be updated to fetch the XMDE Client Analyzer from a location the machines can access successfully.
Binary Client Analyzer Install Script
The following script performs the first six steps of the Running the Binary version of the Client Analyzer. When complete, the XMDE Client Analyzer binary is available from the /tmp/XMDEClientAnalyzerBinary/ClientAnalyzer directory.
Create a bash file
InstallXMDEClientAnalyzer.shand paste the following content into it.#! /usr/bin/bash echo "Starting Client Analyzer Script. Running As:" whoami echo "Getting XMDEClientAnalyzerBinary" wget --quiet -O /tmp/XMDEClientAnalyzerBinary.zip https://aka.ms/XMDEClientAnalyzerBinary echo '9D0552DBBD1693D2E2ED55F36147019CFECFDC009E76BAC4186CF03CD691B469 /tmp/XMDEClientAnalyzerBinary.zip' | sha256sum -c echo "Unzipping XMDEClientAnalyzerBinary.zip" unzip -q /tmp/XMDEClientAnalyzerBinary.zip -d /tmp/XMDEClientAnalyzerBinary echo "Unzipping SupportToolLinuxBinary.zip" unzip -q /tmp/XMDEClientAnalyzerBinary/SupportToolLinuxBinary.zip -d /tmp/XMDEClientAnalyzerBinary/ClientAnalyzer echo "MDESupportTool installed at /tmp/XMDEClientAnalyzerBinary/ClientAnalyzer"
Python Client Analyzer Install Script
The following script performs the first six steps of the Running the Python version of the Client Analyzer. When complete, the XMDE Client Analyzer Python scripts are available from the /tmp/XMDEClientAnalyzer directory.
Create a bash file
InstallXMDEClientAnalyzer.shand paste the following content into it.#! /usr/bin/bash echo "Starting Client Analyzer Install Script. Running As:" whoami echo "Getting XMDEClientAnalyzer.zip" wget --quiet -O XMDEClientAnalyzer.zip https://aka.ms/XMDEClientAnalyzer echo '36C2B13AE657456119F3DC2A898FD9D354499A33F65015670CE2CD8A937F3C66 XMDEClientAnalyzer.zip' | sha256sum -c echo "Unzipping XMDEClientAnalyzer.zip" unzip -q XMDEClientAnalyzer.zip -d /tmp/XMDEClientAnalyzer echo "Setting execute permissions on mde_support_tool.sh script" cd /tmp/XMDEClientAnalyzer chmod a+x mde_support_tool.sh echo "Performing final support tool setup" ./mde_support_tool.sh
Running the Client Analyzer Install Scripts
Initiate a Live Response session on the machine you need to investigate.
Select Upload file to library.
Select Choose file.
Select the downloaded file named
InstallXMDEClientAnalyzer.sh, and then select Confirm.While still in the LiveResponse session, use the following commands to install the analyzer:
run InstallXMDEClientAnalyzer.sh
Running the XMDE Client Analyzer
Live Response doesn't support running the XMDE Client Analyzer or Python directly, so an execution script is necessary.
Important
The following scripts assume the XMDE Client Analyzer was installed using the same locations from the scripts mentioned earlier. If your organization has chosen to install the scripts into a different location, then the following scripts need to be updated to align with your organization's chosen installation location.
Binary Client Analyzer Run Script
The Binary Client Analyzer accepts command line parameters to perform different analysis tests. To provide similar capabilities during Live Response the execution script takes advantage of the $@ bash variable to pass all input parameters provided to the script to the XMDE Client Analyzer.
Create a bash file
MDESupportTool.shand paste the following content into it.#! /usr/bin/bash echo "cd /tmp/XMDEClientAnalyzerBinary/ClientAnalyzer" cd /tmp/XMDEClientAnalyzerBinary/ClientAnalyzer echo "Running MDESupportTool" ./MDESupportTool $@
Python Client Analyzer Run Script
The Python Client Analyzer accepts command line parameters to perform different analysis tests. To provide similar capabilities during Live Response the execution script takes advantage of the $@ bash variable to pass all input parameters provided to the script to the XMDE Client Analyzer.
Create a bash file
MDESupportTool.shand paste the following content into it.#! /usr/bin/bash echo "cd /tmp/XMDEClientAnalyzer" cd /tmp/XMDEClientAnalyzer echo "Running mde_support_tool" ./mde_support_tool.sh $@
Running the Client Analyzer Script
Note
If you have an active Live Response session you can skip Step 1.
Initiate a Live Response session on the machine you need to investigate.
Select Upload file to library.
Select Choose file.
Select the downloaded file named
MDESupportTool.sh, and then select Confirm.While still in the Live Response session, use the following commands to run the analyzer and collect the resulting file.
run MDESupportTool.sh -parameters "--bypass-disclaimer -d"
GetFile "/tmp/your_archive_file_name_here.zip"
See also
- Client analyzer overview
- Download and run the client analyzer
- Run the client analyzer on Windows
- Run the client analyzer on macOS or Linux
- Data collection for advanced troubleshooting on Windows
- Understand the analyzer HTML report
Tip
Do you want to learn more? Engage with the Microsoft Security community in our Tech Community: Microsoft Defender for Endpoint Tech Community.
Feedback
Coming soon: Throughout 2024 we will be phasing out GitHub Issues as the feedback mechanism for content and replacing it with a new feedback system. For more information see: https://aka.ms/ContentUserFeedback.
Submit and view feedback for