Set up sites
Microsoft Defender for IoT in the Microsoft Defender portal includes the Site security page, which offers an overview of the security state of your entire operational technology (OT) environment. Your organization's security team use this page to regularly monitor the security status of your production sites.
In this article, you learn how to set up a site in the Site security page.
Learn more about the site security benefits and use cases.
Important
This article discusses Microsoft Defender for IoT in the Defender portal (Preview).
If you're an existing customer working on the classic Defender for IoT portal (Azure portal), see the Defender for IoT on Azure documentation.
Learn more about the Defender for IoT management portals.
Some information in this article relates to a prereleased product which may be substantially modified before it's commercially released. Microsoft makes no warranties, expressed or implied, with respect to the information provided here.
Prerequisites
- Review the general prerequisites for Microsoft Defender for IoT.
- Review the required site security permissions according to RBAC requirements.
- Get a Microsoft Defender for IoT trial license. For more information, see Microsoft Defender for IoT subscriptions settings.
- We recommend you have IP or MAC address details of at least one OT device at the site that is discovered by Microsoft Defender for Endpoint.
Create a site
To set up a site and associate the OT devices in your network to it:
In the Microsoft Defender portal menu, select Operational technology > Site security.
In the Site security page, select Create new site or Create Your First Site.
Type the following details:
- Site name: A name for the site, for example, San Francisco.
- Location: The physical location of the production site.
- Site description: Describe the purpose of the site, what activities occur there, the types and number of devices used, and other important information about the site.
- Owners: The contact emails of any users administering the site who must be contacted when problems occur.
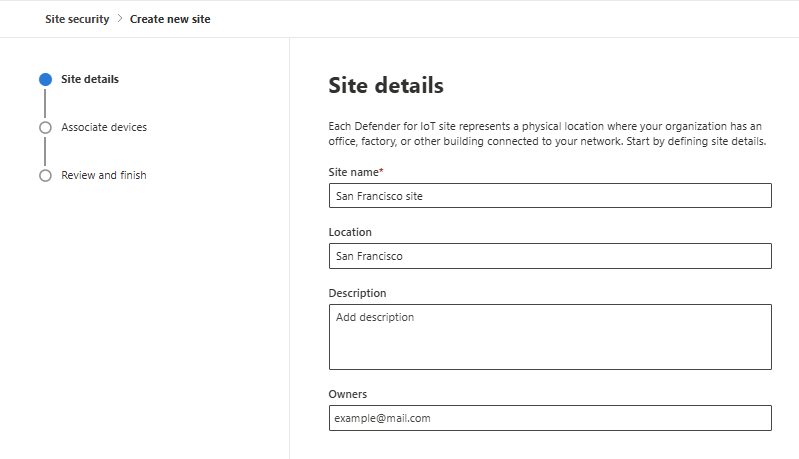
When completed, select Next to associate devices to the site.
Associate devices
In this stage, you configure Defender for IoT to associate OT devices to the site, so it can correctly identify and associate all types of devices at the same site.
In the search bar, type either a public IP address or the IP/MAC address for a specific OT device that is located at this site.
A list of suggested sites appears in the table.
If you don't know any of the OT device addresses:
Select Show all suggested sites.
A list of all possible sites appears in the table. Each row in the table represents a suggested site location based on the OT devices in that location.
Open the location and check that at least one of these devices exists at your site.
Check each location, because Defender for IoT might list your OT devices in more than one suggested location. If this happens, select all of the suggested locations that include an identified OT device. You can select any number of locations. However, you can't edit the list of devices that appear at a specific location.
Review the devices and select the suggested sites to associate with the site. You might need to select more than one suggested site.
Use the Group column to check the ID for each suggested site. Sites with the same ID indicate that the devices are likely located at the same physical location. As these suggested sites are expected to belong to the same site, review and confirm that the devices listed are correct before making your selections and associating the suggested sites.

Select Next to review the site details.

Note
Currently, devices discovered in the Defender portal aren't synchronized with the Azure portal, and therefore the list of devices discovered could be different in each portal.
Review site details
Review that information for the site you want to create:
Review the selected OT devices. If needed, select Edit devices to return to the Associate devices screen.
Select Complete.
The site is now set up and appears in the Site security page.
Regarding device data:
- The site data in the Device Inventory under Site tag and Site attribute starts to appear after each OT device performs network activity and contacts the Defender portal. For some devices, this happens quickly, but for other devices, the data takes time to appear in the inventory. When the site tag and attribute data appears, the device is protected by Defender for IoT, including all of the security value, such as alerts, vulnerabilities, and more.
- Any new devices that are added to the network are automatically detected and added to the Device Inventory. If a device is moved to a different or new location within the network, these changes are automatically made to the network.
Select Create device group to create a device group now, or select Close and set up a device group at a later stage.
Add device group
Use a device group to make sure that the correct users have access to the site. To create a device group:
Select Create device group.
The Settings > Endpoints > Device groups page opens.
Select Add device group and type a device group name.
Select the remediation level, type a description, and select Next.
The Devices page opens.
Type the value for the Tag condition in the format: Site: <Site name>. For example, Site: San Francisco.
Select Next.
The Preview devices page opens with a list of devices in the group.
Select Next.
The User access page opens.
Filter the user groups or select the user groups to add to the device group.
Select Submit and select Done.
Your device group is now set up and appears in the device groups list.
Rank device groups
If a device group lists different preferences for the same user, you need to rank the importance of each device group.
To move a group up or down, drag the row to the correct position in the list. For more information, see ranking device groups in Microsoft Defender for Endpoint.
Assign device group roles and permissions
To get the full benefit of the Device group, you might need to create roles and permission settings. For more information, see role based access control in Microsoft Defender for Endpoint, and create and manage roles in Microsoft Defender for Endpoint.