Tutorial: Deploy a .NET Aspire project with a Redis Cache to Azure
In this tutorial, you learn to configure a .NET Aspire project with a Redis Cache for deployment to Azure. .NET Aspire provides multiple caching integration configurations that provision different Redis services in Azure. You'll learn how to:
- Configure the app to provision an Azure Cache for Redis
- Configure the app to provision a containerized Redis Cache
Note
This document focuses specifically on .NET Aspire configurations to provision and deploy Redis Cache resources in Azure. For more information and to learn more about the full .NET Aspire deployment process, see the Azure Container Apps deployment tutorial.
Prerequisites
To work with .NET Aspire, you need the following installed locally:
- .NET 8.0
- .NET Aspire workload:
- Installed with the Visual Studio installer or the .NET CLI workload.
- An OCI compliant container runtime, such as:
- Docker Desktop or Podman.
- An Integrated Developer Environment (IDE) or code editor, such as:
- Visual Studio 2022 version 17.10 or higher (Optional)
- Visual Studio Code (Optional)
- C# Dev Kit: Extension (Optional)
For more information, see .NET Aspire setup and tooling.
Create the sample solution
Follow the Tutorial: Implement caching with .NET Aspire integrations to create the sample project.
Configure the app for Redis cache deployment
.NET Aspire provides two built-in configuration options to streamline Redis Cache deployment on Azure:
- Provision a containerized Redis Cache using Azure Container Apps
- Provision an Azure Cache for Redis instance
Add the .NET Aspire integration to the app
Add the appropriate .NET Aspire integration to the AspireRedis.AppHost project for your desired hosting service.
Add the Aspire.Hosting.Azure.Redis package to the AspireRedis.AppHost project:
dotnet add package Aspire.Hosting.Azure.Redis
Configure the AppHost project
Configure the AspireRedis.AppHost project for your desired Redis service.
Replace the contents of the Program.cs file in the AspireRedis.AppHost project with the following code:
var builder = DistributedApplication.CreateBuilder(args);

var cache = builder.AddRedis("cache")
                   .PublishAsAzureRedis();

var apiService = builder.AddProject<Projects.AspireRedis_ApiService>("apiservice")
                        .WithReference(cache);

builder.AddProject<Projects.AspireRedis_Web>("webfrontend")
    .WithExternalHttpEndpoints()
    .WithReference(cache)
    .WithReference(apiService);

builder.Build().Run();
The preceding code adds an Azure Cache for Redis resource to your app and configures a connection called cache. The PublishAsAzureRedis method ensures that tools such as the Azure Developer CLI or Visual Studio create an Azure Cache for Redis resource during the deployment process.
Deploy the app
Tools such as the Azure Developer CLI (azd) support .NET Aspire Redis integration configurations to streamline deployments. azd consumes these settings and provisions properly configured resources for you.
Note
You can also use the Azure CLI or Bicep to provision and deploy .NET Aspire project resources. These options require more manual steps, but provide more granular control over your deployments. .NET Aspire projects can also connect to an existing Redis instance through manual configurations.
Open a terminal window in the root of your .NET Aspire project.
Run the
azd initcommand to initialize the project withazd.azd initWhen prompted for an environment name, enter docs-aspireredis.
Run the
azd upcommand to begin the deployment process:azd upSelect the Azure subscription that should host your app resources.
Select the Azure location to use.
The Azure Developer CLI provisions and deploys your app resources. The process may take a few minutes to complete.
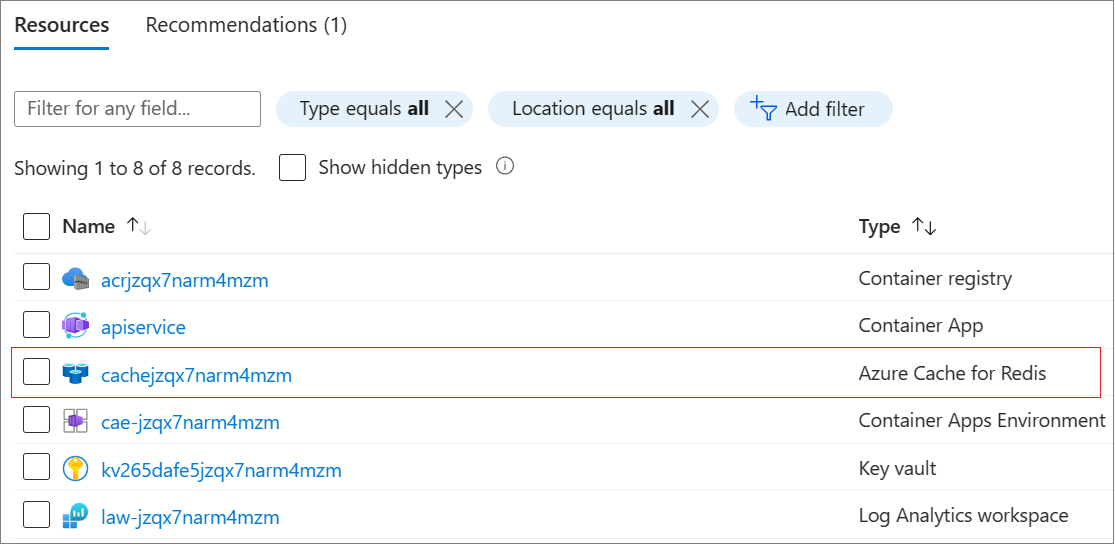
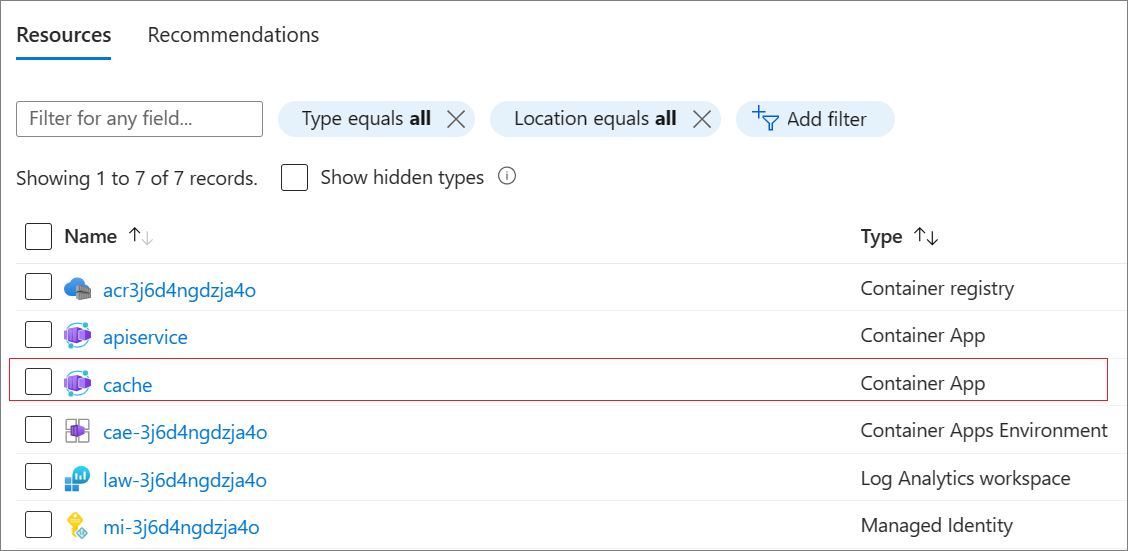
When the deployment finishes, click the resource group link in the output to view the created resources in the Azure portal.
The deployment process provisioned an Azure Cache for Redis resource due to the .AppHost configuration you provided.
Clean up resources
Run the following Azure CLI command to delete the resource group when you no longer need the Azure resources you created. Deleting the resource group also deletes the resources contained inside of it.
az group delete --name <your-resource-group-name>
For more information, see Clean up resources in Azure.
See also
.NET Aspire