Deploy a .NET Aspire project to Azure Container Apps using Visual Studio
.NET Aspire projects are designed to run in containerized environments. Azure Container Apps is a fully managed environment that enables you to run microservices and containerized applications on a serverless platform. This article will walk you through creating a new .NET Aspire solution and deploying it to Microsoft Azure Container Apps using the Visual Studio. You'll learn how to complete the following tasks:
- Provision an Azure resource group and Container Registry
- Publish the .NET Aspire projects as container images in Azure Container Registry
- Provision a Redis container in Azure
- Deploy the apps to an Azure Container Apps environment
- View application console logs to troubleshoot application issues
Prerequisites
To work with .NET Aspire, you need the following installed locally:
- .NET 8.0
- .NET Aspire workload:
- Installed with the Visual Studio installer or the .NET CLI workload.
- An OCI compliant container runtime, such as:
- Docker Desktop or Podman.
- An Integrated Developer Environment (IDE) or code editor, such as:
- Visual Studio 2022 version 17.10 or higher (Optional)
- Visual Studio Code (Optional)
- C# Dev Kit: Extension (Optional)
For more information, see .NET Aspire setup and tooling.
Create a .NET Aspire project
As a starting point, this article assumes that you've created a .NET Aspire project from the .NET Aspire Starter Application template. For more information, see Quickstart: Build your first .NET Aspire project.
Resource naming
When you create new Azure resources, it's important to follow the naming requirements. For Azure Container Apps, the name must be 2-32 characters long and consist of lowercase letters, numbers, and hyphens. The name must start with a letter and end with an alphanumeric character.
For more information, see Naming rules and restrictions for Azure resources.
Deploy the app
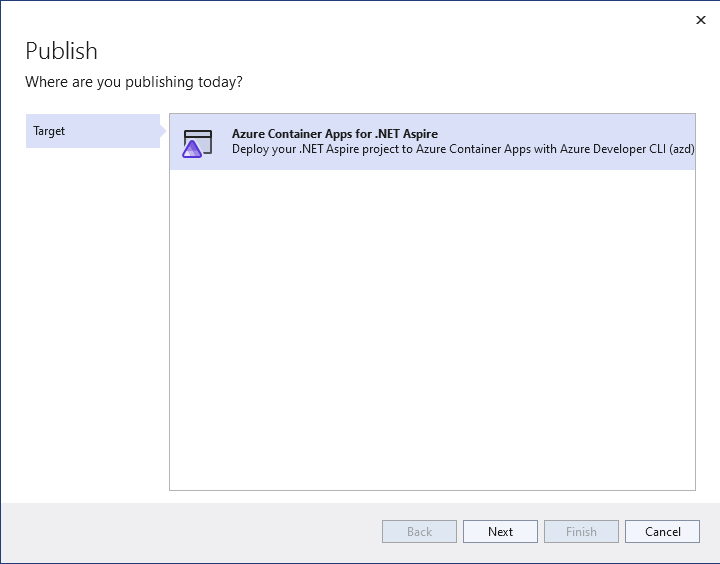
In the solution explorer, right-click on the .AppHost project and select Publish to open the Publish dialog.
Select Azure Container Apps for .NET Aspire as the publishing target.
On the AzDev Environment step, select your desired Subscription and Location values and then enter an Environment name such as aspire-vs. The environment name determines the naming of Azure Container Apps environment resources.
Select Finish to close the dialog workflow and view the deployment environment summary.
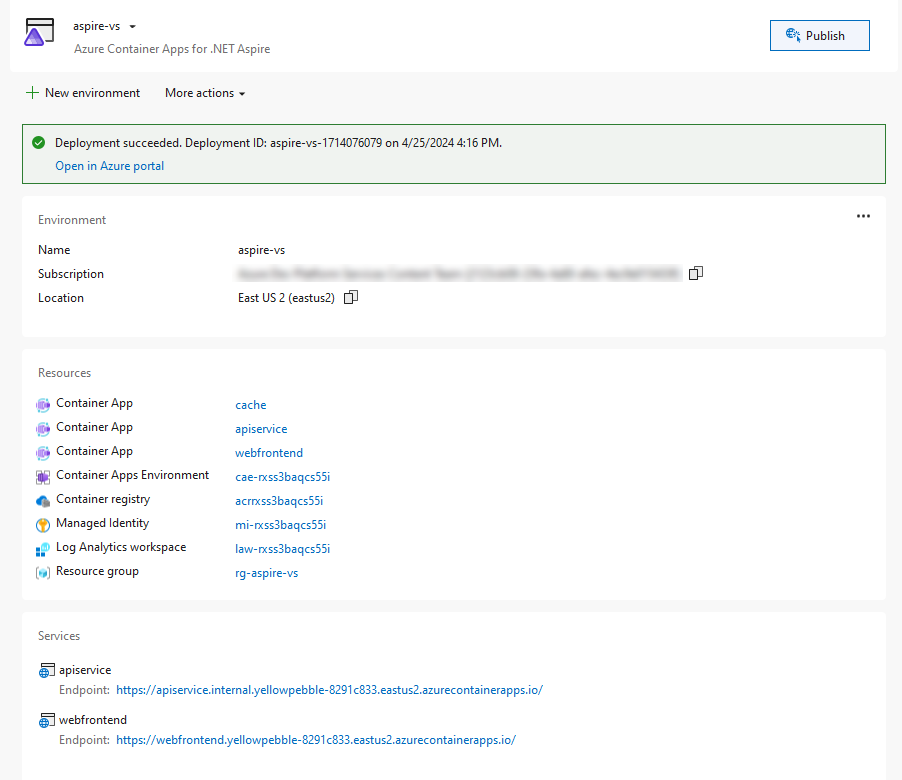
Select Publish to provision and deploy the resources on Azure. This process may take several minutes to complete. Visual Studio provides status updates on the deployment progress.
When the publish completes, Visual Studio displays the resource URLs at the bottom of the environment screen. Use these links to view the various deployed resources. Select the webfrontend URL to open a browser to the deployed app.
Test the deployed app
Now that the app has been provisioned and deployed, you can browse to the Azure portal. In the resource group where you deployed the app, you'll see the three container apps and other resources.

Click on the web Container App to open it up in the portal.

Click the Application URL link to open the front end in the browser.

When you click the "Weather" node in the navigation bar, the front end web container app makes a call to the apiservice container app to get data. The front end's output will be cached using the redis container app and the .NET Aspire Redis Output Caching component. As you refresh the front end a few times, you'll notice that the weather data is cached. It will update after a few seconds.
Deploy the .NET Aspire Dashboard
You can deploy the .NET Aspire dashboard as part of your hosted app. This feature is now fully supported. When deploying, the azd output logs print an additional URL to the deployed dashboard.
You can run azd monitor to automatically launch the dashboard.
azd monitor
Clean up resources
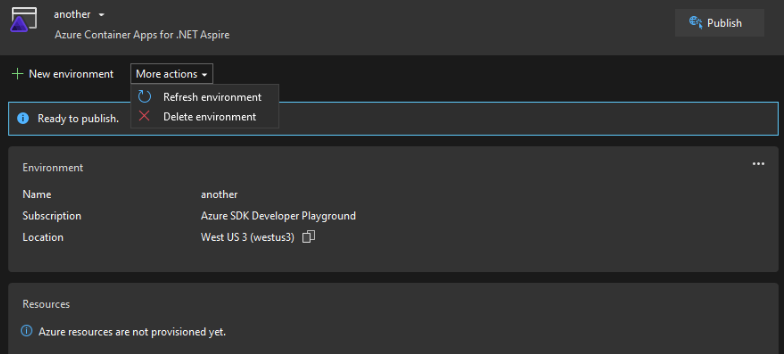
To delete the azd environment, the More actions dropdown and then choose Delete environment.
.NET Aspire
Feedback
Coming soon: Throughout 2024 we will be phasing out GitHub Issues as the feedback mechanism for content and replacing it with a new feedback system. For more information see: https://aka.ms/ContentUserFeedback.
Submit and view feedback for