Tutorial: Add .NET Aspire to an existing .NET app
If you have already created a microservices .NET web app, you can add .NET Aspire to it and get all the included features and benefits. In this article, you'll add .NET Aspire orchestration to a simple, pre-existing .NET 8 project. You'll learn how to:
- Understand the structure of the existing microservices app.
- Enroll existing projects in .NET Aspire orchestration.
- Understand the changes enrollment makes in the projects.
- Start the .NET Aspire project.
Prerequisites
To work with .NET Aspire, you need the following installed locally:
- .NET 8.0
- .NET Aspire workload:
- Installed with the Visual Studio installer or the .NET CLI workload.
- An OCI compliant container runtime, such as:
- Docker Desktop or Podman.
- An Integrated Developer Environment (IDE) or code editor, such as:
- Visual Studio 2022 version 17.10 or higher (Optional)
- Visual Studio Code (Optional)
- C# Dev Kit: Extension (Optional)
For more information, see .NET Aspire setup and tooling.
Get started
Let's start by obtaining the code for the solution:
Open a command prompt and change to a directory where you want to store the code.
To clone to .NET 8 example solution, use this command:
git clone https://github.com/MicrosoftDocs/mslearn-dotnet-cloudnative-devops.git eShopLite
Explore the sample app
This article uses a .NET 8 solution with three projects:
- Data Entities. This project is an example class library. It defines the
Productclass used in the Web App and Web API. - Products. This example Web API returns a list of products in the catalog and their properties.
- Store. This example Blazor Web App displays the product catalog to website visitors.
Open and start debugging the project to examine its default behavior:
Start Visual Studio and then select File > Open > Project/Solution.
Navigate to the top level folder of the solution you cloned, select eShopLite.sln, and then select Open.
In the Solution Explorer, right-click the eShopLite solution, and then select Configure Startup Projects.
Select Multiple startup projects.
In the Action column, select Start for both the Products and Store projects.
Select OK.
To start debugging the solution, press F5 or select Start.
Two pages open in the browser:
- A page displays products in JSON format from a call to the Products Web API.
- A page displays the homepage of the website. In the menu on the left, select Products to see the catalog obtained from the Web API.
To stop debugging, close the browser.
Start Visual Studio Code and open the folder that you just cloned.
Select the Run and Debug menu item, or press Ctrl+Shift+D.
Select the create a launch.json file link.
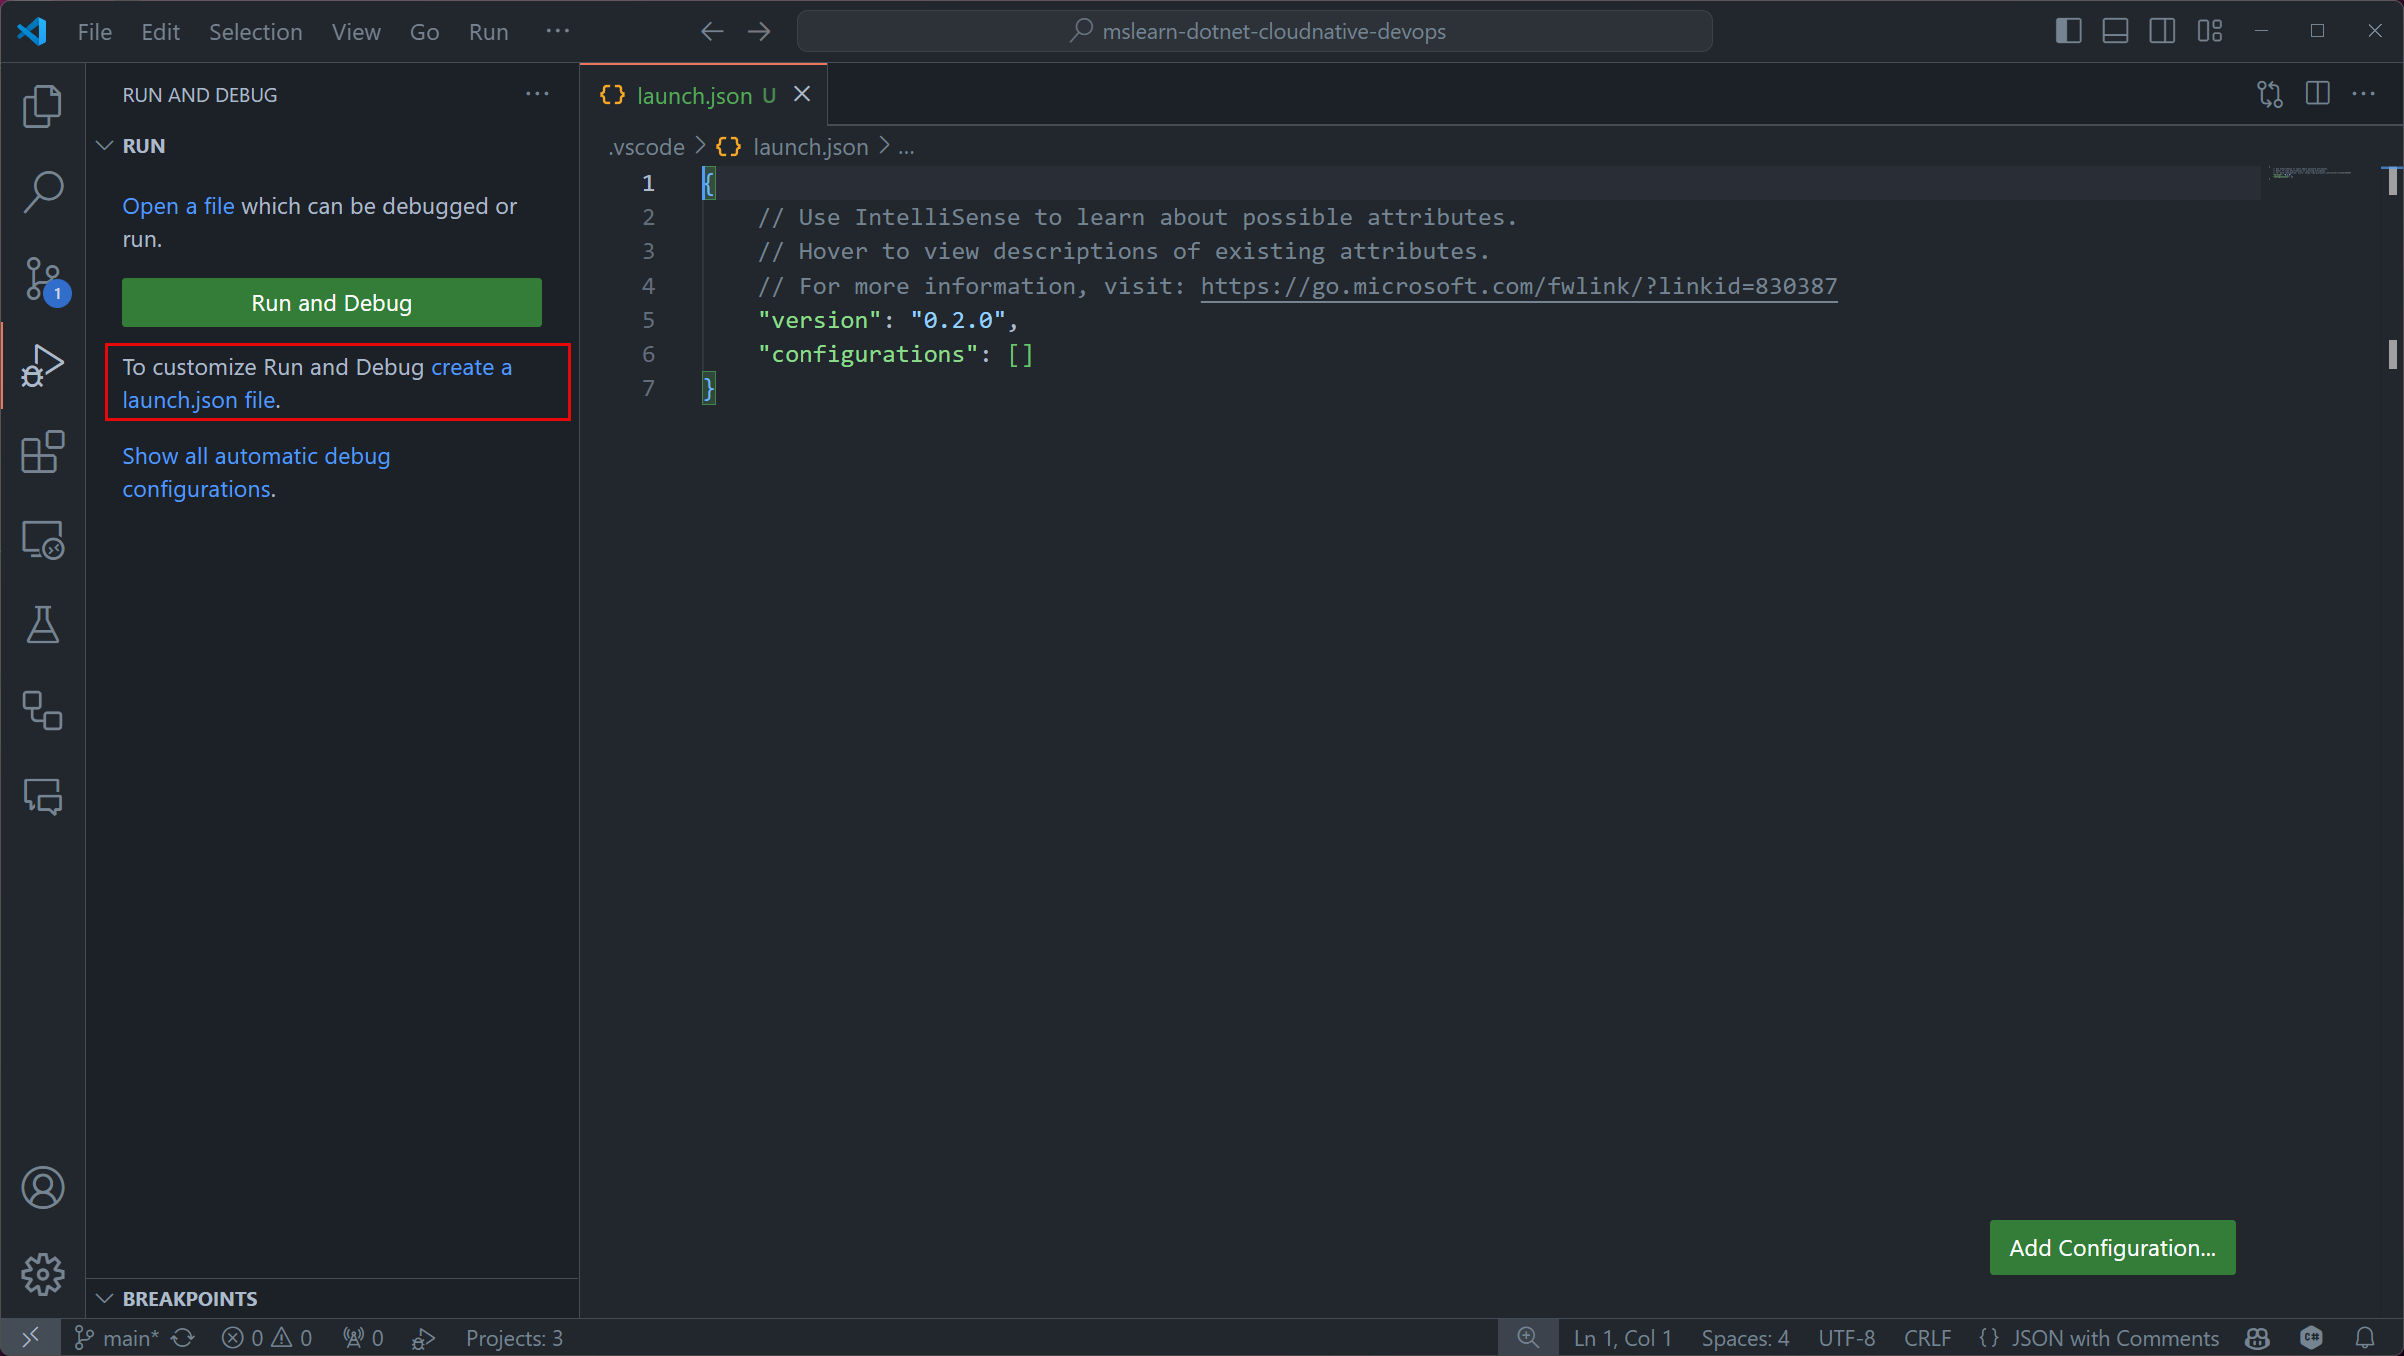
Copy and paste the following JSON into this file and Save:
{ "version": "0.2.0", "compounds": [ { "name": "Run all", "configurations": [ "Run products", "Run store", ] } ], "configurations": [ { "name": "Run products", "type": "dotnet", "request": "launch", "projectPath": "${workspaceFolder}/Products/Products.csproj" }, { "name": "Run store", "type": "dotnet", "request": "launch", "projectPath": "${workspaceFolder}/Store/Store.csproj" } ] }To start debugging the solution, press F5 or select Start.
Two pages open in the browser:
- A page displays products in JSON format from a call to the Products Web API.
- A page displays the homepage of the website. In the menu on the left, select Products to see the catalog obtained from the Web API.
To stop debugging, close the browser, and then select the Stop button twice (once for each running debug instance).

Open a terminal window and change directories into the newly cloned repository.
To start the Products app, run the following command:
dotnet run --project ./Products/Products.csprojA browser page opens, displaying the JSON for the products.
In a separate terminal window, again change directories to cloned repository.
Start the Store app by running the following command:
dotnet run --project ./Store/Store.csprojThe browser opens a page that displays the homepage of the website. In the menu on the left, select Products to see the catalog obtained from the Web API.
To stop debugging, close the browser, and press Ctrl+C in both terminals.
Add .NET Aspire to the Store web app
Now, let's enroll the Store project, which implements the web user interface, in .NET Aspire orchestration:
In Visual Studio, in the Solution Explorer, right-click the Store project, select Add, and then select .NET Aspire Orchestrator Support.
In the Add .NET Aspire Orchestrator Support dialog, select OK.
You should now have two new projects, both added to the solution:
- eShopLite.AppHost: An orchestrator project designed to connect and configure the different projects and services of your app. The orchestrator is set as the Startup project, and it depends on the eShopLite.Store project.
- eShopLite.ServiceDefaults: A .NET Aspire shared project to manage configurations that are reused across the projects in your solution related to resilience, service discovery, and telemetry.
In the eShopLite.AppHost project, open the Program.cs file. Notice this line of code, which registers the Store project in the .NET Aspire orchestration:
builder.AddProject<Projects.Store>("store");
For more information, see AddProject.
To add the Products project to .NET Aspire:
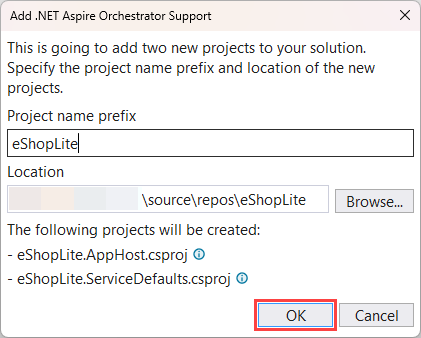
In Visual Studio, in the Solution Explorer, right-click the Products project, select Add, and then select .NET Aspire Orchestrator Support.
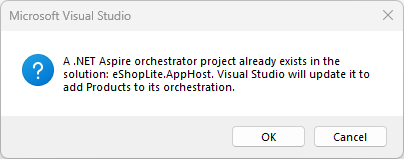
A dialog indicating that .NET Aspire Orchestrator project already exists, select OK.
In the eShopLite.AppHost project, open the Program.cs file. Notice this line of code, which registers the Products project in the .NET Aspire orchestration:
builder.AddProject<Projects.Products>("products");
Also notice that the eShopLite.AppHost project, now depends on both the Store and Products projects.
Create an app host project
In order to orchestrate the existing projects, you need to create a new app host project. To create a new app host project from the available .NET Aspire templates, use the following .NET CLI command:
dotnet new aspire-apphost -o eShopLite.AppHost
Add the app host project to existing solution:
Add the Store project as a project reference to the app host project using the following .NET CLI command:
Create a service defaults project
After the app host project is created, you need to create a new service defaults project. To create a new service defaults project from the available .NET Aspire templates, use the following .NET CLI command:
dotnet new aspire-servicedefaults -o eShopLite.ServiceDefaults
To add the project to the solution, use the following .NET CLI command:
dotnet sln ./eShopLite.sln add ./eShopLite.ServiceDefaults/eShopLite.ServiceDefaults.csproj
Update the app host project to add a project reference to the Products project:
dotnet add ./eShopLite.AppHost/eShopLite.AppHost.csproj reference ./Products/Products.csproj
Both the Store and Products projects need to reference the service defaults project so that they can easily include service discovery. To add a reference to the service defaults project in the Store project, use the following .NET CLI command:
dotnet add ./Store/Store.csproj reference ./eShopLite.ServiceDefaults/eShopLite.ServiceDefaults.csproj
The same command with slightly different paths should be used to add a reference to the service defaults project in the Products project:
dotnet add ./Products/Products.csproj reference ./eShopLite.ServiceDefaults/eShopLite.ServiceDefaults.csproj
In both the Store and Products projects, update their Program.cs files, adding the following line immediately after their var builder = WebApplication.CreateBuilder(args); line:
builder.AddServiceDefaults();
Update the app host project
Open the Program.cs file of the app host project, and replace its contents with the following C# code:
var builder = DistributedApplication.CreateBuilder(args);

builder.AddProject<Projects.Store>("store");

builder.AddProject<Projects.Products>("products");

builder.Build().Run();
The preceding code:
- Creates a new
DistributedApplicationBuilderinstance. - Adds the Store project to the orchestrator.
- Adds the Products project to the orchestrator.
- Builds and runs the orchestrator.
Service Discovery
At this point, both projects are part of .NET Aspire orchestration, but the Store needs to be able to discover the Products backend address through .NET Aspire's service discovery. To enable service discovery, open the Program.cs file in eShopLite.AppHost and update the code that the Store adds a reference to the Products project:
var builder = DistributedApplication.CreateBuilder(args);

var products = builder.AddProject<Projects.Products>("products");

builder.AddProject<Projects.Store>("store")
       .WithExternalHttpEndpoints()
       .WithReference(products);

builder.Build().Run();
You've added a reference to the Products project in the Store project. This reference is used to discover the address of the Products project. Additionally, the Store project is configured to use external HTTP endpoints. If you later choose to deploy this app, you'd need the call to WithExternalHttpEndpoints to ensure that it's public to the outside world.
Next, update the appsettings.json in the Store project with the following JSON:
{
  "DetailedErrors": true,
  "Logging": {
    "LogLevel": {
      "Default": "Information",
      "Microsoft.AspNetCore": "Warning"
    }
  },
  "AllowedHosts": "*",
  "ProductEndpoint": "http://products",
  "ProductEndpointHttps": "https://products"
}
The addresses for both the endpoints now uses the "products" name that was added to the orchestrator in the app host. These names are used to discover the address of the Products project.
Explore the enrolled app
Let's start the solution and examine the new behavior that .NET Aspire has added.
Note
Notice that the eShopLite.AppHost project is the new startup project.
- In Visual Studio, to start debugging, press F5 Visual Studio builds the projects.
- If the Start Docker Desktop dialog appears, select Yes. Visual Studio starts the Docker engine and creates the necessary containers. When the deployment is complete, the .NET Aspire dashboard is displayed.
- In the dashboard, select the endpoint for the products project. A new browser tab appears and displays the product catalog in JSON format.
- In the dashboard, select the endpoint for the store project. A new browser tab appears and displays the home page for the web app.
- In the menu on the left, select Products. The product catalog is displayed.
- Close the browser to stop debugging.
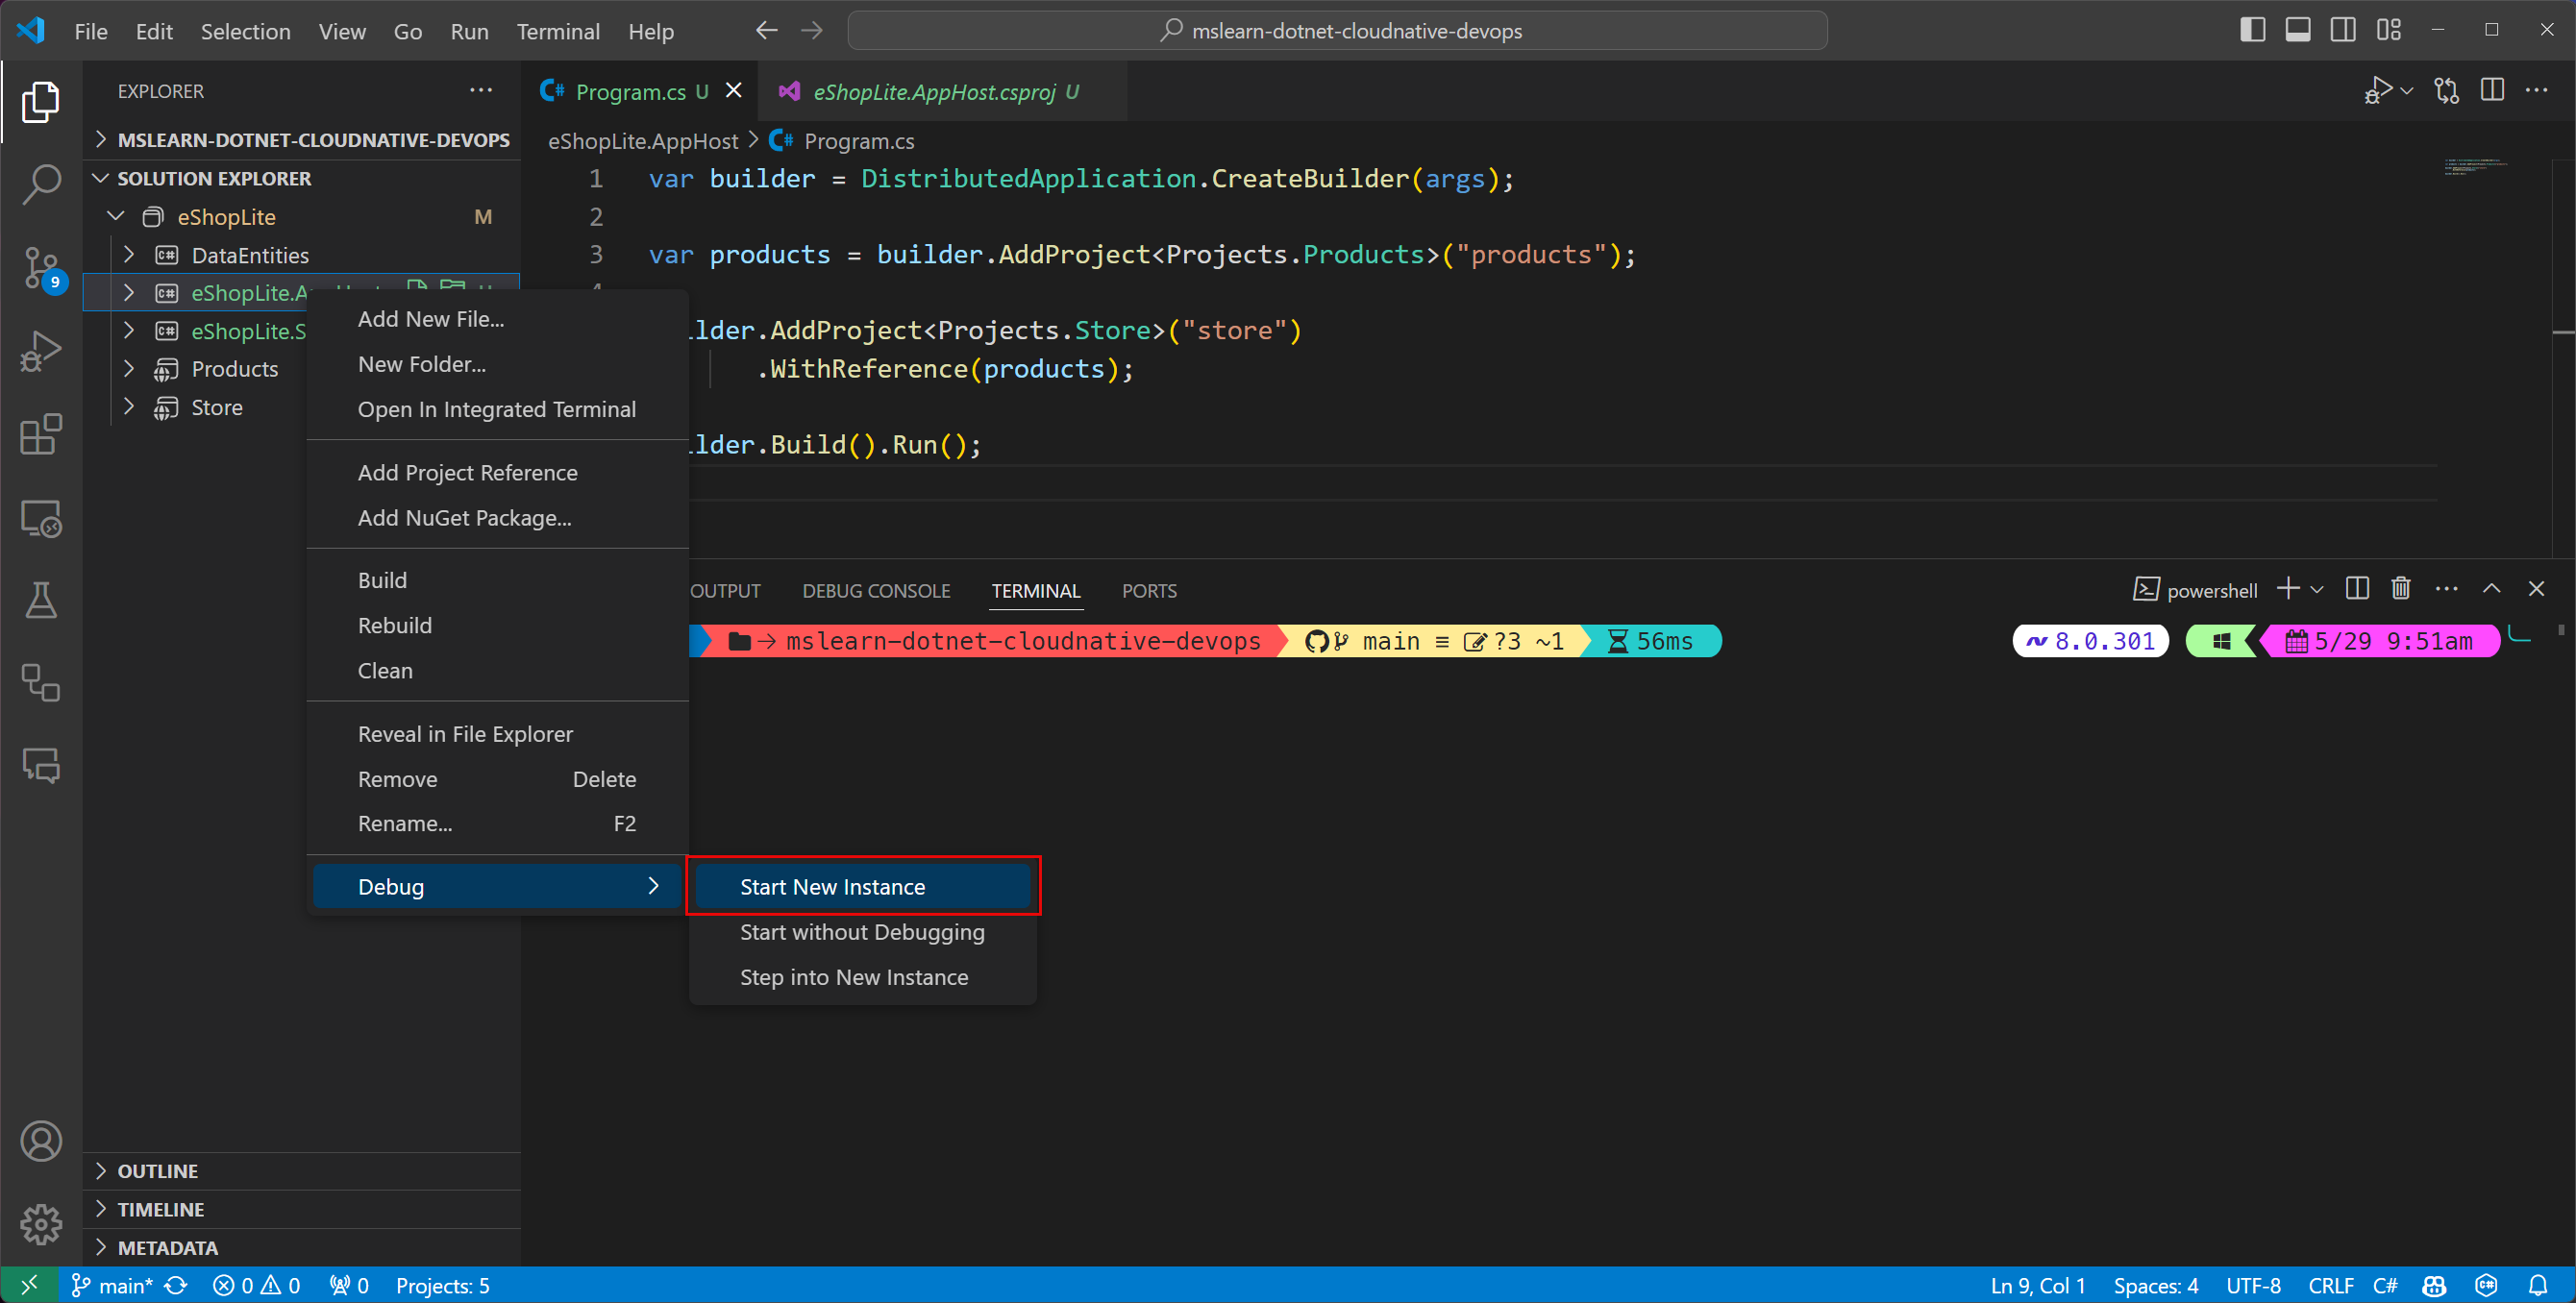
You can delete the launch.json file that you created earlier, as it's not needed. Instead, simply start the app host project, which will orchestrate the other projects:
Start the app host project by right-clicking the eShopLite.AppHost project in the Solution Explorer and selecting Debug > Start New Instance:
Note
If Docker Desktop (or Podman) isn't running, you'll experience an error. Start the OCI compliant container engine and try again.

Start the app host project by running the following command:
dotnet run --project ./eShopLite.AppHost/eShopLite.AppHost.csprojNote
If Docker Desktop (or Podman) isn't running, you'll experience an error. Start the OCI compliant container engine and try again.
- In the dashboard, select the endpoint for the products project. A new browser tab appears and displays the product catalog in JSON format.
- In the dashboard, select the endpoint for the store project. A new browser tab appears and displays the home page for the web app.
- In the menu on the left, select Products. The product catalog is displayed.
- Close the browser to stop debugging.
Congratulations! You have added .NET Aspire orchestration to your pre-existing web app. You can now add .NET Aspire components and use the .NET Aspire tooling to streamline your cloud-native web app development.
.NET Aspire
Feedback
Coming soon: Throughout 2024 we will be phasing out GitHub Issues as the feedback mechanism for content and replacing it with a new feedback system. For more information see: https://aka.ms/ContentUserFeedback.
Submit and view feedback for