Customer Insights quickstart guide
Customer Insights is a one-stop-shop to identify, ingest, and act on customer data. Use Customer Insights to harness disparate data and use it to reach customers when and where they’re the most responsive.
Think of a scenario where a retail giant wants to reward customers who surpass a loyalty point threshold. Each purchase earns loyalty points that are redeemable for exclusive discounts and rewards. The retailer has heaps of information about what people buy, how often they shop, and what they like. They track product purchases and loyalty card usage, generating thousands of data points. Translating the data into action, however, involves navigating a maze of data sources, manually building segments, and initiating cumbersome communication processes.
Now, imagine if the retailer implemented Dynamics 365 Customer Insights. With Customer Insights, data is processed automatically, allowing the store to understand what customers like and how they shop. Customer Insights then allows customers to actively shape marketing campaigns, choosing how and where they interact with the brand. Dynamics 365 Customer Insights empowers the retailer—and you—to create personalized, targeted experiences.
This guide explores a step-by-step process to seamlessly integrate, analyze, and utilize customer information, crafting tailored experiences that resonate with individual preferences and behaviors.
Prerequisites
Setup:
- Install Customer Insights - Data and Customer Insights - Journeys on the same environment.
- Set up Customer Insights - Data
Connect the apps:
- After you've installed the Customer Insights - Journeys and Customer Insights - Data apps on the same environment, you need to finish connecting them. To connect the apps, go to Customer Insights - Journeys then go to Settings > Data Management > Customer Insights and select the Connect button. This completes the data sync for segmentation between the two applications.
- You can now use unified profiles from Customer Insights - Data in Customer Insights - Journeys.
Note
If the apps are installed on the same Dataverse environment, they share the same data, including any unified profiles or Customer Insights - Data segments created in Customer Insights - Data. Once the button is selected to connect Customer Insights - Journeys and Customer Insights - Data segments, Customer Insights - Journeys sees Customer Insights - Data segments and they can be used in Customer Insights - Journeys for journeys.
Procedure
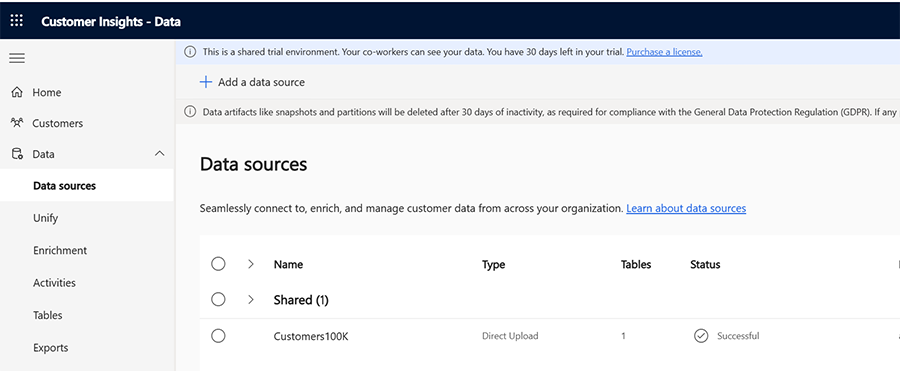
Step 1: Import data into Customer Insights – Data (from data sources)
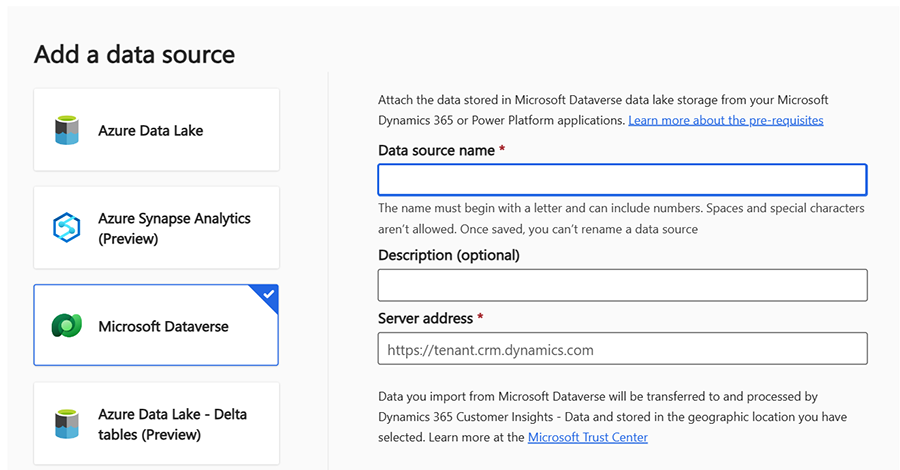
Customer Insights - Data allows you to collect, unify, and enrich customer data from various sources. To ingest data, you need to create data sources and dataflows that define how the data is imported and transformed.
For example, if retailer mentioned above wanted to track customer purchases and loyalty card usage, they would create the following data sources:
- A CSV file that contains customer information from the eCommerce system such as name, email, phone, address, purchase history, etc.
- An SQL database that contains customer information from the loyalty card system, such as name, email, phone number, loyalty status, loyalty points, etc.
Note
Customer Insights - Data supports a variety of data sources such as Azure Data Lake Storage, Azure Synapse Analytics, Microsoft Dataverse, Delta Lake, Power Query, and more. You can also use on-premises data sources using the data gateway.
Learn more about creating data sources and dataflows in Customer Insights - Data: Data sources overview
After you create your data sources, you’ll use Customer Insights – Data to connect, import, and transform your data and create unified profiles for your customers.
Step 2: Create unified profiles and set-up relationships in Customer Insights - Data
Unified profiles are the core of Customer Insights - Data, as they provide a holistic and actionable view of each customer. Once you’ve imported your data, run the data unification process.
- Unified profiles are created by matching and merging data from different sources based on a unique identifier such as email, phone number, loyalty status, purchase history, and more.
- You can also enrich unified profiles with additional attributes such as demographics, preferences, scores, etc. Learn more: Data enrichment (preview) overview
For example, a unified profile for a customer named John Smith might look like this:
| Attribute | Value |
|---|---|
| Name | John Smith |
| john.smith@example.com | |
| Phone | +1 234 567 8901 |
| Address | 123 Main Street, New York, NY 10001 |
| Age | 35 |
| Loyalty Status | Gold |
| Loyalty Points | 1500 |
| Gender | Male |
| Purchase History | Shoes, Jacket, Backpack |
Learn more about creating unified profiles in Customer Insights - Data: Data unification overview
Step 3: Analyze the data
Next, you’ll want to enrich and visualize your customer data from various sources. This step helps you gain insights into customer behavior, preferences, needs, and value. You can analyze your data through:
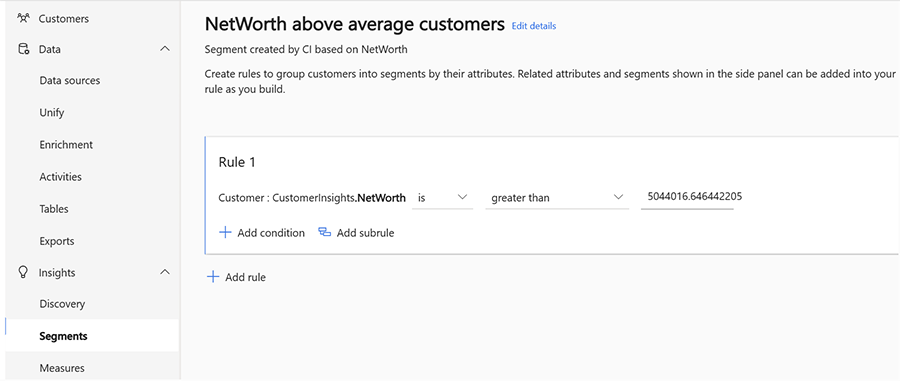
Segments: Segments are groups of customers that share common characteristics or behaviors.
Create a segment for customers that surpass a loyalty point threshold.
For example, in the retail store scenario, you can create a segment with the following criteria: Loyalty Points > 1,000. This filters the customers who have more than 1,000 loyalty points. Learn more: Create and manage segments
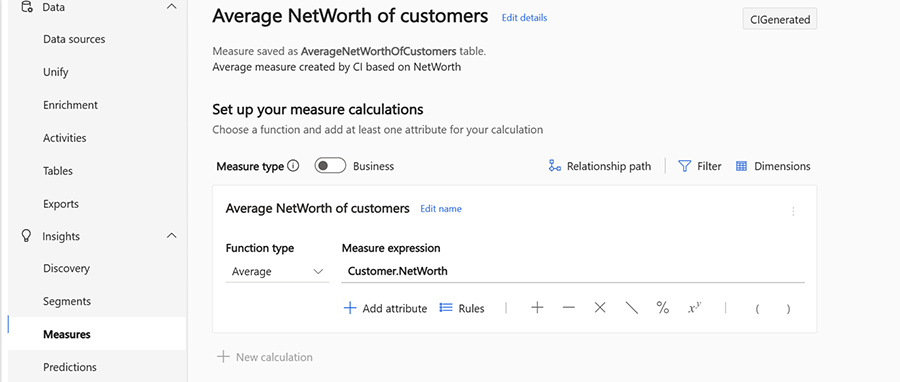
Measures: Measures are calculations that help you quantify customer behaviors and business performance.
You can use measures to create metrics, KPIs, or insights based on the data from your unified customer profiles.
For example, in the retail store scenario, you can create a measure that calculates the loyalty points for each customer based on the data from your Loyalty Card system. Learn more: Create and manage measures
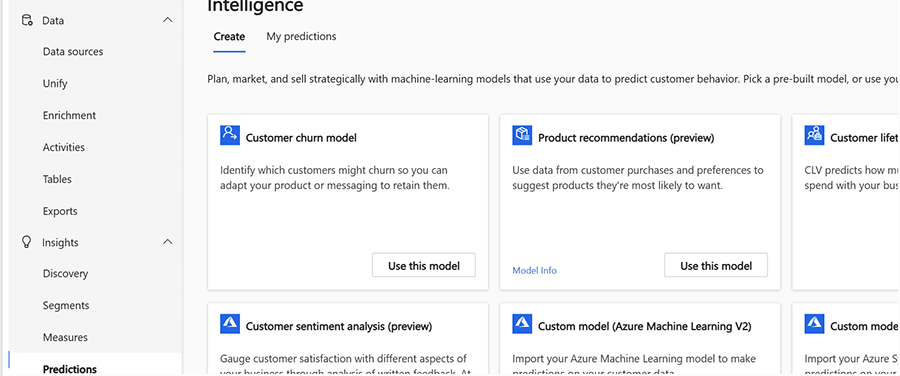
Predictions: Predictions are forecasts that help you anticipate customer behavior and outcomes based on the data from your unified customer profiles.
You can use predictions to create scenarios, recommendations, or actions based on the data from your unified customer profiles.
For example, in the retail store scenario, you can use an out-of-box prediction model to predict the product recommendation for each customer based on their purchase behavior and customers with similar purchase patterns. Learn more: Create and manage predictions
Step 4: Use Customer Insights - Data profiles in Customer Insights - Journeys
Once you’ve connected both the applications, you can use the unified profiles to create and manage customer journeys in Customer Insights - Journeys.
In Customer Insights - Journeys, create a journey that targets the segment you created in Customer Insights - Data. You can use the journey designer or the advanced editor to create your journey. For example, you can create a journey with the following steps:
- Triggers: Set the trigger to Segment (Customer Insights - Data) and select the segment you created in Customer Insights - Data. This starts the journey for every customer who belongs to that segment.
- Channels:
- Add an email tile and configure the email content. You can use dynamic content based on measures from the unified customer profile. For example, you can use the following template:
Hi {{First Name}}, Congratulations! You have earned more than {{Loyalty Points}} loyalty points and become one of our loyal customers. As a token of our appreciation, we would like to offer you a 20% off coupon for your next purchase. Just use the code LOYAL20 at the checkout and enjoy the discount. Thank you for choosing us and we hope to see you soon. Your friends at {{Company Name}} - Analytics: You can measure the performance and effectiveness of your email campaign based on the Customer Insights - Data profiles. You can track metrics such as open rate, click rate, conversion rate, and revenue generated by your campaign.
- Lead scoring: You can assign scores to your customers based on their loyalty points and other attributes from the Customer Insights - Data profiles. You can use the lead scoring feature to rank your customers based on their engagement and readiness to buy.
Step 5 Add an end tile and set the journey status to "Completed"
This will end the journey for the customer after they receive the email. Publish and activate your journey. This makes your journey live and ready to run. You can monitor the performance of your journey using the analytics dashboard and the insights panel.
Summary
Customer Insights effortlessly translates rich data into impactful, automated interactions that resonate with customers. To start the process, use Customer Insights - Data to create comprehensive customer views, importing data and processing it to create unified profiles.
Once the data is unified, use segments, measures, and predictions to analyze it and unveil valuable insights into customer behavior and preferences.
After analyzing the data, reach out to customers with Customer Insights - Journeys, using the rich customer data to craft personalized journeys. The journeys are composed of launch triggers, communication channels (for example, email content based on dynamic customer attributes), analytics for campaign performance measurement, and lead scoring.
Customer Insights is a complete solution to getting to know customers and reaching them when and where they're most receptive.
Next steps