Resolve, cancel, and reassign cases
Customer Service provides you with the ability to resolve, cancel, and reassign cases.
Resolve a case
In the list of active cases, open the one you want to resolve.
On the command bar, select Resolve case. The status of the case is set to Resolved only when you select Resolve Case and the case gets resolved. You can't set the value of the Case Status field to Resolved
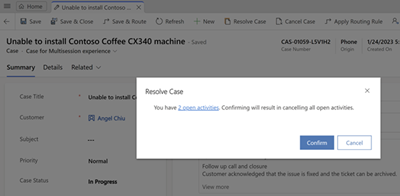
If you have open activities linked to the case, you see a message with the following actions:
A link with the number of open activities. You can select the link to view the open activities associated with the case on a tab your administrator has configured. More information: Enable the redirection link for Customer Service apps
Confirm: If you select Confirm on the warning, the system automatically cancels the open activities when the case is resolved.
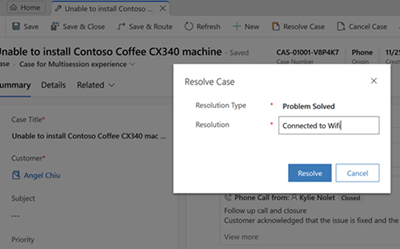
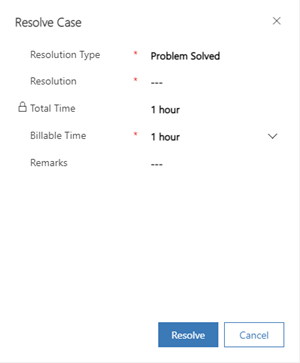
- Depending on the settings enabled for you, you see the minimal case resolution dialog or legacy case resolution dialog that are explained as follows:
By default, you'll see the Resolution Type and Resolution fields only on the Resolve Case dialog.
- Select Resolve.
Note
- We recommend that you resolve or close a case before deleting it.
- While you can't edit or update any attribute of the case after it is resolved, through the UI, you can configure an API or a Power Automate flow to be run if the setting in service configuration is enabled. Learn more in Allow updates for resolved and canceled cases
- The "resolve cases" action isn't available in the business process flow in Customer Service Hub. As a workaround, you can customize the business process flow to add the action. Learn more in Add an action to a business process flow.
Resolve a case with a parent and child relationship
Important
Sometimes, resolving a case action might be blocked based on your current case status. This is because your admin may have set things up so that you only see a limited set of statuses to choose from based on the current status of a case. For more information about the available list of case statuses, contact your administrator.
Depending on your settings, a case with a parent and child relationship can be closed in one of the following ways:
When all the child cases are resolved, you can close the parent case.
When you resolve the parent case, it resolves all the active associated child cases.
A parent and child case can be closed independently of each other. This is the default setting.
Before you resolve a parent case that has active child cases, make sure that all the case activities are closed. Otherwise, you get a message with the following actions:
- A link with the number of open activities. You can select the link to view the open activities associated with the case on a tab your administrator has configured. Learn more in Enable the redirection link for Customer Service apps
- Confirm: If you select Confirm on the warning, the system will automatically cancel the open activities when the case is resolved. Also, performance might be slow when you close a parent case with lots of active child cases associated with it.
Cancel a case
All case activities must be closed before you can cancel a case.
In the list of active cases, open the case you want to cancel, and then on the command bar, select Cancel Case.
In the Confirm Cancellation dialog box, select the case status:
Canceled: The case is canceled and is no longer assigned to you.
Merged: The case is merged with another case. When the case is merged, the case activities are moved to the case it was merged with.
Select Confirm.
Note
If you are using a custom code or custom workflow to mark a case as resolved or canceled, make sure that you set up appropriate validation to check if the case is already resolved or canceled. If a custom workflow tries to resolve or cancel a case that's already resolved or canceled, you get errors while executing the custom workflow.
Reassign a case
Important
When unified routing is enabled, use the save and route option to reassign a case or work item.
If you don’t have enough information to resolve a case, or if you think another member in your team has expertise on the subject, you can assign the case to another user or team.
In the list of cases, select the case that you want to reassign, and on the command bar, select Assign.
In the Assign to Team or User dialog box, in the Assign To field, select User or Team, and then in the User or team field, select who you want to assign the case to.
Select Assign.
Case resolution history
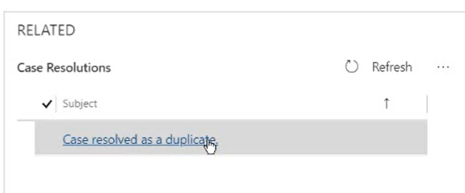
Displays the case resolution history. If a case must be reopened, agents have the ability to view case history here.


