As an admin, you can enable the Field Service for Outlook add-in for your organization or for specific users and groups.
Field Service for Outlook includes copilot AI capabilities to create work orders in Outlook. Copilot adheres to responsible AI guidelines. To opt out of using Copilot, see Give consent to use Copilot in Field Service for Outlook.
Prerequisites
Deploy the Field Service for Outlook add-in
To set up Field Service for Outlook capability for your organization, enable it as an Outlook Add-in. For more information, see Install or remove add-ins for Outlook for your Exchange 2013 organization.
Sign in to the Microsoft 365 admin center.
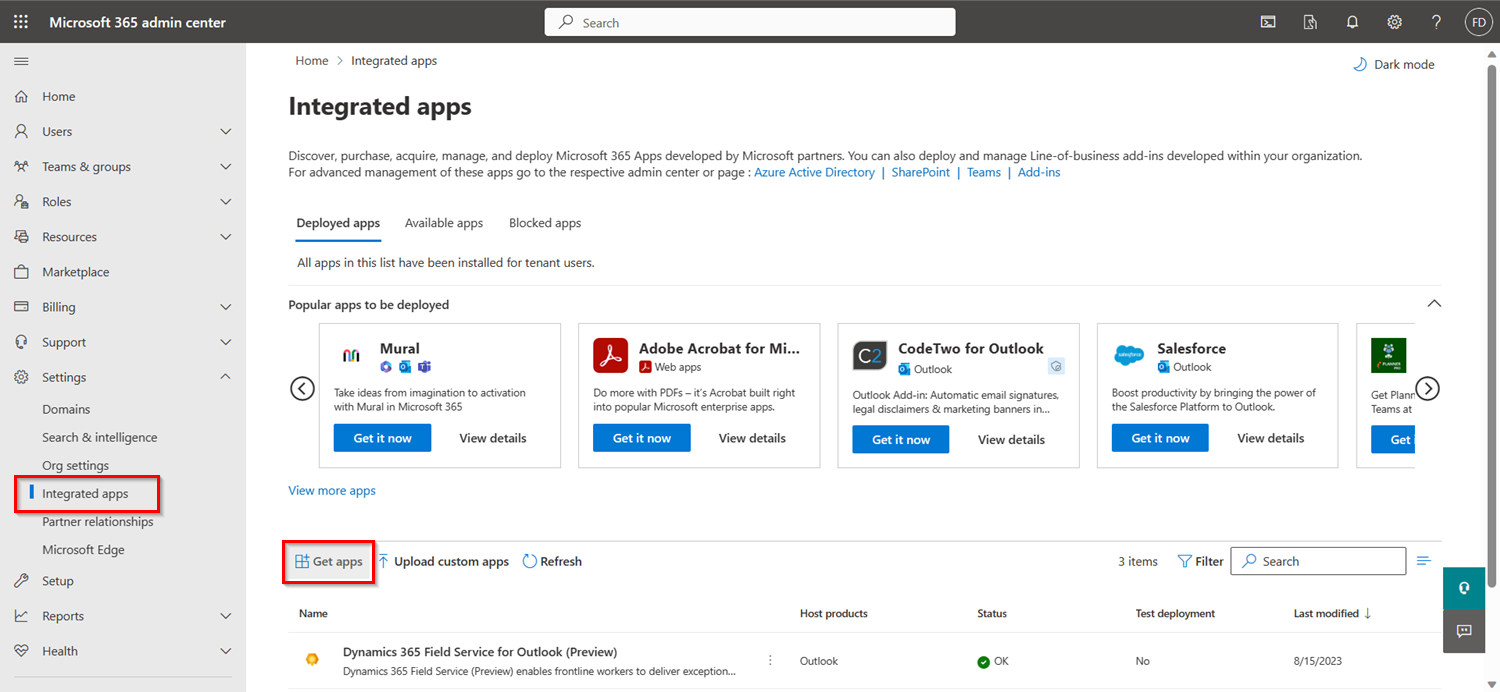
Select Settings > Integrated apps, and then select Get apps. For more information, see Deploy an Office Add-in using the admin center.
Search for and select Dynamics 365 Field Service for Outlook.
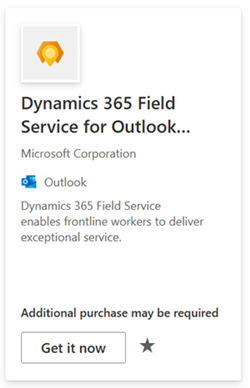
Select Add, Get it now, or Update. Confirm your information.
On the Add users page, under Assign users, select Entire organization.
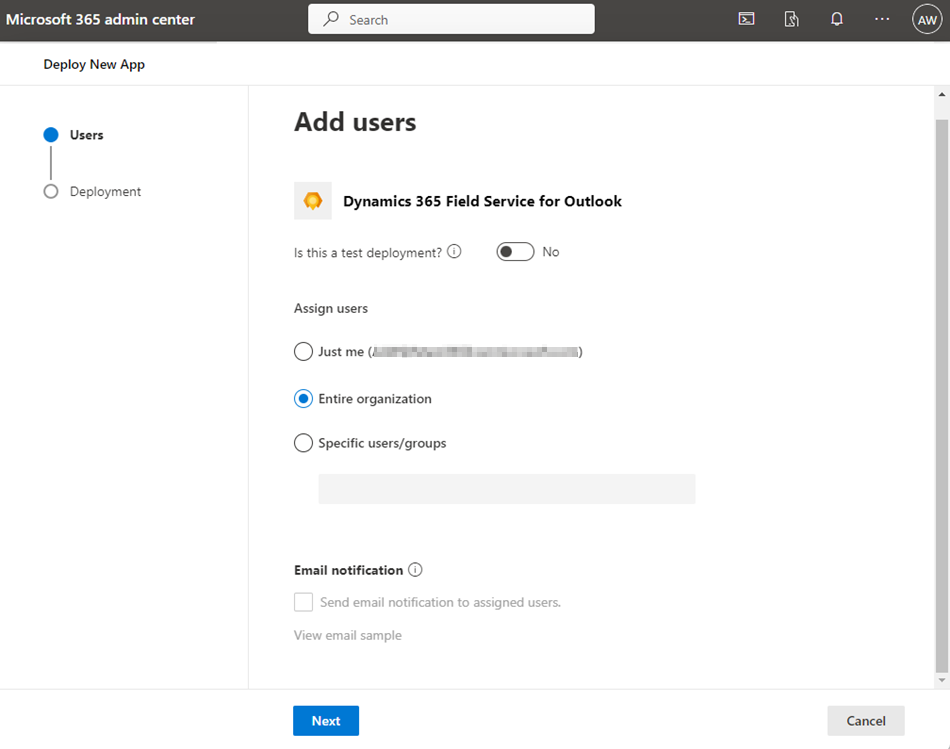
Select Next, Accept permissions, Next, and Finish deployment.
Users might need to relaunch Microsoft 365 to view the add-in icon on the app ribbon. Outlook add-ins can take up to 24 hours to appear on app ribbons.
Give consent to use Copilot in Field Service for Outlook
As an admin, you can enable or disable the use of copilot capabilities in Field Service for Outlook. When enabled, you agree that data may be stored and processed outside of your tenant's geographic region or compliance boundary.
In the Field Service app, change to the Settings area.
In the General section, select Field Service Settings.
Select the Features tab.
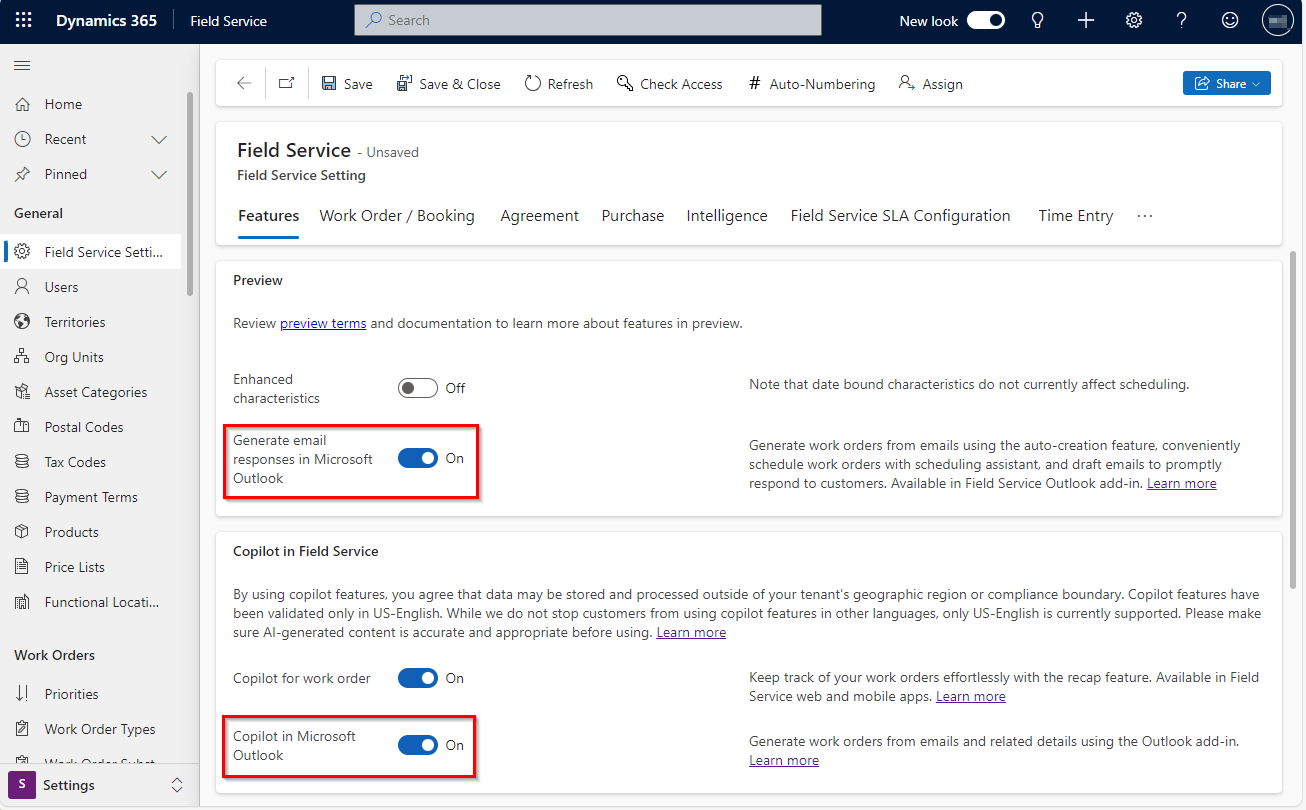
To give consent to use copilot to create work orders, enable Copilot in Microsoft Outlook.
To use copilot to generate email responses, enable Generate email responses in Microsoft Outlook.
Select Save.
To integrate Field Service for Viva Connections (Preview) and Teams, you need to complete the following tasks:
Prerequisites
Create user groups
Note
Azure Active Directory is now Microsoft Entra ID. Learn more.
If you haven't created user groups for your frontline workers and frontline managers, create a group in the Microsoft 365 Admin Center or create a Microsoft Entra group.
Set up the Field Service for Teams app
Deploy the Field Service Teams app.
Install and pin the app.
Open the Field Service app in Teams and select your environment.
Set up the Field Service for Viva Connections SharePoint app
Viva Connections is included in your Microsoft Teams license. Field Service for Viva Connections is a SharePoint app that runs in Teams.
Note
You must select your environment in Teams and see a validation message before deploying Field Service for Viva Connections.
In Microsoft AppSource, search for and select Dynamics 365 Field Service for Viva Connections.

Select Add, Get it now or Update and confirm your information.
On the SharePoint apps page, SharePoint Store tab, select Add to Apps site.
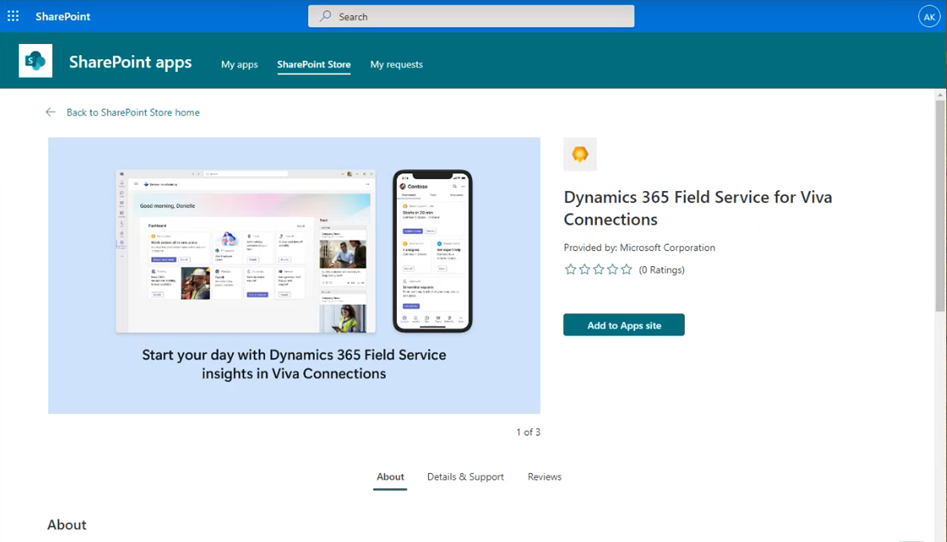
In the data access confirmation, select Enable this app and add it to all sites, and then select Add.
In the access approval confirmation, select Go to API access page.
On the API access page, select the pending request for Dynamics 365 Field Service for Viva Connections, and then select Approve. Confirm your approval.
API access is at the tenant level and is given to all environments in the tenant. Learn more about managing API access.
Add Field Service cards to the Viva Connections dashboard
The Field Service app provides four cards that you can add to the Viva Connections dashboard. For frontline managers, we recommend the Work orders all in one place and Remote Assist cards. For frontline workers, we recommend the Upcoming work order, Work orders assigned, and Remote Assist cards.
Sign in to Microsoft Teams as an admin and open the Viva Connections app.
On the dashboard, select Edit.
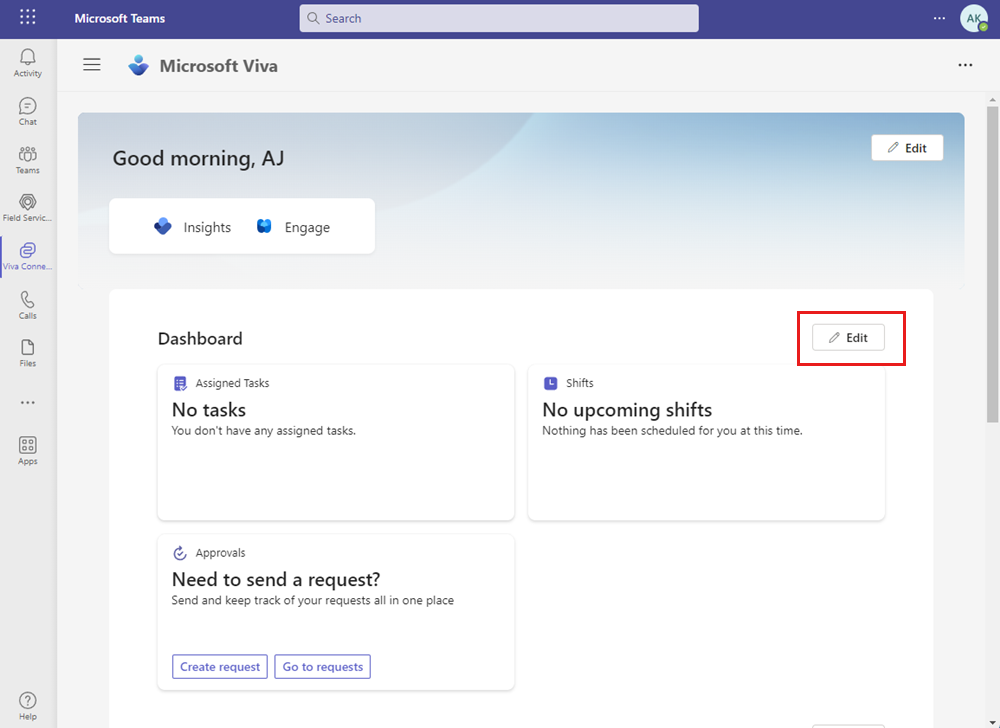
Set up the dashboard for Frontline workers, and then select Continue.
Select Add a card. Select and add each of the four Field Service cards.
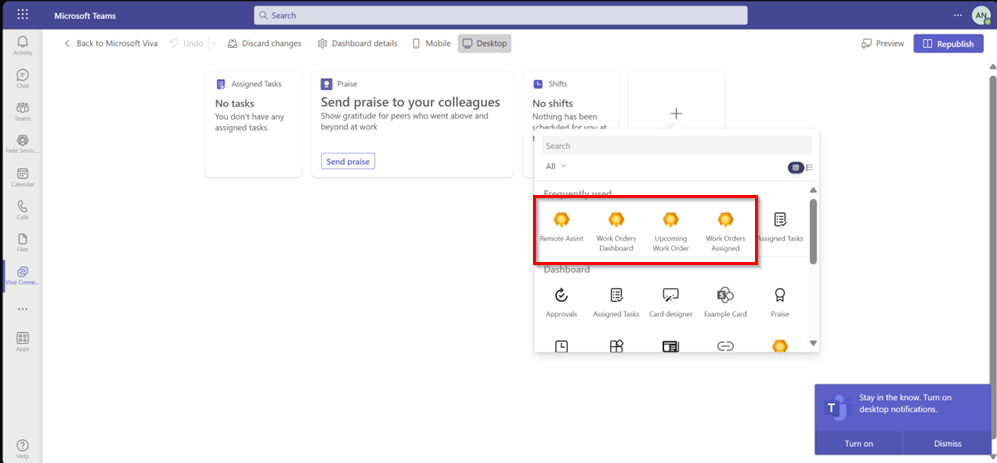
Set the target audience for each card.
If you don't set up the target audience for each card, the card will be available to all workers.
Preview the experience and then select Publish or Republish.
Assign security roles and field security profiles
Assign Microsoft Entra ID permissions for your frontline managers and frontline workers in Field Service or Power Platform admin center. For frontline managers, we recommend the default Field Service - Dispatcher or the Field Service - Administrator role. For frontline workers, we recommend the default Field Service - Resource role.
To assign security roles in Field Service, go to the Field Service Get Started page and set up your frontline workers. Assign a Security Role and Field Security role. The other fields are optional. Learn more about users and security roles and profiles.
Sync Microsoft Entra groups and Dataverse security roles
Synchronize your Microsoft Entra groups to the Dataverse security roles. Although this step is optional, we recommend that you assign Microsoft Entra ID permissions to ensure that adding and removing users is reflected in both Microsoft Entra ID and Power Platform. To automate the process using the Web API, see Assign a security role to a Microsoft Entra group team.
Sign in to the Microsoft 365 admin center.
Create a security group and add members to it.
Assign a security role to the group.
Set up column level security (optional)
If some of the user's permissions are inadequate to view or create work orders, you can grant the user an elevated security role or change the column-level security of the user’s security role. For more information, see Set up users and security profiles and Security roles and privileges.
Go to Power Apps.
Select your environment in the top bar.
In the left navigation pane, select Solutions, and then find and select the Default Solution.
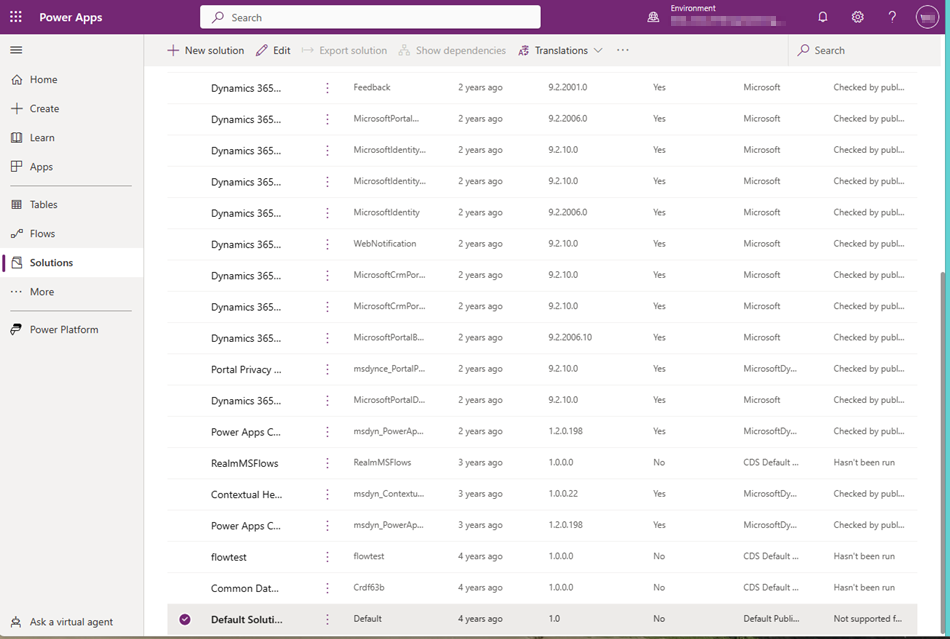
Under Object, select Column security profiles.
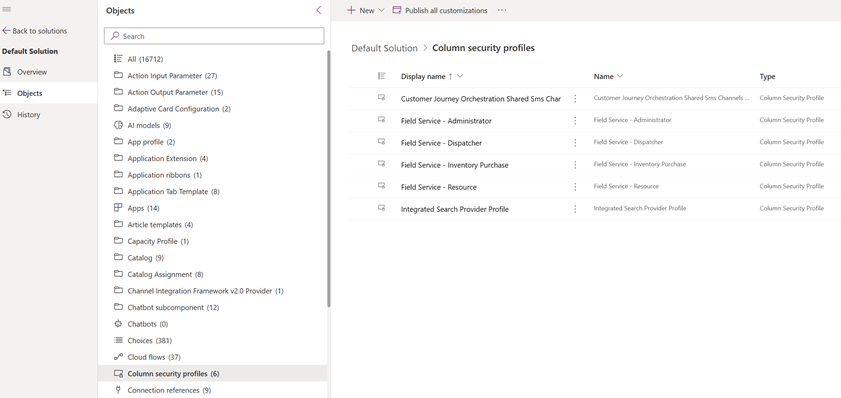
Edit the desired column level profiles.


