Intercompany vendor invoice
Important
Functionality noted in this article is available to targeted users as part of a preview release. The content and the functionality are subject to change.
Applies To: Project Operations for resource/non-stocked based scenarios
To utilize the capabilities described in this article, it's necessary to activate the following features in the Feature Management workspace.
- Enable subcontract actuals processing with Project Operations for resource-based scenarios.
- Enable Intercompany Vendor invoices for resource-based/non-stocked scenarios.
Minimum version required
To use this feature for Microsoft Dynamics 365 Project Operations non-stocked/resource-based scenarios, the following versions are required:
- Project Operations Dataverse version 4.88.0.0 or later.
- Dynamics 365 Finance version 10.0.38 or later.
Run dual-write maps for the vendor invoice lines
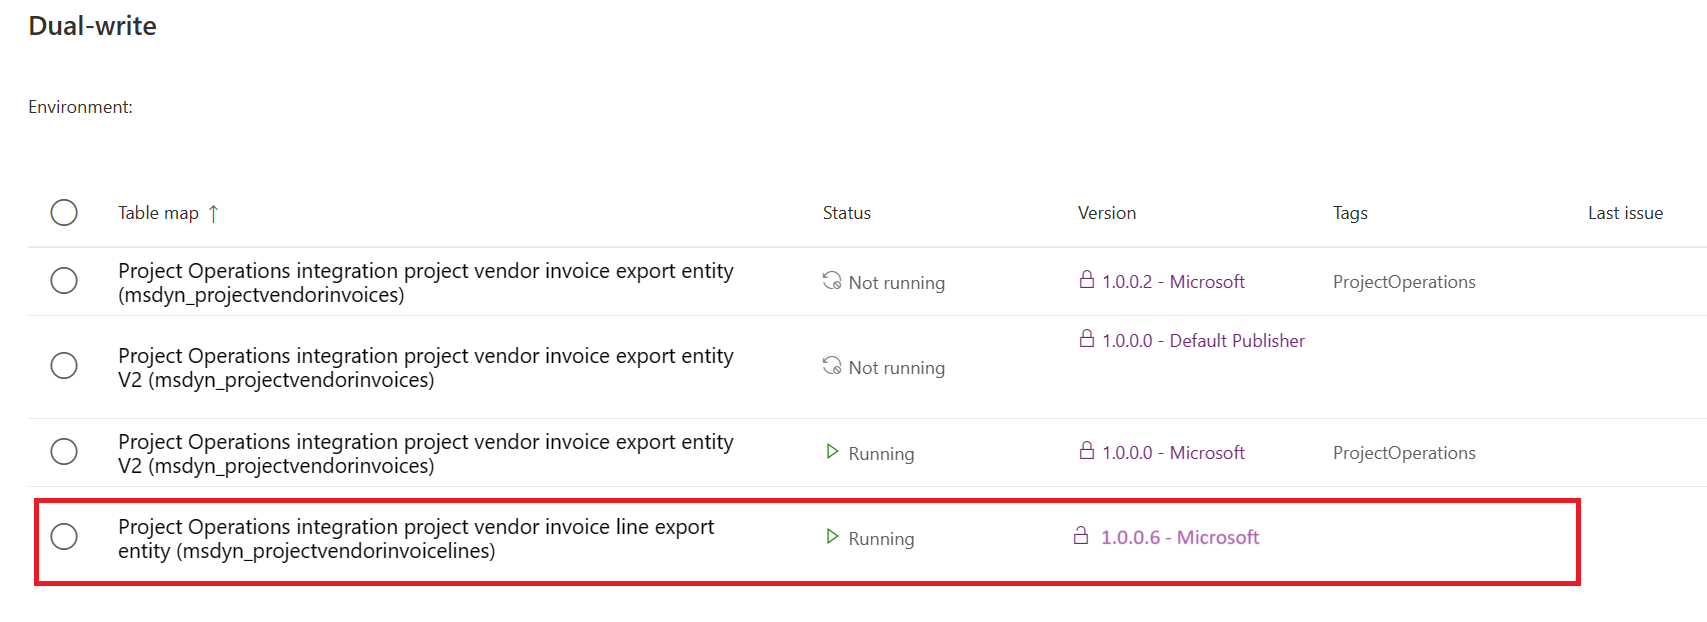
Make sure that the mapping for Project Operations integration project vendor invoice line export entity and msdyn_projectvendorinvoicelines use version 1.0.0.6 or later.
The following screenshot shows the dual-write entity map that's used for vendor invoice lines.
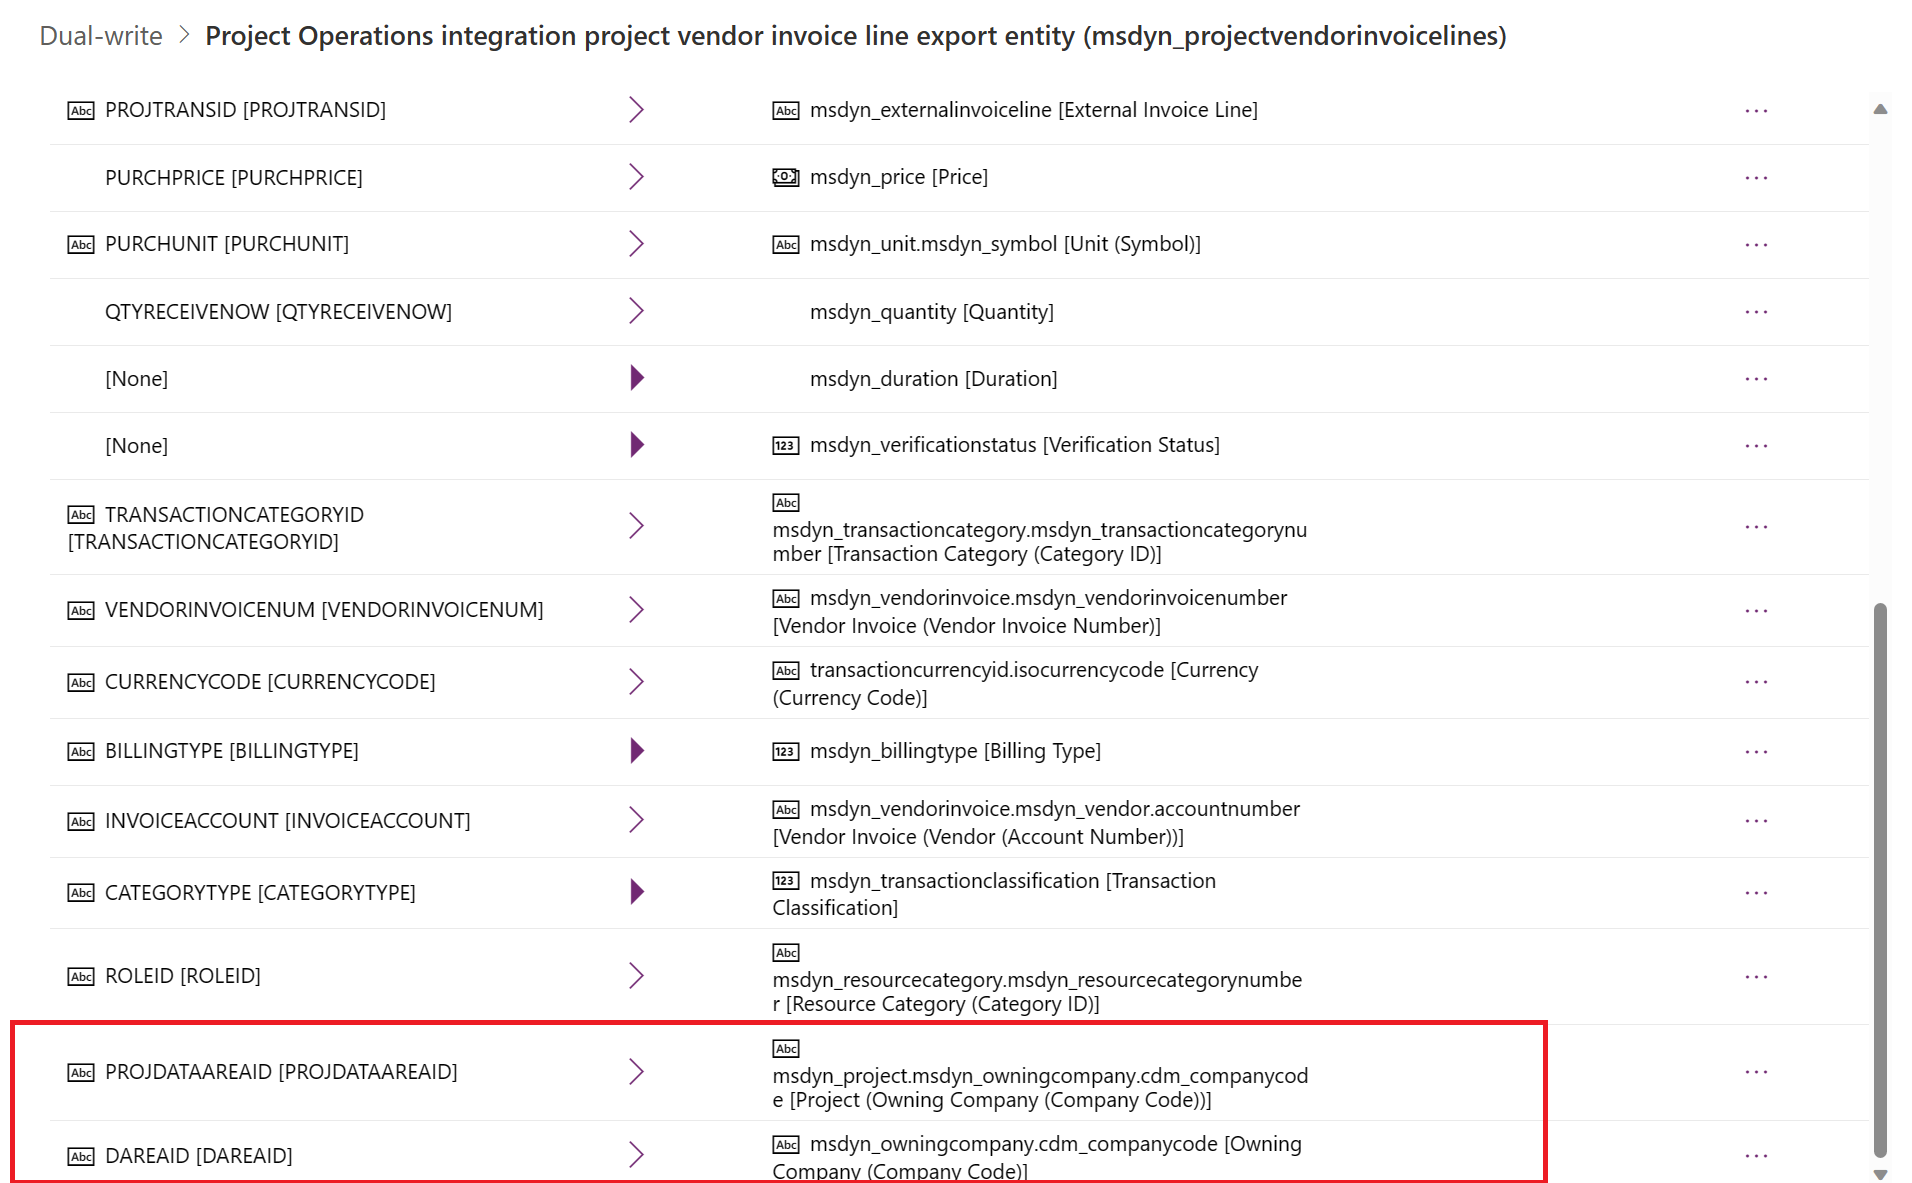
The following screenshot shows the dual-write field mapping that's used for vendor invoices lines.
Create and post an intercompany vendor invoice
USPM, the lending legal entity, must create and post the intercompany vendor invoice for a project from GBPM, the borrowing legal entity. This vendor invoice represents the outsourced labor and expense that were performed by vendors that are paid by USPM.
To create an intercompany invoice, follow these steps.
- In Microsoft Dynamics 365 Finance, go to Accounts payables > Invoices > Pending vendor invoices.
- To create a vendor invoice, on the Action pane, select New.
- On the Invoice header, in the Invoice account field, select Subcontractor.
- Select the Invoice date.
- On the Invoice line FastTab, select Add line to create a vendor invoice line.
- Select the Procurement category that was created for subcontract lines, and enter the unit price, unit of measurement, and quantity.
- In the vendor invoice lines section, on the Project tab, select the Project company GBPM and the project from the GBPM company.
- Select the Project category. It can be of type expenses or hours. If the selected project category is of the hour type, select the role.
- Select Post to post the vendor invoice.
After the vendor invoice has been successfully posted, it becomes accessible within Microsoft Dataverse for verification and processing by the project manager. For more information about the process of verifying vendor invoices in Dataverse, see Verification of vendor invoices. Upon confirmation of an intercompany vendor invoice in Dataverse, this action triggers the generation of corresponding actual transactions within the Dataverse system.
| Transaction type | Description |
|---|---|
| Cost | This transaction is created for the borrowing legal entity and doesn't synchronize with Dynamics 365 Finance for integration journal posting. |
| Unbilled sales | This transaction is created for Borrowing legal entity and synchronizes with Dynamics 365 Finance for integration journal posting. |
| Inter-organizational sales | This transaction is created for Lending legal entity and synchronizes with Dynamics 365 Finance for integration journal posting. |
| Resourcing unit cost | This transaction is created for lending legal entity and synchronizes with Dynamics 365 Finance for integration journal posting. |
Post the integration journal for the lending legal entity
After the vendor invoice is validated and approved by the Project manager within Dataverse, the subsequent step involves the posting of Project Integration Journals in Dynamics 365 Finance specifically for the lending legal entity.
To post the integration journal for the lending legal entity, follow these steps.
- In Dynamics 365 Finance, go to Project management and accounting > Periodic > Project Operations on Customer Engagement > Import from staging and select to run the periodic process. This periodic process fills in Project Operations Integration journal.
- Go to Project management and accounting > Journals > Project Operations integration journal and review the journal lines. The system creates the journal lines for Inter-organizational sales and Resourcing unit cost.
- On the Action pane, select Post to post the integration journal.
Following the completion of the Project integration journal posting, the subsequent action entails generating an Intercompany customer invoice by the lending legal entity, succeeded by the vendor invoice posting performed by the borrowing legal entity.
For more information about the process of creating intercompany customer and vendor invoices, see Create intercompany customer and vendor invoices.