Conflict resolution
A conflict occurs when changes are made to the same item in both the workspace and the remote Git repository. When a conflict occurs, the Git status says Conflict and Commit is disabled.

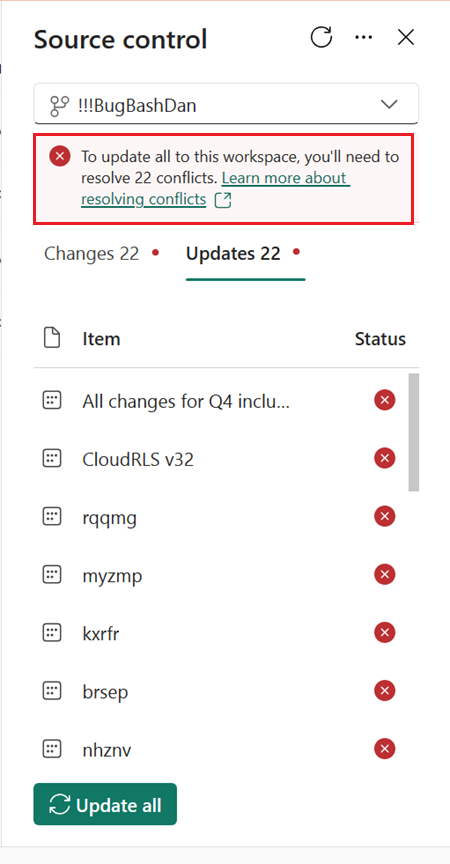
When you select Update when there are conflicts, a message notifies you that you need to resolve the conflicts before you can update.

There are three ways to resolve a conflict:
- Select which version to keep through the UI.
- Revert either the workspace or the Git repository to a previous synced state.
- Resolve the conflict in Git.
- Manually update the workspace if one or more items fail to update.
Resolve conflict in UI
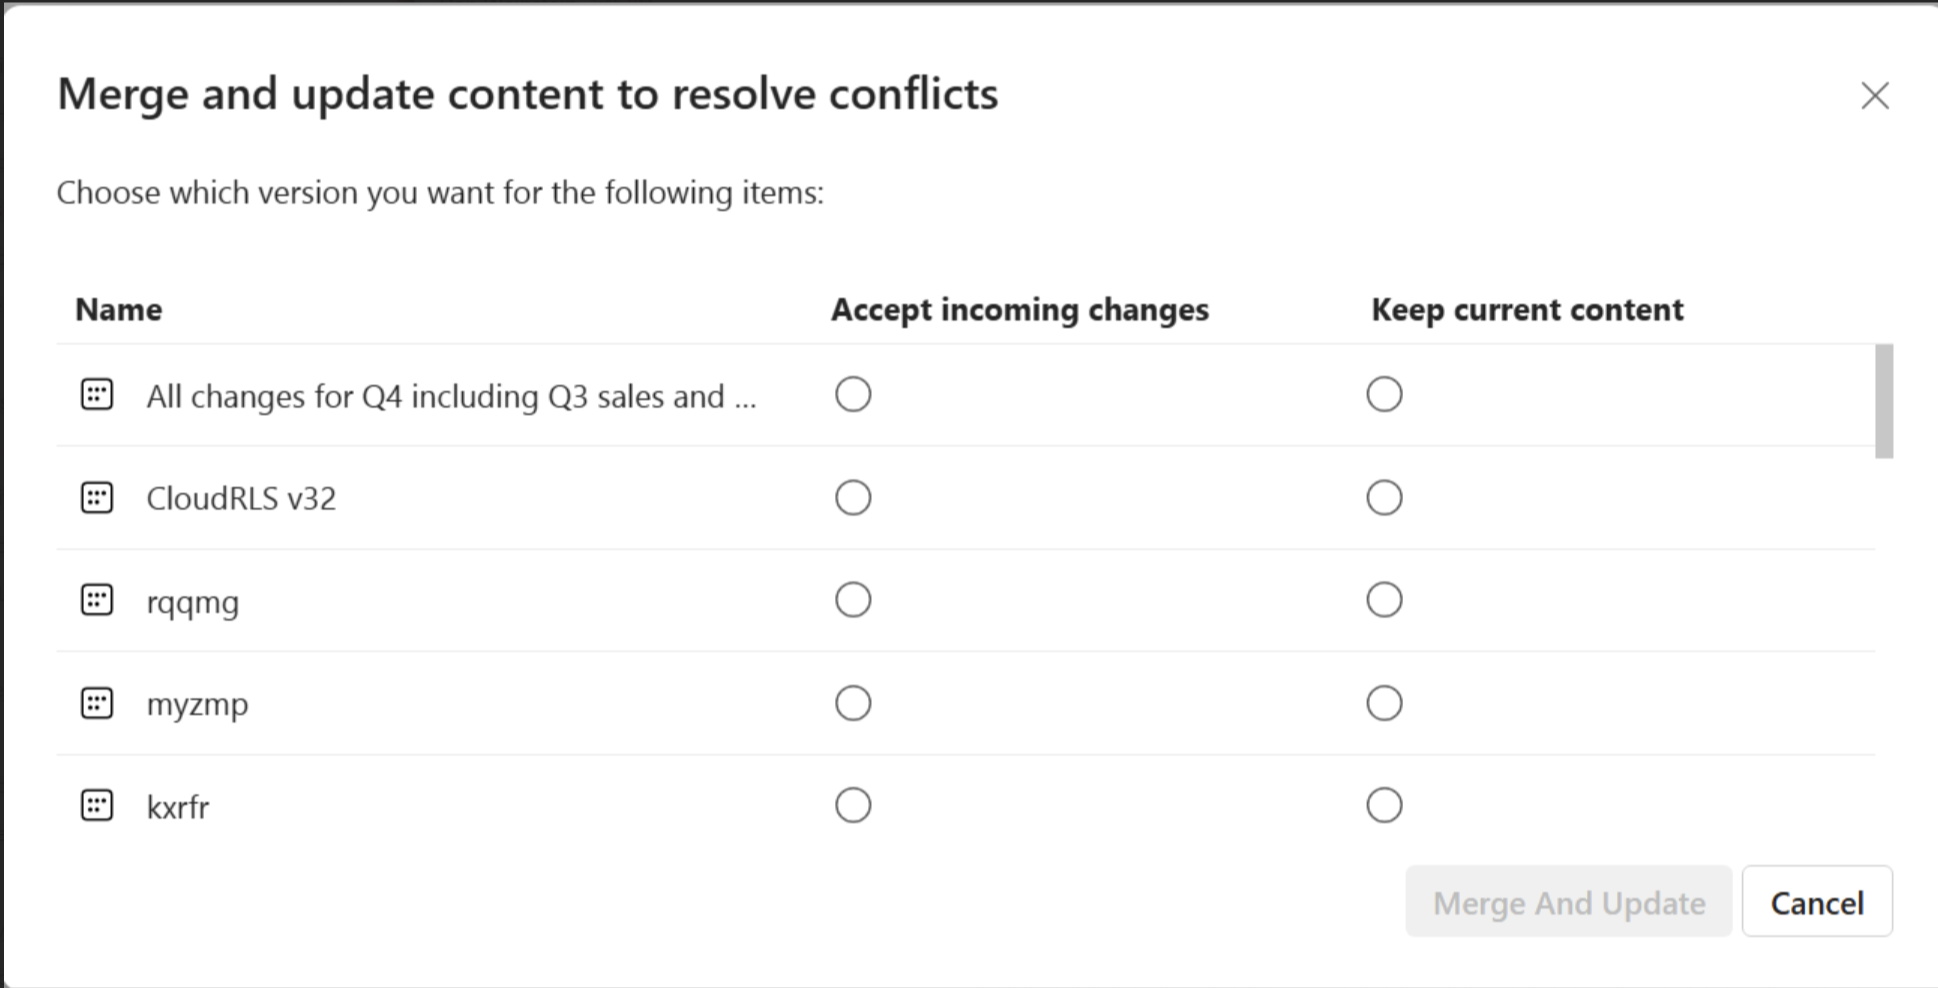
Select Update all to see a list of all the items that have conflicts. You can then select which version to keep for each item. For each conflicted item, you can choose to accept the incoming changes from the Git repository or keep the current version that's in the workspace.

Choose Accept incoming changes to override the changes in the workspace. The workspace changes are lost and the Git status changes to synced if the import succeeds.
Choose Keep current content to keep the version currently in the workspace. After the update is complete, the Git status becomes uncommitted changes as the changes in the workspace aren't yet committed to the branch.
Revert to a previous state
You can revert either the entire workspace or Git branch to last synced state. If you revert the Git branch to a previous commit, you can still see the changes made to the unsynced branch. If you revert the workspace, you lose all the changes made to the workspace since the last commit.
To revert to the prior synced state, do one of the following actions:
- Use the Undo command to return conflicted items in the workspace to their last synced state.
- Revert to the last synced state in Git using the
git revertcommand in Azure DevOps.
You can also resolve conflicts by disconnecting and reconnecting the workspace. When you reconnect, select the direction you want to sync. Note, however, that when you reconnect, it overwrites all items in the workspace or branch and not just the conflicted ones. It doesn't return the workspace or branch to the last synced state. Rather, it overwrites all the content in one location with the content of the other.
Resolve conflict in git
If you're not sure what changes were made and which version to choose and don’t want to revert to a previous state, you can try resolving the conflict in the Git repo by creating a new branch, resolving the conflict in that branch, and syncing it with the current one.
Note
Only a workspace admin can reconnect the workspace to the new branch.
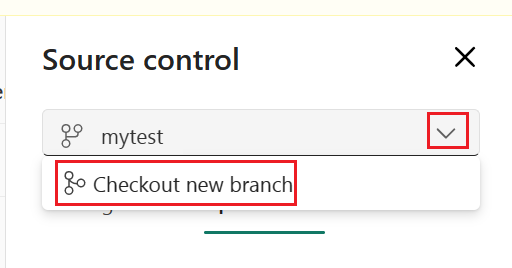
From the Source control panel, check out a new branch using the last synced branch ID shown on bottom of screen


This step creates a new branch from the conflicted branch using the last synced Git state, before changes were made that conflict with your changes. You can see your changes in the Source control panel, but there's nothing to update from the Git branch. The checkout branch keeps the current workspace state, so uncommitted changes are retained when changing the branch.
Commit your changes into the new branch. This new branch now has the changes you made to the items connected to an earlier version of the Git branch that doesn't conflict with your changes.
In git, resolve the conflicts between the original branch and the new branch.
In git, merge the new branch into the original branch
In Fabric, switch the workspace back to the original branch.