Use the Get Metadata activity to look up data from a data source
You can use the Get Metadata activity to retrieve the metadata of any data in a Fabric pipeline. You can use the output from the Get Metadata activity in conditional expressions to perform validation, or consume the metadata in subsequent activities.
Prerequisites
To get started, you must complete the following prerequisites:
- A tenant account with an active subscription. Create an account for free.
- A workspace is created.
Add a Get Metadata activity to a pipeline with UI
To use a Get Metadata activity in a pipeline, complete the following steps:
Creating the activity
Create a new pipeline in your workspace.
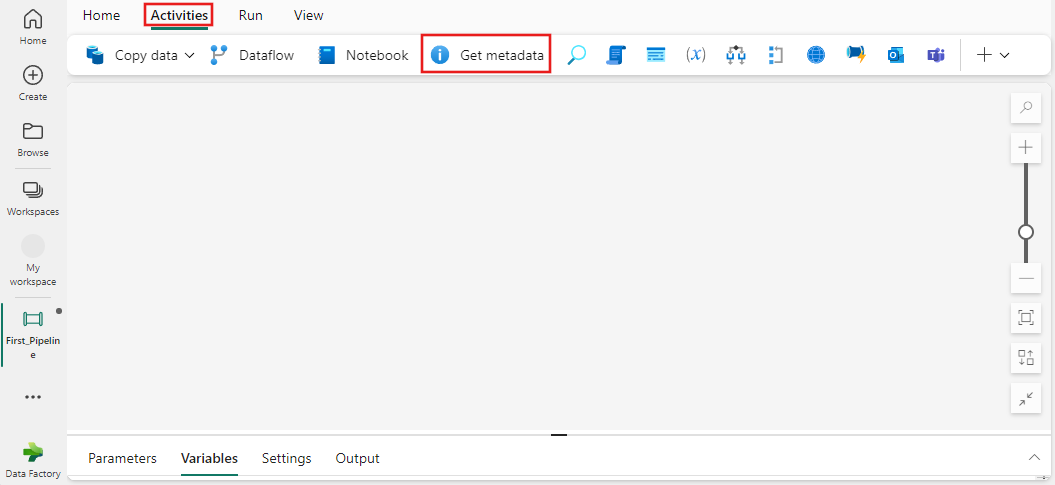
Search for Get Metadata in the pipeline Activities pane, and select it to add it to the pipeline canvas.

Select the new Get Metadata activity on the canvas if it isn't already selected.
Refer to the General settings guidance to configure the General settings tab.
Get Metadata settings
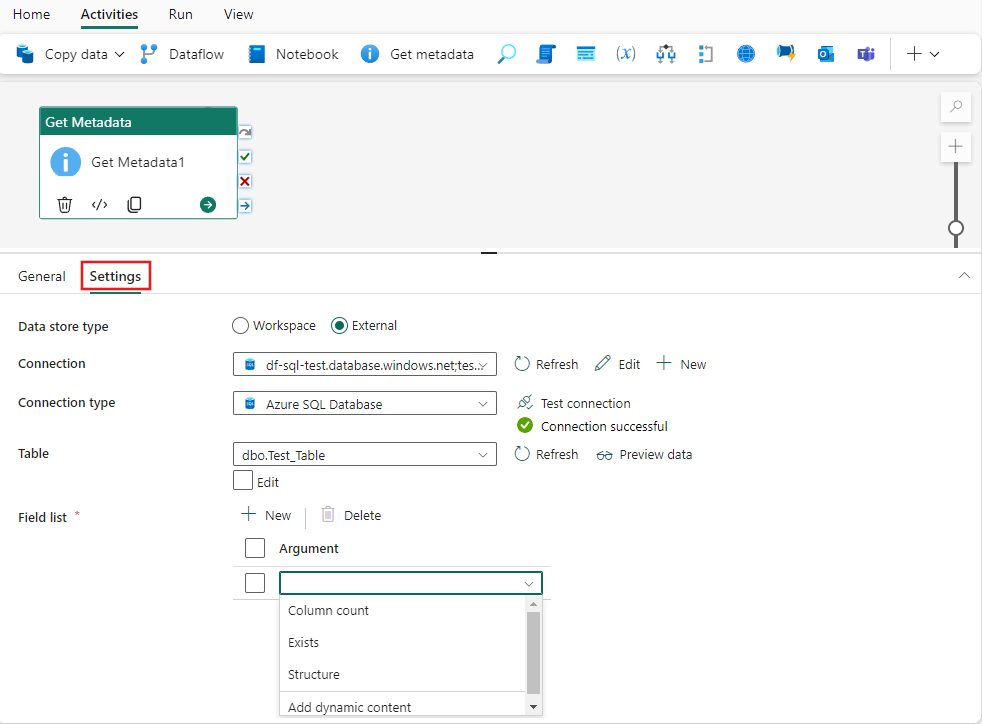
Select the Settings tab, and then select an existing connection from the Connection dropdown, or create a new connection, and specify its configuration details. Then select a table, to choose from the various metadata fields available for the table, including column count, exists, structure, and dynamic content.

Using the Get Metadata activity
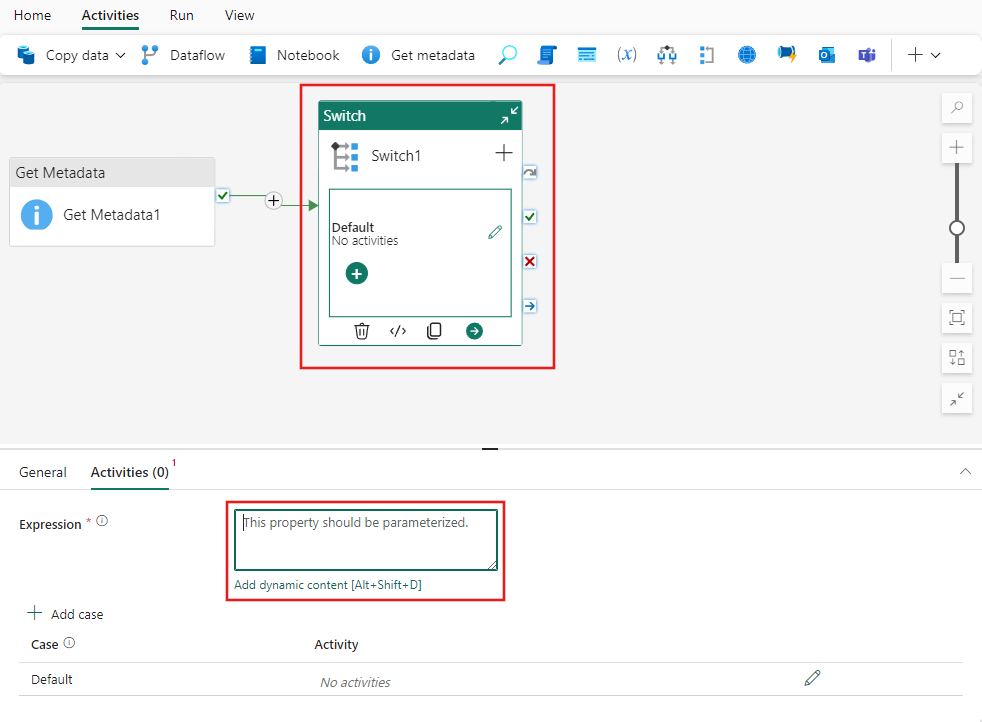
You can use the output of the Get Metadata activity in any other activities where dynamic content is supported. In this example, it's used as the Expression for a Switch activity.

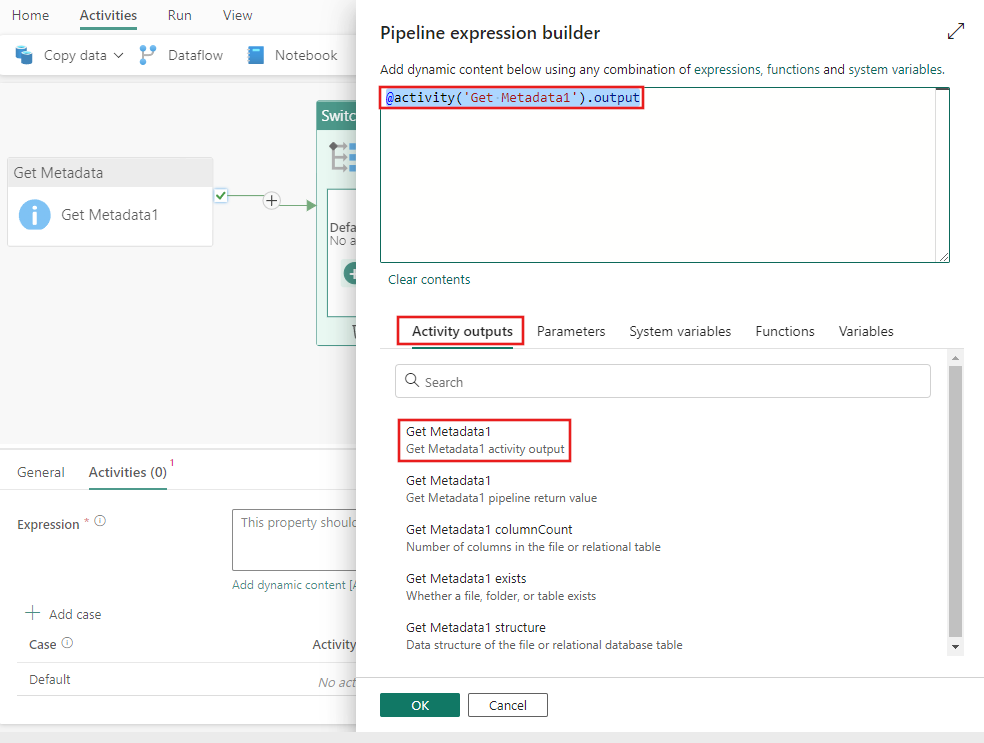
Select the Add dynamic content link that appears under the Expression text box for the Switch activity. Then you can browse the activity outputs in the expression builder and select them to add them to the expression.

Save and run or schedule the pipeline
After adding any other activities necessary to your pipeline, you can save and run it. Switch to the Home tab at the top of the pipeline editor, and select the save button to save your pipeline. Select Run to run it directly, or Schedule to schedule it. You can also view the run history here or configure other settings.
