Perform hyperparameter tuning in Fabric (preview)
Hyperparameter tuning is the process of finding the optimal values for the parameters of a machine learning model that affect its performance. It can be challenging and time-consuming, especially when dealing with complex models and large datasets. In this article, we will show you how to perform hyperparameter tuning in Fabric.
In this tutorial, we will use the California housing dataset, which contains information about the median house value and other features for different census blocks in California. Once the data is prepped, we will train a SynapseML LightGBM model to predict the house value based on the features. Next, we will use FLAML, a fast and lightweight AutoML library, to find the best hyperparameters for the LightGBM model. Finally, we will compare the results of the tuned model with the baseline model that uses the default parameters.
Important
This feature is in preview.
Prerequisites
Get a Microsoft Fabric subscription. Or, sign up for a free Microsoft Fabric trial.
Sign in to Microsoft Fabric.
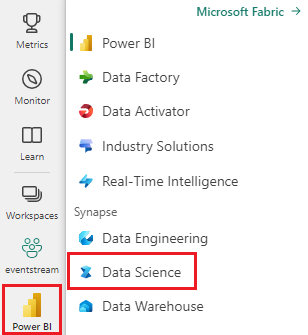
Use the experience switcher on the left side of your home page to switch to the Synapse Data Science experience.
- Create a new Fabric environment or ensure you are running on the Fabric Runtime 1.2 (Spark 3.4 (or higher) and Delta 2.4)
- Create a new notebook.
- Attach your notebook to a lakehouse. On the left side of your notebook, select Add to add an existing lakehouse or create a new one.
Prepare training and test datasets
In this section, we prepare the training and test datasets for the LightGBM model. We use the California housing dataset from Sklearn. We create a Spark dataframe from the data and use a VectorAssembler to combine the features into a single vector column.
from sklearn.datasets import fetch_california_housing
from pyspark.sql import SparkSession

# Load the Scikit-learn California Housing dataset
sklearn_dataset = fetch_california_housing()

# Convert the Scikit-learn dataset to a Pandas DataFrame
import pandas as pd
pandas_df = pd.DataFrame(sklearn_dataset.data, columns=sklearn_dataset.feature_names)
pandas_df['target'] = sklearn_dataset.target

# Create a Spark DataFrame from the Pandas DataFrame
spark_df = spark.createDataFrame(pandas_df)

# Display the data
display(spark_df)
We then randomly split the data into three subsets: training, validation, and test, with 85%, 12.75%, and 2.25% of the data respectively. We use the training and validation sets for hyperparameter tuning and the test set for model evaluation.
from pyspark.ml.feature import VectorAssembler

# Combine features into a single vector column
featurizer = VectorAssembler(inputCols=sklearn_dataset.feature_names, outputCol="features")
data = featurizer.transform(spark_df)["target", "features"]

# Split the data into training, validation, and test sets
train_data, test_data = data.randomSplit([0.85, 0.15], seed=41)
train_data_sub, val_data_sub = train_data.randomSplit([0.85, 0.15], seed=41)
Set up the ML experiment
Configure MLflow
Before we perform hyperparameter tuning, we need to define a train function that can take different values of hyperparameters and train a LightGBM model on the training data. We also need to evaluate the model performance on the validation data using the R2 score, which measures how well the model fits the data.
To do this, we first import the necessary modules and set up the MLflow experiment. MLflow is an open source platform for managing the end-to-end machine learning lifecycle. It helps us track and compare the results of different models and hyperparameters.
# Import MLflow and set up the experiment name
import mlflow

mlflow.set_experiment("flaml_tune_sample")

# Enable automatic logging of parameters, metrics, and models
mlflow.autolog(exclusive=False)
Set logging level
Here, we configure the logging level to suppress unnecessary output from the Synapse.ml library, keeping the logs cleaner.
import logging

logging.getLogger('synapse.ml').setLevel(logging.ERROR)
Train baseline model
Next, we define the train function that takes four hyperparameters as inputs: alpha, learningRate, numLeaves, and numIterations. These are the hyperparameters that we want to tune later using FLAML.
The train function also takes two dataframes as inputs: train_data and val_data, which are the training and validation datasets respectively. The train function returns two outputs: the trained model and the R2 score on the validation data.
# Import LightGBM and RegressionEvaluator
from synapse.ml.lightgbm import LightGBMRegressor
from pyspark.ml.evaluation import RegressionEvaluator

def train(alpha, learningRate, numLeaves, numIterations, train_data=train_data_sub, val_data=val_data_sub):
    """
    This train() function:
     - takes hyperparameters as inputs (for tuning later)
     - returns the R2 score on the validation dataset

    Wrapping code as a function makes it easier to reuse the code later for tuning.
    """
    with mlflow.start_run() as run:

        # Capture run_id for prediction later
        run_details = run.info.run_id

        # Create a LightGBM regressor with the given hyperparameters and target column
        lgr = LightGBMRegressor(
            objective="quantile",
            alpha=alpha,
            learningRate=learningRate,
            numLeaves=numLeaves,
            labelCol="target",
            numIterations=numIterations,
            dataTransferMode="bulk"
        )

        # Train the model on the training data
        model = lgr.fit(train_data)

        # Make predictions on the validation data
        predictions = model.transform(val_data)
        # Define an evaluator with R2 metric and target column
        evaluator = RegressionEvaluator(predictionCol="prediction", labelCol="target", metricName="r2")
        # Compute the R2 score on the validation data
        eval_metric = evaluator.evaluate(predictions)

        mlflow.log_metric("r2_score", eval_metric)

    # Return the model and the R2 score
    return model, eval_metric, run_details
Finally, we use the train function to train a baseline model with the default values of the hyperparameters. We also evaluate the baseline model on the test data and print the R2 score.
# Train the baseline model with the default hyperparameters
init_model, init_eval_metric, init_run_id = train(alpha=0.2, learningRate=0.3, numLeaves=31, numIterations=100, train_data=train_data, val_data=test_data)
# Print the R2 score of the baseline model on the test data
print("R2 of initial model on test dataset is: ", init_eval_metric)
Perform hyperparameter tuning with FLAML
FLAML is a fast and lightweight AutoML library that can automatically find the best hyperparameters for a given model and dataset. It uses a low-cost search strategy that adapts to the feedback from the evaluation metric. In this section, we will use FLAML to tune the hyperparameters of the LightGBM model that we defined in the previous section.
Define tune function
To use FLAML, we need to define a tune function that takes a config dictionary as input and returns a dictionary with the evaluation metric as the key and the metric value as the value.
The config dictionary contains the hyperparameters that we want to tune and their values. The tune function will use the train function that we defined earlier to train and evaluate the model with the given config.
# Import FLAML
import flaml

# Define the tune function
def flaml_tune(config):
    # Train and evaluate the model with the given config
    _, metric, run_id = train(**config)
    # Return the evaluation metric and its value
    return {"r2": metric}
Define search space
Next, we need to define the search space for the hyperparameters that we want to tune. The search space is a dictionary that maps the hyperparameter names to the ranges of values that we want to explore. FLAML provides some convenient functions to define different types of ranges, such as uniform, loguniform, and randint.
In this case, we want to tune the following four hyperparameters: alpha, learningRate, numLeaves, and numIterations.
# Define the search space
params = {
    # Alpha is a continuous value between 0 and 1
    "alpha": flaml.tune.uniform(0, 1),
    # Learning rate is a continuous value between 0.001 and 1
    "learningRate": flaml.tune.uniform(0.001, 1),
    # Number of leaves is an integer value between 30 and 100
    "numLeaves": flaml.tune.randint(30, 100),
    # Number of iterations is an integer value between 100 and 300
    "numIterations": flaml.tune.randint(100, 300),
}
Define hyperparameter trial
Finally, we need to define a hyperparameter trial that will use FLAML to optimize the hyperparameters. We need to pass the tune function, the search space, the time budget, the number of samples, the metric name, the mode, and the verbosity level to the flaml.tune.run function. We also need to start a nested MLflow run to track the results of the trial.
The flaml.tune.run function will return an analysis object that contains the best config and the best metric value.
# Start a nested MLflow run
with mlflow.start_run(nested=True, run_name="Child Run: "):
    # Run the hyperparameter trial with FLAML
    analysis = flaml.tune.run(
        # Pass the tune function
        flaml_tune,
        # Pass the search space
        params,
        # Set the time budget to 120 seconds
        time_budget_s=120,
        # Set the number of samples to 100
        num_samples=100,
        # Set the metric name to r2
        metric="r2",
        # Set the mode to max (we want to maximize the r2 score)
        mode="max",
        # Set the verbosity level to 5
        verbose=5,
        )
After the trial is finished, we can view the best configuration and the best metric value from the analysis object.
# Get the best config from the analysis object
flaml_config = analysis.best_config
# Print the best config
print("Best config: ", flaml_config)
print("Best score on validation data: ", analysis.best_result["r2"])
Compare results
After finding the best hyperparameters with FLAML, we need to evaluate how much they improve the model performance. To do this, we use the train function to create a new model with the best hyperparameters on the full training dataset. We then use the test dataset to calculate the R2 score for both the new model and the baseline model.
# Train a new model with the best hyperparameters
flaml_model, flaml_metric, flaml_run_id = train(train_data=train_data, val_data=test_data, **flaml_config)

# Print the R2 score of the baseline model on the test dataset
print("On the test dataset, the initial (untuned) model achieved R^2: ", init_eval_metric)
# Print the R2 score of the new model on the test dataset
print("On the test dataset, the final flaml (tuned) model achieved R^2: ", flaml_metric)
Save final model
Once we have completed our hyperparameter trial, we can now save the final, tuned model as an ML model in Fabric.
# Specify the model name and the path where you want to save it in the registry
model_name = "housing_model"  # Replace with your desired model name
model_path = f"runs:/{flaml_run_id}/model"

# Register the model to the MLflow registry
registered_model = mlflow.register_model(model_uri=model_path, name=model_name)

# Print the registered model's name and version
print(f"Model '{registered_model.name}' version {registered_model.version} registered successfully.")
Related content
Feedback
Coming soon: Throughout 2024 we will be phasing out GitHub Issues as the feedback mechanism for content and replacing it with a new feedback system. For more information see: https://aka.ms/ContentUserFeedback.
Submit and view feedback for