Build a basic AI chatbot
The AI chatbot template showcases a bot app, similar to ChatGPT, that responds to user questions and allows users to interact with the AI bot in Microsoft Teams. Teams AI library is used to build the app template, providing the capabilities to create AI-based Teams applications.
Prerequisites
| Install | For using... |
|---|---|
| Visual Studio Code | JavaScript, TypeScript, or Python build environments. Use the latest version. |
| Teams Toolkit | Microsoft Visual Studio Code extension that creates a project scaffolding for your app. Use the latest version. |
| Node.js | Back-end JavaScript runtime environment. For more information, see Node.js version compatibility table for project type. |
| Microsoft Teams | Microsoft Teams to collaborate with everyone you work with through apps for chat, meetings, and calls all in one place. |
| Azure OpenAI | First create your OpenAI API key to use OpenAI's Generative Pretrained Transformer (GPT). If you want to host your app or access resources in Azure, you must create an Azure OpenAI service. |
Create a new basic AI chatbot project
Open Visual Studio Code.
Select the Teams Toolkit
 icon in the Visual Studio Code Activity Bar
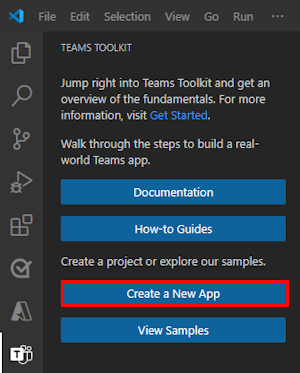
Select Create a New App.
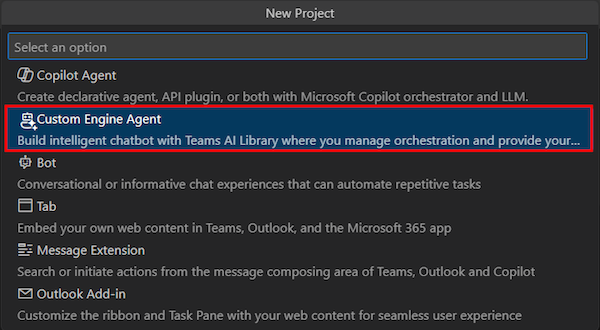
Select Custom Engine Agent.
Select Basic AI Chatbot.

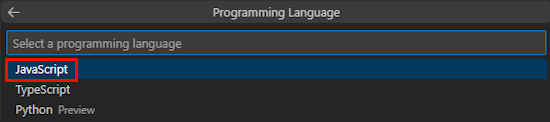
Select JavaScript.
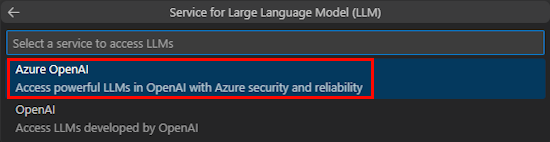
Select Azure OpenAI.
Enter your OpenAI or Azure OpenAI credentials based on the service you select. Select Enter.

Select Default folder.

To change the default location, follow these steps:
- Select Browse.
- Select the location for the project workspace.
- Select Select Folder.
Enter an application name for your app and then select the Enter key.

You've successfully created your AI chat bot project workspace.
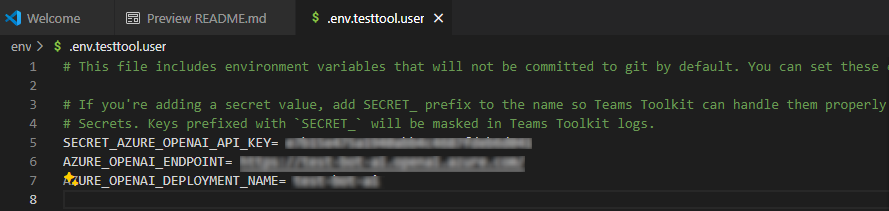
Under EXPLORER, go to the env > .env.testtool.user file.
Update the following details:
SECRET_AZURE_OPENAI_API_KEY=<your-key>AZURE_OPENAI_ENDPOINT=<your-endpoint>AZURE_OPENAI_DEPLOYMENT_NAME=<your-deployment>
To debug your app, select the F5 key or from the left pane, select Run and Debug (Ctrl+Shift+D) and then select Debug in Test Tool (Preview) from the dropdown list.
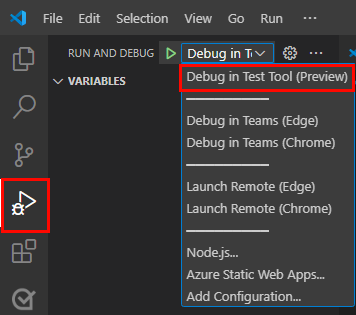
Test Tool opens the bot in a webpage.

Take a tour of the bot app source code
| Folder | Contents |
|---|---|
.vscode |
Visual Studio Code files for debugging. |
appPackage |
Templates for the Teams application manifest. |
env |
Environment files. |
infra |
Templates for provisioning Azure resources. |
src |
The source code for the application. |
teamsapp.yml |
This is the main Teams Toolkit project file. The project file defines two primary things: Properties and configuration Stage definitions. |
teamsapp.local.yml |
This overrides teamsapp.yml with actions that enable local execution and debugging. |
teamsapp.testtool.yml |
This overrides teamsapp.yml with actions that enable local execution and debugging in Teams App Test Tool. |
src/index.js |
Sets up the bot app server. |
src/adapter.js |
Sets up the bot adapter. |
src/config.js |
Defines the environment variables. |
src/prompts/chat/skprompt.txt |
Defines the prompt. |
src/prompts/chat/config.json |
Configures the prompt. |
src/app/app.js |
Handles business logics for the basic AI chatbot. |
How Teams AI chatbot works
Teams AI library provides a flow to build an intelligent chatbot with AI capabilities as follows:

TurnContext: The turn context object provides information about the activity, such as the sender and receiver, the channel, and other data needed to process the activity.
TurnState: The turn state object, similar to a cookie, stores data for the current turn. This object, as the turn context, is carried through the entire application logic, including the activity handlers and the AI system.
Authentication: If user authentication is configured, Teams AI attempts to sign the user in. If the user is already signed in, the SDK retrieves the access token and continues. Otherwise, the SDK initiates the sign-in flow and ends the current turn.
Activity Handlers: Teams AI library executes a set of registered activity handlers, enabling you to handle several types of activities. The activity handler system is the primary method for implementing bot or message extension app logic. It's a set of methods and configurations that allow you to register callbacks, known as route handlers, which trigger based on the incoming activity. The incoming activity can be in the form of a message, message reaction, or virtually any interaction within the Teams app.
AI system: The AI system in Teams AI library is responsible for moderating input and output, generating plans, and executing them. It can be used as a standalone or routed to by the app object. The important concepts are as follows:
- Prompt manager: Prompts play a crucial role in communicating and directing the behavior of Large Language Models (LLMs) AI.
- Planner: The planner receives the user's request, which is in the form of a prompt or prompt template, and returns a plan to fulfill it. This is achieved by using AI to mix and match atomic functions, known as actions, that are registered to the AI system. These actions are recombined into a series of steps that complete a goal.
- Actions: An action is an atomic function that is registered to the AI system.
AfterTurn handler: After the activity handler or AI system is executed, Teams AI library executes an
afterTurnhandler. The handler allows you to perform an action after the turn. If it returns astrue, the SDK saves the turn state to storage.Respond to user: Teams AI library saves the state and the bot can send the responses to the user.
Customize basic AI chatbot
You can add customizations on top of the basic app to build complex scenarios as follows:
Customize prompt: Prompts play a crucial role in communicating and directing the behavior of LLMs AI. They serve as inputs or queries that users can provide to elicit specific responses from a model. Here's a prompt that asks the LLM for name suggestions:
Request
Give me 3 name suggestions for my pet golden retriever.Response
Some possible name suggestions for a pet golden retriever are:
- Bailey
- Sunny
- Cooper
To use project generated with Teams Toolkit, you can author the prompts in the
src/prompts/chat/skprompt.txtfile. The prompts written in this file are inserted into the prompt used to instruct the LLM. Teams AI library defines the following syntax that you can use in the prompt text:{{ $[scope].property }}: Teams AI library renders the value of a property that is scoped and defined within the turn state. It defines three such scopes: temp, user, and conversation. If no scope is specified, by default, the library uses the temp scope.The
{{$[scope].property}}is used in the following way:In the
src/app/turnState.tsfile, define your temp state, user state, conversation state, and app turn state. If theturnState.tsfile doesn't exist in your project, create it undersrc/app.import { DefaultConversationState, DefaultTempState, DefaultUserState, TurnState } from "@microsoft/teams-ai"; export interface TempState extends DefaultTempState { } export interface UserState extends DefaultUserState { } export interface ConversationState extends DefaultConversationState { tasks: Record<string, Task>; } export interface Task { title: string; description: string; } export type ApplicationTurnState = TurnState<ConversationState, UserState, TempState>;In the
src/app/app.tsfile, use app turn state to initialize the app.const storage = new MemoryStorage(); const app = new Application<ApplicationTurnState>({ storage, ai: { planner, }, });In the
src/prompts/chat/skprompt.txtfile, use the scoped state property such as{{$conversation.tasks}}.
Customize user input: Teams AI library allows you to augment the prompt sent to LLM by including the user inputs. When including user inputs, you need to specify it in a prompt configuration file by setting
completion.include_inputtotrueinsrc/prompts/chat/config.json. You can also optionally configure the maximum number of user input tokens insrc/prompts/chat/config.jsonby changingcompletion.max_input_tokens. This is useful when you want to limit the length of user inputs to avoid exceeding the token limit.Customize conversation history: The SDK automatically manages the conversation history, and you can customize as follows:
In
src/prompts/chat/config.json, configurecompletion.include_history. Iftrue, the history is inserted into the prompt to let LLM aware of the conversation context.Maximum number of history messages. Configure
max_history_messageswhen initializingPromptManager.const prompts = new PromptManager({ promptsFolder: path.join(__dirname, "../prompts"), max_history_messages: 3, });Maximum number of history tokens. Configure
max_conversation_history_tokens when initializingPromptManager.const prompts = new PromptManager({ promptsFolder: path.join(__dirname, "../prompts"), max_conversation_history_tokens: 1000, });
Customize model type: You can use a specific model for a prompt. In the
src/prompts/chat/config.jsonfile, configurecompletion.model. If no model is configured for the prompt, the default model configured inOpenAIModelis used.The models that support the SDK as follows:
Model Supported gpt-3.5-turbo Supported gpt-3.5-turbo-16k Supported gpt-3.5-turbo-instruct Not supported from 1.1.0 gpt-4 Supported gpt-4-32k Supported gpt-4-vision Supported gpt-4-turbo Supported DALL·E Not supported Whisper Not supported TTS Not supported Customize model parameters:
In the
src/prompts/chat/config.jsonfile, configure the model parameters under completion as follows:- Max_tokens: The maximum number of tokens to generate.
- Temperature: The models temperature as a number between 0 and 2.
- Top_p: The models
top_pas a number between 0 and 2. - Presence_penalty: The models
presence_penaltyas a number between 0 and 1. - Frequency_penalty: The models
frequency_penaltyas a number between 0 and 1. - Stop_sequences: Array of stop sequences that when hit stops generation.
See also
Platform Docs