Build your first PowerPoint content add-in
In this article, you'll walk through the process of building a PowerPoint content add-in using Visual Studio.
Prerequisites
Visual Studio 2019 or later with the Office/SharePoint development workload installed.
Note
If you've previously installed Visual Studio, use the Visual Studio Installer to ensure that the Office/SharePoint development workload is installed.
Office connected to a Microsoft 365 subscription (including Office on the web).
Create the add-in project
In Visual Studio, choose Create a new project.
Using the search box, enter add-in. Choose PowerPoint Web Add-in, then select Next.
Name your project and select Create.
In the Create Office Add-in dialog window, choose Insert content into PowerPoint slides, and then choose Finish to create the project.
Visual Studio creates a solution and its two projects appear in Solution Explorer. The Home.html file opens in Visual Studio.
Explore the Visual Studio solution
When you've completed the wizard, Visual Studio creates a solution that contains two projects.
| Project | Description |
|---|---|
| Add-in project | Contains only an XML-formatted add-in only manifest file, which contains all the settings that describe your add-in. These settings help the Office application determine when your add-in should be activated and where the add-in should appear. Visual Studio generates the contents of this file for you so that you can run the project and use your add-in immediately. Change these settings any time by modifying the XML file. |
| Web application project | Contains the content pages of your add-in, including all the files and file references that you need to develop Office-aware HTML and JavaScript pages. While you develop your add-in, Visual Studio hosts the web application on your local IIS server. When you're ready to publish the add-in, you'll need to deploy this web application project to a web server. |
Update the code
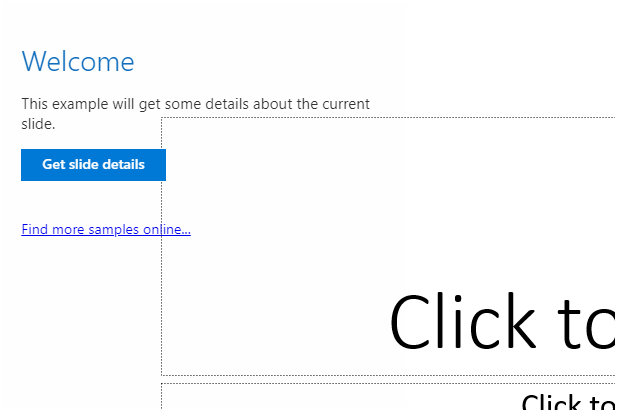
Home.html specifies the HTML that will be rendered in the add-in's task pane. In Home.html, find the
<p>element that contains the text "This example will read the current document selection." and the<button>element where theidis "get-data-from-selection". Replace these entire elements with the following markup then save the file.<p class="ms-font-m-plus">This example will get some details about the current slide.</p> <button class="Button Button--primary" id="get-data-from-selection"> <span class="Button-icon"><i class="ms-Icon ms-Icon--plus"></i></span> <span class="Button-label">Get slide details</span> <span class="Button-description">Gets and displays the current slide's details.</span> </button>Open the file Home.js in the root of the web application project. This file specifies the script for the add-in. Find the
getDataFromSelectionfunction and replace the entire function with the following code then save the file.// Gets some details about the current slide and displays them in a notification. function getDataFromSelection() { if (Office.context.document.getSelectedDataAsync) { Office.context.document.getSelectedDataAsync(Office.CoercionType.SlideRange, function (result) { if (result.status === Office.AsyncResultStatus.Succeeded) { showNotification('Some slide details are:', '"' + JSON.stringify(result.value) + '"'); } else { showNotification('Error:', result.error.message); } } ); } else { app.showNotification('Error:', 'Reading selection data is not supported by this host application.'); } }
Update the manifest
Open the add-in only manifest file in the add-in project. This file defines the add-in's settings and capabilities.
The
ProviderNameelement has a placeholder value. Replace it with your name.The
DefaultValueattribute of theDisplayNameelement has a placeholder. Replace it with My Office Add-in.The
DefaultValueattribute of theDescriptionelement has a placeholder. Replace it with A content add-in for PowerPoint..Save the file. The updated lines should look like the following code sample.
...
<ProviderName>John Doe</ProviderName>
<DefaultLocale>en-US</DefaultLocale>
<!-- The display name of your add-in. Used on the store and various places of the Office UI such as the add-ins dialog. -->
<DisplayName DefaultValue="My Office Add-in" />
<Description DefaultValue="A content add-in for PowerPoint."/>
...
Try it out
Using Visual Studio, test the newly created PowerPoint add-in by pressing F5 or choosing the Start button to launch PowerPoint with the content add-in displayed over the slide.
In PowerPoint, choose the Get slide details button in the content add-in to get details about the current slide.
Note
To see the console.log output, you'll need a separate set of developer tools for a JavaScript console. To learn more about F12 tools and the Microsoft Edge DevTools, visit Debug add-ins using developer tools for Internet Explorer, Debug add-ins using developer tools for Edge Legacy, or Debug add-ins using developer tools in Microsoft Edge (Chromium-based).
Next steps
Congratulations, you've successfully created a PowerPoint content add-in! Next, learn more about developing Office Add-ins with Visual Studio.
Troubleshooting
Ensure your environment is ready for Office development by following the instructions in Set up your development environment.
Some of the sample code uses ES6 JavaScript. This isn't compatible with older versions of Office that use the Trident (Internet Explorer 11) browser engine. For information on how to support those platforms in your add-in, see Support older Microsoft webviews and Office versions. If you don't already have a Microsoft 365 subscription to use for development, you might qualify for a Microsoft 365 E5 developer subscription through the Microsoft 365 Developer Program; for details, see the FAQ. Alternatively, you can sign up for a 1-month free trial or purchase a Microsoft 365 plan.
- If your add-in shows an error (for example, "This add-in could not be started. Close this dialog to ignore the problem or click "Restart" to try again.") when you press F5 or choose Debug > Start Debugging in Visual Studio, see Debug Office Add-ins in Visual Studio for other debugging options.
See also
Office Add-ins