Tutorial: Update a spreadsheet from a Power Automate flow
This tutorial teaches you how to run an Office Script for Excel through Power Automate. You'll make a script that updates the values of two cells with the current time. You'll then connect that script to a manually triggered Power Automate flow, so that the script is run whenever a button in Power Automate is selected. Once you understand the basic pattern, you can expand the flow to include other applications and automate more of your daily workflow.
Tip
If you are new to Office Scripts, we recommend starting with Tutorial: Create and format an Excel table. Office Scripts use TypeScript and this tutorial is intended for people with beginner to intermediate-level knowledge of JavaScript or TypeScript. If you're new to JavaScript, we recommend starting with the Mozilla JavaScript tutorial.
Prerequisites
You'll need access to Office Scripts and Power Automate for this tutorial. Please review the Platform support if the Automate tab doesn't appear. The Power Automate sign-up FAQ has information on getting started with Power Automate.
Prepare the workbook
Power Automate shouldn't use relative references like Workbook.getActiveWorksheet to access workbook components. So, you need a workbook and worksheet with consistent names that Power Automate can reference.
Create a new workbook named MyWorkbook.
In the MyWorkbook workbook, create a worksheet called TutorialWorksheet.
Create an Office Script
Go to the Automate tab and select New Script.
Replace the default script with the following script. This script adds the current date and time to the first two cells of the TutorialWorksheet worksheet.
function main(workbook: ExcelScript.Workbook) {
  // Get the "TutorialWorksheet" worksheet from the workbook.
  let worksheet = workbook.getWorksheet("TutorialWorksheet");

  // Get the cells at A1 and B1.
  let dateRange = worksheet.getRange("A1");
  let timeRange = worksheet.getRange("B1");

  // Get the current date and time using the JavaScript Date object.
  let date = new Date(Date.now());

  // Add the date string to A1.
  dateRange.setValue(date.toLocaleDateString());

  // Add the time string to B1.
  timeRange.setValue(date.toLocaleTimeString());
}
Rename the script to Set date and time. Select the script name to change it.
Save the script by selecting Save Script.
Create an automated workflow with Power Automate
Sign in to the Power Automate site.
In the menu that's displayed on the left side of the screen, select Create. This brings you to a list of ways to create new workflows.

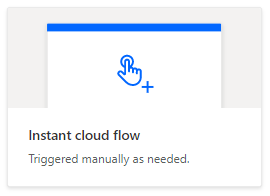
In the Start from blank section, select Instant flow. This creates a manually activated workflow. You can also make scheduled flows and flows that start based on events. These are covered in the next tutorials.

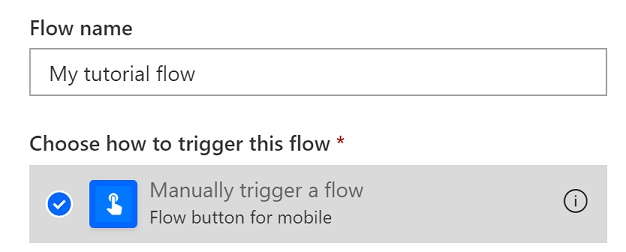
In the dialog window that appears, enter a name for your flow in the Flow name text box. Under Choose how to trigger the flow, select Manually trigger a flow from the list of options. Select Create to finish the initial setup.

Note that a manually triggered flow is just one of many types of flows. In the next tutorial, you'll make a flow that automatically runs when you receive an email.
In the flow builder, select the + button and Add an action.
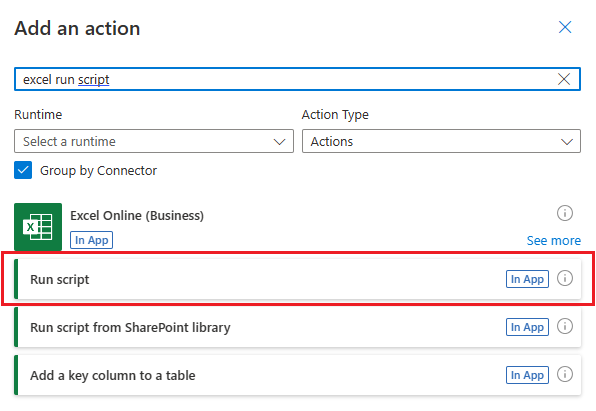
In the Add an action task pane, search for "Excel run script". Choose the Excel Online (Business) connector's Run script action. This action runs a script from your OneDrive on a workbook. If you want to use a script stored in your team's SharePoint library, you should use the Run script from a SharePoint library action.

You may be asked to sign in to your Microsoft 365 account. Do so to continue the tutorial.
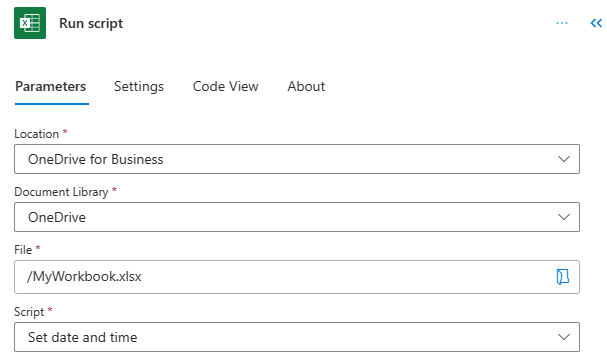
Next, you'll select the workbook and script to use in the flow step. For the tutorial, you'll use the workbook you created in your OneDrive, but you could use any workbook in a OneDrive or SharePoint site. Specify the following parameters for the Run script action:
- Location: OneDrive for Business
- Document Library: OneDrive
- File: MyWorkbook.xlsx (Chosen through the file browser)
- Script: Set date and time

Select Save.

Your flow is now ready to be run through Power Automate. You can test it using the Test button in the flow editor or follow the remaining tutorial steps to run the flow from your flow collection.
Run the script through Power Automate
From the main Power Automate page, select My flows.

Select My tutorial flow from the list of flows displayed in the My flows tab. This shows the details of the flow we previously created.
Select Run.

A task pane will appear for running the flow. If you are asked to Sign in to Excel Online, do so by selecting Continue.
Select Run flow. This runs the flow, which runs the related Office Script.
Select Done. You should see the run history update accordingly.
Refresh the page to see the results of the Power Automate. If it failed, verify the flow's settings and run it a second time.

Open the workbook to see the updated cells. You should see the current date in cell A1 and the current time in cell B1. Power Automate uses Coordinated Universal Time (UTC), so the time will likely be offset from your current time zone.

Next steps
Complete Tutorial: Automatically save content from emails in a workbook. It teaches you how to pass data from a workflow service to your Office Script and run the Power Automate flow when certain events occur.
Office Scripts