Apps and games download reports
Appropriate roles: Executive report viewer | Report viewer
This article explains how to create a new Apps and games report, and how to aggregate and set a timeframe for download.
Authorization required
For the Apps and games tile to be enabled in Downloads hub, you need to be signed in and enrolled in the AppDev program.

Create a new report
Create, download, or schedule downloadable reports. Select either of the following paths:
Basic: Generate a report with familiar steps in the classic download report's view.
The basic path is: Select program > select report name > select columns (optional) > select time range > update file name > select file type > review report and download.
Advanced: With the advanced path, you create templates, schedule reports, and access the templates. The templates help in report discovery and usability.
Here are common elements for the paths:
Program selector: Select the program for the report to be downloaded.
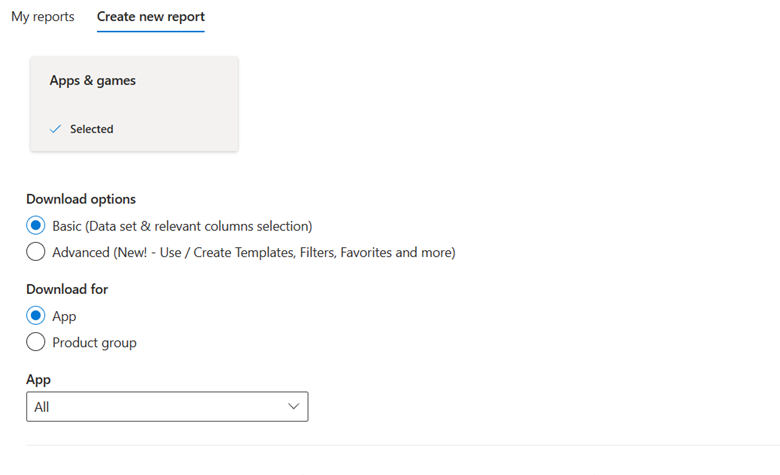
Report name: A generic name is added to the report by default. Update the name to any string, and the downloaded file will have the same name.

Preview data: Preview the data after selecting any of the templates (or columns). The first 15 rows of data appear, based on your selection. That's a change from how the report generation currently works.


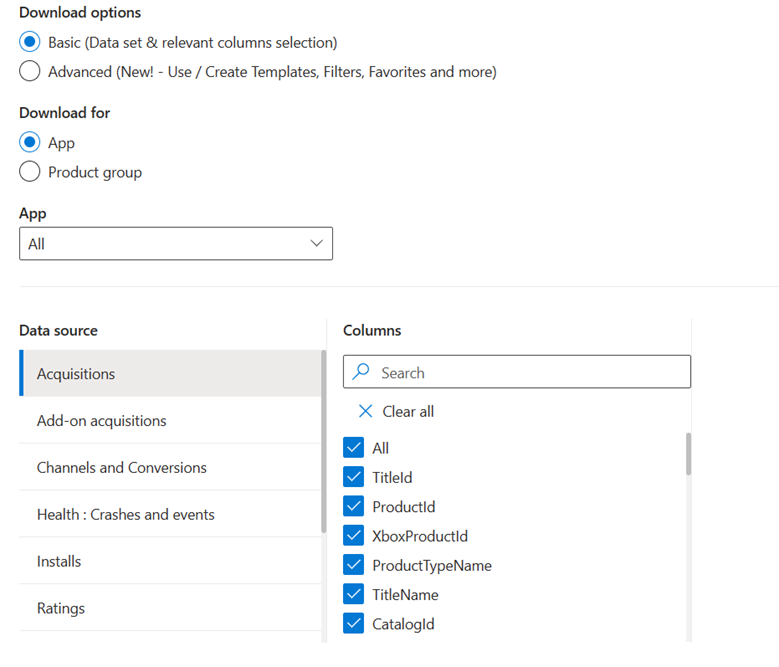
Basic path
Column selector: Select the columns that are available for a report.

Advanced path
Template: Templates are preselected groups of columns that are applied to the report before downloading. You can choose from:
Default templates.
Curated templates: Apply to any generic use case.
Custom templates: Create a template by using any set of columns.
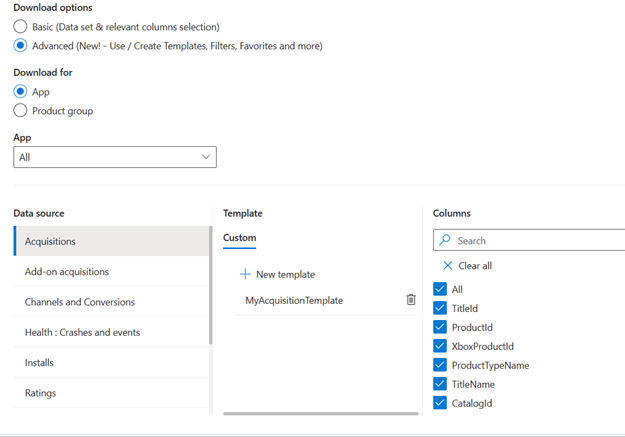
Column selector: Select columns that are available for a report. You might not need all of the available columns. For example, Azure usage has around 40 columns.
Adding to favorites: You can save frequently used templates as favorites and access them on the download report's landing page. You can use up to five favorites. If you try to add a favorite after that, you're prompted to replace an existing favorite to make room for the new one.
Only user-defined templates can be added to favorites.
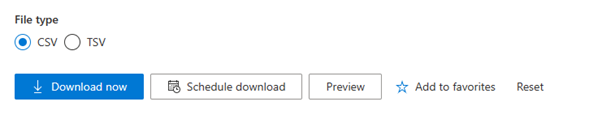
Reset the report creation: If you make an error, you can select the option to reset. Resetting removes all the selections that you made for area, template, columns, and filters.


Reports scheduled
You can find all of the reports scheduled under the Reports scheduled section.

This section displays the following details:
- Report name: Shows the user the defined name or the default name based on the report type for unique identification of the scheduled report.
- Occurrence count: Shows the number of occurrences, which are planned as per the user.
- Program details: Shows the program name to which the report belongs.
- Columns and filter details: Shows the count of selected columns and filters applied.
- Time range: Shows the time range for which the report is scheduled.
Feedback
Coming soon: Throughout 2024 we will be phasing out GitHub Issues as the feedback mechanism for content and replacing it with a new feedback system. For more information see: https://aka.ms/ContentUserFeedback.
Submit and view feedback for