Create report bookmarks in Power BI to share insights and build stories
APPLIES TO:
Power BI Desktop
Power BI service
When you edit a report in Power BI Desktop and the Power BI service, you can add bookmarks to capture the current state of a report page. Bookmarks save the current filters and slicers, cross-highlighted visuals, sort order, and so on. There are two types of bookmarks: personal and report. This article covers creating and using report bookmarks. When you add report bookmarks to a report and others view your report, they can get back to that exact state by selecting your saved report bookmark.
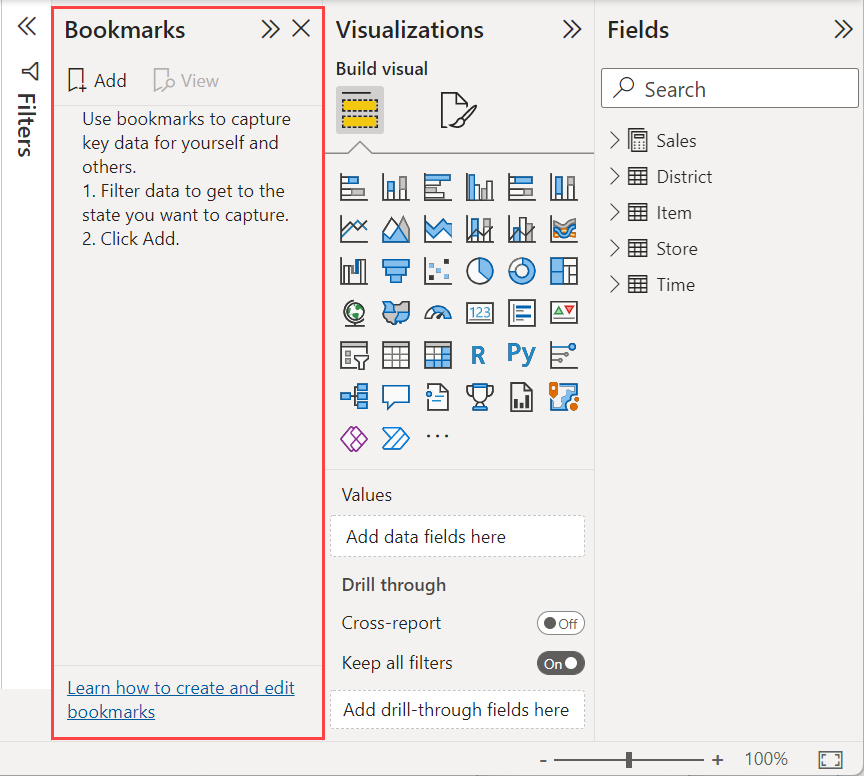 There are many uses for bookmarking. For example, you can create a collection of bookmarks and arrange them in the order you want. Later, step through each bookmark in a presentation to highlight a series of insights, or the story you want to tell with your visuals and reports. You can also use bookmarks to keep track of your own progress in creating reports (bookmarks are easy to add, delete, and rename).
Other articles about bookmarks
- In the Power BI service, anyone viewing a report can create a personal bookmark. For more about personal bookmarks, read about personal bookmarks in the Power BI service.
- After you create your report bookmarks, you and your report readers can do more with them. You can quickly build a bookmark navigation experience with a few more clicks.
Create report bookmarks
To create report bookmarks, you must have edit permissions for the report.
Power BI Desktop
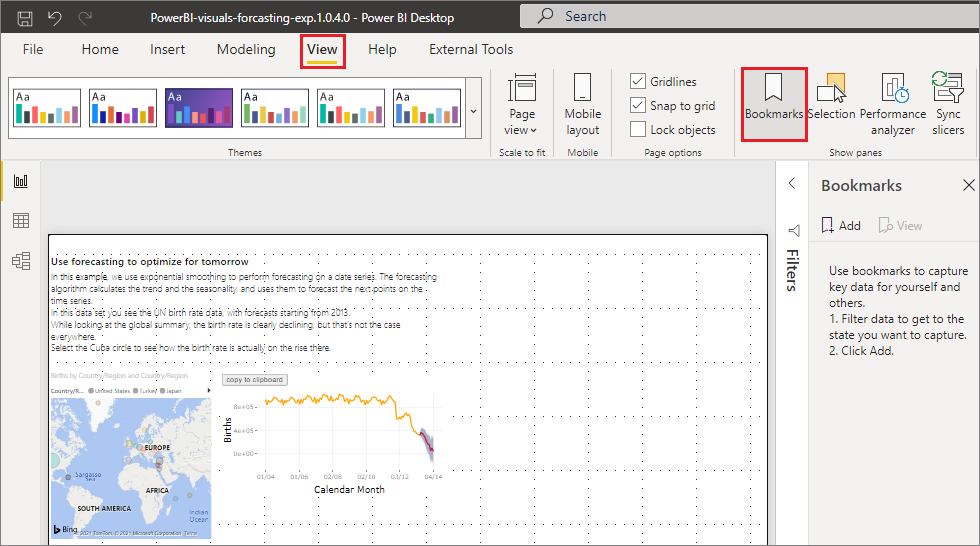
On the View tab, select Bookmarks.
Power BI service
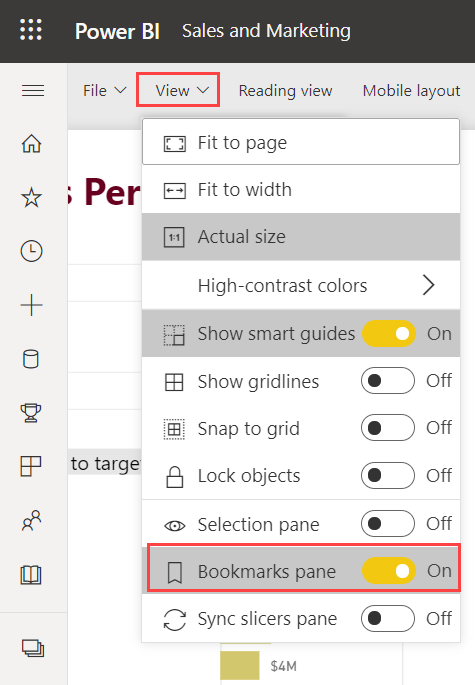
Open a report in Editing view.

Select View and enable Bookmarks pane.
When you create a bookmark, the following elements are saved with the bookmark:
- The current page
- Filters
- Slicers, including slicer type (for example, dropdown or list) and slicer state
- Visual selection state (such as cross-highlight filters)
- Sort order
- Drill location
- Visibility of an object (by using the Selection pane)
- The focus or Spotlight mode of any visible object
Configure a report page as you want it to appear in the bookmark. After your report page and visuals are arranged how you want them, select Add from the Bookmarks pane to add a bookmark.
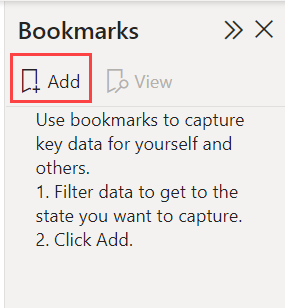
Power BI creates a bookmark and gives it a generic name. Easily Rename, Delete, or Update a bookmark by selecting More options (...) next to the bookmark's name, then selecting an action from the menu that appears.
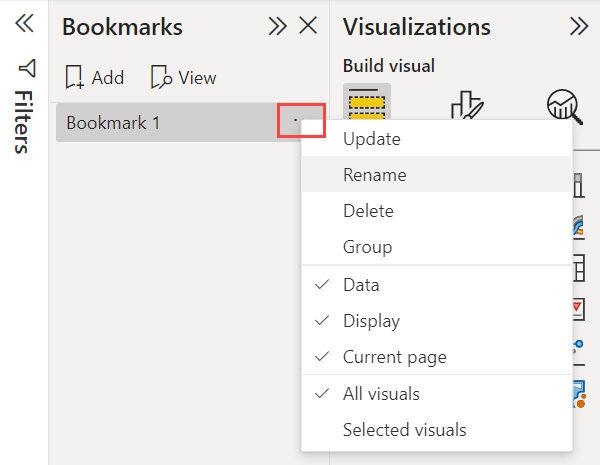
After you create a bookmark, display it by selecting it in the Bookmarks pane.
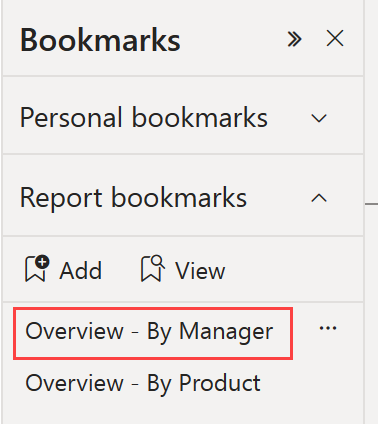
You can also select whether each bookmark applies other properties in the report. To make these changes, select More options (...) next to the bookmark name, then select or clear the check marks next to Data, Display, and other controls. The options are:
- Data properties, such as filters and slicers.
- Display properties, such as spotlight and its visibility.
- Current page changes, which present the page that was visible when the bookmark was added.
- Choose between All visuals and Selected visuals.
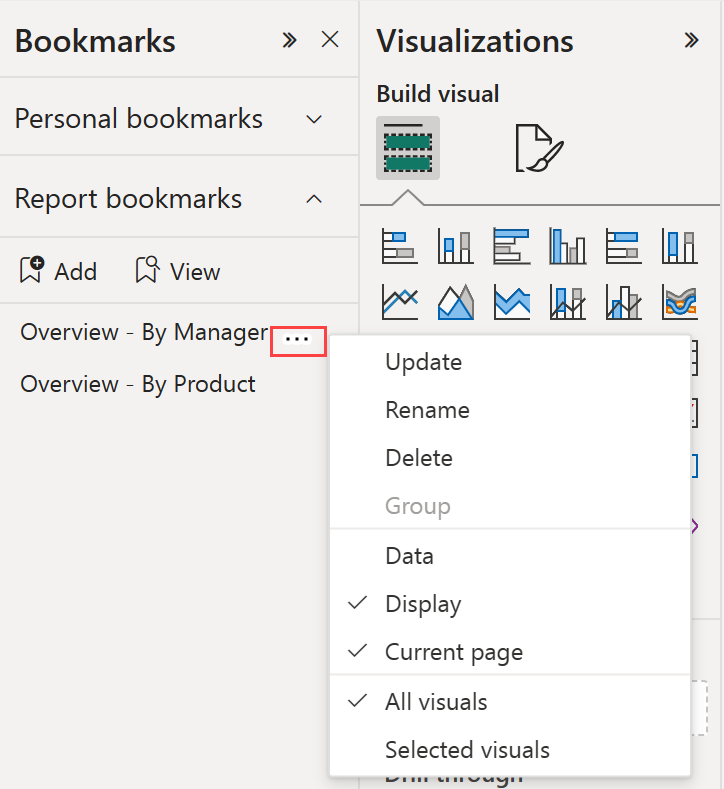
These capabilities are useful when you use bookmarks to switch between report views or selections of visuals. Because of this, you likely want to turn off data properties, so that filters aren't reset when users switch views by selecting a bookmark.
Arranging bookmarks
As you create report bookmarks, you might find that the order in which you create them is different from the order you'd like to present to your audience. No problem, you can easily rearrange the order of bookmarks.
In the Bookmarks pane, drag and drop bookmarks to change their order.
The yellow bar between bookmarks designates where you're placing the dragged bookmark.
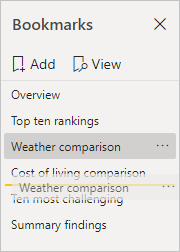
The order of your bookmarks can be important when you use the View feature of bookmarks, as described in the next section, Bookmarks as a slide show.
Note
You can't rearrange personal bookmarks except to choose the default view.
Bookmarks as a slide show
When you have a collection of bookmarks you'd like to present in order, you can view them as a slide show in Power BI Desktop, and in the Power BI service in either Edit or Reading mode.
In the Bookmarks pane, select View.
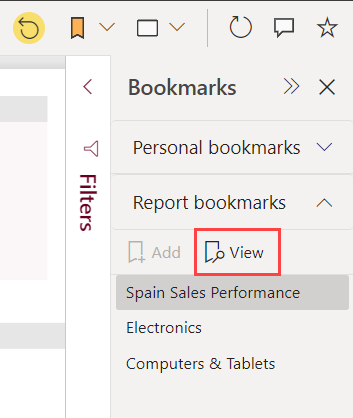
Read more about using bookmarks as a slideshow in the Power BI service.
Visibility: Using the Selection pane
The Selection pane is similar to the Bookmarks pane. They both display a list of all objects on the current page and allow you to select an object and specify whether it's visible.
Power BI Desktop Selection Pane
In Power BI Desktop, the Selection pane is on the View tab.

Power BI Edit Report
When you're editing a report in the Power BI service, the Selection pane is on the View menu. You don't see it if you can't edit the report.
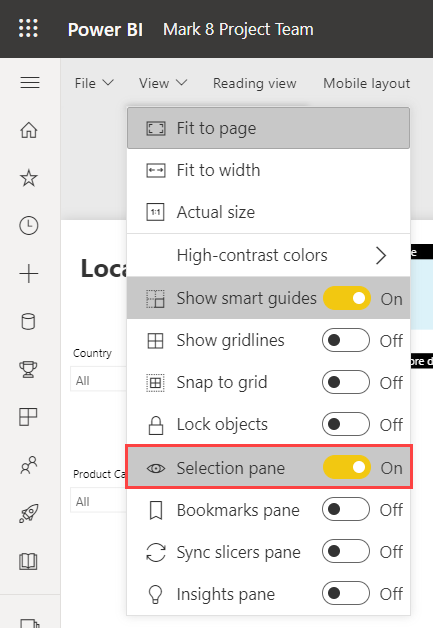
In the Selection pane, you select an object and toggle whether the object is currently visible by selecting the eye icon to the right of the object.
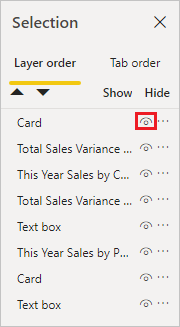
When you add a bookmark, the visibility status of each object is also saved, based on its setting in the Selection pane.
It's important to note that slicers continue to filter a report page, regardless of whether they're visible. As such, you can create many different bookmarks, with different slicer settings, and make a single report page appear different (and highlight different insights) in various bookmarks.
Note
When using the Selection pane in combination with bookmarks, changing the visibility of a selection results in its visibility reverting to the default setting. After making such changes, right-click a bookmark and select Update to update its visibility.
Assign bookmarks to buttons
You can link bookmarks to shapes and images. With this feature, when you select an object, it shows the bookmark associated with that object. This feature can be especially useful when you work with buttons. Read more about using buttons in Power BI. Consider also creating a bookmark navigator, which creates a set of buttons all linked automatically to a group of bookmarks.
Power BI Desktop Bookmark
To assign a bookmark to a button in Power BI Desktop:
On the Insert ribbon, select Buttons > Blank.
In the Format button pane, toggle the Action slider to On.
Expand the Action section. Under Type, select Bookmark.
Under Bookmarks, select a bookmark.
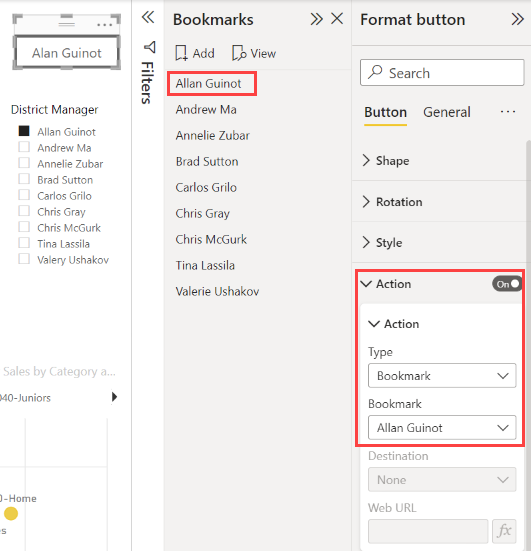
Power BI Bookmark
To assign a bookmark to a button in the Power BI service:
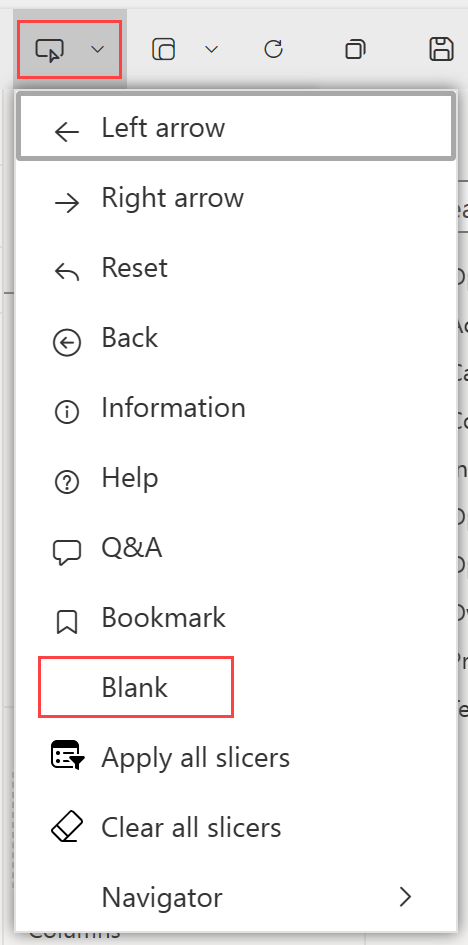
From the top menu bar, select the Buttons icon and choose Blank.
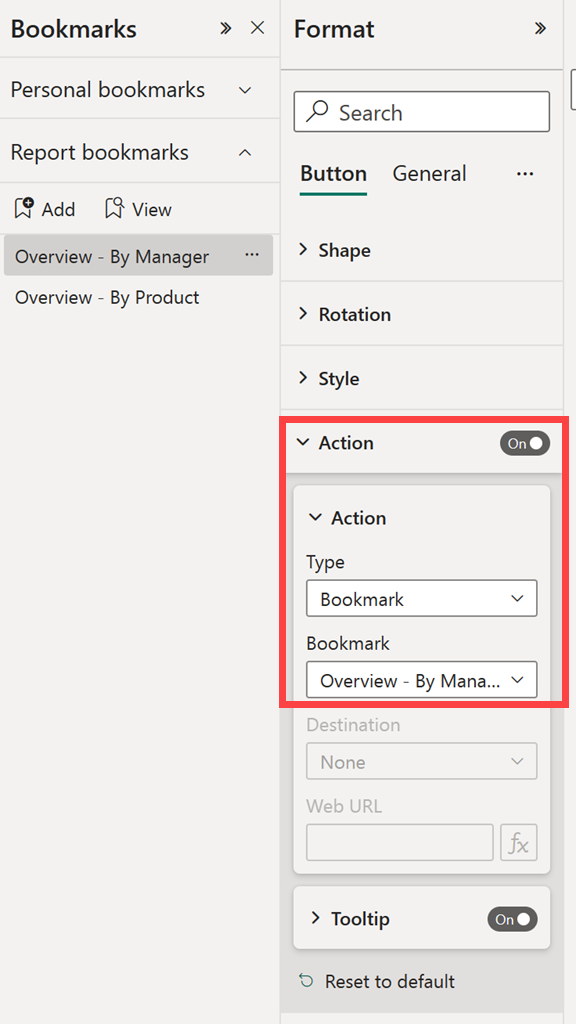
In the Format button pane, toggle the Action slider to On.
Expand the Action section. Under Type, select Bookmark.
Under Bookmarks, select a bookmark.
There are all sorts of interesting things you can do with object-linked bookmarking. You can create a visual table of contents on your report page, or you can provide different views (such as visual types) of the same information.
When you're in editing mode, press Ctrl and select the link to follow it. When you're not in editing mode, select the object to follow the link.
Bookmark groups
When editing a report, you can create and use bookmark groups. A bookmark group is a collection of bookmarks that you specify, which can be shown and organized as a group. You can't create groups of personal bookmarks.
Create a bookmark group
Press Ctrl and select the bookmarks you want to include in the group.
Select More options (...) next to your selected bookmarks, and then select Group from the menu that appears.
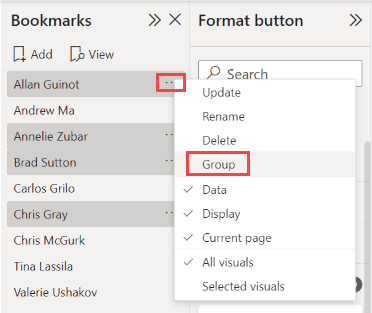
Power BI Desktop automatically names the group Group 1. You can select More options (...) next to this name, select Rename, and rename it to whatever you want.
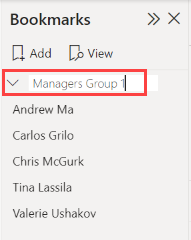
Expanding the bookmark group's name only expands or collapses the group of bookmarks, and doesn't represent a bookmark by itself.
Bookmark groups in View mode
When you use the View feature of bookmarks, the following details apply:
If the selected bookmark is in a group when you select View from bookmarks, only the bookmarks in that group are shown in the viewing session.
If the selected bookmark isn't in a group, or is on the top level (such as the name of a bookmark group), then all bookmarks for the entire report are played, including bookmarks in any group.
Ungroup bookmarks
Select any bookmark in a group and select More options (...).
Select Ungroup from the menu that appears.
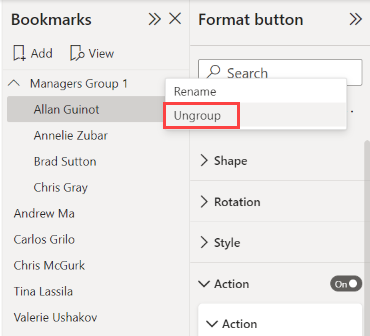
Selecting Ungroup for any bookmark from a group removes all bookmarks from the group; it deletes the group, but not the bookmarks themselves.
Remove a single bookmark from a group
Ungroup any member from that group, which deletes the entire grouping.
Select the members you want in the new group by pressing Ctrl and selecting each bookmark, then and select Group again.
Considerations and limitations
In this release of bookmark features, there are a few considerations and limitations to keep in mind.
- Most Power BI visuals work well with bookmarks. However, if you encounter problems with bookmarks and a custom visual, contact the creator of that custom visual and ask them to add support for bookmarks to their visual.
- If you add a slicer to a page where you previously created bookmarks, the slicer is cleared.
- Bookmarks apply to the state of the visuals on a report page, and not to the visuals' location on the report page. You can create a bookmark and then move visuals on that page. Selecting the bookmark doesn't return those visuals to their previous locations.
Related content
For more information about features that are similar or interact with bookmarks, see the following articles: