Create a support ticket
Before creating a support ticket, get real-time help by using the Power Platform admin center (admin roles only) or the Microsoft Fabric support page. If you can't resolve the issue through self-help, create a support ticket.
Prerequisites
Users can create support tickets if they have one of the following security roles or licenses:
Microsoft Entra role administrator
Environment administrator (or system administrator role in Dataverse)
Company administrator
Billing administrator
Service administrator
CRM service administrator
CRM organization administrator
Security administrator
Partner delegated administrator
SharePoint administrator
Teams administrator
Exchange administrator
Fabric administrator
Compliance administrator
Helpdesk administrator
Power BI Pro users can create support tickets for Power BI
Fabric users can create support tickets for Fabric products
Steps for creating a support ticket
The steps you take to create a support ticket vary, depending on your role.
For administrators
Sign in to the Power Platform admin center (PPAC) with your admin credentials.
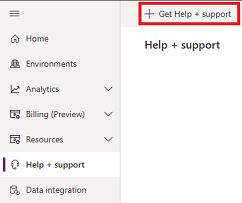
Select Help + support in the left navigation pane, and then select Get Help + support.
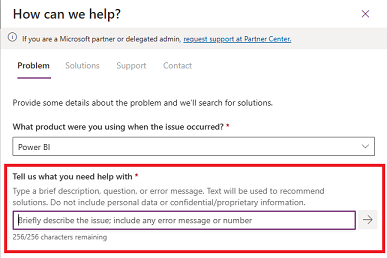
Select the product you're experiencing an issue with.
Tip
You can type the product name to quickly find the requested product.
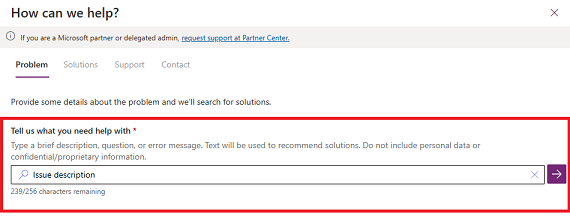
Fill in the description of the issue and select the arrow to the right of the text box. Solutions matching the issue's description appear.
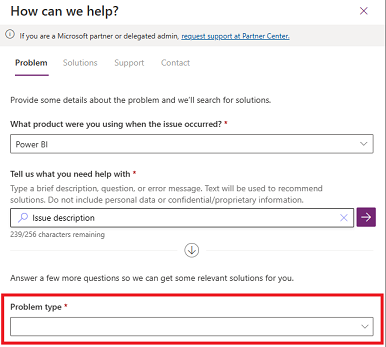
If you don't find the correct solution, select the problem type and subtype, and then choose Get solutions. For some problem type and subtype selections, you're asked to provide additional information.
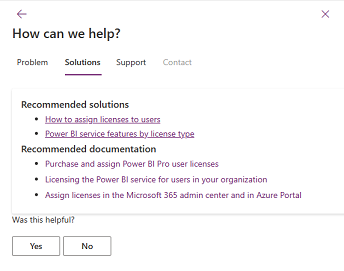
Based on the information you provide, PPAC presents you with a list of possible solutions to your issue. Select the relevant solution and determine if the content can successfully guide you to a fix.
If the guidance doesn't resolve your issue, scroll down, select Next, and then fill in the fields on the Support tab.
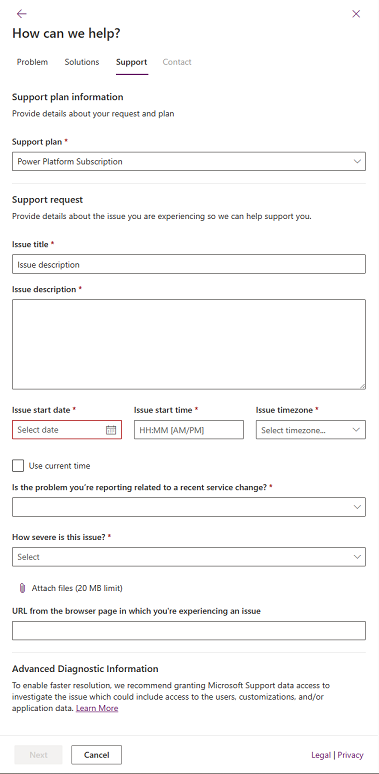
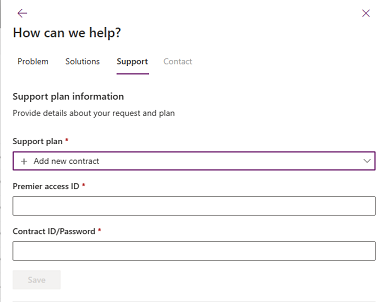
If you have a Unified or Premier support plan that doesn't appear under Support plan, select Add new contract and fill in the fields. If you don't know your access or contract ID, contact your service admin, Incident Manager, or Customer Success Account Manager (CSAM).
Tip
- For Contract ID/Password, enter your Unified or Premier contract ID.
- The Contract ID/Password defaults to the Unified or Premier contract ID. If you've changed the password when registering online in the Unified/Premier portal, you should use the updated password instead of the contract ID.
For Fabric users and Power BI Pro users
On the Microsoft Fabric support page, review the Product status dashboard list, the Service Outage/Degradation status, the Awareness status, and the current known issues, to ensure that your issue isn't already known.
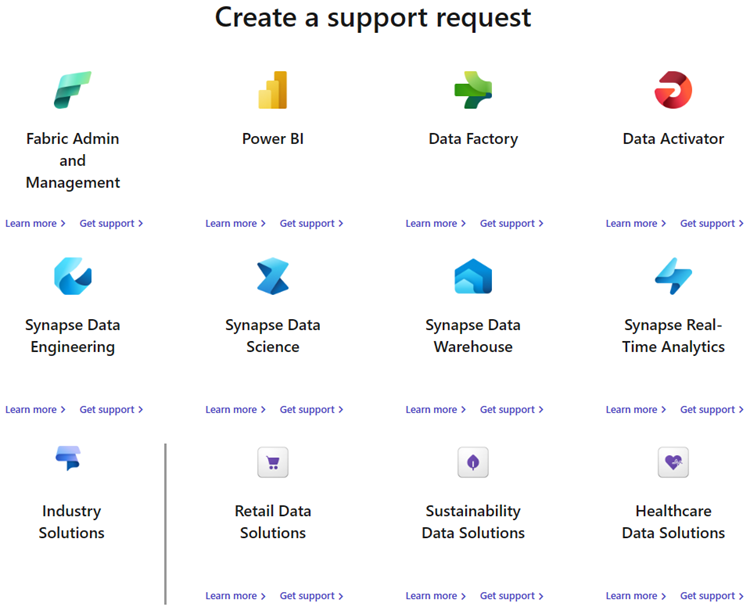
If you don't find your issue, scroll down to Create a support request and select the Get support link below the product you're experiencing an issue with.
Fill in the description of the issue and select the arrow to the right of the text box. Solutions matching the issue's description appear.
If you don't find the correct solution, select the problem type and subtype, and then choose Get solutions. For some problem type and subtype selections, you're asked to provide additional information.

Based on the information you provide, you see a list of possible solutions to your issue. Select the relevant solution and see if the content can successfully guide you to a fix.
If the guidance doesn't resolve your issue, scroll down, select Next, and then fill in the fields on the Support tab.
If you have a Unified or Premier support plan that doesn't appear under Support plan, select Add new contract and fill in the fields. If you don't know your access or contract ID, contact your service admin, Incident Manager, or Customer Success Account Manager (CSAM).
Tip
- For Contract ID/Password, enter your Unified or Premier contract ID.
- The Contract ID/Password defaults to the Unified or Premier contract ID. If you have changed the password when registering online in the Unified/Premier portal, you should use the updated password instead of the contract ID.
Live Chat
For some of the combinations of problem type and subtype, users might see the option to start a live chat session with a Microsoft Support representative. The option to start a live chat session appears on the Contact page.

Feedback
Coming soon: Throughout 2024 we will be phasing out GitHub Issues as the feedback mechanism for content and replacing it with a new feedback system. For more information see: https://aka.ms/ContentUserFeedback.
Submit and view feedback for