Data quality for Snowflake data (Preview)
When scanning Snowflake data sources, Microsoft Purview supports:
Extracting technical metadata including:
- Server, Databases, Schemas, and Tables including the columns, Views including the columns, foreign keys, and unique constraints
- Stored procedures including the parameter dataset and result set
- Functions including the parameter dataset
- Pipes, Stages, and Streams including the columns
- Tasks, and Sequences
Configure datamap scan to catalog Snowflake data in Microsoft Purview
Register a Snowflake source
To register a new Snowflake source in your data catalog, follow these steps:
- Navigate to your Microsoft Purview account in the Microsoft Purview governance portal.
- Select Data Map on the left navigation.
- Select Register
- On Register sources, select Snowflake.
Set up a datamap scan
- Select the registered Snowflake source.
- Select + New scan.
- Provide the below details:
- Name: The name of the scan
- Connect via integration runtime: Select the Azure autoresolved integration runtime, Managed VNet IR, or SHIR according to your scenario.
- Host for connection: Choose the endpoint used to establish connection to Snowflake during scan. You can choose from the server URL, or the other hosts that you configured in data source.
- Credential: Select the credential to connect to your data source. Make sure to:
- Select Basic Authentication while creating a credential.
- Provide the user name used to connect to Snowflake in the User name input field.
- Store the user password used to connect to Snowflake in the secret key.
- Warehouse: Specify the name of the warehouse instance used to empower scan in capital case. The default role assigned to the user specified in the credential must have USAGE rights on this warehouse.
- Databases: Specify one or more database instance names to import in capital case. Separate the names in the list with a semi-colon (;). For example, DB1;DB2. The default role assigned to the user specified in the credential must have adequate rights on the database objects.
- Schema: List subset of schemas to import expressed as a semicolon separated list.
- Select Test connection to validate the settings (available when using Azure Integration Runtime).
- Select Continue.
- Select a scan rule set for classification. You can choose between the system default, existing custom rule sets, or create a new rule set inline.
- Review your scan and select Save and Run.
Once scanned, the data asset in Snowflake will be available on the data catalog search. For more details about how to connect and manage Snowflake in Microsoft Purview, follow this document.
Important
When object is deleted from the data source, currently the subsequent scan won't automatically remove the corresponding asset in Microsoft Purview.
Set up connection to Snowflake data source for data quality scan
At this point we have the scanned asset ready for cataloging and governance. Associate the scanned asset to the Data Product in a Business Domain Sele. At the Data Quality Tab, add a new Azure SQL Database Connection: Get the Database Name entered manually.
Select Data quality > Business Domain > Manage tab to create connection.

Configure connection in the connection page.
- Add connection name and description
- select source type Snowflake
- add Server name, Warehouse name, Database name, Schema name, and Table name
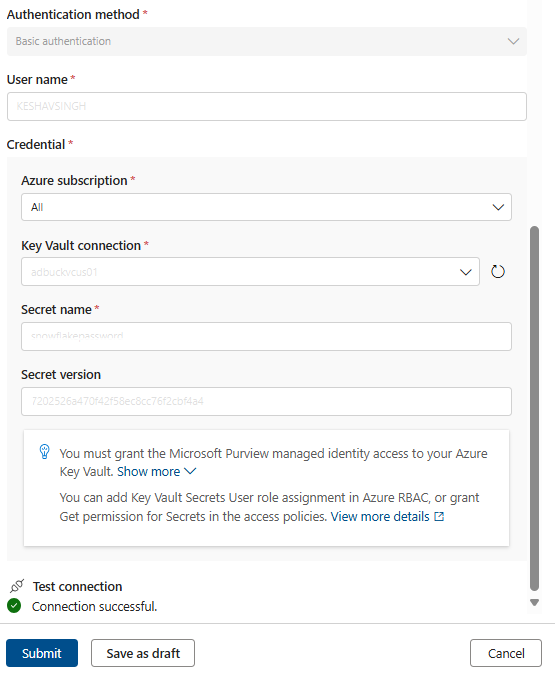
- select authentication method - Basic authentication
- add User name
- add Credential
- Add Azure subscription
- Key vault connection
- secret name
- secret version
Test connection to make sure the configured connection is successfully established.


Important
Data Quality stewards need read only access to Snowflake to setup data quality connection.
Profiling and data quality scanning for data in Snowflake
After completed connection setup successfully, you can profile, create and apply rules, and run DQ scan of your data in Snowflake. Follow the step-by-step guideline described in below documents: