Exercise - Detect threats with Microsoft Sentinel analytics
The Threat detection with Microsoft Sentinel Analytics exercise in this module is an optional unit. However, if you want to perform this exercise, you need access to an Azure subscription where you can create Azure resources. If you don't have an Azure subscription, create a free account before you begin.
To deploy the prerequisites for the exercise, perform the following tasks.
Note
If you choose to perform the exercise in this module, be aware you might incur costs in your Azure Subscription. To estimate the cost, refer to Microsoft Sentinel Pricing.
Task 1: Deploy Microsoft Sentinel using ARM template
Select the following link:
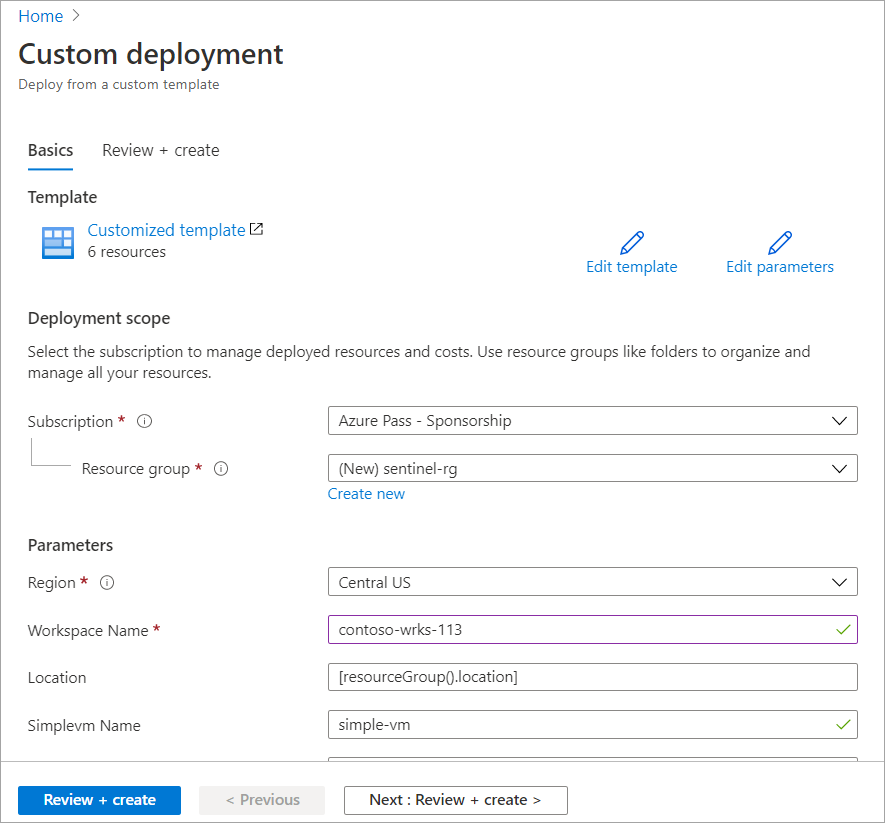
You're prompted to sign in to Azure. The Custom deployment pane appears.
On the Basics tab, enter the following values for each setting.
Setting Value Project details Subscription Select your Azure subscription. Resource group Select Create new, and provide a name for the resource group, such as azure-sentinel-rg.Instance details Region From the dropdown list, select the location where you want to deploy the Microsoft Sentinel. Workspace Name Provide a unique name for the Microsoft Sentinel Workspace such as <yourName>-sentinel, where <yourName> represents the workspace name that you chose in the previous task.Location Accept the default value of [resourceGroup().location]. Simplevm Name Accept the default value of simple-vm. Simplevm Windows OS Version Accept the default value of 2016-Datacenter. Select the Review + create. When validation passes, select Create.
Note
Wait for the deployment to complete. The deployment should take less than five minutes.
Task 2: Check the resources created
In the Azure portal, search for Resource groups.
Select azure-sentinel-rg.
Sort the list of resources by Type.
The resource group should contain the resources listed in the following table.
Name Type Description <yourName>-sentinelLog Analytics workspace Log Analytics workspace used by Microsoft Sentinel, where <yourName> represents the workspace name that you chose in the previous task. simple-vmNetworkInterfaceNetwork interface Network interface for the VM. SecurityInsights(<yourName>-sentinel)Solution Security insights for Microsoft Sentinel. simple-vmVirtual machine Virtual machine (VM) used in the demonstration. st1<xxxxx>Storage account Storage account used by the VM, where <xxxxx> represents a random string generated to create a unique storage account name. vnet1Virtual network Virtual network for the VM.
Note
The resources deployed and configuration steps completed in this exercise are required in the next exercise. If you intended completing the next exercise, do not delete the resources from this exercise.
Task 3: Configure Microsoft Sentinel Data connectors
In this task, you deploy a Microsoft Sentinel Data connector to detect Azure Activity.
In the Azure portal, select Home, and then search for and select Microsoft Sentinel.
In the list of Sentinel workspace names, select the Microsoft Sentinel workspace you created in Task 2. The Overview pane for your Sentinel workspace appears.
In the menu pane, under Content management, select Content hub. The Content hub pane appears.
In the Search box, search for and select the Azure Activity Solution. On the Azure Activity details pane, select Install.
Wait for the install to complete and them select Manage.
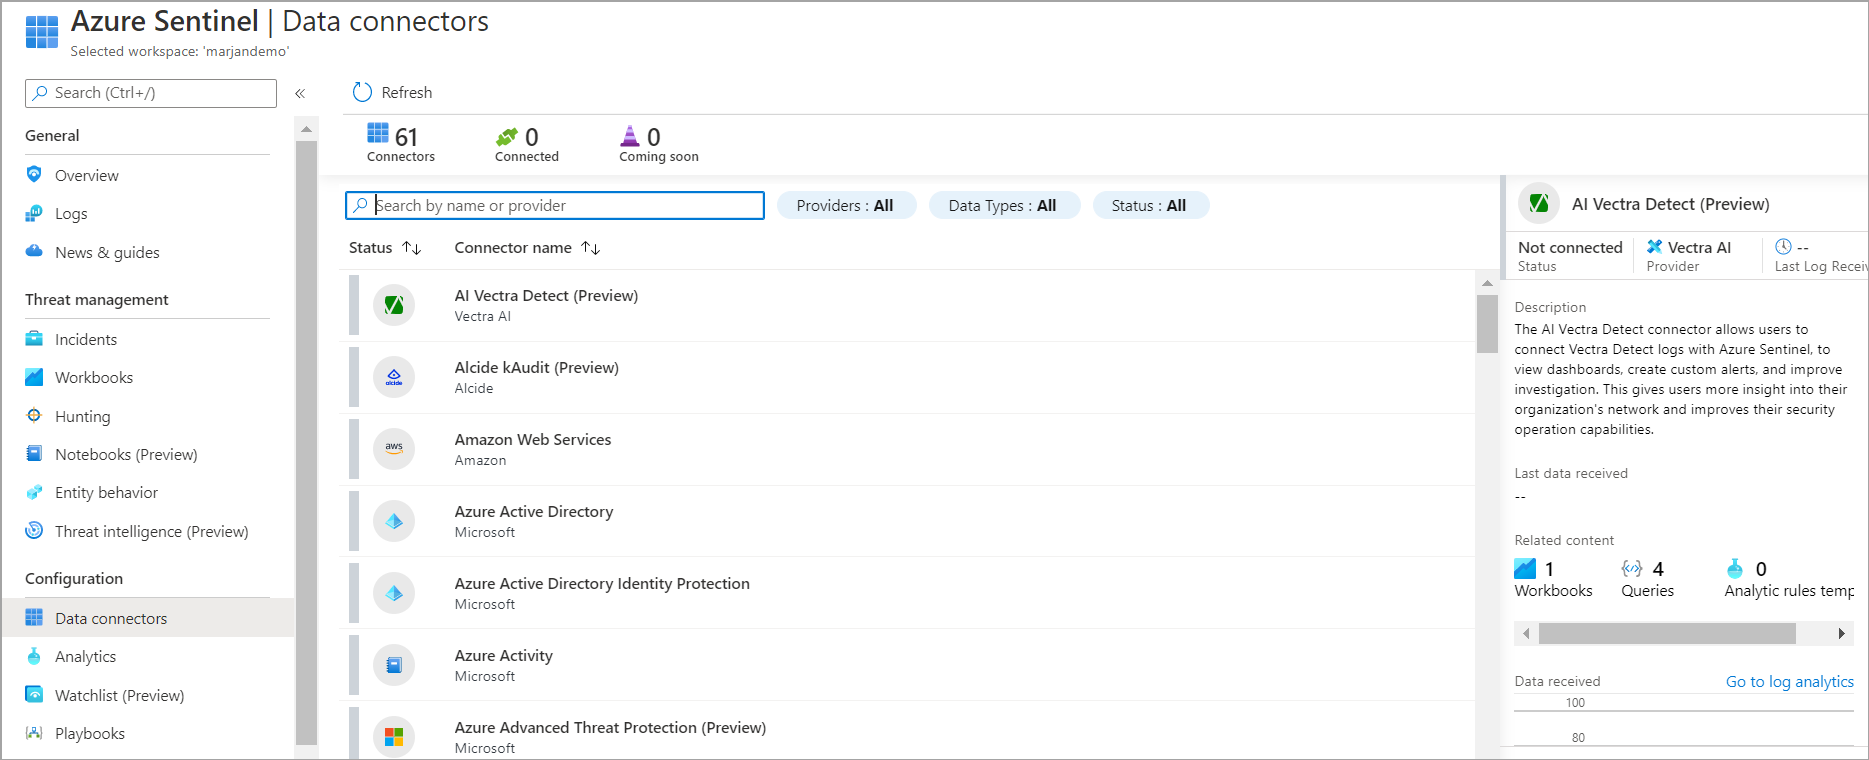
In the Search box, search for and select the Azure Activity Data connector.
On the Azure Activity details pane, select Open connector page.
In the Instructions tab, Configuration area, scroll down and under "2. Connect your subscriptions..." select Launch Azure Policy Assignment Wizard>.
In the Basics tab, select the ellipsis button (...) under Scope and select your "Azure subscription" from the drop-down list and select Select.
Select the Parameters tab, choose your yourName-sentinel workspace from the Primary Log Analytics workspace drop-down list.
Select the Remediation tab and select the Create a remediation task checkbox. This action applies the subscription configuration to send the information to the Log Analytics workspace.
Note
To apply the policy to your existing resources, you need to create a remediation task.
Select the Review + Create button to review the configuration.
Select Create to finish.
Once the deployment is complete, you'll see the Connected status (green bar) for the Azure Activity connector in the Configuration/Data connectors pane.
Note
The connector for Azure Activity could take 15 minutes to show Connected in Microsoft Sentinel. You can proceed with rest of the steps and with other units of this module.