Exercise - Preview changes with the what-if command
Note
The first time you activate a sandbox and accept the terms, your Microsoft account is associated with a new Azure directory named Microsoft Learn Sandbox. You're also added to a special subscription named Concierge Subscription.
The design team at your toy company has asked you to update a template that configures a virtual network. In this unit, you use what-if to verify the effects of deploying the updated template.
During the process, you'll:
- Create and deploy an initial template.
- Prepare to deploy a template that's slightly different, and use the what-if operation to review the expected changes.
- Use a complete deployment to deploy an empty template, and use the what-if operation to review the expected changes.
This exercise uses the Azure Resource Manager Tools for Visual Studio Code. Be sure to install this extension in Visual Studio Code.
This exercise uses the Bicep extension for Visual Studio Code. Be sure to install this extension in Visual Studio Code.
Create the starting template
You start with an existing template that your team has been using. The template creates the virtual network.
Open Visual Studio Code.
Create a new file called azuredeploy.json.
Save the empty file so that Visual Studio Code loads the ARM template tooling.
You can either select File > Save As or select Ctrl+S in Windows (⌘+S on macOS). Be sure to remember where you've saved the file. For example, you might want to create a scripts folder to save it in.
Copy the following code into azuredeploy.json.
{
  "$schema": "https://schema.management.azure.com/schemas/2019-04-01/deploymentTemplate.json#",
  "contentVersion": "1.0.0.0",
  "parameters": {},
  "variables": {},
  "resources": [
    {
      "apiVersion": "2018-10-01",
      "type": "Microsoft.Network/virtualNetworks",
      "name": "vnet-001",
      "location": "[resourceGroup().location]",
      "tags": {
        "CostCenter": "12345",
        "Owner": "Team A"
      },
      "properties": {
        "addressSpace": {
          "addressPrefixes": [
            "10.0.0.0/16"
          ]
        },
        "enableVmProtection": false,
        "enableDdosProtection": false,
        "subnets": [
          {
            "name": "subnet001",
            "properties": {
              "addressPrefix": "10.0.0.0/24"
            }
          },
          {
            "name": "subnet002",
            "properties": {
              "addressPrefix": "10.0.1.0/24"
            }
          }
        ]
      }
    }
  ]
}
Save the template.
Open Visual Studio Code.
Create a new file called main.bicep.
Save the empty file so that Visual Studio Code loads the Bicep tooling.
You can either select File > Save As or select Ctrl+S in Windows (⌘+S on macOS). Be sure to remember where you've saved the file. For example, you might want to create a scripts folder to save it in.
Copy the following code into main.bicep.
resource vnet 'Microsoft.Network/virtualNetworks@2018-10-01' = {
  name: 'vnet-001'
  location: resourceGroup().location
  tags: {
    'CostCenter': '12345'
    'Owner': 'Team A'
  }
  properties: {
    addressSpace: {
      addressPrefixes: [
        '10.0.0.0/16'
      ]
    }
    enableVmProtection: false
    enableDdosProtection: false
    subnets: [
      {
        name: 'subnet001'
        properties: {
          addressPrefix: '10.0.0.0/24'
        }
      }
      {
        name: 'subnet002'
        properties: {
          addressPrefix: '10.0.1.0/24'
        }
      }
    ]
  }
}
Save the template.
Deploy the template to Azure
To deploy this template to Azure, sign in to your Azure account from the Visual Studio Code terminal. Be sure you've installed Azure PowerShell, and sign in to the same account that activated the sandbox.
On the Terminal menu, select New Terminal. The terminal window usually opens in the lower half of your screen.
If the shell shown on the right side of the terminal window is powershell or pwsh, the correct shell is open, and you can skip to the next section.

If a shell other than powershell or pwsh appears, select the shell dropdown arrow, and then select PowerShell.
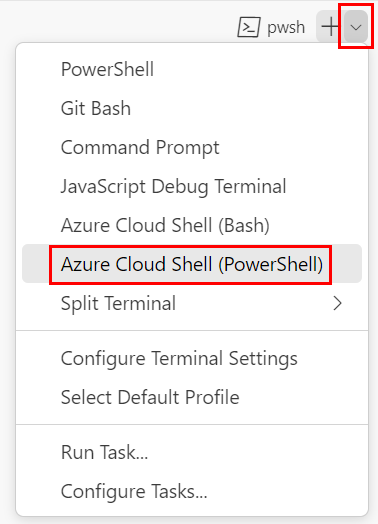
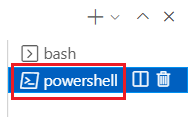
In the list of terminal shells, select powershell or pwsh.
In the terminal, go to the directory where you saved your template. For example, if you saved your template in the templates folder, you can use this command:
Set-Location -Path templates
Install the Bicep CLI
To use Bicep from Azure PowerShell, install the Bicep CLI.
Sign in to Azure by using Azure PowerShell
In the Visual Studio Code terminal, run the following command:
Connect-AzAccountA browser opens so that you can sign in to your Azure account.
After you've signed in to Azure, the terminal displays a list of the subscriptions associated with this account.
If you've activated the sandbox, a subscription named Concierge Subscription is displayed. Use it for the rest of the exercise.
Set the default subscription for all of the Azure PowerShell commands that you run in this session.
$context = Get-AzSubscription -SubscriptionName 'Concierge Subscription'
Set-AzContext $context
Note
If you've used more than one sandbox recently, the terminal might display more than one instance of Concierge Subscription. In this case, use the next two steps to set one as the default subscription. If the preceding command was successful, and only one Concierge Subscription is listed, skip the next two steps.
Get the subscription ID. Running the following command lists your subscriptions and their IDs. Look for
Concierge Subscription, and then copy the ID from the second column. It looks something likecf49fbbc-217c-4eb6-9eb5-a6a6c68295a0.Get-AzSubscriptionChange your active subscription to Concierge Subscription. Be sure to replace {Your subscription ID} with the one that you copied.
$context = Get-AzSubscription -SubscriptionId {Your subscription ID}
Set-AzContext $context
Set the default resource group
You can set the default resource group and omit the parameter from the rest of the Azure PowerShell commands in this exercise. Set this default to the resource group created for you in the sandbox environment.
Set-AzDefault -ResourceGroupName <rgn>[sandbox resource group name]</rgn>
To deploy this template to Azure, you need to sign in to your Azure account from the Visual Studio Code terminal. Be sure you've installed the Azure CLI, and remember to sign in with the same account that you used to activate the sandbox.
On the Terminal menu, select New Terminal. The terminal window usually opens in the lower half of your screen.
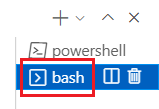
If the shell shown on the right side of the terminal window is bash, the correct shell is open and you can skip to the next section.

If a shell other than bash appears, select the shell dropdown arrow, and then select Azure Cloud Shell (Bash).
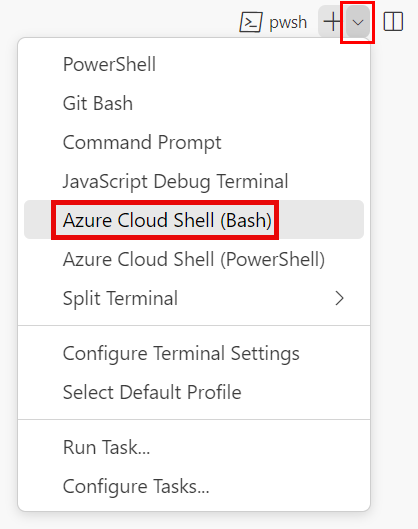
In the list of terminal shells, select bash.
In the terminal, go to the directory where you saved your template. For example, if you saved your template to the templates folder, you can use this command:
cd templates
Install Bicep
Run the following command to ensure you have the latest version of Bicep:
az bicep install && az bicep upgrade
Sign in to Azure
In the Visual Studio Code terminal, sign in to Azure by running the following command:
az loginIn the browser that opens, sign in to your Azure account.
The Visual Studio Code terminal displays a list of the subscriptions associated with this account.
Set the default subscription for all of the Azure CLI commands that you run in this session.
az account set --subscription "Concierge Subscription"Note
If you've used more than one sandbox recently, the terminal might display more than one instance of Concierge Subscription. In this case, use the next two steps to set one as the default subscription. If the preceding command was successful, and only one Concierge Subscription is listed, skip the next two steps.
Get the Concierge Subscription IDs.
 az account list \
   --refresh \
   --query "[?contains(name, 'Concierge Subscription')].id" \
   --output table
Set the default subscription by using the subscription ID. Replace {your subscription ID} with the latest Concierge Subscription ID.
az account set --subscription {your subscription ID}
Set the default resource group
When you use the Azure CLI, you can set the default resource group and omit the parameter from the rest of the Azure CLI commands in this exercise. Set the default to the resource group that's created for you in the sandbox environment.
az configure --defaults group="<rgn>[sandbox resource group name]</rgn>"
To deploy this template to Azure, sign in to your Azure account from the Visual Studio Code terminal. Be sure you've installed Azure PowerShell, and sign in to the same account that activated the sandbox.
On the Terminal menu, select New Terminal. The terminal window usually opens in the lower half of your screen.
If the shell shown on the right side of the terminal window is powershell or pwsh, the correct shell is open, and you can skip to the next section.
If a shell other than powershell or pwsh appears, select the shell dropdown arrow, and then select PowerShell.
In the list of terminal shells, select powershell or pwsh.
In the terminal, go to the directory where you saved your template. For example, if you saved your template in the templates folder, you can use this command:
Set-Location -Path templates
Sign in to Azure by using Azure PowerShell
In the Visual Studio Code terminal, run the following command:
Connect-AzAccountA browser opens so that you can sign in to your Azure account.
After you've signed in to Azure, the terminal displays a list of the subscriptions associated with this account.
If you've activated the sandbox, a subscription named Concierge Subscription is displayed. Use it for the rest of the exercise.
Set the default subscription for all of the Azure PowerShell commands that you run in this session.
$context = Get-AzSubscription -SubscriptionName 'Concierge Subscription'
Set-AzContext $context
Note
If you've used more than one sandbox recently, the terminal might display more than one instance of Concierge Subscription. In this case, use the next two steps to set one as the default subscription. If the preceding command was successful, and only one Concierge Subscription is listed, skip the next two steps.
Get the subscription ID. Running the following command lists your subscriptions and their IDs. Look for
Concierge Subscription, and then copy the ID from the second column. It looks something likecf49fbbc-217c-4eb6-9eb5-a6a6c68295a0.Get-AzSubscriptionChange your active subscription to Concierge Subscription. Be sure to replace {Your subscription ID} with the one that you copied.
$context = Get-AzSubscription -SubscriptionId {Your subscription ID}
Set-AzContext $context
Set the default resource group
You can set the default resource group and omit the parameter from the rest of the Azure PowerShell commands in this exercise. Set this default to the resource group created for you in the sandbox environment.
Set-AzDefault -ResourceGroupName <rgn>[sandbox resource group name]</rgn>
To deploy this template to Azure, you need to sign in to your Azure account from the Visual Studio Code terminal. Be sure you've installed the Azure CLI, and remember to sign in with the same account that you used to activate the sandbox.
On the Terminal menu, select New Terminal. The terminal window usually opens in the lower half of your screen.
If the shell shown on the right side of the terminal window is bash, the correct shell is open and you can skip to the next section.
If a shell other than bash appears, select the shell dropdown arrow, and then select Azure Cloud Shell (Bash).
In the list of terminal shells, select bash.
In the terminal, go to the directory where you saved your template. For example, if you saved your template to the templates folder, you can use this command:
cd templates
Sign in to Azure
In the Visual Studio Code terminal, sign in to Azure by running the following command:
az loginIn the browser that opens, sign in to your Azure account.
The Visual Studio Code terminal displays a list of the subscriptions associated with this account.
Set the default subscription for all of the Azure CLI commands that you run in this session.
az account set --subscription "Concierge Subscription"Note
If you've used more than one sandbox recently, the terminal might display more than one instance of Concierge Subscription. In this case, use the next two steps to set one as the default subscription. If the preceding command was successful, and only one Concierge Subscription is listed, skip the next two steps.
Get the Concierge Subscription IDs.
 az account list \
   --refresh \
   --query "[?contains(name, 'Concierge Subscription')].id" \
   --output table
Set the default subscription by using the subscription ID. Replace {your subscription ID} with the latest Concierge Subscription ID.
az account set --subscription {your subscription ID}
Set the default resource group
When you use the Azure CLI, you can set the default resource group and omit the parameter from the rest of the Azure CLI commands in this exercise. Set the default to the resource group that's created for you in the sandbox environment.
az configure --defaults group="<rgn>[sandbox resource group name]</rgn>"
Deploy the template by using Azure PowerShell
Run New-AzResourceGroupDeployment to deploy the template.
New-AzResourceGroupDeployment -TemplateFile main.bicep
The text Running... appears in the terminal. The deployment takes a minute or two to finish.
Deploy the template by using Azure PowerShell
Run New-AzResourceGroupDeployment to deploy the template.
New-AzResourceGroupDeployment -TemplateFile azuredeploy.json
The text Running... appears in the terminal. The deployment takes a minute or two to finish.
Deploy the template by using the Azure CLI
Run az deployment group create to deploy the template.
az deployment group create --template-file main.bicep
The deployment takes a minute or two to finish.
Deploy the template by using the Azure CLI
Run az deployment group create to deploy the template.
az deployment group create --template-file azuredeploy.json
The deployment takes a minute or two to finish.
Verify the deployment
To validate that your deployment has been created and sent to Azure, go to the Azure portal and make sure you're in the sandbox subscription:
Select your avatar in the upper corner of the page.
Select Switch directory. In the list, select the Microsoft Learn Sandbox directory.
Select Resource groups.
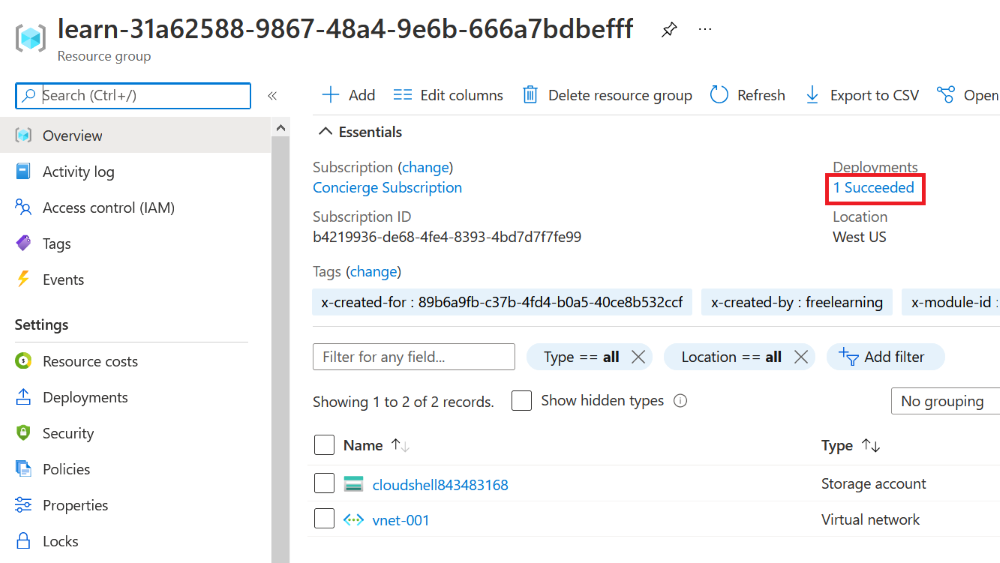
Select
[sandbox resource group name] .In Overview, you see that one deployment succeeded.
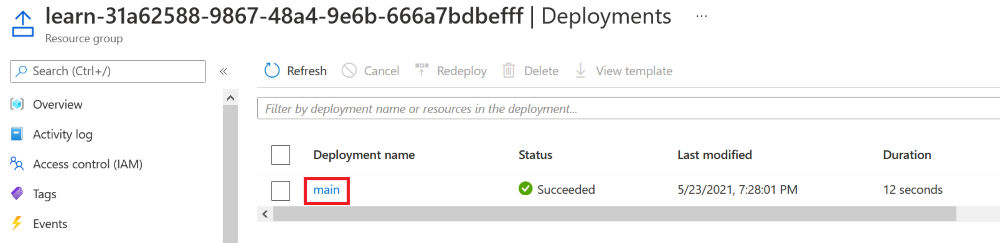
Select 1 Succeeded to see the details of the deployment.
Select the main deployment to see what resources were deployed. In this case, one virtual network (address space 10.0.0.0/16) with two subnets has been deployed.
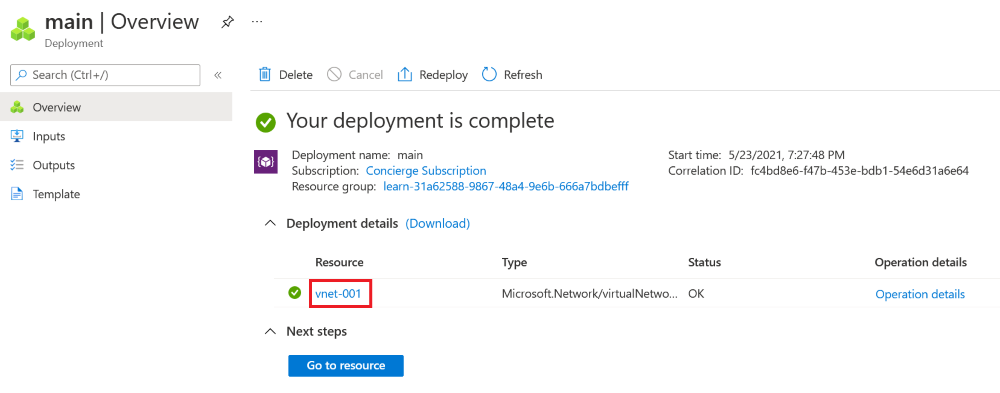
Leave the page open in your browser so you can check on deployments again later.
Modify the template
In the azuredeploy.json file in Visual Studio Code, delete the tag named
Ownerand its value. After you're done, thetagsproperty of the virtual network should look like this:"tags": { "CostCenter": "12345" },Update the
addressPrefixesto change/16to/15. After you're done, theaddressSpaceproperty of the virtual network should look like this:"addressSpace": { "addressPrefixes": [ "10.0.0.0/15" ] },Delete the subnet named
subnet001. Make sure to delete the whole subnet object. After you're done, thesubnetsproperty of the virtual network should look like this:"subnets": [ { "name": "subnet002", "properties": { "addressPrefix": "10.0.1.0/24" } } ]Save the template.
In the main.bicep file in Visual Studio Code, delete the tag named
Ownerand its value. After you're done, thetagsproperty of the virtual network should look like this:tags: { 'CostCenter': '12345' }Update the
addressPrefixesto change the/16to/15. After you're done, theaddressSpaceproperty of the virtual network should look like this:addressSpace: { addressPrefixes: [ '10.0.0.0/15' ] }Delete the subnet named
subnet001. Make sure to delete the whole subnet object. After you're done, thesubnetsproperty of the virtual network should look like this:subnets: [ { name: 'subnet002' properties: { addressPrefix: '10.0.1.0/24' } } ]Save the template.
Run the what-if command with the modified template
Run New-AzResourceGroupDeployment with the -WhatIf flag to perform the what-if operation.
New-AzResourceGroupDeployment `
  -WhatIf `
  -TemplateFile main.bicep
Run New-AzResourceGroupDeployment with the -WhatIf flag to perform the what-if operation.
New-AzResourceGroupDeployment `
  -WhatIf `
  -TemplateFile azuredeploy.json
Run az deployment group what-if to perform the what-if operation:
az deployment group what-if \
  --template-file main.bicep
Run az deployment group what-if to perform the what-if operation:
az deployment group what-if \
  --template-file azuredeploy.json
The what-if output is similar to the following one:
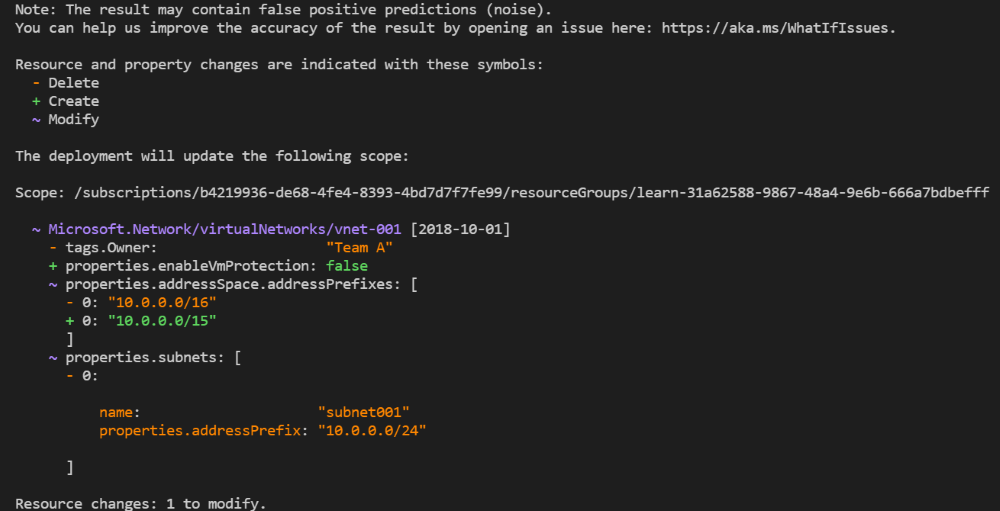
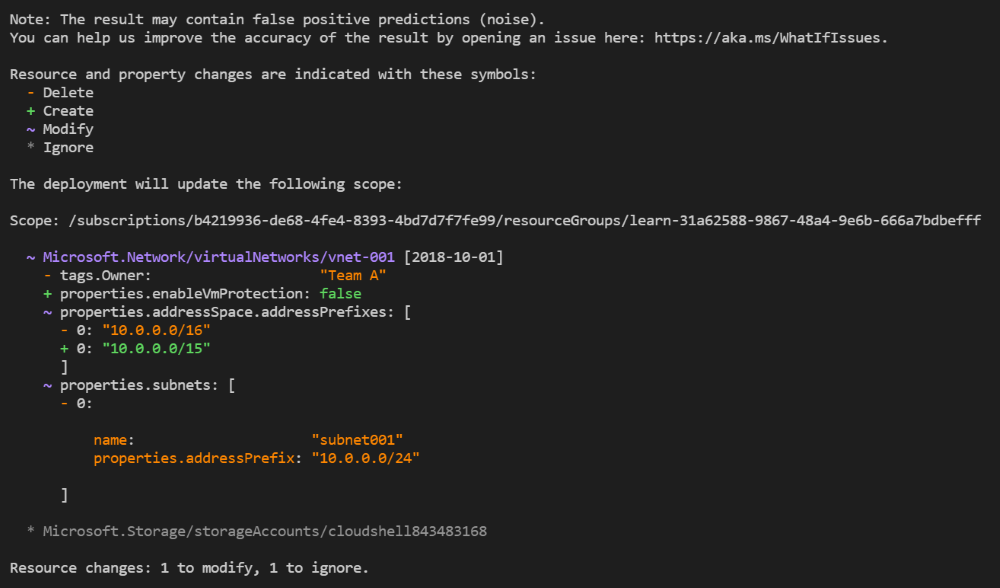
Notice that the result is color-coded in addition to having a prefix:
- Purple and ~ for any modifications
- Green and + for new resources to be created
- Orange and - for deletions
Remove the resources in the template
Update the azuredeploy.json file in Visual Studio Code, and remove all of the contents of the
resourcesarray. When you're done, your template should look like this:{ "$schema": "https://schema.management.azure.com/schemas/2019-04-01/deploymentTemplate.json#", "contentVersion": "1.0.0.0", "resources": [ ] }Save the template.
In the main.bicep file in Visual Studio Code, delete all of the contents of the file but don't delete the file itself.
Save the template.
Deploy by using complete mode and the confirmation option
In these next steps, you'll deploy an empty template over your existing environment.
Warning
Doing this in real life will remove anything you have in the cloud. The following code is interesting as an intellectual experiment, but be careful about using this mode. At minimum, use the -Confirm flag so you can stop this operation if you don't like the proposed changes.
Warning
Doing this in real life will remove anything you have in the cloud. The following code is interesting as an intellectual experiment, but be careful about using this mode. At minimum, use the --confirm-with-what-if flag so you can stop this operation if you don't like the proposed changes.
Run
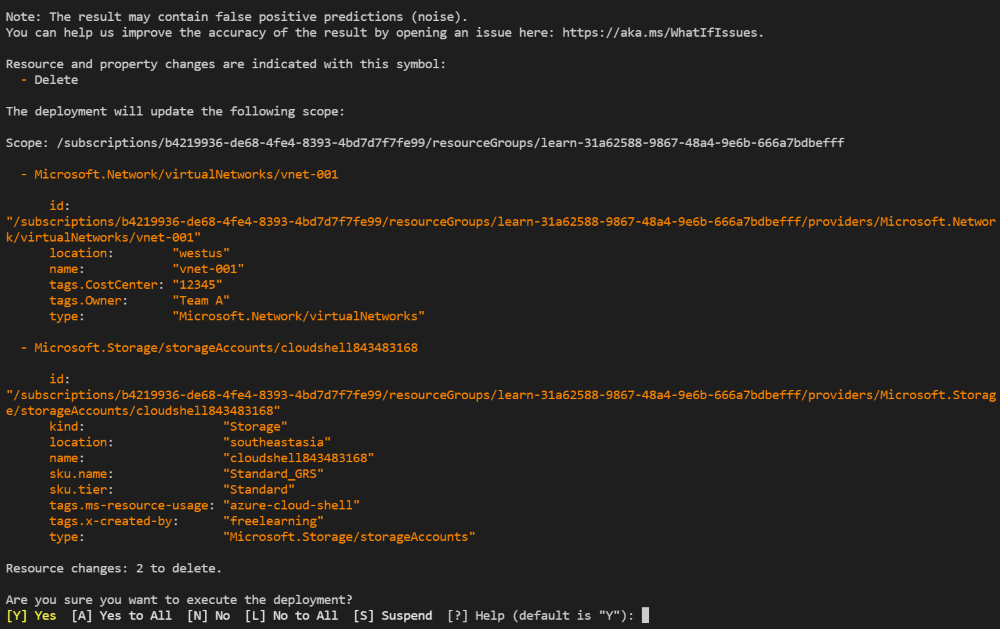
New-AzResourceGroupDeploymentwith the-Mode Completeflag to execute the deployment in complete mode:New-AzResourceGroupDeployment ` -Mode Complete ` -Confirm ` -TemplateFile main.bicepYour output will look similar to the following:
Note how the last line of the output is a confirmation. It's asking you to select y or n to proceed.
For [A] Yes to All, enter A to execute the deployment and clean out your environment.
Run
New-AzResourceGroupDeploymentwith the-Mode Completeflag to execute the deployment in complete mode:New-AzResourceGroupDeployment ` -Mode Complete ` -Confirm ` -TemplateFile azuredeploy.jsonYour output will look similar to the following:
Note how the last line of the output is a confirmation. It's asking you to select y or n to proceed.
For [A] Yes to All, enter A to execute the deployment and clean out your environment.
Run
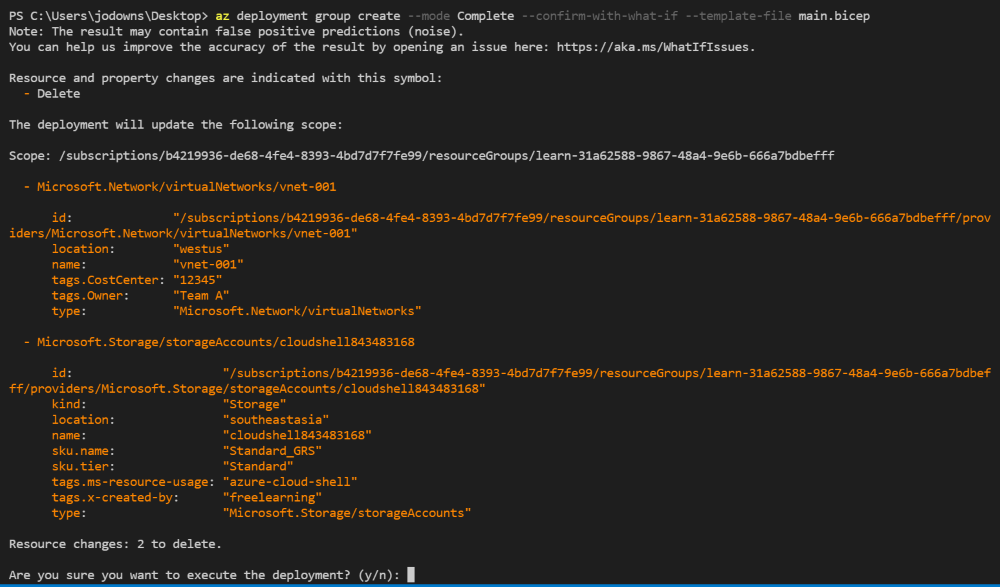
az deployment group createwith the flag--mode Completeto create a deployment in complete mode:az deployment group create \ --mode Complete \ --confirm-with-what-if \ --template-file main.bicepYour output will look similar to the following:
Note how the last line of the output is a confirmation. It's asking you to select y or n to proceed.
Enter y (for "yes") to execute the deployment and clean out your environment.
Run
az deployment group createwith the flag--mode Completeto create a deployment in complete mode:az deployment group create \ --mode Complete \ --confirm-with-what-if \ --template-file azuredeploy.jsonYour output will look similar to the following:
Note how the last line of the output is a confirmation. It's asking you to select y or n to proceed.
Enter y (for "yes") to execute the deployment and clean out your environment.
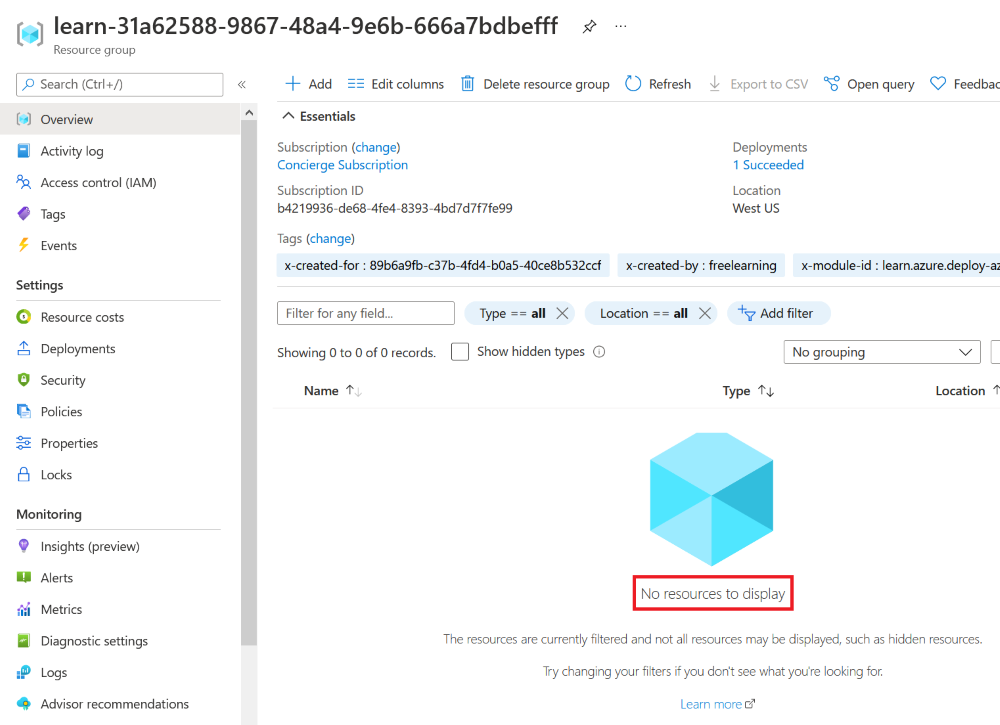
Verify the deployment
Go back to the open browser that you used earlier. Verify that the virtual network is no longer there, as in this screenshot: