Formulas and functionality
When using formulas, you have the ability to change the way controls respond and function. For example, in certain scenarios, you can hide a control on the screen until another action takes place. This is done by writing a simple formula to update the Visible property of the control. Or maybe instead of hiding the control, you set the DisplayMode property to View which removes the ability to edit that control. There are many more scenarios where you can implement this type of formula in a canvas app. By using formulas in your canvas app to modify the DisplayMode and or Visible properties of a control, you can develop a more user-friendly app.
Let's look at how you can apply this formula to show and hide a button in a gallery based on the information in our data source. In this example, we create a collection called "TestScoresCollection." To follow along, you can open an already existing canvas app and create a new screen.
Insert a Button control to your screen.
Set the OnSelect property for the button to:
ClearCollect(TestScoresCollection,{Name:"Student 1", TestScore:"B"},{Name:"Student 2", TestScore:"C"},{Name:"Student 3", TestScore:"A"},{Name:"Student 4", TestScore:"C"},{Name:"Student 5", TestScore:"A"})To generate the TestScoresCollection, hold the Alt key on your keyboard (or put the app in preview mode) and select the button.
Insert a Vertical gallery control into your screen, and change the Layout to Title and Subtitle
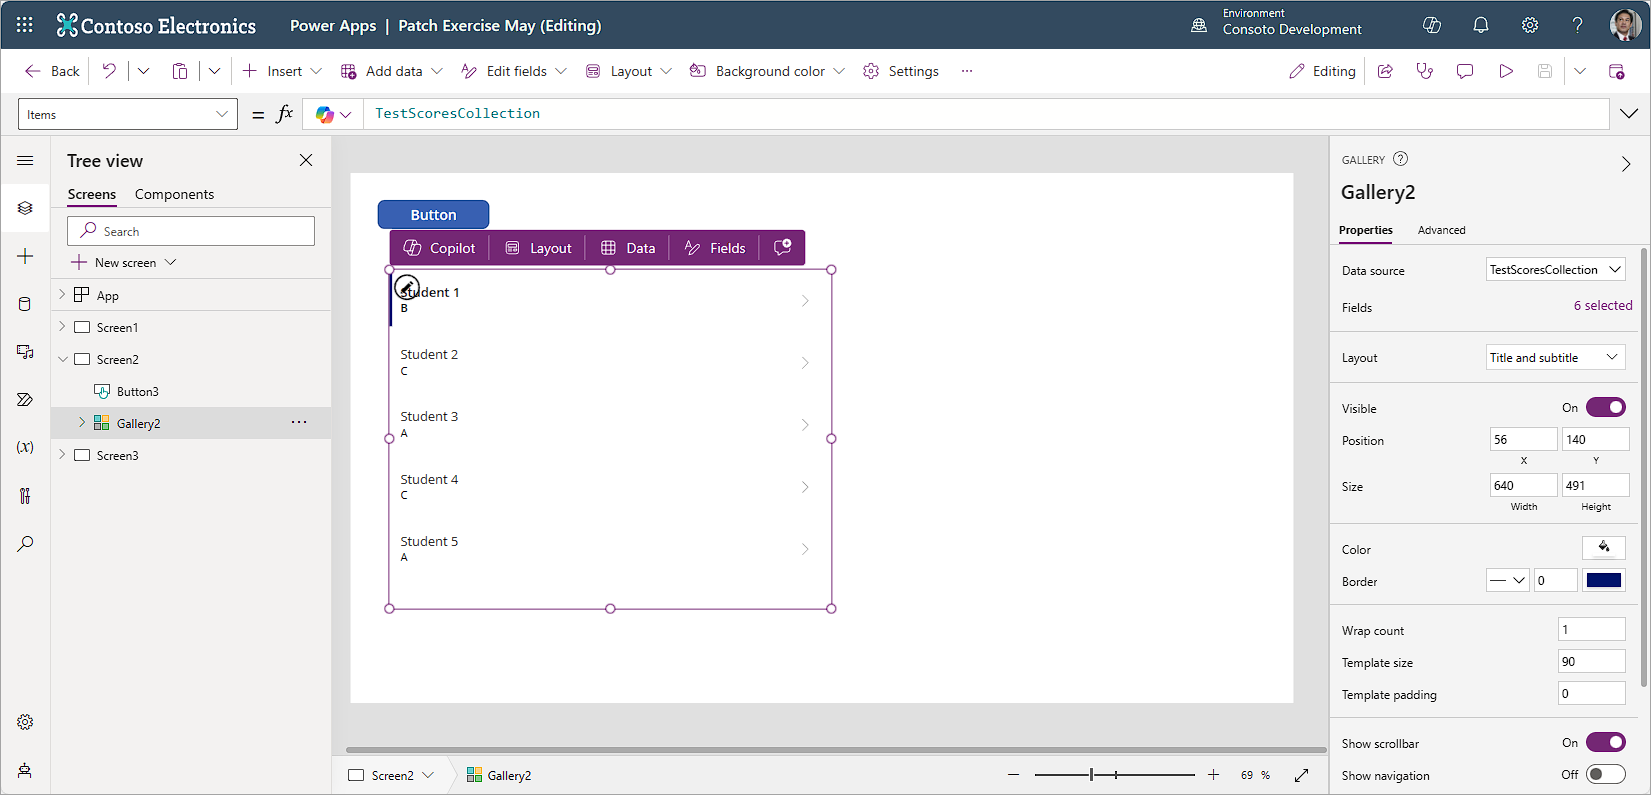
Select TestScoresCollection as the data source. Your gallery should resemble the following screenshot.
Select the first row of the gallery and insert a new button into the gallery itself.
Change the text property of the button to "Retake Test."
With the button still selected, go to the Visible property and enter the following code, so that this button is only visible for student grades not equal to "A" or "B".
If(ThisItem.TestScore = "A" Or ThisItem.TestScore = "B", false,true)Notice that when you input this code, your button disappears from the students who had an "A" or "B". If you look up in your formula input field for the Visible property, you notice the Copilot button. We can use Copilot to tell us more about this (or any) formula in our app.
Select the Copilot button in the formula bar, then select Explain this formula. You should see something related to this screenshot.
You can take advantage of the Copilot Explain this formula feature to help you understand formulas throughout your app. Additionally, you can use the Copy button to capture Copilot's explanation and add it as a remark in your code. To add remarks in your code, add a double forward slash "//" in front of any line in your code. The double forward slash makes Power Apps ignore whatever code follows, so it's useful for documentation.
//This expression checks if the TestScore of the current item is equal to "A" or "B". If it is, the expression returns false. Otherwise, it returns true.
Though we used this formula for the View property of a button, you could apply logic to this to affect the display mode of the button. In this case, we didn't add any code to the OnSelect property our "Retake test" button, but you can get the idea that we're controlling app behavior adjusting how controls respond. Our formula evaluates to true or false, which is all that Power Apps is looking for in the visible property. We can even shorten this code because it's a true/false answer, but we'll cover that in the next unit.

