Create a Collection on Microsoft Learn
Another way to contribute to Microsoft Learn is to create a Collection. A Collection is a curated group of Microsoft Learn assets that anyone with a Microsoft Learn profile can make and share. A Collection can be a personal guide for your own learning or a recommendation that leads others through a progression of resources to help them develop new skills.
Why create a Collection?
Contributing by creating a Collection gathers and personalizes useful learning resources. You can use a Collection to record your own learning journey or to share the journey with others. You can browse Collections created by trusted experts in your topic of interest or create a Collection to become a trusted expert yourself! Customized Collections can help you meet personal learning goals or strengthen your team’s learning culture.
For example, recall that you have experience using AI Builder. You’d like to build your team’s capabilities using this service by sending them some Microsoft Learn resources. You search for a Learning Path about AI Builder for a scenario that your team needs training in, but you can’t find what you’re looking for. You decide to create your own Collection of training modules. You find six modules that cover the skills that would help your team and add them to your Collection. You order the modules in a way that will make sense to your team. You name the Collection “AI Builder training for my team,” and share it with your team so they can start learning.
How to create a Collection
To create a Collection, you need to first sign in to your Microsoft Learn account.
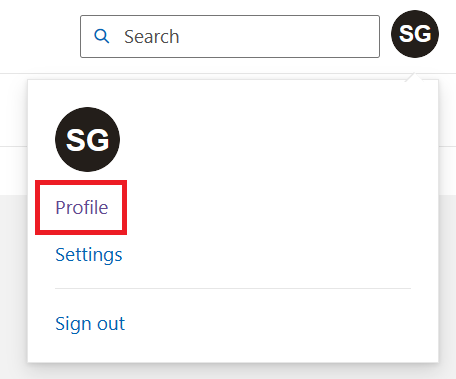
Navigate to your account profile. In the top right corner, select your account (usually your initials) and choose profile.
From the account options on the left, select Collections.
Select +New Collection.
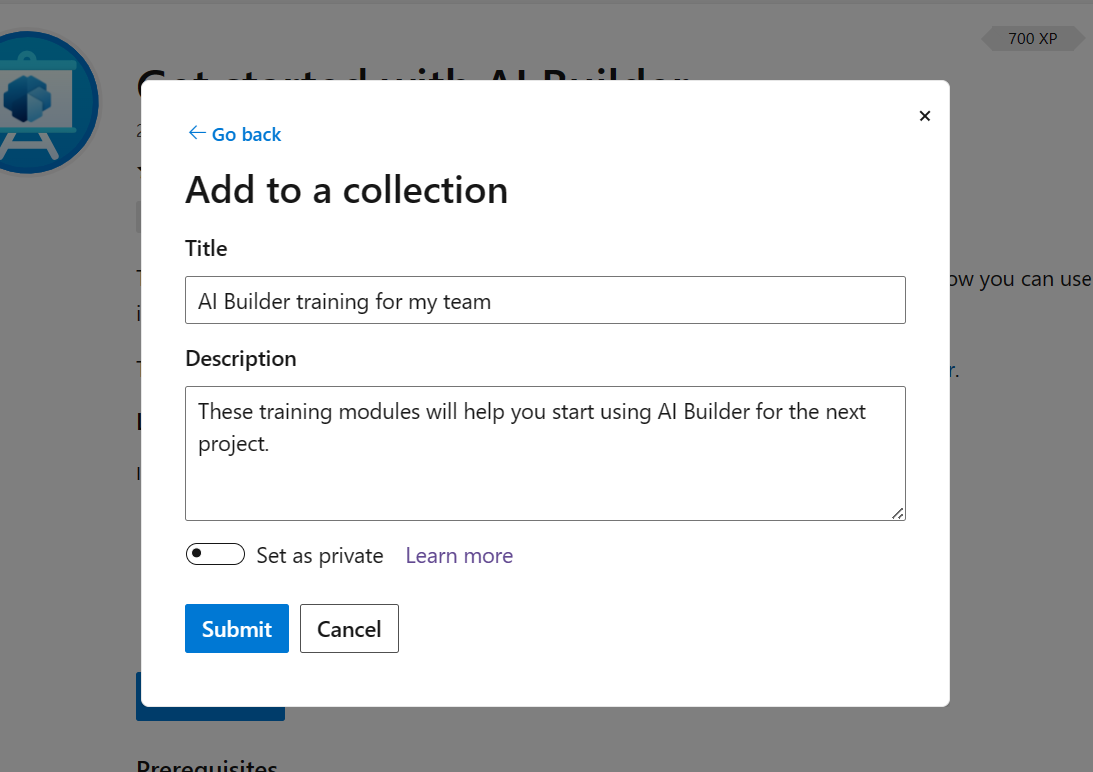
Name your Collection. Provide an optional description to give details about the topic or progression of modules.
Select Create.
Your Collection is now ready for you to add resources to. Let’s do that next:
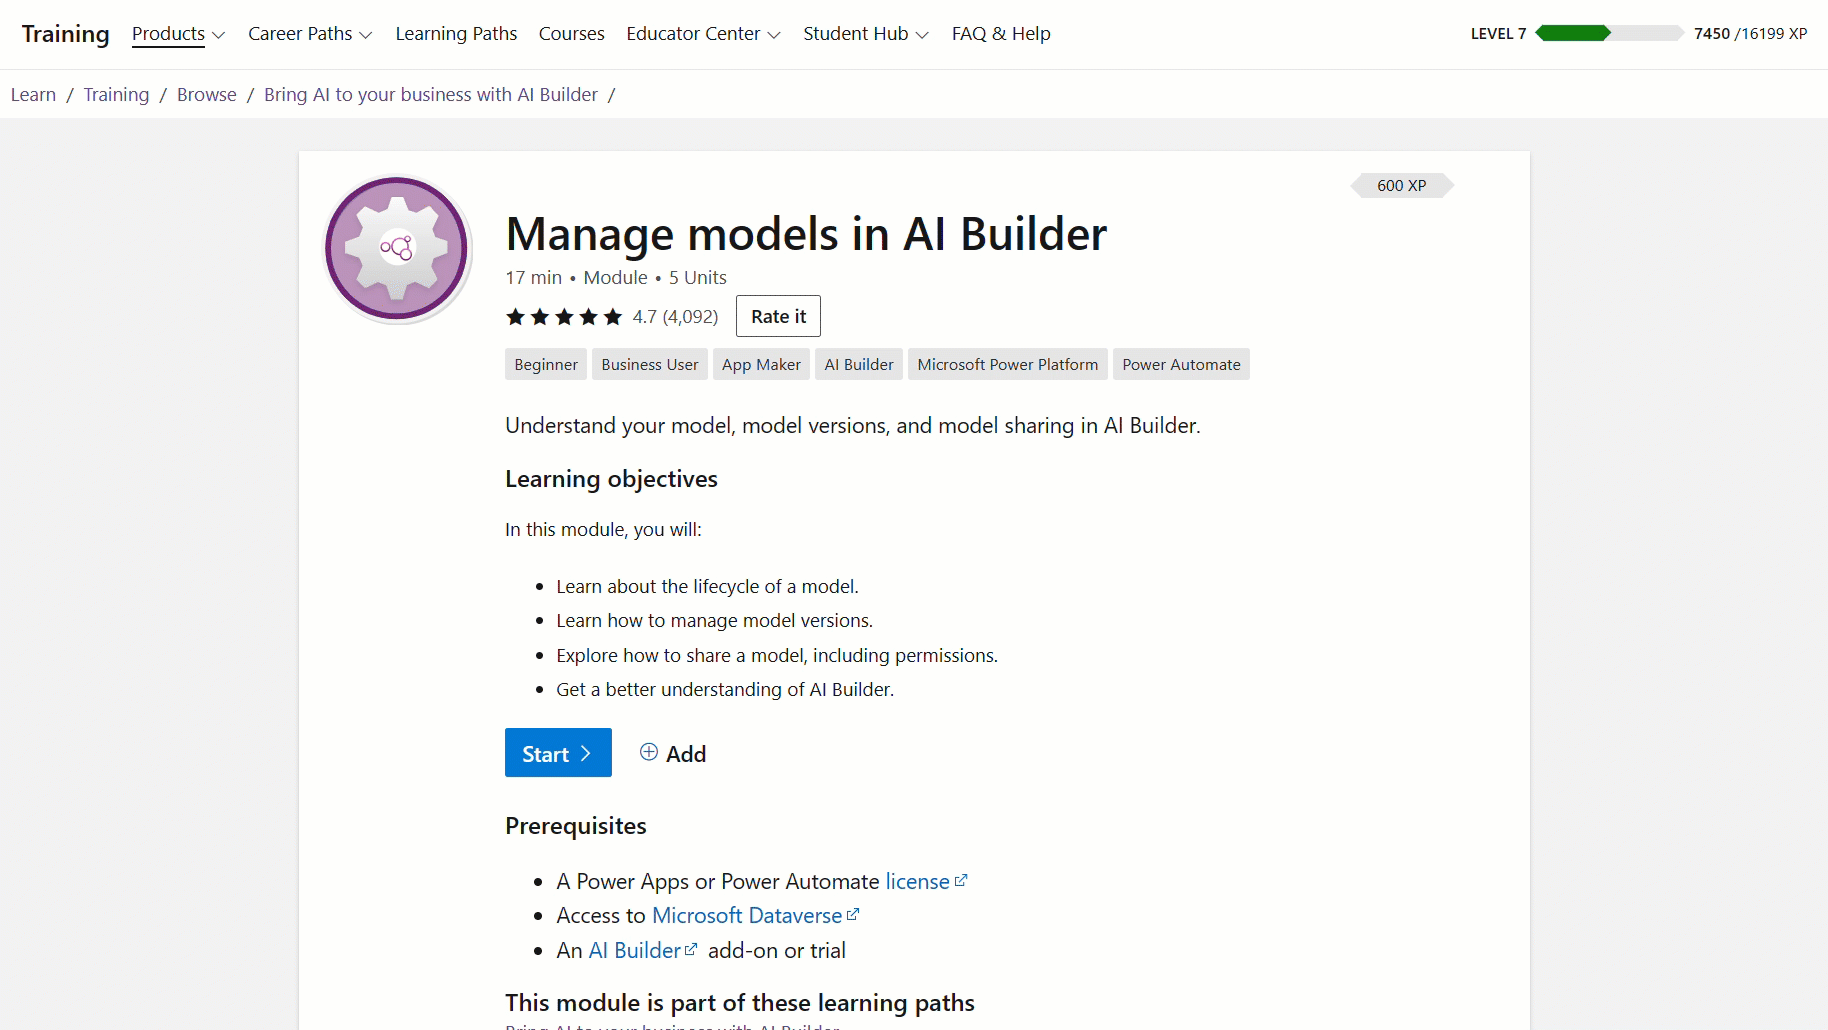
Navigate to an article, training module, or other resource you’d like to add. For this example, we’re adding training modules.
From the training module’s landing page, select +Add to save the module to your Collection.
- For a training module, this button appears near the bottom of the title section.
- For a documentation article, this button appears to the right of the title.
- For a code sample, the button appears on the Browse code samples page, at the bottom of each search result.
A pop-up box will appear. Check the box next to the name of the Collection you’d like to add the module to. You can also create a new Collection from this pop-up if needed.
Select Save. You can confirm that the module was added to your Collection by checking to see that the +Add option now reads Added.
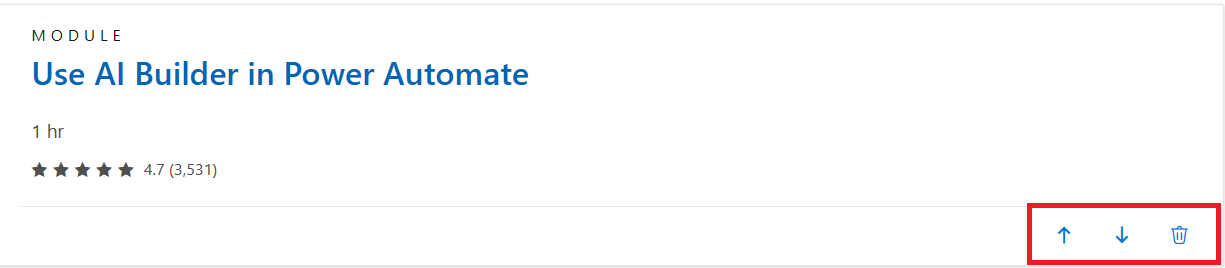
Reorder or remove modules from a Collection
You can reorder or remove modules in a Collection. In your Microsoft Learn profile, select Collections. Select the Collection you’d like to edit. You’ll see the list of modules you added. Use the up or down arrows to move the modules in the corresponding direction in the list. To remove a module from your Collection, select the trashcan icon.