Connect your AWS accounts
Onboarding your AWS account into Microsoft Defender for Cloud, integrates AWS Security Hub and Defender for Cloud. Defender for Cloud thus provides visibility and protection across both of these cloud environments to provide:
Automatic agent provisioning (Defender for Cloud uses Azure Arc to deploy the Log Analytics agent to your AWS instances)
Policy management
Vulnerability management
Embedded Endpoint Detection and Response (EDR)
Detection of security misconfigurations
A single view showing Defender for Cloud recommendations and AWS Security Hub findings
Incorporation of your AWS resources into Defender for Cloud's secure score calculations
Regulatory compliance assessments of your AWS resources
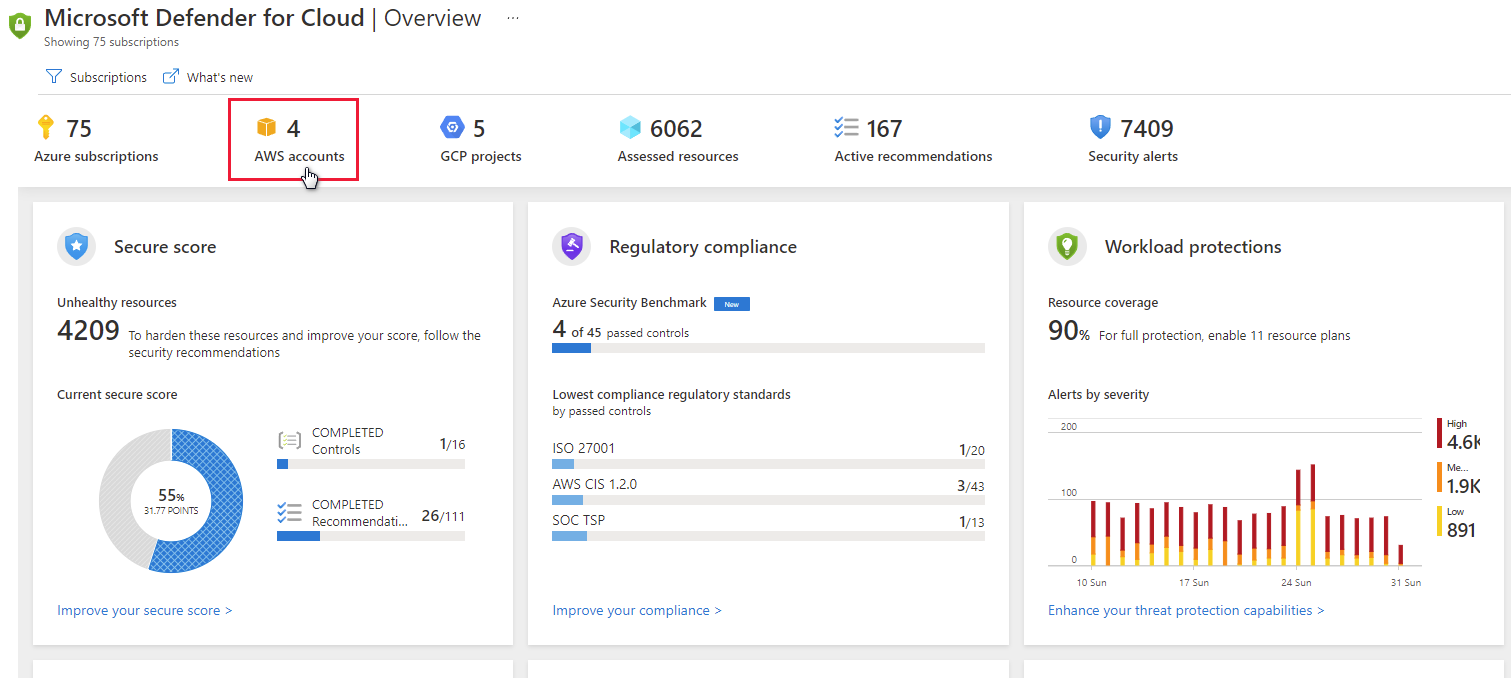
In the screenshot below, you can see AWS accounts displayed in Security Center's overview dashboard.
Follow the steps below to create your AWS cloud connector.
Set up AWS Security Hub:
To view security recommendations for multiple regions, repeat the following steps for each relevant region. If you're using an AWS master account, repeat the following three steps to configure the master account and all connected member accounts across all relevant regions
Enable AWS Config.
Enable AWS Security Hub.
Verify that there's data flowing to the Security Hub.
When you first enable Security Hub, it might take several hours for data to be available.
Set up authentication for Security Center in AWS
There are two ways to allow Defender for Cloud to authenticate to AWS:
Create an IAM role for Defender for Cloud - This is the most secure method and is recommended
AWS user for Defender for Cloud - A less secure option if you don't have IAM enabled
Create an IAM role for Defender for Cloud:
From your Amazon Web Services console, under Security, Identity & Compliance, select IAM.
Select Roles and Create role.
Select Another AWS account.
Enter the following details:
Account ID - enter the Microsoft Account ID (158177204117) as shown in the AWS connector page in Security Center.
Require External ID - should be selected
External ID - enter the subscription ID as shown in the AWS connector page in Security Center
Select Next.
In the Attach permission policies section, select the following policies:
SecurityAudit
AmazonSSMAutomationRole
AWSSecurityHubReadOnlyAccess
Optionally add tags. Adding Tags to the user doesn't affect the connection.
Select Next.
In The Roles list, choose the role you created
Save the Amazon Resource Name (ARN) for later.
Configure the SSM Agent
AWS Systems Manager is required for automating tasks across your AWS resources. If your EC2 instances don't have the SSM Agent, follow the relevant instructions from Amazon:
Complete Azure Arc prerequisites
Make sure the appropriate Azure resources providers are registered:
Microsoft.HybridCompute
Microsoft.GuestConfiguration
Create a Service Principal for onboarding at scale. As an Owner on the subscription you want to use for the onboarding, create a service principal for Azure Arc onboarding as described in Create a Service Principal for onboarding at scale.
Connect AWS to Defender for Cloud
From Defender for Cloud's menu, select Security solutions and then select Multi cloud connectors.
Select Add AWS account.
Configure the options in the AWS authentication tab:
Enter a Display name for the connector.
Confirm that the subscription is correct. It's the subscription that will include the connector and AWS Security Hub recommendations.
Depending on the authentication option, you chose in Step 2. Set up authentication for Security Center in AWS:
- Select Assume Role and paste the ARN from Create an IAM role for Security Center. Pasting the ARN file in the relevant field of the AWS connection wizard in the Azure portal
or
- Select Credentials and paste the access key and secret key from the .csv file you saved in Create an AWS user for Security Center.
Select Next.
Configure the options in the Azure Arc Configuration tab:
Defender for Cloud discovers the EC2 instances in the connected AWS account and uses SSM to onboard them to Azure Arc.
Select the Resource Group and Azure Region that the discovered AWS EC2s will be onboarded to in the selected subscription.
Enter the Service Principal ID and Service Principal Client Secret for Azure Arc as described here Create a Service Principal for onboarding at scale
If the machine connects to the internet via a proxy server, specify the proxy server IP address or the name and port number that the machine uses to communicate with the proxy server. Enter the value in the format http://<proxyURL>:<proxyport>
Select Review + create.
Review the summary information
The Tags sections will list all Azure Tags that will be automatically created for each onboarded EC2 with its own relevant details to easily recognize it in Azure.
Confirmation
After the connector is successfully created and AWS Security Hub has been configured properly:
Defender for Cloud scans the environment for AWS EC2 instances, onboarding them to Azure Arc, enabling it to install the Log Analytics agent and providing threat protection and security recommendations.
The ASC service scans for new AWS EC2 instances every 6 hours and onboards them according to the configuration.
The AWS CIS standard will be shown in the Defender for Cloud's regulatory compliance dashboard.
If Security Hub policy is enabled, recommendations will appear in the Defender for Cloud portal and the regulatory compliance dashboard 5-10 minutes after onboard completes.