Exercise - Integrate an existing ASP.NET Core web app
Now let's explore how to add .NET Aspire to an existing ASP.NET Core web app. Along the way, you'll learn how to add the .NET Aspire stack to an existing ASP.NET Core web app and then run the app. You'll also see how to call microservices from the ASP.NET Core app.
Set up your environment
To add .NET Aspire to an existing demo ASP.NET Core web app, you need to first obtain the existing app.
In a terminal window:
Set the current working directory to where you want to store your code.
Clone the repository into a new folder named ExampleApp:
git clone https://github.com/MicrosoftDocs/mslearn-aspire-starter ExampleApp
Explore the example app
Use Visual Studio to explore the demo app.
Open Visual Studio, then select Open a project or solution.
In the Open Project/Solution dialog, navigate to the ExampleApp/eShopAdmin folder, then select EShopAdmin.sln.
Select Open.
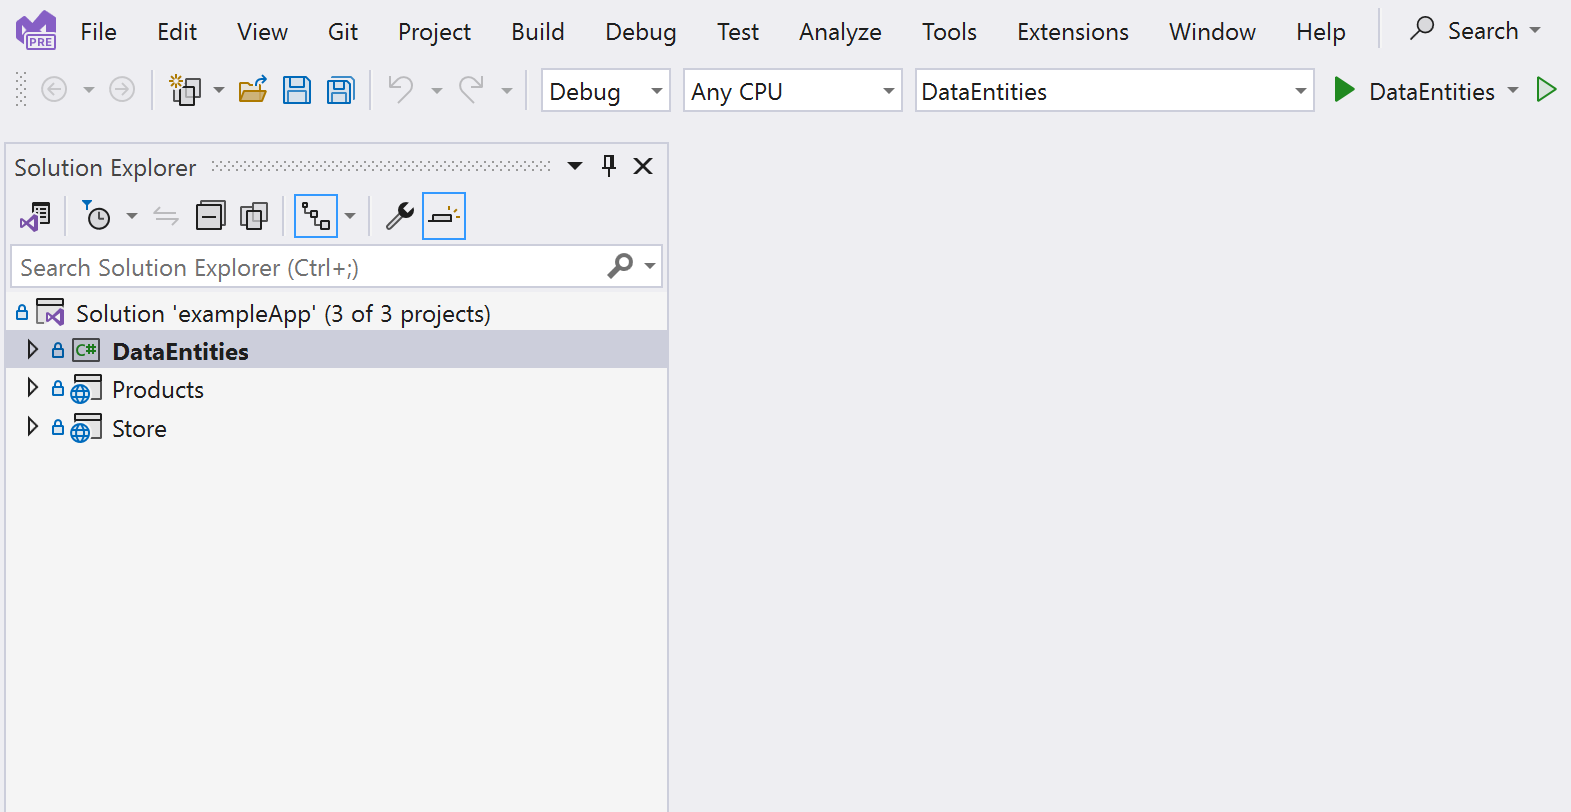
The demo app is a .NET 8 solution with three projects:
- Data Entities. A class library that defines the Product class used in the Web App and Web API.
- Products. A Web API that returns a list of products in the catalog with their properties.
- Store. A Blazor Web App displays these products to website visitors.
To successfully run the app, change the projects that start up:
From the menu, select Project > Configure Startup Projects....
In the Solution Property Pages dialog, select Multiple startup projects.
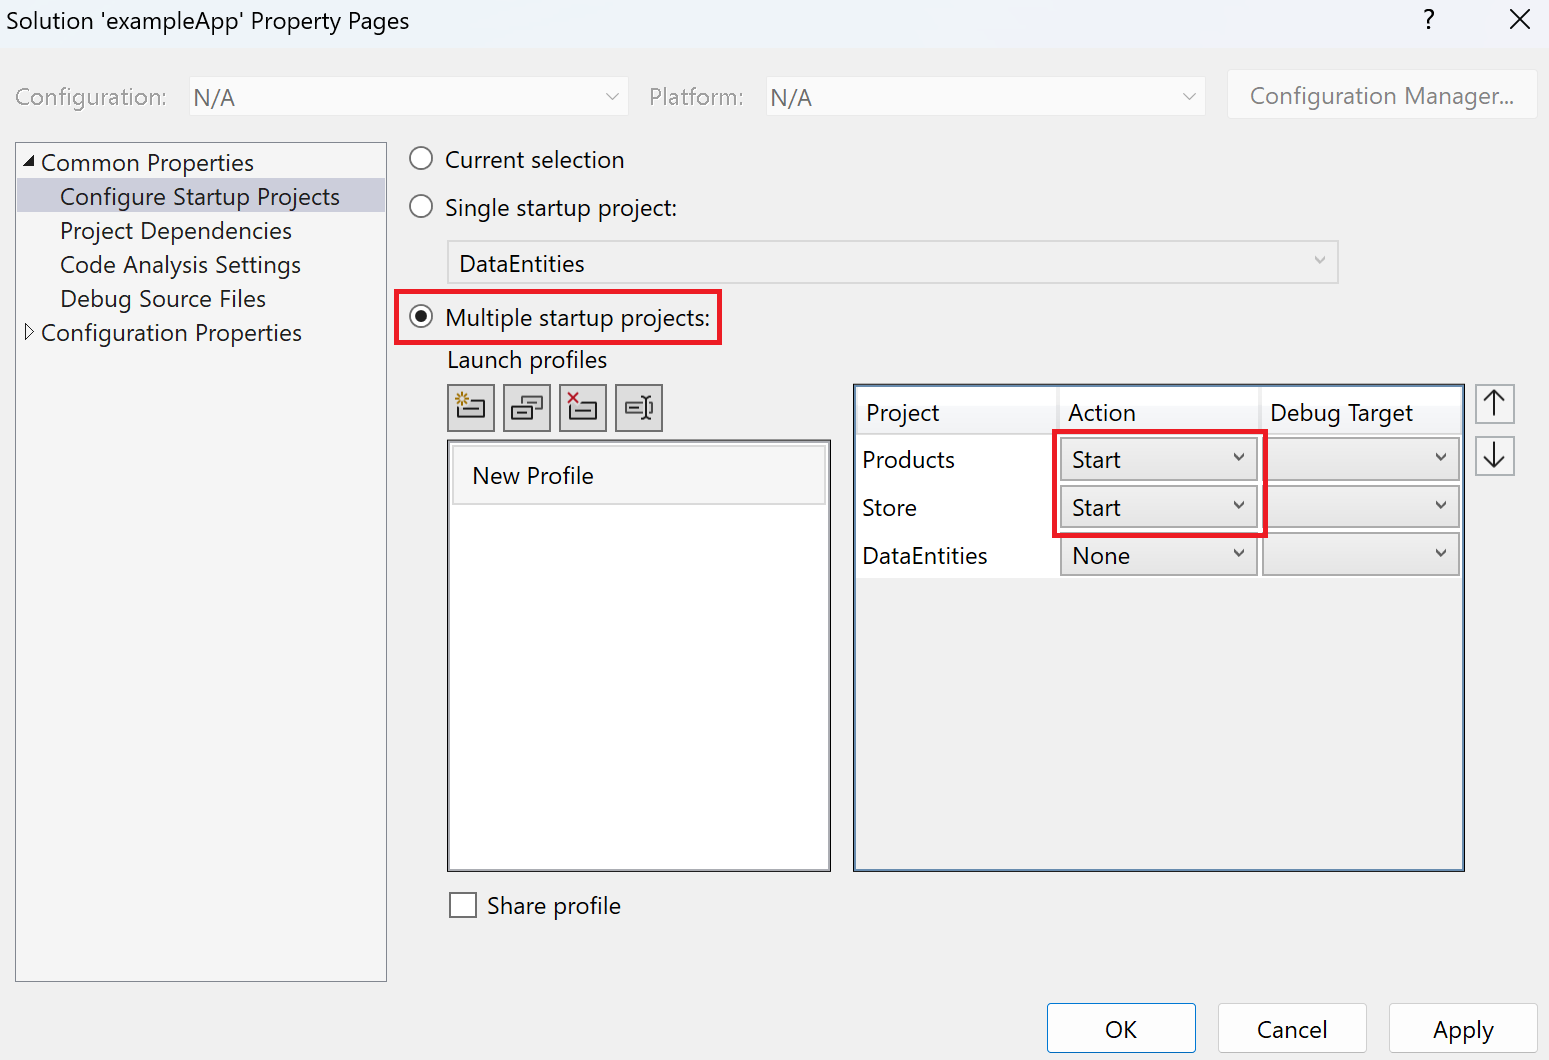
In the Action column, set Products and Store to Start.
Select OK.
Run the app by pressing F5, or by selecting Start in the toolbar.
The app opens two instances of your default web browser. One shows the JSON output of the Web API, and the other shows the Blazor Web App.
In the web app, select Products from the menu. You should see this error.
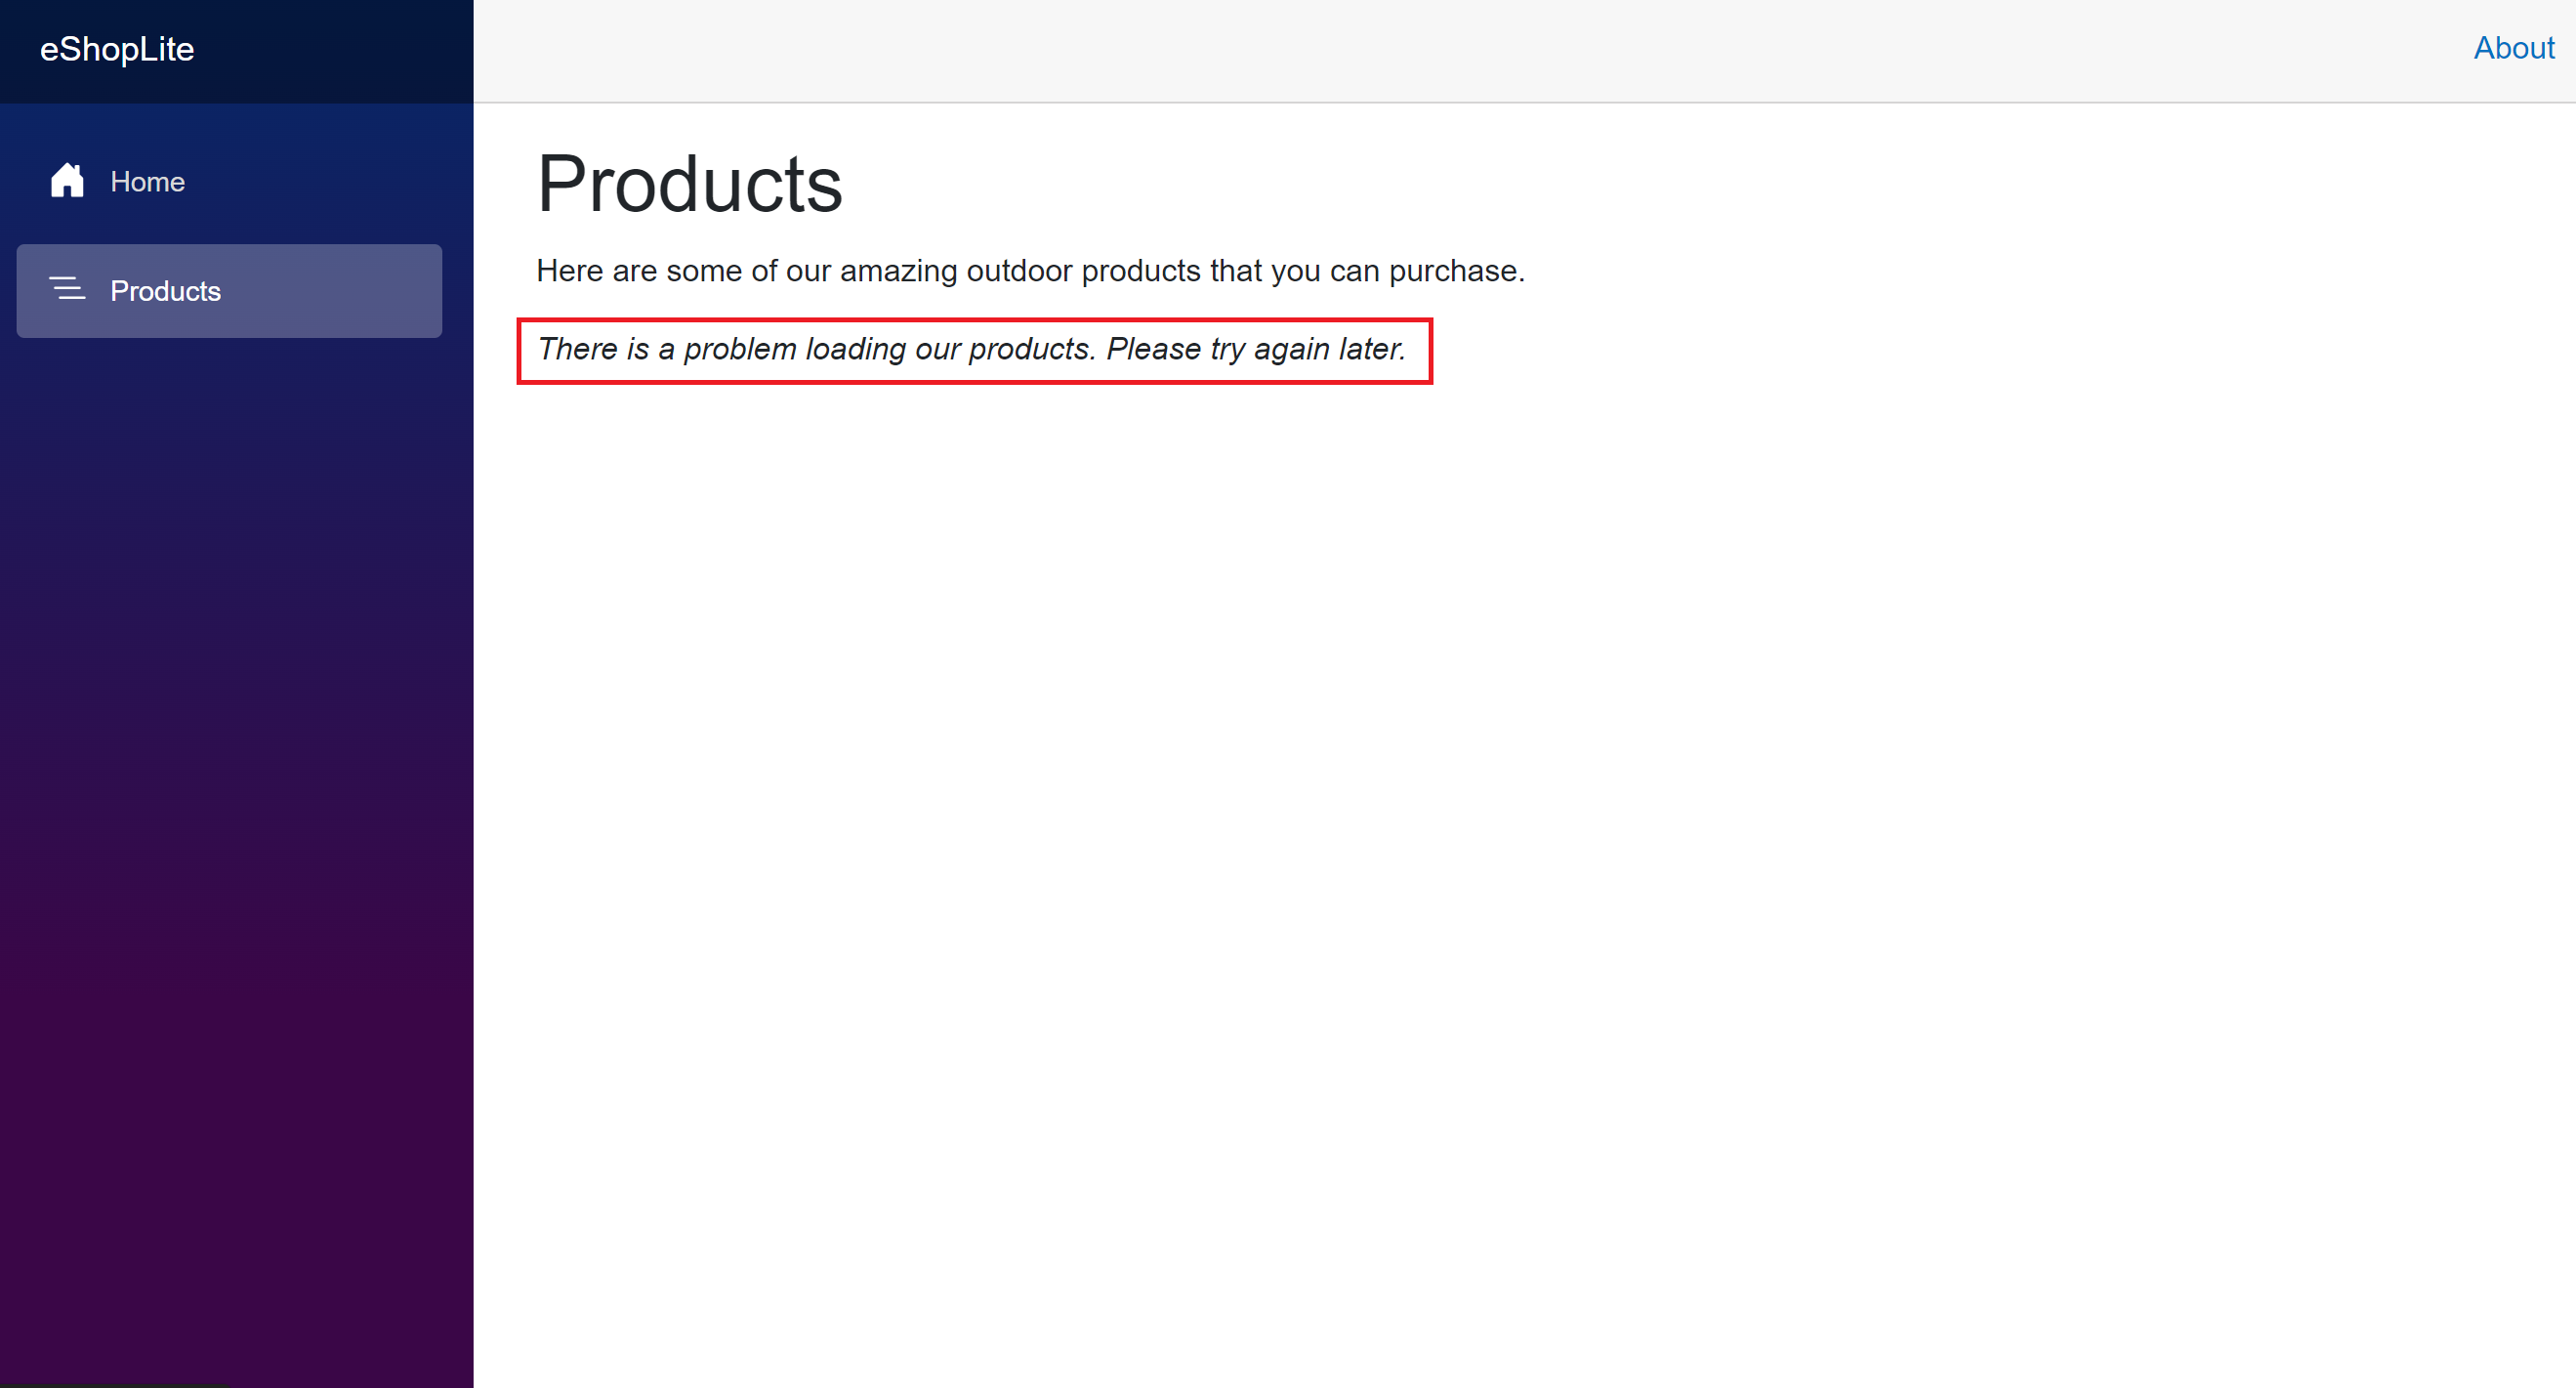
Stop the app by pressing Shift+F5, or select Stop Debugging in the toolbar.


This app is new to you. You're not sure how the endpoints and services are configured. Let's add .NET Aspire orchestration and see if it can help diagnose the problem.
Enlist the existing app in .NET Aspire orchestration
In Visual Studio:
In Solution Explorer, right-click the Store project, then select Add > .NET Aspire Orchestrator Support....
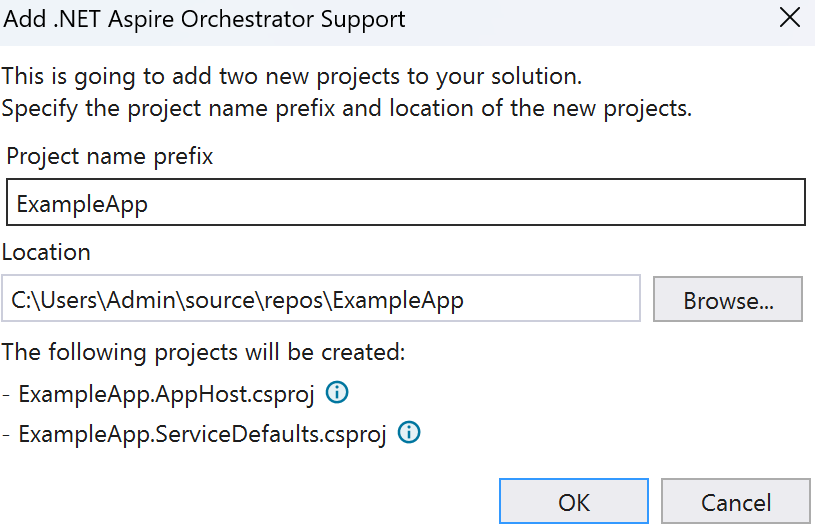
In the Add .NET Aspire Orchestrator Support dialog, select OK.
Now you can see the AppHost and ServiceDefaults projects are added to the solution. The AppHost project is also set as the startup project.
Run the app by pressing F5, or by selecting Start in the toolbar.
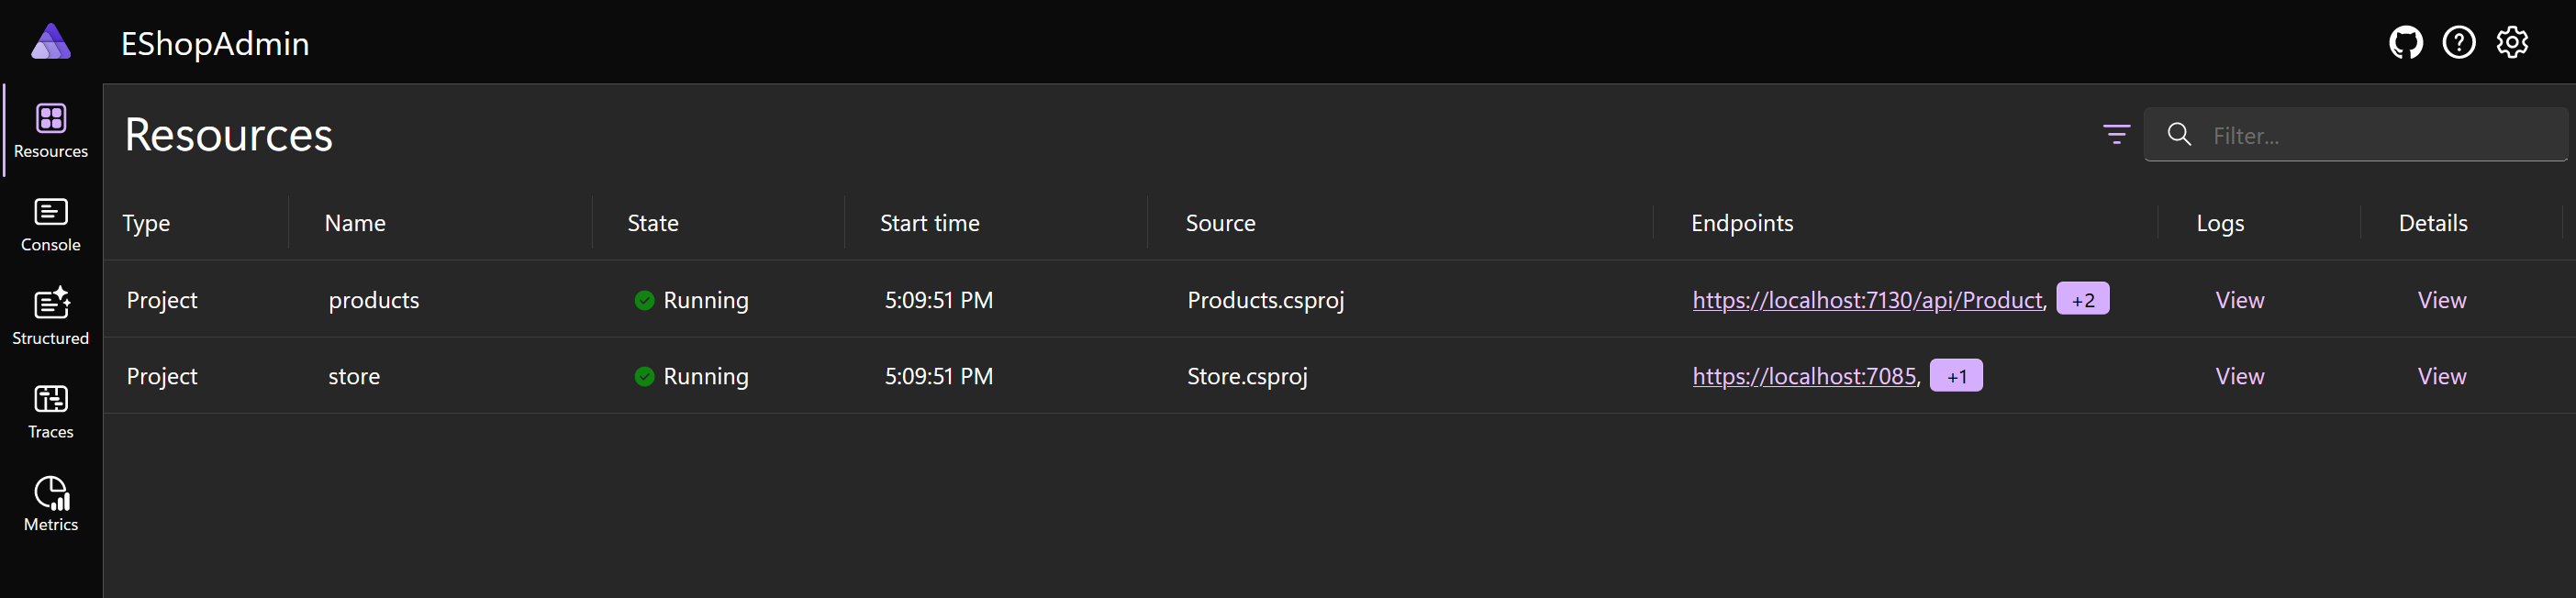
This time, the solution opens a single browser window showing the .NET Aspire dashboard.
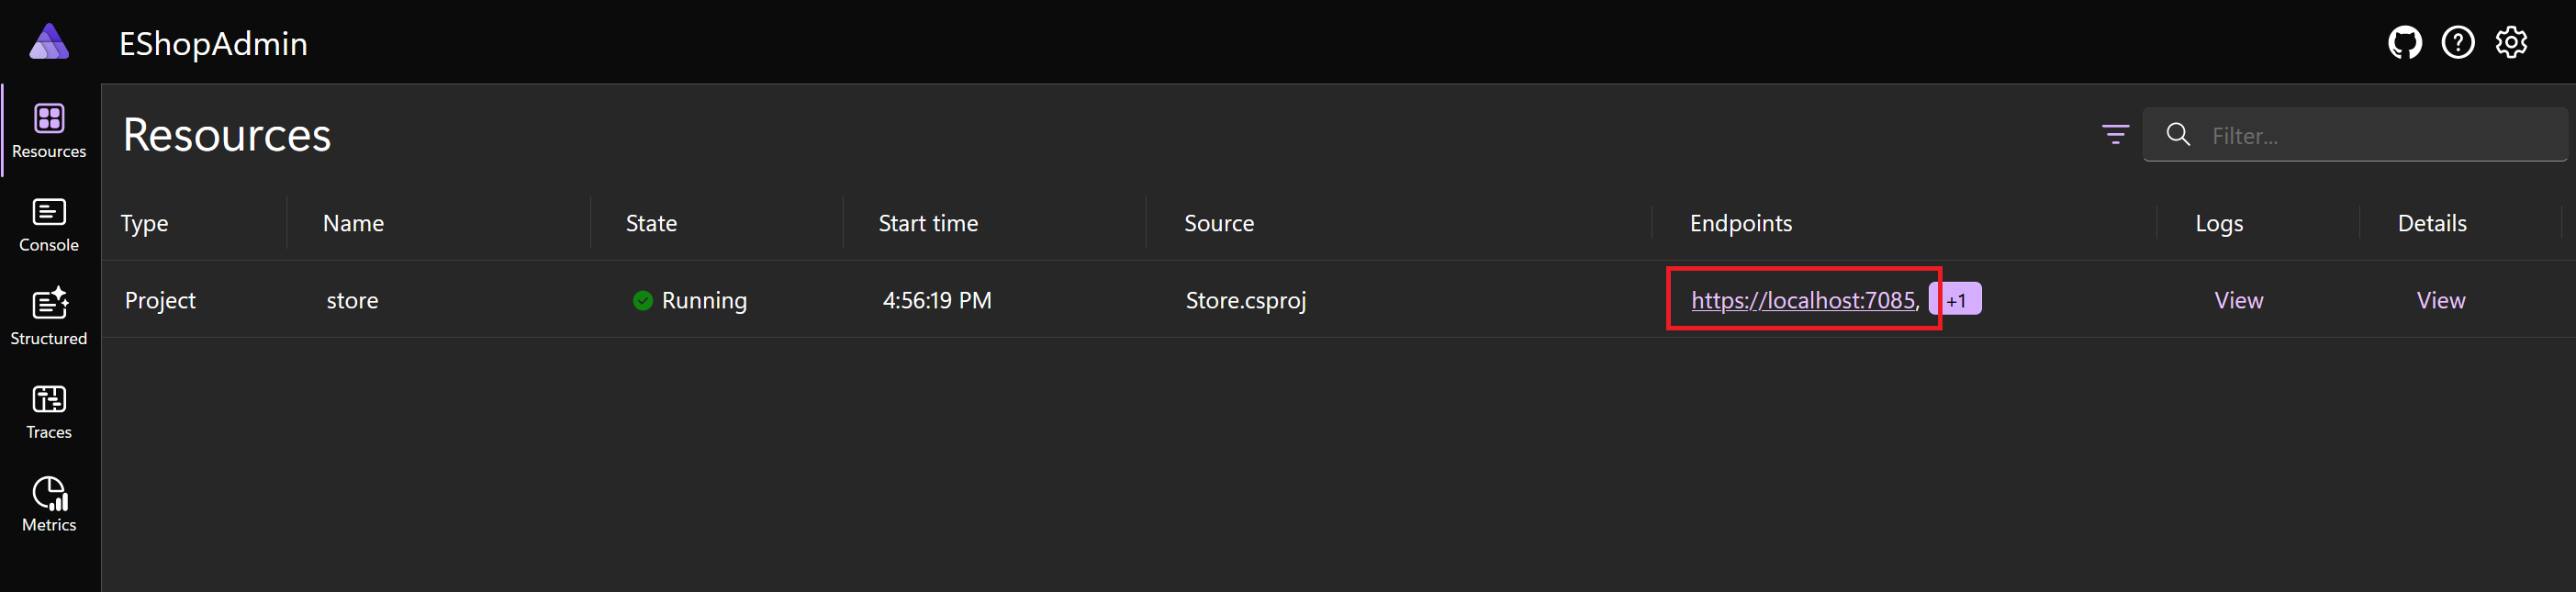
Select the endpoint for the store project, and then select Products. You should see the same error as before.
Return to the dashboard.
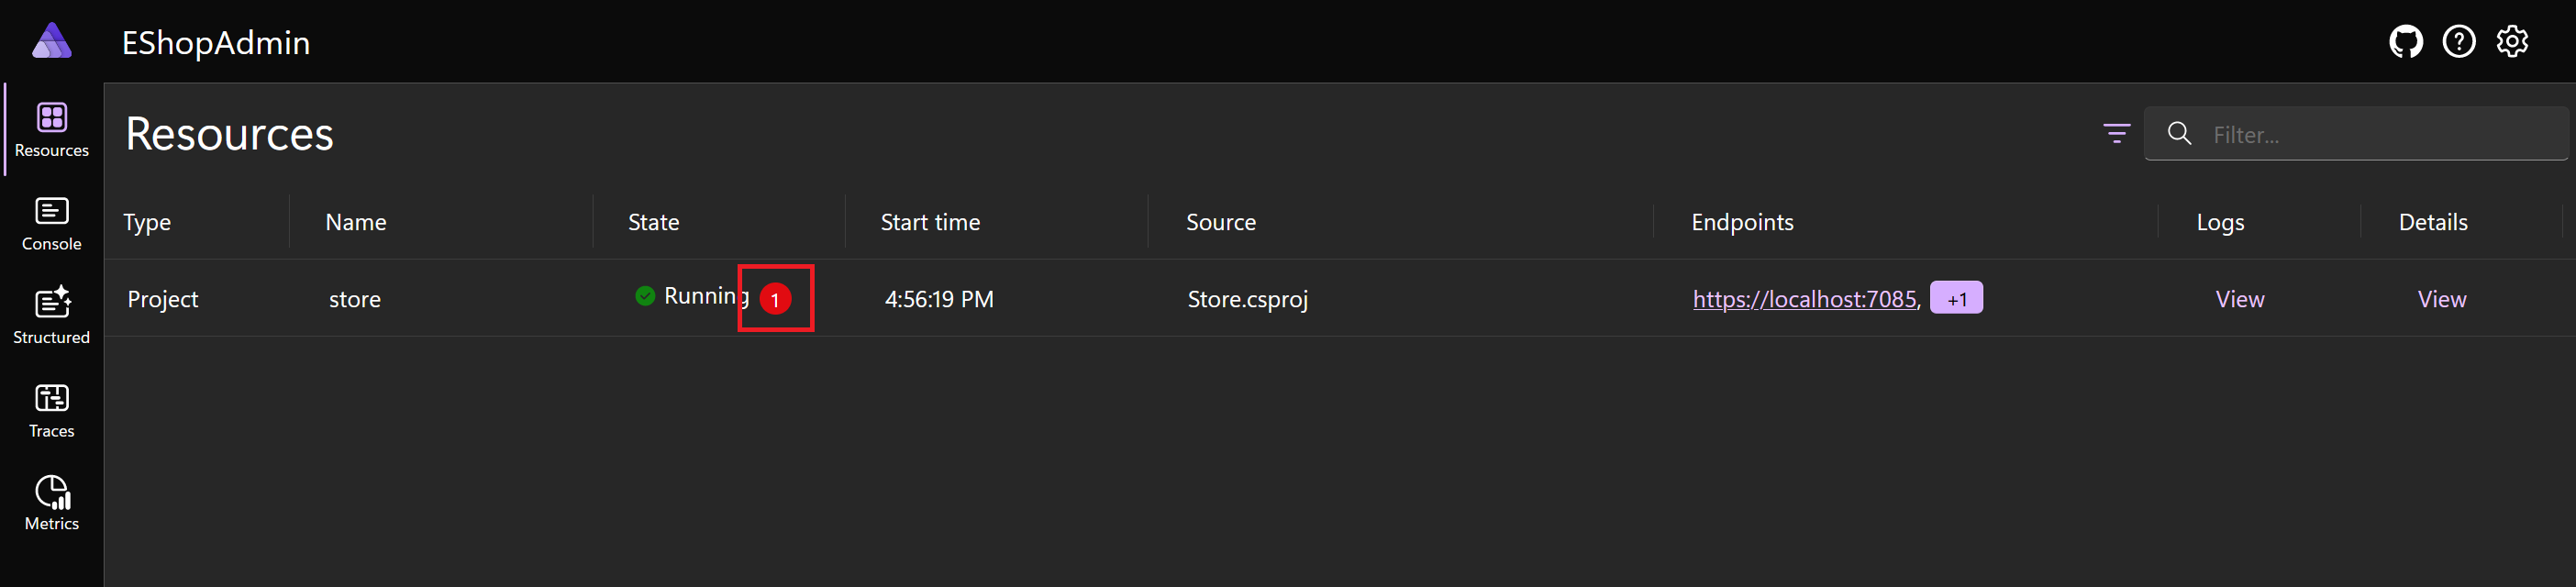
Select the red error notification next to Running, and then in the Details column, select View.
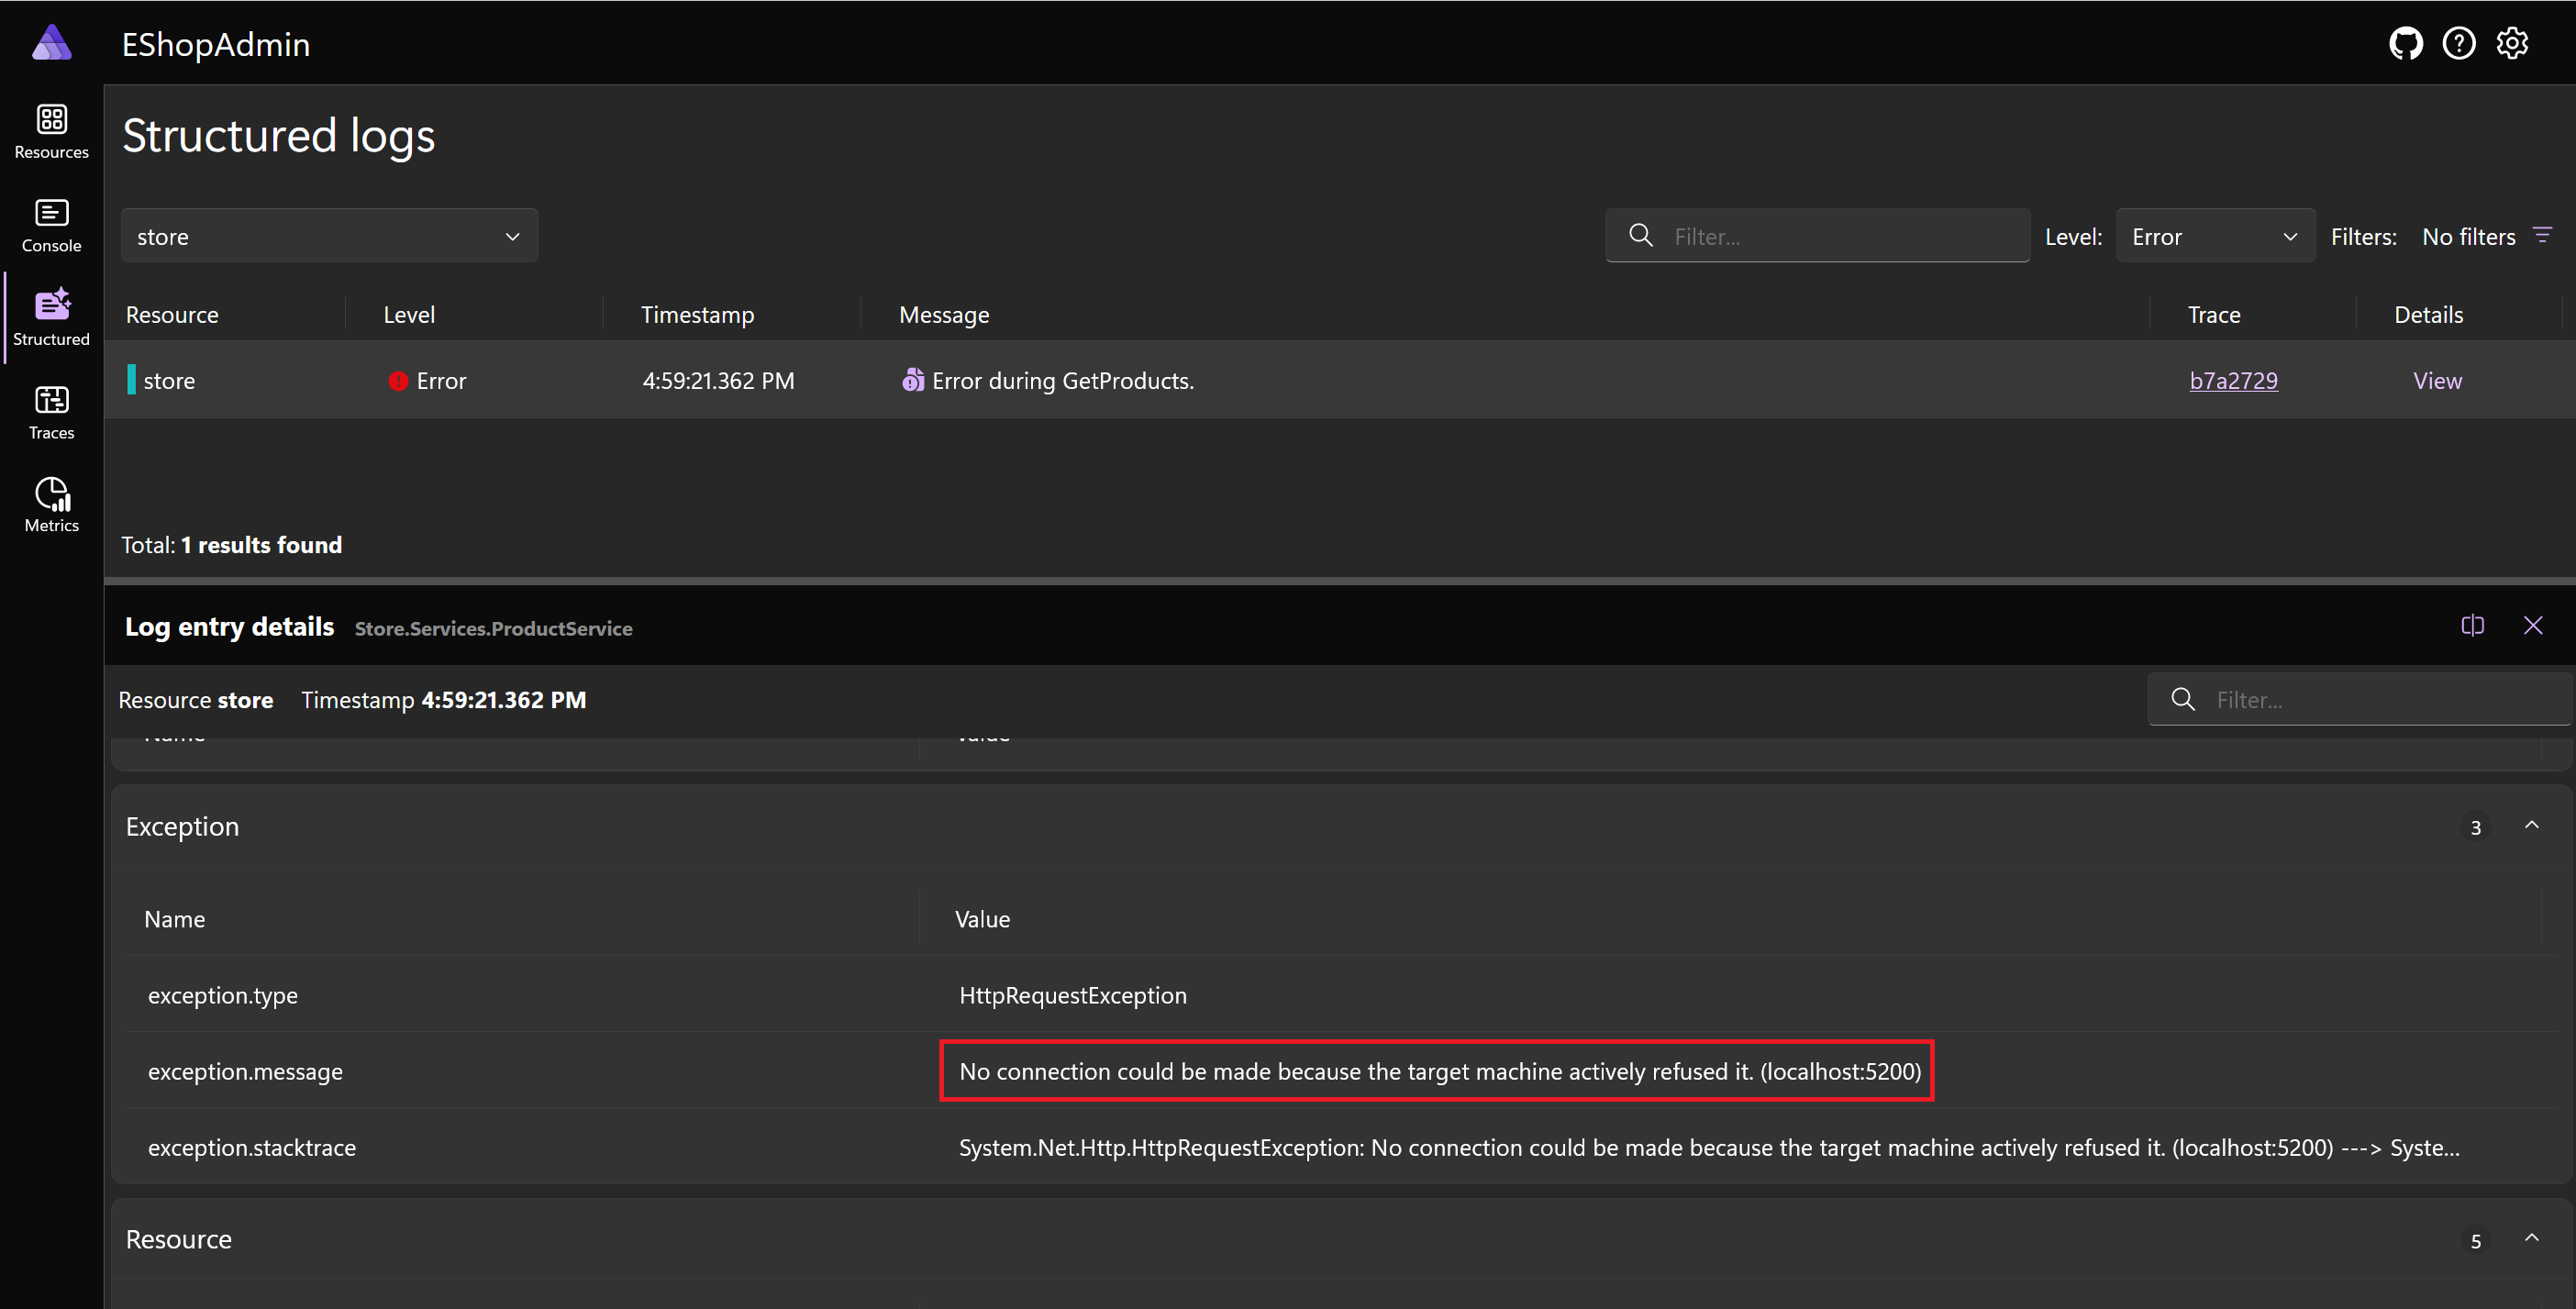
Scroll through the error details until you can see the exception.message. The Web app is struggling to connect to localhost:5200. Port 5200 is the port the front end thinks the products API is running on.
Stop the app by pressing Shift+F5, or select Stop Debugging in the toolbar.

Update the orchestration to include the products API
There are many ways to resolve this issue. You could explore the code, work out how the front end is configured, edit the code, or change the launchSettings.json or appsettings.json files.
With .NET Aspire, you can change the orchestration so that the products API responds on port 5200.
In Visual Studio:
To add the Products project to the orchestration, in Solution Explorer, right-click the Products project, then select Add > .NET Aspire Orchestrator Support....
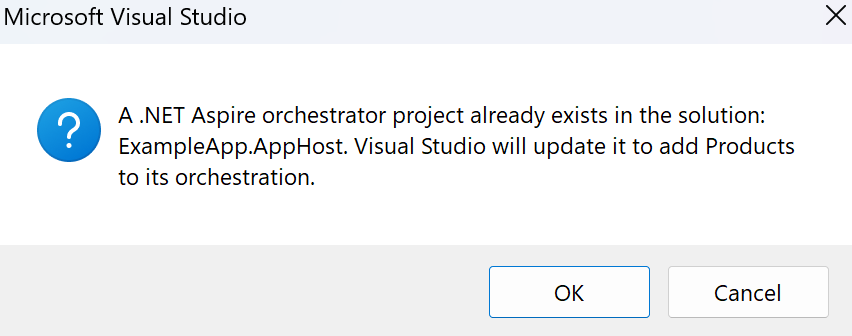
In the dialog, select OK.
In Solution Explorer, open the AppHost project, then open the Program.cs file.
Explore the code and see how the Products project is added to the orchestration:
var builder = DistributedApplication.CreateBuilder(args);

builder.AddProject<Projects.Store>("store");

builder.AddProject<Projects.Products>("products");

builder.Build().Run();
Next configure .NET Aspire to add a new end point for the products API.
Replace the
builder.AddProject<Projects.Products>("products");line with this code:builder.AddProject<Projects.Products>("products") .WithHttpEndpoint(port: 5200, name: "products");Run the app by pressing F5, or by selecting Start in the toolbar.
The products project is now listed on the dashboard with two endpoints.
Select the endpoint for the Store project, and then select Products.
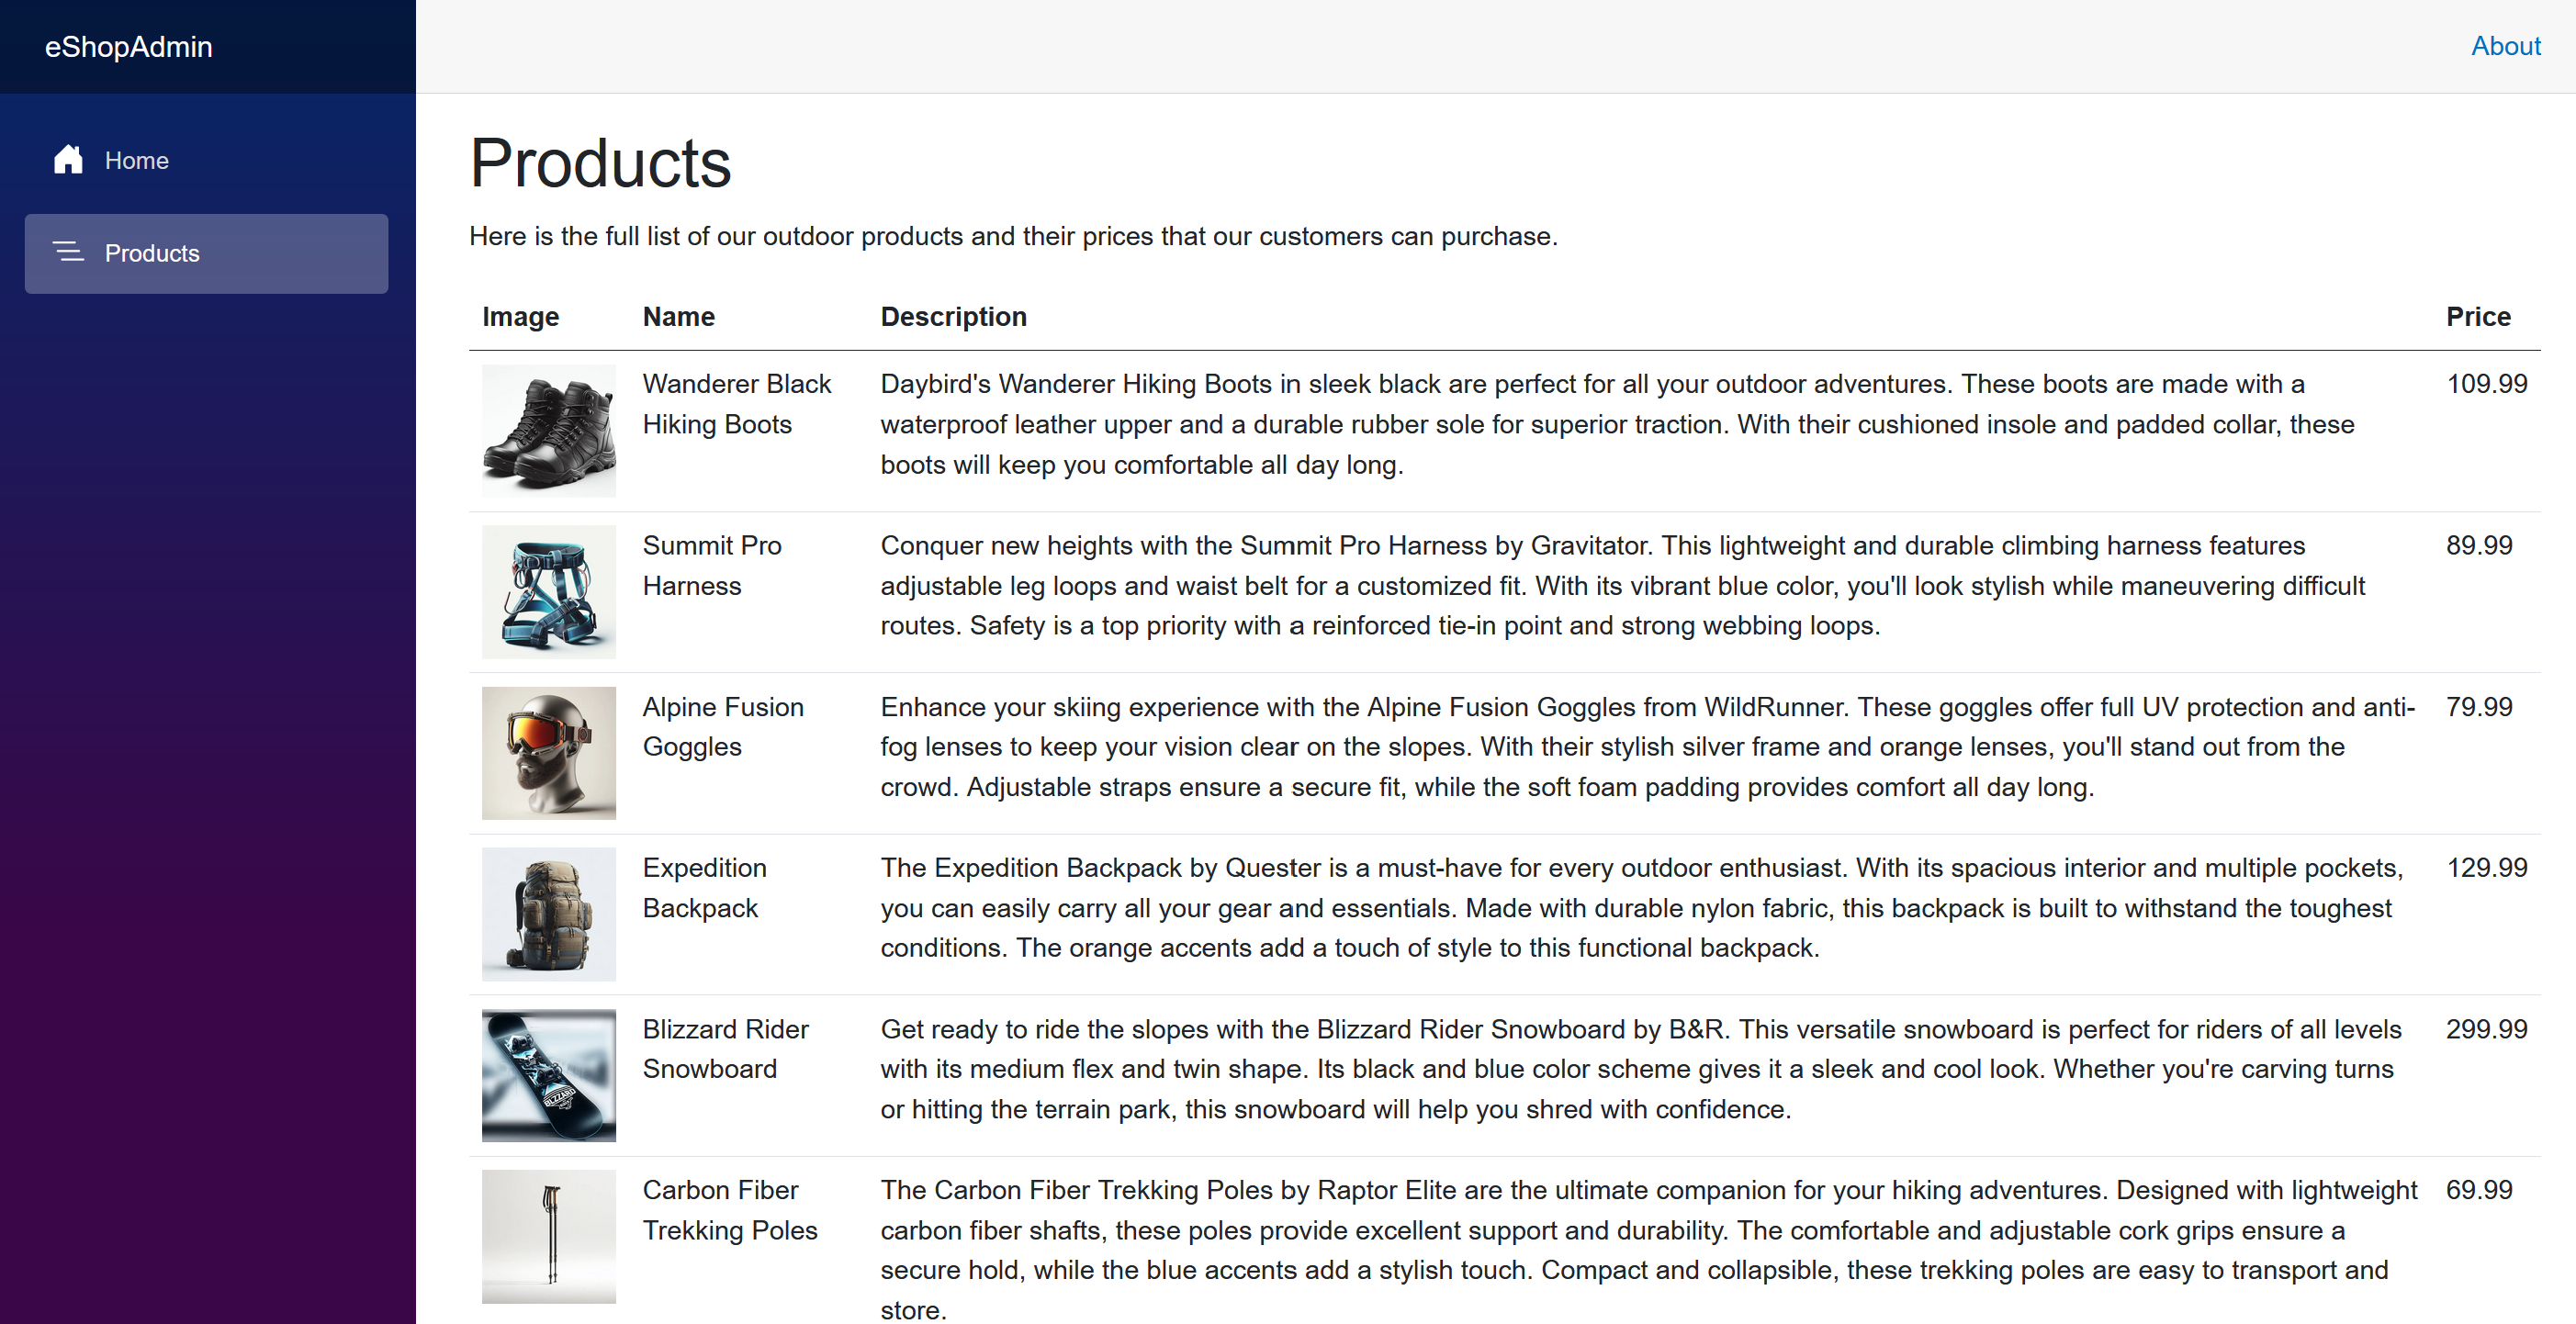
The products are now displayed in the web app.
Stop the app by pressing Shift+F5, or select Stop Debugging in the toolbar.


This approach resolves the configuration issue, but it isn't the best way to fix the problem. If you decide to use .NET Aspire, you should also use .NET Aspire service discovery.
Update the web app to use .NET Aspire service discovery
In Visual Studio:
In Solution Explorer, open the AppHost project, then open the Program.cs file.
Replace the code in the file with this code:
var builder = DistributedApplication.CreateBuilder(args);

var products = builder.AddProject<Projects.Products>("products");

builder.AddProject<Projects.Store>("store")
       .WithReference(products);

builder.Build().Run();
The above code reorders the projects. The products API is now passed as a project reference to the front end Store web app.
In Solution Explorer, open the Store project, then open the appsettings.json file.
Delete the endpoint configuration lines:
"ProductEndpoint": "http://localhost:5200",
"ProductEndpointHttps": "https://localhost:5200"
The settings are now:
{
  "DetailedErrors": true,
  "Logging": {
    "LogLevel": {
      "Default": "Information",
      "Microsoft.AspNetCore": "Warning"
    }
  },
  "AllowedHosts": "*"
}
In Solution Explorer, under the Store project, open the Program.cs file.
Replace this line:
var url = builder.Configuration["ProductEndpoint"]
     ?? throw new InvalidOperationException("ProductEndpoint is not set");
with this line:
var url = "http://products";Run the app by pressing F5, or by selecting Start in the toolbar.
Select the endpoint for the Store project, then select Products.
The app is still working as expected, but the front end is now using .NET Aspire service discovery to get information about the products API endpoint.