Exercise - Add and delete users in Microsoft Entra ID
You need to add member user accounts for the new developer team in your organization.
In this exercise, you'll create a new Microsoft Entra organization to hold all of your user accounts. You'll also create a user account, delete a user account, and learn how to recover a deleted user account.
Create a Microsoft Entra organization
To hold all of the users you create in this exercise, create a new organization.
Note
You need to have a paid Azure subscription to create a Microsoft Entra organization. You can't create a Microsoft Entra organization with a free subscription, but you can review the steps below to see how to create one.
Sign in to the Azure portal.
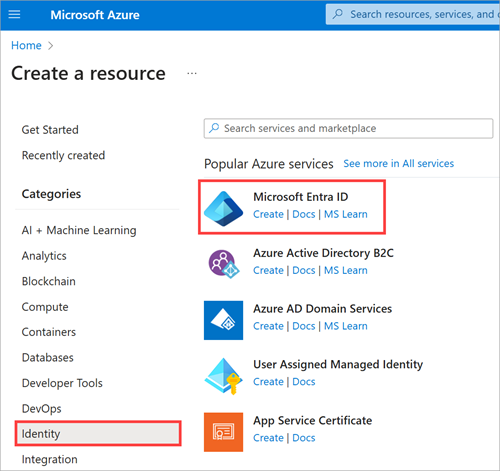
On the Azure portal home page, under Azure services, select Create a resource.
In Create a resource, in the left menu under Categories, select Identity. Under Popular Azure services, select Create under Microsoft Entra ID.
In Create a tenant, on the Basics tab, enter the following value for the setting.
Setting Value Tenant type Select a tenant type Microsoft Entra ID Select Next : Configuration, and enter the following values for each setting.
Setting Value Directory details Organization name Enter Contoso Marketing Company Initial domain name Enter contosomarketingXXXX where you replace XXXX with numbers or letters to make your domain name unique Location Select your location from the drop-down Select Next : Review + create.
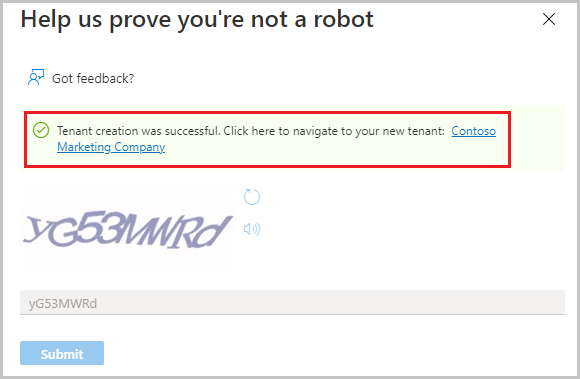
After validation passes, select Create. The Help us prove you're not a robot pane appears.
Enter the appropriate match to the request and select Submit. Wait for your tenant creation to complete.
On the Help us prove you're not a robot pane, select the Click here to navigate to your new tenant: Contoso Marketing Company link.
The Overview pane for Contoso Marketing Company appears.
Get a free trial for Microsoft Entra ID P1 or P2
To complete all the exercises in this module, you'll need to activate a free trial for Microsoft Entra ID P1 or P2.
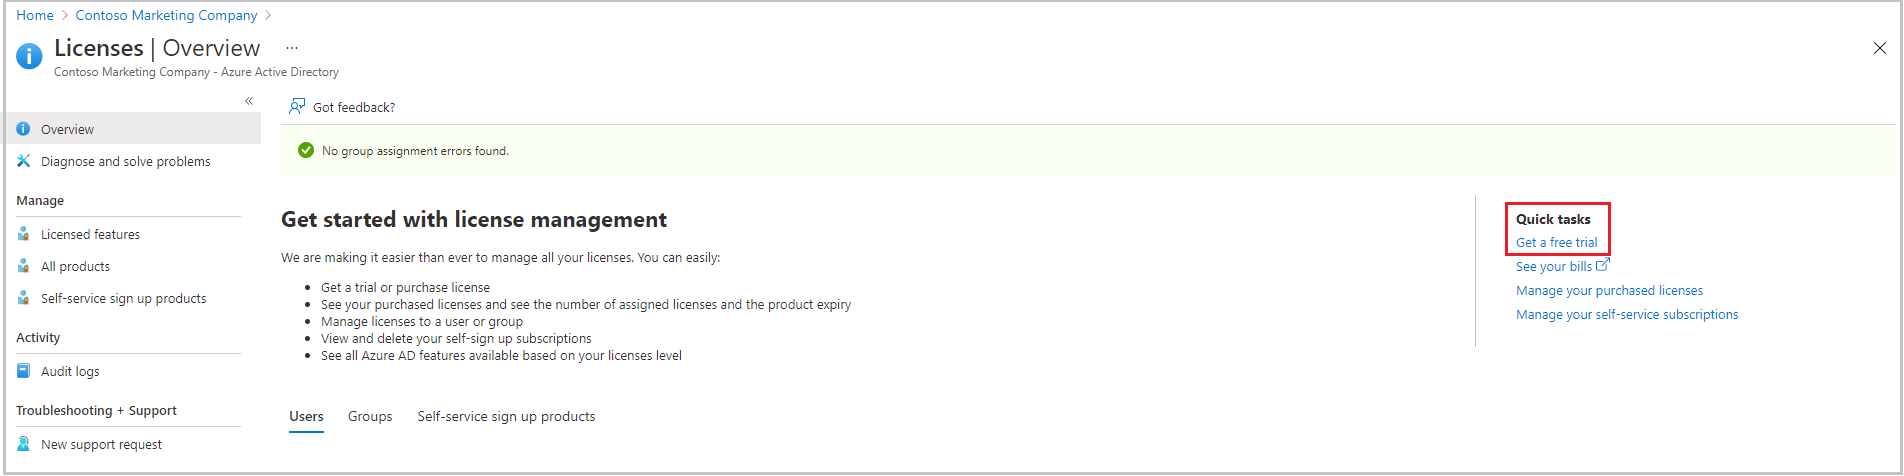
In the left menu pane, under Manage, select Licenses. The Overview pane for Licenses appears.
On the right side of the pane, under Quick tasks, select Get a free trial.
The Activate pane appears.
Under Microsoft Entra ID P2, expand Free trial, then select Activate. If you don't have that option, that's okay. You can complete most of the exercises without it. After the premium license activates, the Overview pane for Licenses reappears.
Return to the Overview pane for the Contoso Marketing Company Microsoft Entra ID. On the Overview tab, under the Basic information section, refresh the browser until you see Microsoft Entra ID P2 appear next to License. It might take a couple of minutes.
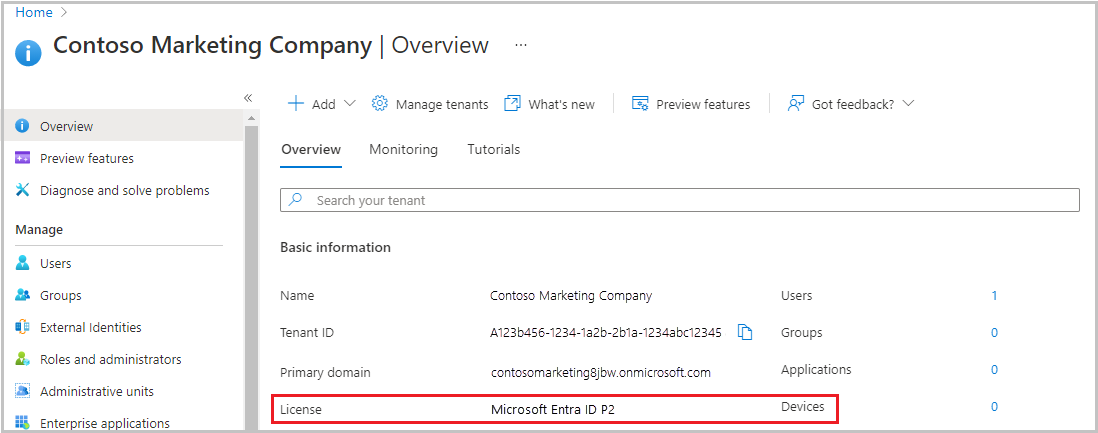
Under My feed, you should also see your role listed as the Global administrator.
Under Basic information, copy the Primary domain name to use in the next section.
Add a new user
Now, let's create a user account.
In the Microsoft Entra organization you created, in the left menu pane, under Manage, select Users. The All users pane appears.
In the top menu bar, select New user, then select Create new user in the drop-down. The New user pane appears for Contoso Marketing Company.
Enter the following values for each setting.
Identity
- User principal name:
chris@contosomarketingXXXXXX.onmicrosoft.com. The domain name should match the primary domain you copied in the previous section. - Display name: Chris Green
- User principal name:
Select Review + Create, then select Create. The All users pane reappears for Contoso Marketing Company - Microsoft Entra ID. The user is now created and registered to your organization.
Delete a user
You can delete users after they're created.
In your All users pane for Microsoft Entra organization, check the box for Chris Green in the list.
In the top menu bar, select Delete. If you don't see that option, select More.
Select OK to confirm deletion.
Recover a deleted user
You can restore deleted users. View the list of the deleted users, and then restore one.
In your All users pane for Microsoft Entra organization, in the left menu pane, select Deleted users under Manage. You now see all of the users that were deleted within the last 30 days.
Check the box next to Chris Green and select Restore users in the top menu bar.
To confirm, select OK. The All users pane reappears.
Verify that Chris Green's account is recovered by selecting All users in the left menu pane. You should see Chris Green restored as a user.