Add packages to your .NET project
.NET comes with many core libraries that handle everything from managing files to HTTP to compressing files. There's also a huge ecosystem of third-party libraries. You can use NuGet, the .NET package manager, to install these libraries and use them in your application.
.NET and its ecosystem use the word dependency a lot. A package dependency is a third-party library. It's a piece of reusable code that accomplishes something and that you can add to your application. The third-party library is something your application depends on to function, hence the word dependency.
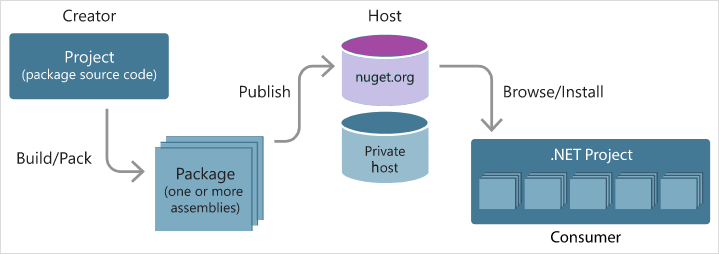
You can think of the third-party library as a package stored in a repository. A package consists of one or more libraries that you can add to your application so you can take advantage of its features.
Here, we focus on package dependencies. However, a .NET project can have other types of dependencies in addition to package dependencies. Including, frameworks, analyzers, project references, and shared project dependencies.
Determine whether you need a package
How do you know if you need a package for your project? It's a complicated question that involves a few factors:
- Getting better code: Ask yourself if you're dealing with a task like security, for example, and are trying to implement authentication and authorization. It's a task that you need to get right to protect your data and your customers' data. There are standard patterns out there and libraries that many developers use. These libraries implement features that you probably always need, and issues are patched as they arise. You should use such libraries instead of creating your own. You're not likely to write the code as well yourself, because there are so many edge cases that you need to consider.
- Saving time: You can probably build most things yourself, like utility or UI component libraries, but it takes time. Even if your results are comparable to what's available, it's not a good use of your time to replicate the work.
- Maintenance: All libraries and apps need maintenance sooner or later. Maintenance involves adding new features and correcting bugs. Is it a good use of your time or your team's time to maintain a library, or is it better to let an open-source software team handle it?
Evaluate a package
Before you install a library, you might want to inspect the dependencies on which it relies. These dependencies might encourage you to use the package, or they might deter you. Here are some factors to consider when you select a dependency for your project:
- Size: The number of dependencies might create a large footprint. If you're on a limited bandwidth or have other hardware limitations, this factor might be a concern.
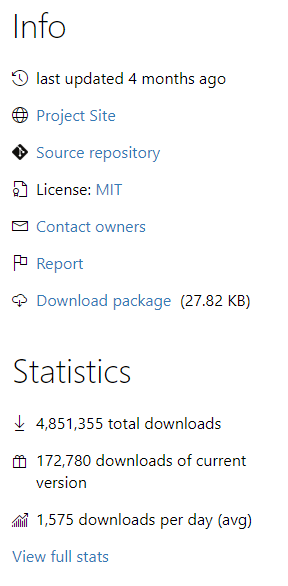
- Licensing: You need to ensure that the license granted for the library covers your intended use, whether that use is commercial, personal, or academic.
- Active maintenance: It might be a problem if your package relies on a dependency that isn't actively maintained. The dependency could be deprecated or not updated for a long time.
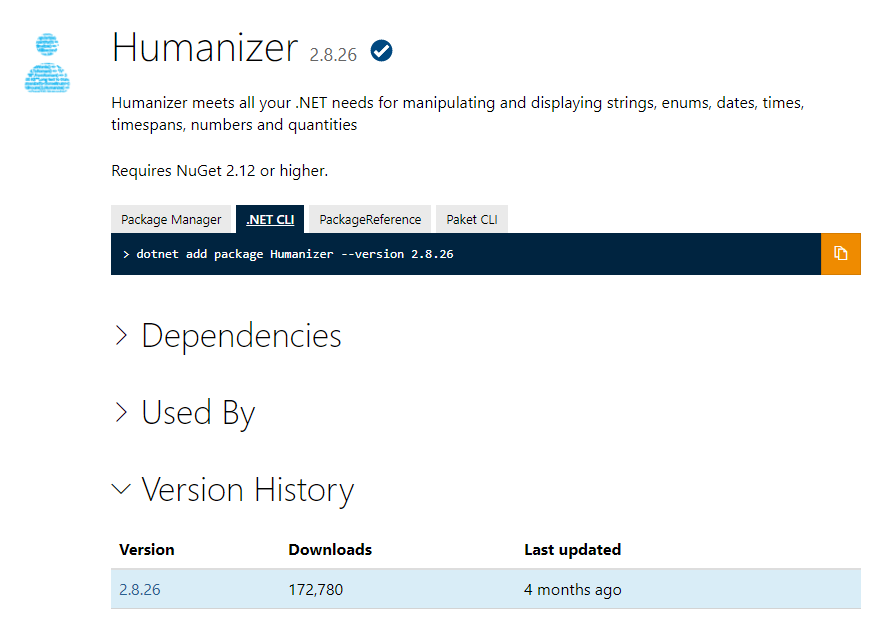
You can learn more about a package before installing it by going to https://www.nuget.org/packages/<package name>. This URL takes you to a detailed page for the package. Select the Dependencies drop-down list to see on which packages it relies to function.
The number of listed dependencies might not tell the whole truth. If you download a package, you might end up with a package dependency that contains dozens of packages. Why is that? Every package has a list of dependencies. To ensure that you can use a package, all dependencies are crawled and downloaded when you run the dotnet add package <package name> command.
Install a package
There are several ways to install packages. There's a built-in command line and graphical user interface for a package manager in Visual Studio and Visual Studio for Mac. You can manually add package references to your project file, or you can install them through a command-line interface (CLI) tool such as Paket or the .NET Core CLI.
For this module, we use the built-in .NET Core CLI to install packages. You can add a package to your .NET project by invoking a command in the terminal. A typical installation command looks like this: dotnet add package <name of package>. When you run the add package command, the command-line tool connects to a global registry, fetches the package, and stores it in a cached folder location that all projects can use.
After your project installs and builds, the references are added into your debug or release folders. Your project directory looks something like this:
-| bin/
---| Debug/
------| net3.1
--------| <files included in the dependency>
Find a package
Individual developers might use the global registry at NuGet.org to find and download packages that they need for their apps. A company might have a strategy in place for what packages are OK to use and where to find them.

Packages might be located in many different places. Some of these sources might be publicly available, and some might be restricted and available only to employees of a specific company. Here are some places where packages might reside:
- Registries: An example might be a global registry, like the NuGet.org registry. You can host your own registries that can be either private or public. Services such as GitHub and Azure DevOps make private registries available.
- Files: You can install a package from a local folder. Installation from a package is common when you're trying to develop your own .NET libraries and want to test the package locally. Or, for some reason you don't want to use a registry.

NuGet registry and dotnet tool
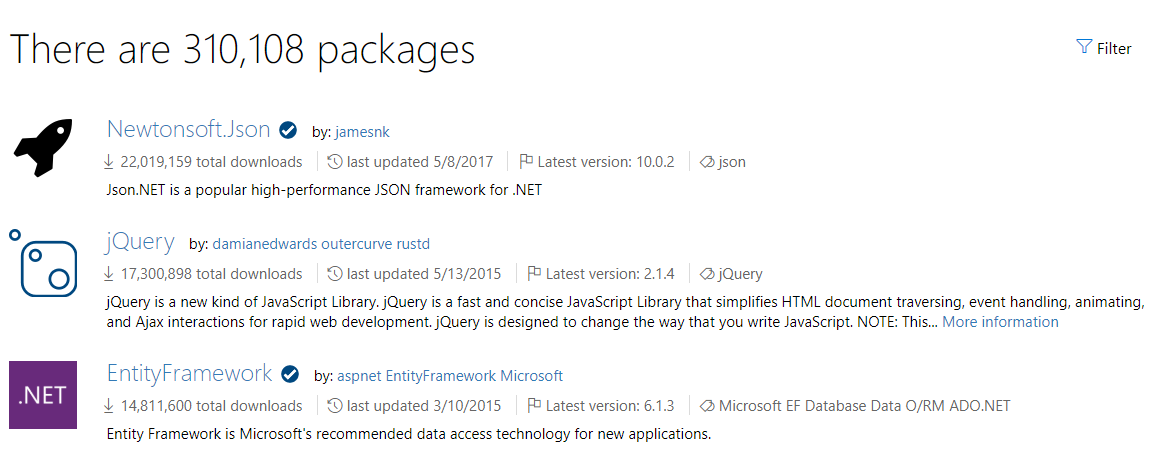
When you run dotnet add package <name of dependency>, .NET goes to a global registry called the NuGet.org registry located at https://nuget.org and looks for the code to download. You can also browse through this page for packages if you visit it by using a browser. Every package has a dedicated website to which you can go.

On these sites, you can learn more about where the source code resides. You can also find information like metrics on downloads and information about maintenance.

.NET commands
So far, you learned how you can install dependencies by using the .NET Core CLI. But this tool can do a lot more.
The .NET Core CLI has quite a few commands. The commands help you with tasks like installing packages, authoring packages, and initializing .NET projects. You don't need to know all the commands in detail. When you start out with .NET, you're likely to use only a subset of the commands. As you expand your use of .NET, you might use more commands from various categories.
To help you remember what the commands do, it helps to think of them as belonging to categories:
- Manage dependencies: Commands in this category cover installation, removal, cleanup after package installations, and package updates.
- Run programs: The .NET Core tool can help you manage flows in your application development. Examples of application flows are running tests, building code, and running migrate commands to upgrade projects.
- Author and publish packages: Several commands can help you with tasks like creating a compressed package and pushing the package to a registry.
If you want a detailed list of all commands, enter dotnet --help in the terminal.
How to install a package
Use the dotnet add package <dependency name> command to install a normal dependency which is meant to be used as part of your application.
Note
You can install some packages globally. These packages aren't meant to be imported into your project. For that reason, many global packages are CLI tools or templates. You can also install these global tools from a package repository. Install tools by using the dotnet tool install <name of package> command. Install templates by using the dotnet new -i <name of package> command.
After installation
The installed packages are listed in the dependencies section of your .csproj file. If you want to see what packages are in the folder, you can enter dotnet list package.
Project 'DotNetDependencies' has the following package references
   [net8.0]:
   Top-level Package      Requested   Resolved
   > Humanizer            2.7.9       2.7.9
This command lists only the top-level packages, and not dependencies of those packages that we call transitive packages. This command is nice for a quick look. If you want a more in-depth view, you can list all transitive packages. When you do so, the list command looks like this:
dotnet list package --include-transitive
Including transitives allows you to see dependencies along with all the packages you installed. If you run dotnet list package --include-transitive, you might get this output:
Project 'DotNetDependencies' has the following package references
   [net8.0]:
   Top-level Package      Requested   Resolved
   > Humanizer            2.7.9       2.7.9

   Transitive Package               Resolved
   > Humanizer.Core                 2.7.9
   > Humanizer.Core.af              2.7.9
   > Humanizer.Core.ar              2.7.9
   > Humanizer.Core.bg              2.7.9
   > Humanizer.Core.bn-BD           2.7.9
   > Humanizer.Core.cs              2.7.9
   ...
Restore dependencies
When you create or clone a project, the included dependencies aren't downloaded or installed until you build your project. You can manually restore dependencies, and project-specific tools that are specified in the project file, by running the dotnet restore command. In most cases, you don't need to explicitly use the command. NuGet restore runs implicitly, if necessary, when you run commands like new, build, and run.
Clean up dependencies
Sooner or later, you're likely to realize that you no longer need a package. Or, you might realize that the package you installed isn't the one you need. Maybe you found one that accomplishes a task better. Whatever the reason, you should remove dependencies that you aren't using. Doing so keeps things clean. Also, dependencies take up space.
To remove a package from your project, use the remove command, like so: dotnet remove package <name of dependency>. This command removes the package from your project's .csproj file.