Exercise - Build an inventory app with SharePoint
Consider a scenario where you want users within your company, Contoso, to order their own coffee machines. Contoso wants you to build an app that you can share with anyone who handles that process.
In this exercise, you'll set up a couple of SharePoint lists to store the coffee machine data and the order data. Then, you'll create a Power Apps canvas app to interact with that data and place orders.
Create the machine list
Your first task is to create the machine list:
Download the Machine Order Data Excel file.
Go to a SharePoint Online site where you want to store your app data.
In the upper-left corner, select New > List.
Select the From Excel option.
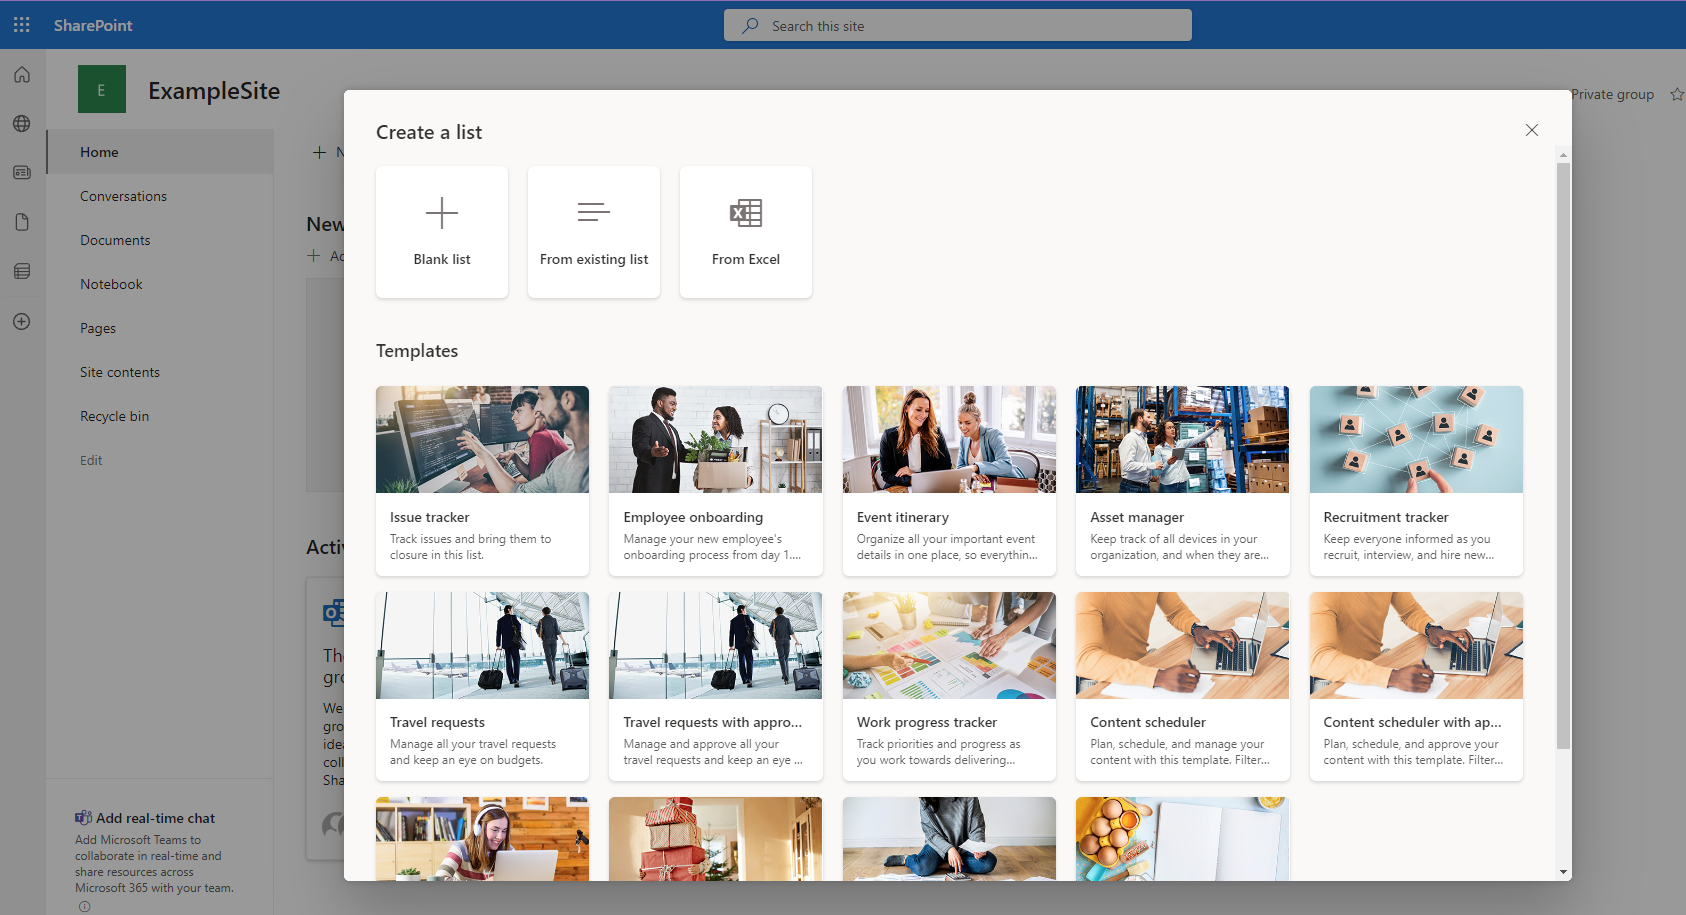
Select Upload file and then select the Machine-Order-Data.xlsx file that you previously downloaded.
On the Customize page, make sure that the Machines table is selected from the Select a table from this file dropdown menu and then select Next in the lower-right corner.

Select the Create button.


When the list has been created, your browser should automatically direct you to the newly created list. All data from your Excel sheet should be loaded and ready for you to use.
Create the orders list
Next, you'll create the orders list by following these steps:
Select the Home option in the upper-left corner, under your SharePoint site name.
In the upper-left corner, select New > List.
Select Blank list.
Name your list Orders-List and then select Create.

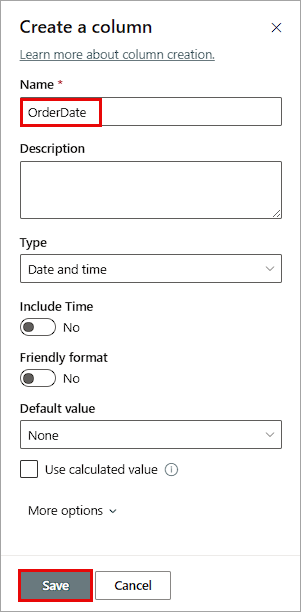
On the Orders-List page, select Add column.
Select Date and time and then select Next.
Name this column OrderDate and then select Save.
Select Add column again.
Scroll down and select Currency and then select Next.
Name this column OrderTotal and then select Save.


Now, you have a SharePoint list that you can use to store order data for the coffee machines.
Create the canvas app
Follow these steps to create the canvas app in Power Apps:
Go to make.powerapps.com.
Select the Create option on the left.
Select Blank app.

Select the Create option under Blank canvas app.
Name your app Contoso Coffee Machine Ordering and then select the Create button.
After a brief wait, you'll be directed to the canvas app editor where you'll design and edit your Power Apps application that interacts with your SharePoint data.

Select the Save icon in the upper-right corner. (By default, Power Apps automatically saves your app every two minutes, but only after the first time that you save manually; therefore, it's always a good idea to save your app after you've created it).
Select the Add data dropdown menu.
Search for and select SharePoint (the standard SharePoint option, not SharePoint Sites). You might need to scroll down the results to find it.

A panel will open on the right side of the screen. Make sure that the Connect directly (cloud services) option is selected and then select Connect in the lower part of the screen.
The SharePoint site where you created your machine lists should appear from the list of recent sites. If not, search for its name or enter its URL in the upper part of the screen. When the correct site appears, select it.
Select the Machine-Order-Data and Orders-List checkboxes.
Select Connect.


You've now created and connected your Power Apps application to your data so that you can read and write back to SharePoint directly through the app.
Design the canvas app
In this task, you'll design the canvas app.
In the upper ribbon, select Insert > Text label.

Move the label that appears to the upper-left corner of the canvas and then resize it to stretch across the entire canvas.
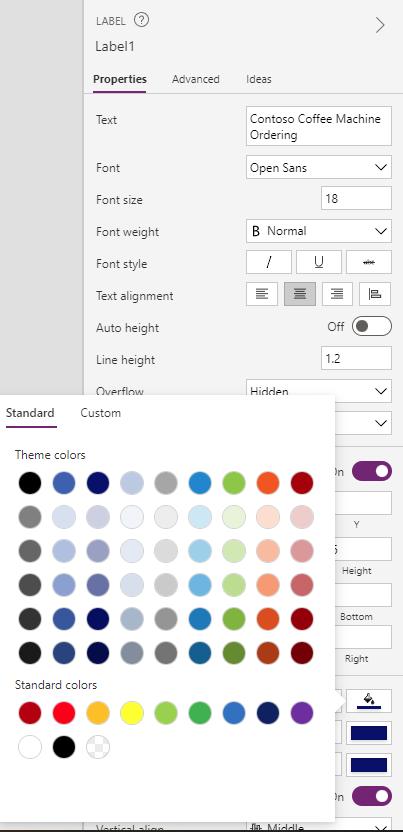
On the right side of the screen, you can edit the control properties in your canvas apps by using a friendly interface and without needing to edit code. With the label still selected, change the text to Contoso Coffee Machine Ordering.
Change the Font size to 18.
For Text alignment, select center.
Next to color, the letter A icon indicates text color and the paint bucket icon indicates the background color of that label. Select the A text color icon and then select white.
Select the paint bucket icon and then choose a dark blue (or any other color that you want).
In the upper ribbon, select Insert > Vertical gallery.
A pop-up window appears, prompting you to connect the gallery to a data source. Select Machine-Order-Data.
On the Properties pane of the gallery, on the right of the screen, next to the Fields property, select Edit.
Change the Subtitle1 dropdown menu to Price and the Title1 dropdown menu to Machine Name.
The text that's displaying in your gallery should change. Close the Properties pane. Resize the gallery to fit under the header label so that it's about half of the screen.
Select the first image icon in the gallery. In the upper part of the screen, in the formula bar where you can write code to change the properties of a control in Power Apps, delete the SampleImage text and then enter
ThisItem.Photo.
On the left tree view, select Subtitle1.
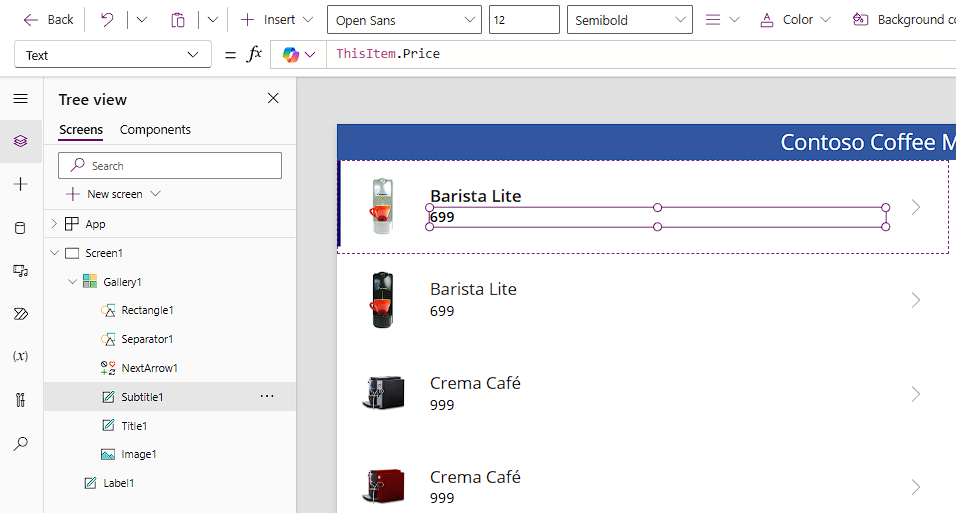
In the upper part of the screen, change the formula for Text to be
Text(ThisItem.Price,"$##,###.00"). This change will format the price label.In the upper ribbon, select Insert > Edit form.
Reposition and resize the form to fit the right half of your canvas.
Make sure that the newly created form is selected. On the Properties pane on the right, select the Data source dropdown menu and then select Orders-List.
The form automatically fills in the fields from your SharePoint list and corresponding controls. On the Properties pane, select Edit fields.
Select the ellipsis (...) next to Attachments and then select Remove.

Select the Title card on the form. On the Properties pane, select the Advanced tab and then select the Unlock to change properties button.
Select the OrderDate card on the form and then unlock that card also.
Select the OrderTotal card on the form and unlock it.
Select the text input box under Title in your form.
Change the Default formula to
Gallery1.Selected.'Machine Name'.Select the date picker control under OrderDate and then change the formula to
Today().Select the text input box under OrderTotal and then change the formula to
Gallery1.Selected.Price.Select the entire form. In the upper-left corner, the DataSource dropdown menu will likely show. By selecting this dropdown menu, you can choose any property that's available for a control and change the formula that's processing for that control property. In this case, you'll change the Item property of the form, so select that dropdown menu and then select Item.

In the formula for Item, enter
Defaults('Orders-List').In the upper ribbon, select Insert > Button.
Move the button to the appropriate location on the right side of your screen.
On the Properties pane, change the text to Submit Order.
With the button selected, in the upper formula bar, enter
SubmitForm(Form1).


Now, you have an app where users can select a coffee machine, preview their order, and submit the order. Your finished app should resemble the following image.

If you select the Play (triangle) button in the upper-right corner, you can test your new app. Select a coffee machine and then select the Submit Order button. If you return to the Orders-List on your SharePoint site, a newly created order should display.

After completing this exercise, you can build on this app or your Orders-List. Additionally, you can add new properties, design, or functionality that meets the different needs of your company.